The Ultimate Guide on How to Use Snapseed Photo Editing App on iPhone
Snapseed is a complete and professional photo editor. Featured with 24 editing tools and creative filters, it is one of the most popular photo editing apps for the iPhone. As a beginner of Snapseed, are you confused about where to start and how to use Snapseed to edit photos on iPhone 7/7 Plus/SE/6s/6s Plus/6/6 Plus/5s/5? Don’t worry, now follow our steps to get familiar with Snapseed.
You may be also interested in How to Shrink/Reduce Photo Size on iPhone to Save Space.
How to Use Snapseed Photo Editing Apps to Edit Photos on iPhone
Step 1: Run Snapseed and open a photo
To get started, run The app Snapseed on your iPhone. Tap Open Photo on Snapseed to open a photo on your device.
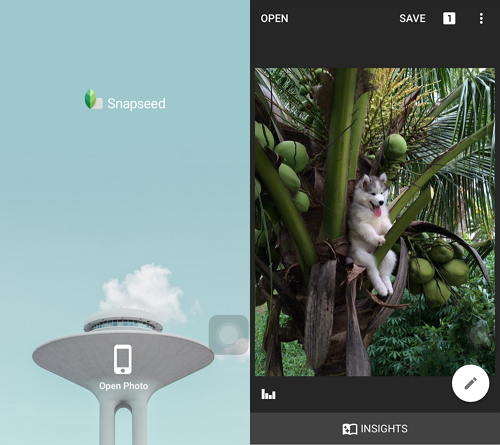
Step 2: Use tools and filters on Snapseed to edit your photo
Then, click on the pencil icon on the right corner. The tool has two editing sections: Tools and Filters. The Tools section includes all of the adjustment tools that Snapseed has to offer, and the Filters section contains a wide range of adjustable preset filters.
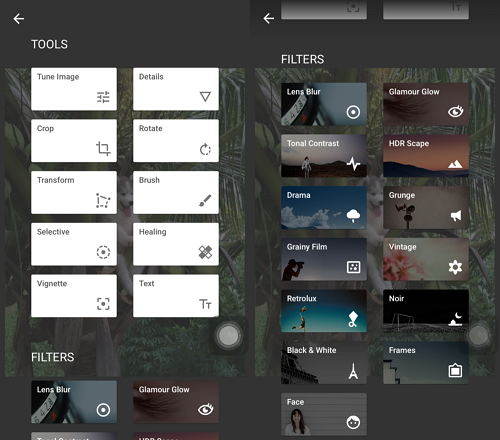
Tools on Snapseed:
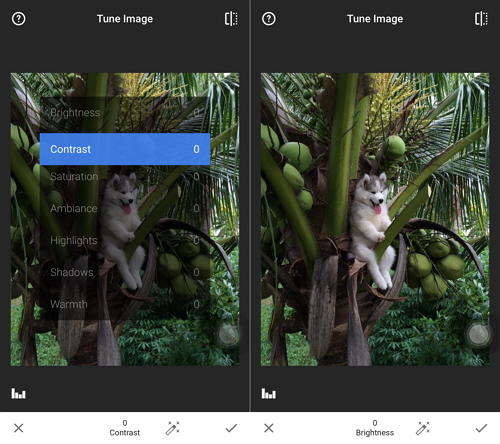
Tune image – adjust exposure and color (Brightness, Ambience, Contrast, Saturation, Shadows, Highlights and Warmth). You can swipe up or down to access the adjustment options within the Tune Image tool.
You can automatically adjust the lighting and tone of your image by tapping the Magic Wand icon at the bottom of the screen or swipe left or right to adjust by yourself.
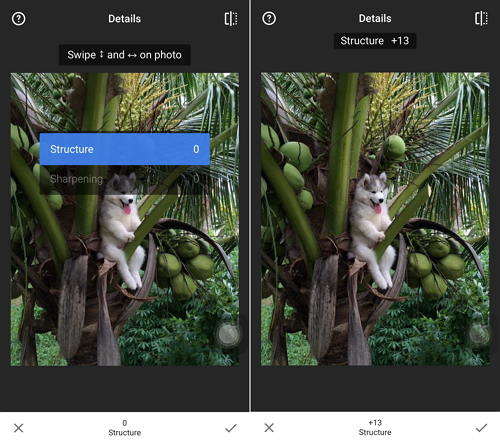
Details – magically brings out surface structures in images. It’s an excellent tool for recovering lost detail in your image and making “soft” photos appear sharper. The Details tool has two options: Structure: a local-contrast adjustment and Sharpening: increases the overall sharpness of the shot.
Also, you can swipe up or down to choose the option you want, then swipe left or right to increase or decrease the intensity of the adjustment.
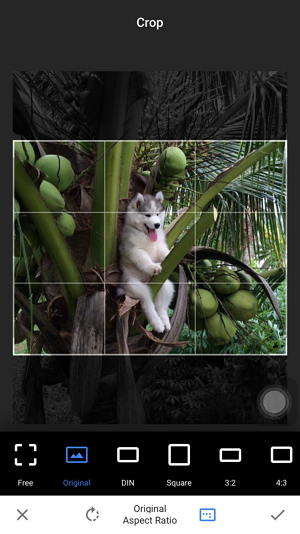
Crop – crop to standard sizes or freely (8 aspect ratios). Tapped on the Crop tool, tap the Aspect Ratio icon (rectangle with dots) at the bottom of the screen. Here you can choose to crop your image to a predefined aspect ratio (Square, 4:3, 3:2, etc.).
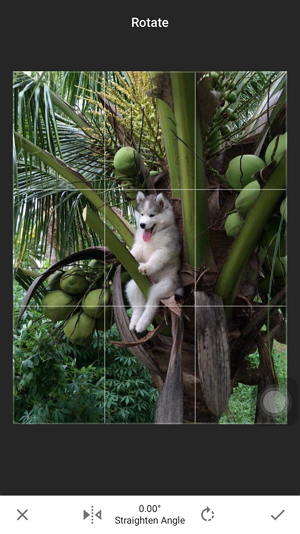
Rotate – rotate by 90°, or straighten a skewed horizon.
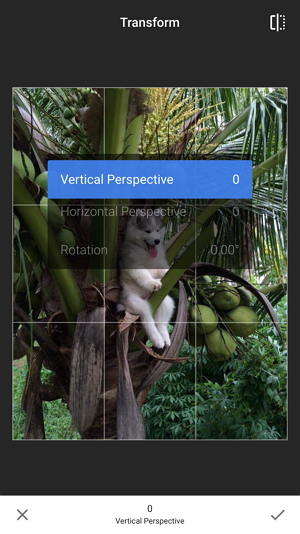
Transform – fix skewed lines and perfect the geometry of horizons or buildings. It’s particularly useful if you shoot architectural subjects. There are three types of adjustments that you can make with the Transform tool. You can adjust the perspective along the vertical axis or the horizontal axis, and you can also rotate the image.
Also, you can swipe up or down to choose the option you want, then swipe left or right to alter the perspective.
Brush – selectively retouch exposure, saturation, brightness or warmth.
Selective – the renown “Control Point” technology: Position up to 8 points on the image and assign enhancements, the algorithm does the rest magically.
Healing – remove the uninvited neighbor from a group picture.
Vignette – add a soft darkness around the corners like a beautiful, wide-aperture would do.
Text – add both stylized or plain text (38 predefined styles).
Filters on Snapseed:
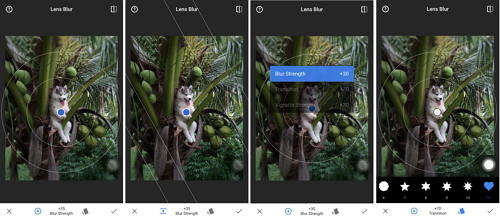
Lens Blur– add a beautiful Bokeh to images (background softening), ideal for photographic portraits. Tap on Lens Blur, and you can see two circles on the screen. The area outside of the circles will be blurred, and the area inside the inner circle will remain unaffected. The area between the two circles is the transition between the focused and blurred areas of the image.
Tap the icon to the left of centre at the bottom of the screen allows you to switch between Elliptical and Parallel blur. Swipe up and down on the screen, you can access to a menu of options for fine-tuning the effect. Tapping the Presets icon at the right of center at the bottom , you can see a menu of shapes affecting the type of blur that will be applied.
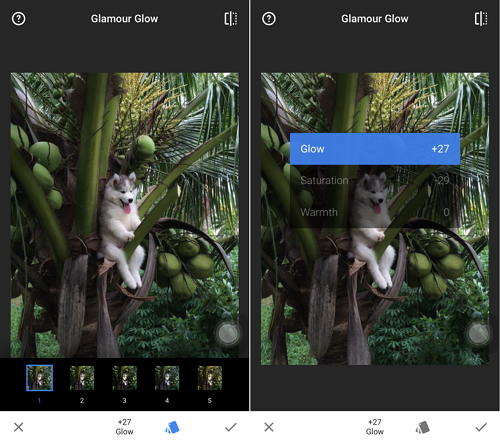
Glamour Glow – add a fine glow to images, great for fashion or portraits (6 styles). Select Glamour Glow and you can see a selection of preset effects. Tap on the one you wish to use. Also, swipe up and down on the screen, you can see the options for adjusting the Glow (softness), Saturation and Warmth.
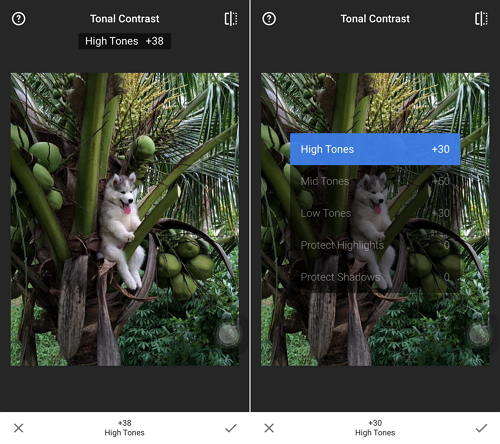
Tonal Contrast – boost details selectively in the shadows, midtones and highlights. Swipe left or right to adjust the contrast between the tones. Swiping up and down on the screen gives you options for adjusting the contrast across the Low Tones, Mid Tones or High Tones, protect shadows and highlights.
HDR Scape – bring a stunning look to your images by creating the effect of multiple exposures.
Drama – add a hint of doomsday to your images (6 styles).
Grunge – an edgy look with strong styles and texture overlays (5 basic styles, endless variations).
Grainy Film – get modern film looks with realistic grain (18 styles).
Vintage – the style of color film photo from the 50’s, 60’s or 70’s (12 styles).
Retrolux – go retro with light leaks, scratches, film styles (13 basic styles, endless variations).
Noir – Black and White film looks with realistic grain and the “wash” effect (14 styles).
Black & White – classic Black and White look straight out of the darkroom (11 styles).
Frames – add frames with adjustable size (23 frames).
Face – add focus to the eyes, add face-specific lighting, or smoothen skin.
Step 3: Save your edits
After editing, tap Save on the top of the screen, and you’ll have 3 options to save your edits. Save (save your final edit over the original photo on your Camera Roll), Save A Copy (leaves the original image in your Camera Roll, and creates another copy with changes you can undo), and Export (Create a copy with permanent changes.)
To sum up, we show you the details of how to use the basic tools and filters on Snapseed, and each of those tools & filters works for. For more iPhone tips, click here.


