How to Turn on/off Noise Cancelling on AirPods Pro
Airpods Pro is among the best and the most popular headphones in the world. As the fisrt noise-cancelling wireless earbuds Apple has offered, AirPods Pro quiets your surroundings and lets you focus on your music or work once the active noise cancellation is enabled. However, still many Airpod Pro users don't know how to fully use the powerful Active Noise cancellation feature.
If you are looking at ways to turn the noise cancelling on or off on your AirPods, read on. In this how-to guide, we talk about how to turn on noise cancelling on AirPods on different devices, helping you get the most out of your AirPods Pro.
- Part 1: How Does AirPods Pro Noise Cancellation Work
- Part 2: How to Turn on/off Noise Cancelling on AirPods on iPhone
- Part 3: How to Activate Noise Cancellation on AirPods Pro on Android
- Part 4: How to Turn on Noise Cancelling on AirPods on Laptop
- Bonus Tip: How to Fix AirPods Pro Noise Cancelling Not Working
Part 1: How Does AirPods Pro Noise Cancellation Work?
Before we dive deeper into how to turn the noise cancelling on or off, let's figure out two questions first, ”what is Noise Cancellation in AirPods?" and "how does AirPods Pro noise cancellation work?"
Noise cancellation is a feature that you can use to reduce the amount of ambient noise you hear while wearing your AirPods Pro. That means you will hear much less of the natural noise around you when this feature is turned on.
Noise Cancellation works in such a way that an outward-facing microphone analyzes and detects the external noise coming into the AirPods, and then cancel it out by creating internal sounds of the same frequency. The inward-facing microphone listens for unwanted internal sounds and cancels out the escaped noise before it reach your ears. Noise Cancellation works on AirPods Pro and AirPods Max. If you have the standard pair of AirPods, this feature is unavailable.
Part 2: How to Turn on/off Noise Cancellling on AirPods on iPhone
Here's how to turn on Noise Cancelling on AirPods Pro using an iPhone. There are a few methods to do that, and we'll take you through them one by one.
Way 1: Turn on/off Noise Cancelling on AirPods Through Force Sensor
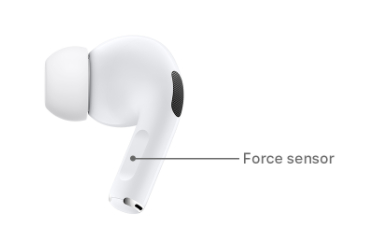
If you're wondering how to activate Noise Cancellation on AirPods prousing the in-built force touch sensors in their stem, follow the steps mentioned below to switch between noise cancellation and transparency mode.
- Have your AirPods Pro connected with your iPhone.
- Long press and hold the force sensor on one of the stems of your AirPods.
You should now hear a chime, which signals that your AirPods' Noise Cancellation has been switched on from Transparency mode.

If you want to turn off noise cancellation on AirPods pro, simply repeat the same process.
Way 2: Turn on/off Noise Cancelling on AirPods Pro in Control Center
You can also turn your Noise Cancellation on or off from the control center on your iPhone or iPad. We explain how to do that in this section.
Here's how to turn on noise cancelling on AirPods Pro in Control Center
- Connect your AirPods Pro to your iPhone.
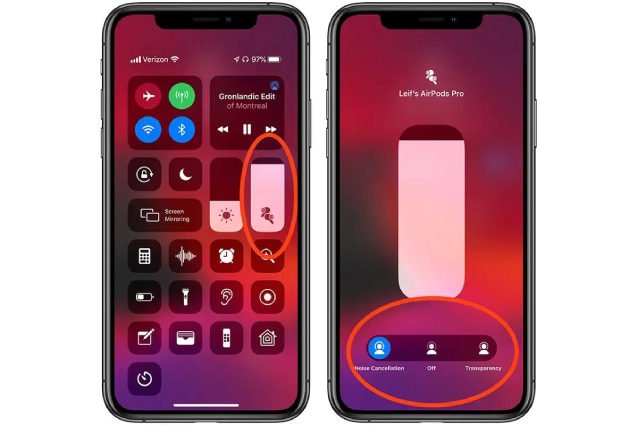
- Swipe down from the top right side of your iPhone to pull down the control center.
- Tap and hold the volume module until it expands.
- Tap "Noise Cancellation".
Select "Noise Cancellation" from the 3 available modes to enable Noise Cancelling.

When you want to turn off the Noise Cancelling, go back to the control center and select the "Off" option.
Way 3: Turn on/off Noise Cancelling on AirPods Pro in Settings
Another way you can use to activate noise cancellation on AirPods Pro is through the Settings app.
Here's how to turn on Noise Cancellation on AirPods Pro in Settings.
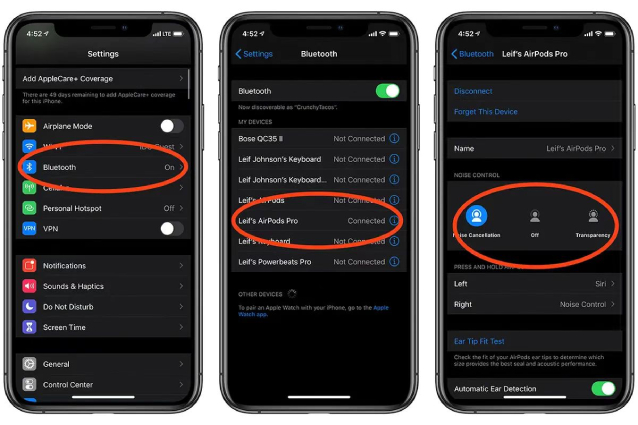
- Go to Settings > Bluetooth.
- Tap the info icon next to your connected AirPods Pro.
Select “Noise Cancellation” under NOISE CONTROL.

With the Noise Cancellation enabled, your AirPods Pro should start blocking out a significant amount of environmental noise. When you want to turn off this feature, simply come back to Bluetooth Settings and tap the “Off” option to disable it.
Part 3: How to Activate Noise Cancellation on Airpods Pro on Android
If you're using your AirPods with an Android smartphone and wondering how to turn on Noise Cancelling on AirPods on Android, this section will help you out.
Here's how to turn on noise cancelling on AirPods Pro Android using the AirPods Pro Stem.
- Press and hold the force sensor on your AirPods stem.
- Don't remove your hand from the sensor until you hear a little chime. Your AirPods Pro are now in Noise Cancellation mode.
Repeat the steps above in case you want to disable the noise cancellation on AirPods Pro on Android.
Part 4: How to Turn on Noise Cancelling on AirPods on Laptop
If you’re listening to your AirPods from a laptop, this section will tell you how to turn on Noise Cancelling on AirPods Pro on PC, as well as MacBook.
On Mac:
The difference between the way of turning on and off Noise Cancelling on AirPods on Mac and that on an iPhone lie in there’s no Control Center on a Mac. But it's still fairly easy to learn how to turn on noise cancellation on AirPods Pro on Mac.
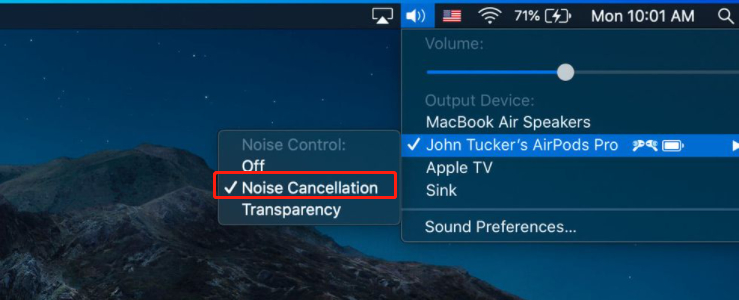
The farest way is to enable it from the volume icon in the Mac menu bar. After connecting your AirPods to your Mac, click the volume control button in the menu bar and then select your AitPods Pro from the list. You should see three options: Off, Noise Cancellation and Transparency. Click “Noise Cancellation” to activate this feature on your Mac. To turn it off, simply click the Off option.
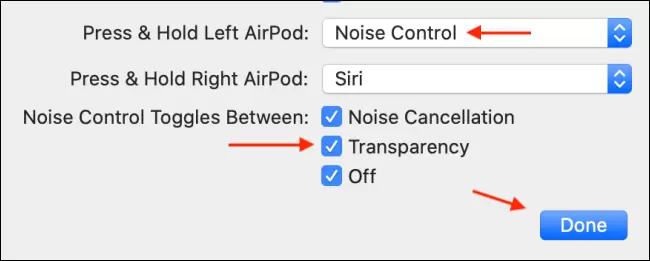
You can also program your AirPods Pro so that you can turn noise cancellation on or off on AirPods Pro quickly. Here's how you can do.
- Connect yourAirPods Pro to your Mac and go to System Preference > Bluetooth on your Mac.
Select your connected AirPods Pro and click on "Option" next to your headphones.

Select "Noise Cancellation" and "Off” from the "Noise Control Toggles Between" section and then click "Done".

You can now quickly activate and deactivate the Noise Cancellation mode on AirPods Pro by pressing and holding the force sensor.
On Windows:
If your've got your AirPods connected to a Windows PC, you can use the same trick of acivating Noise Cancellation on AirPods Pro on Android. Long press and hold the force sensor on one of the stem of an AirPod. When a low-pitched chime comes into your ear,it means the Noise Cancellation mode is enabled.
Bonus Tip: How to Fix AirPods Pro Noise Cancelling Not Working
If your AirPods aren’t working correctly after the latest iOS 15 update, and you’re looking for ways to fix AirPods Pro Noise Cancelling not working, this section will help you out.
You see, your AirPods’ Noise Cancellation may not be working due to a software issue with your iPhone. As a matter of fact, your iPhone’s OS is used to operate the AirPods. Luckily, there’s an easy fix. You can use Tenorshare ReiBoot to fix your iOS system and get rid of all the bugs.
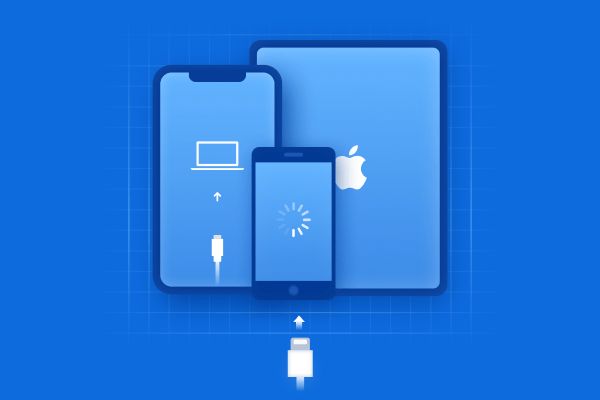
Here's how to fix AirPods Pro Noise Cancelling not working with Tenorshare ReiBoot.
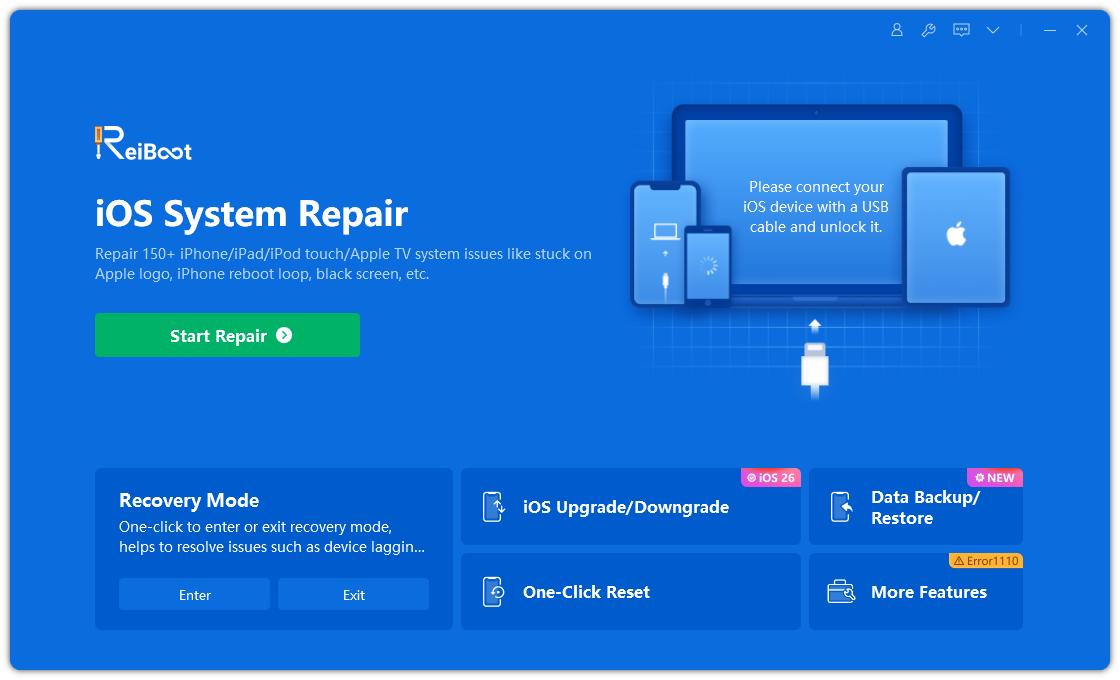
- Download and install Tenorshare ReiBoot on your PC.
Use a USB cable to connect your device to the and PC Click "Start".

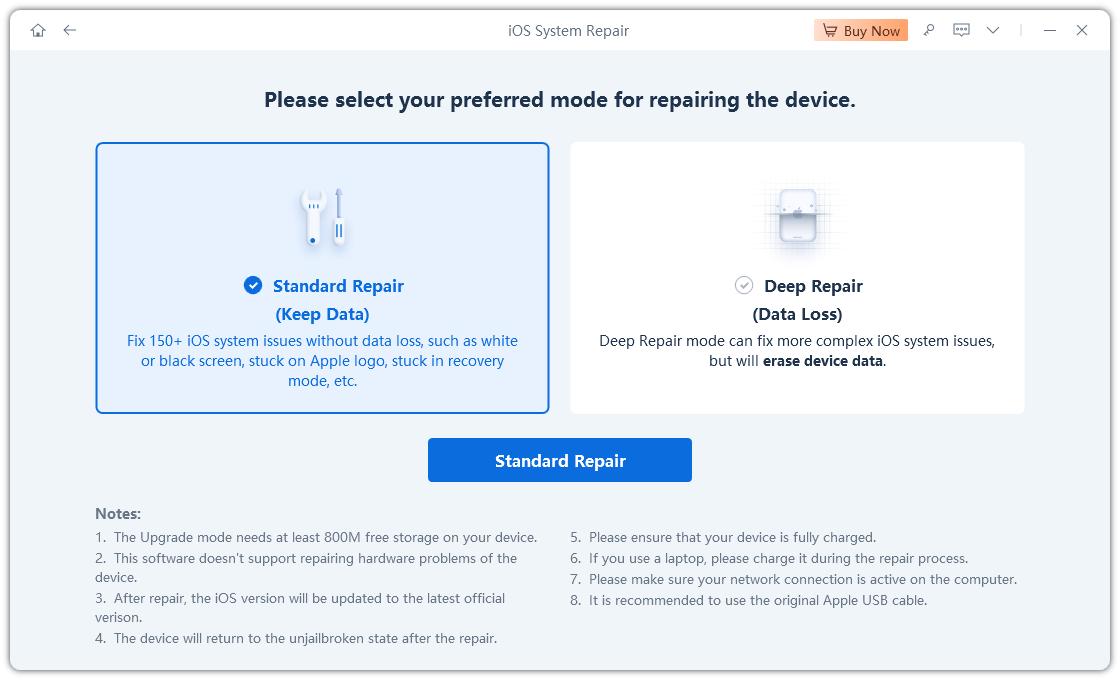
From the two available options, select Standard Repair and then hit the button below to proceed.

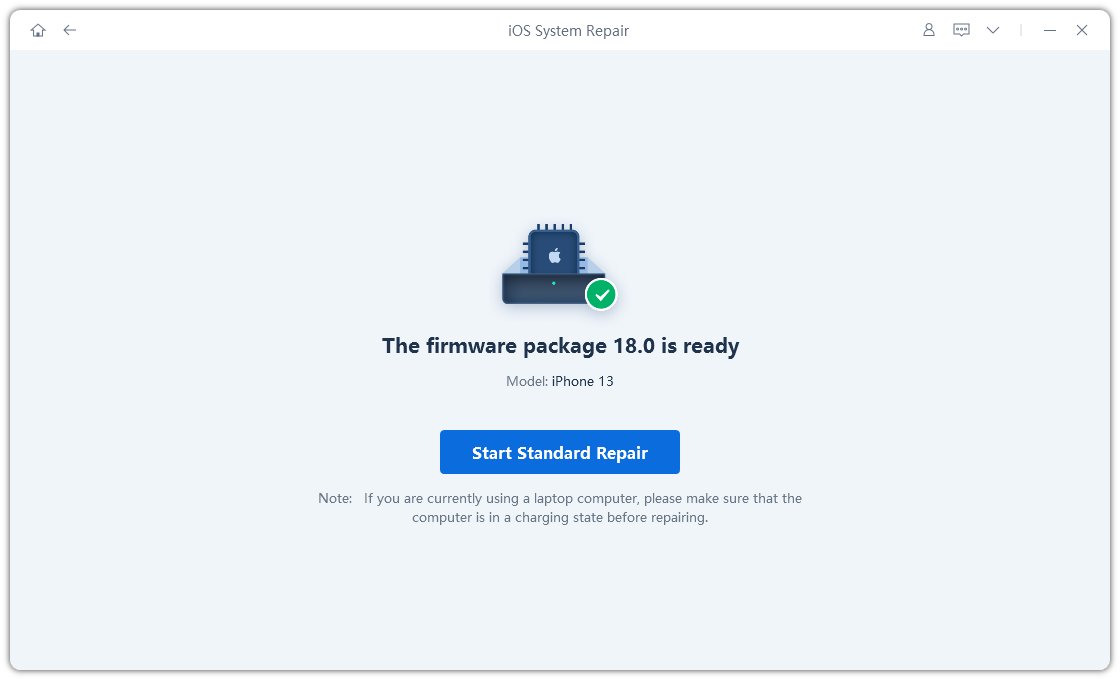
Download the firmware package and click on “Start Standard Repair” once the download is done.

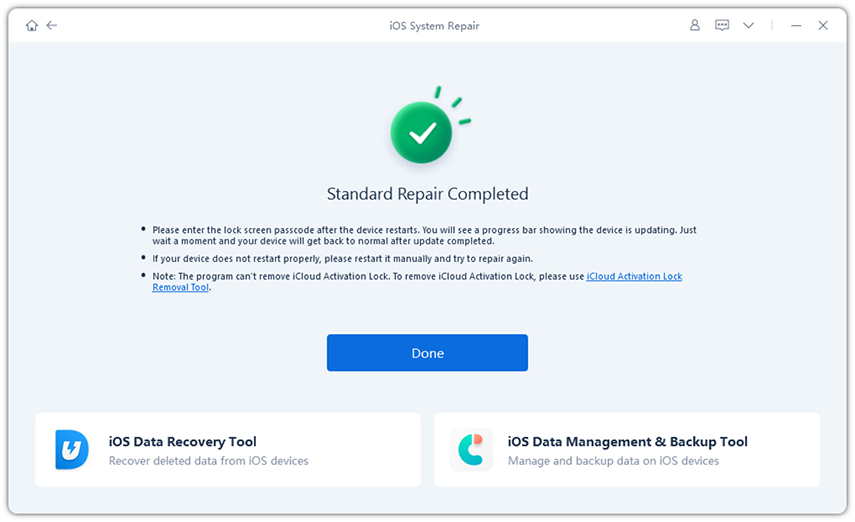
Wait for the repair process to complete, and you're all set after clicking Done!

Now, your AirPods Pro Noise Cancellation should work just fine.
Conclusion
Many AirPods users don’t know how to turn on Noise Cancelling on AirPods. If you’re one of them, we have curated this guide especially for you. We have also explained how to turn off Noise Cancellation on AirPods on various devices like PC and Mac.
On the last note, if you’re having problems with your AirPods, or iOS system in general, you can rely on Tenorshare ReiBoot to fix it.
Speak Your Mind
Leave a Comment
Create your review for Tenorshare articles
