How to Fix Front/Back Camera Not Working on iPhone [2025 Updated]
Having the front/back camera not working on your iPhone can be really frustrating. You open the camera and there is nothing! Just a black screen staring right back at you. We understand how stressful this can be. And if you’re experiencing a similar problem, we’ve got you covered. In this guide, we’ll explain everything you need to know if you’ve got your front camera not working on iPhone. We’ll explain some common reasons behind this problem along with 7 useful ways to resolve it. By the end, you’ll have resolved your back/front camera not working on iPhone.
- Part 1: Why Is Front Not Working on My iPhone?
- Part 2: How to Fix Front/Back Camera Not Working on iPhone with 7 Useful Ways
- Part 3: Fix Front/Back Camera Not Working on iPhone Due to System Glitches
Part 1: Why Is Front Not Working on My iPhone?
Here are some common reasons behind your front/back camera not working on iPhone.
1. Software issues: Software problems are the most common reason behind the back or front camera not working on iPhone.
2. App permissions: If you’ve recently denied camera access to certain apps, this could be the reason.
3. Hardware damage: Physical damage to your iPhone can also make the front and back camera not work on your iPhone.
4. Background apps: Sometimes third-party apps can cause troubles with your iPhone’s camera.
5. Storage limitations: Insufficient storage could also be a reason why your iPhone’s camera is not working.
Part 2: How to Fix Front/Back Camera Not Working on iPhone with 7 Useful Ways
Now that you know what could potentially cause the front and back camera to not work on your iPhone, let’s move onto the quick fixes that can help you solve this problem. We’ve got 7 useful and effective ways you can fix your iPhone’s camera by yourself.
Just follow these methods to fix your front and back camera not working on iPhone.
- Way 1: Check Camera App Permissions
- Way 2: Close Background Apps
- Way 3: Restart or Force Restart iPhone
- Way 4: Remove Screen Protector or Phone Case
- Way 5: Check for Physical Damage
- Way 6: Reset All Settings
- Way 7: Reset iPhone Camera
Way 1: Check Camera App Permissions
One thing you can do is check which apps are allowed access to the camera. Because sometimes third-party apps with access to the camera can make the iPhone's camera non-functional, it is better to take a look.
-
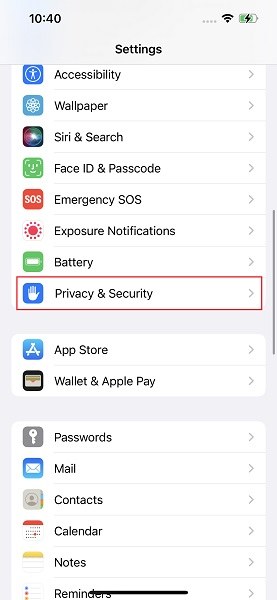
Go to Settings > Privacy & Security.

-
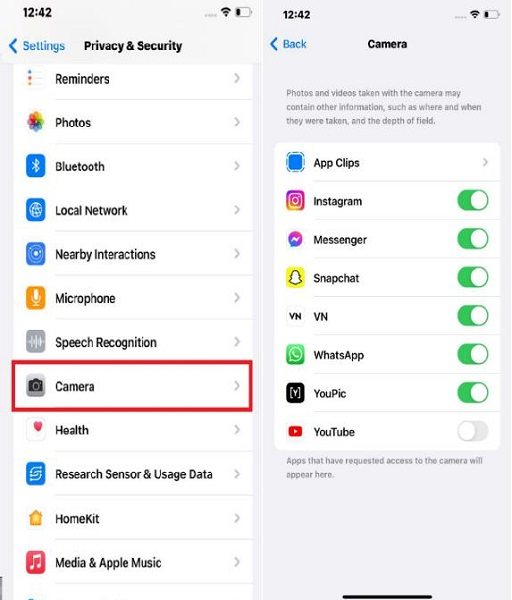
Tap on Camera.

- You can then check which apps can access the Camera on your iPhone. You can deny access to unwanted apps here by toggling off the slider next to each one of them.
Way 2: Close Background Apps
Having too many apps running at the same time can cause performance issues and even glitches like a frozen camera. You can try closing or stopping these background apps.
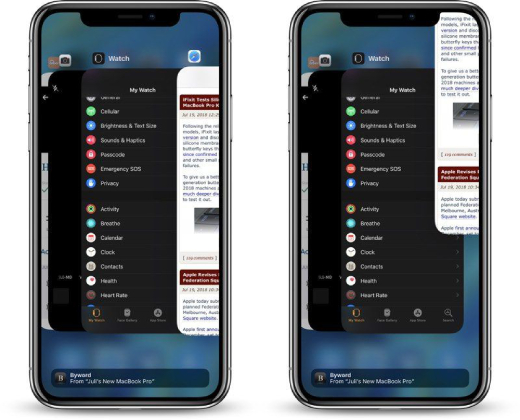
To close apps through the App Switcher:
- Swipe up from the bottom of the screen to open App Switcher.
- Swipe up on any apps you see to close them.
- Try opening the Camera app again.
Way 3: Restart or Force Restart iPhone
Quite often there are minor glitches in the system that can cause several problems including the camera not working. There is nothing much you should do in this case except restarting your device. This gives your iPhone a fresh start and eliminates minor glitches.
- Press and hold the side/power button and one of the volume buttons until the "slide to power off" slider appears.
- Drag the slider to turn off your device.
- Wait a minute then press the side/power button again to turn back on.
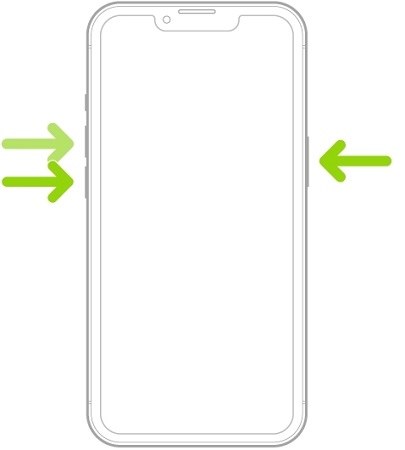
However, if your device doesn’t restart normally or becomes non-responsive, force restart your iPhone.
- Quickly press and release the volume up button.
- Do the same with the volume down button.
- Now press and hold the side/power button until the Apple logo appears.
-
Let go once you see the logo and your iPhone will restart.

Way 4: Remove Screen Protector or Phone Case
It may sound simple, but a screen protector or phone case can unintentionally block the camera lens. Carefully peel off any screen protector or plastic films covering the camera cut-out. Don't use sharp tools that could scratch the lens. Take off your phone case as well and test the camera without the cover.
Way 5: Check for Physical Damage
Physical damage to your iPhone’s camera can make its camera not work. Check the camera lens closely for cracks or scratches. Even minor damage here could cause issues. If you see any cracks or deformities, it's possible serious internal damage occurred and you might have to get the camera repaired.
Moreover, dirt and debris can also sometimes be a problem. So clean the camera lens carefully with a microfibre cloth.
Way 6: Reset All Settings
Another thing you can try to solve the front/back camera not working on your iPhone is reset all settings. To reset all settings:
- Go to Settings > General > Transfer or Reset iPhone.
- Choose Reset.
- Then click on “Reset All Settings” from the given options. Your iPhone may ask for your password to confirm.
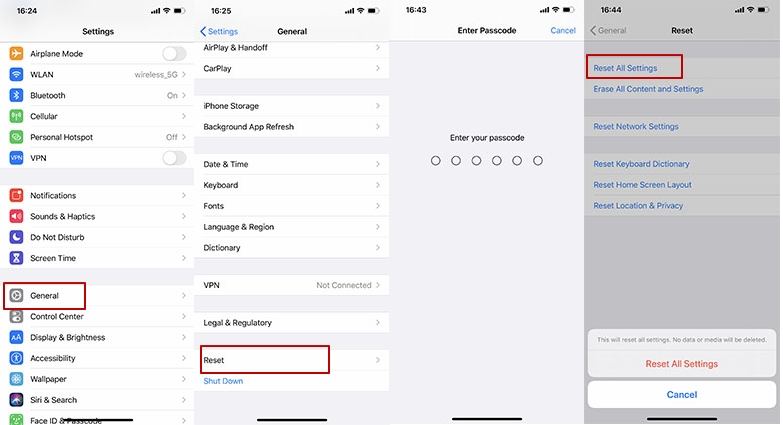
Your iPhone will restart and reset all non-personal settings to their default.
Way 7: Reset iPhone Camera
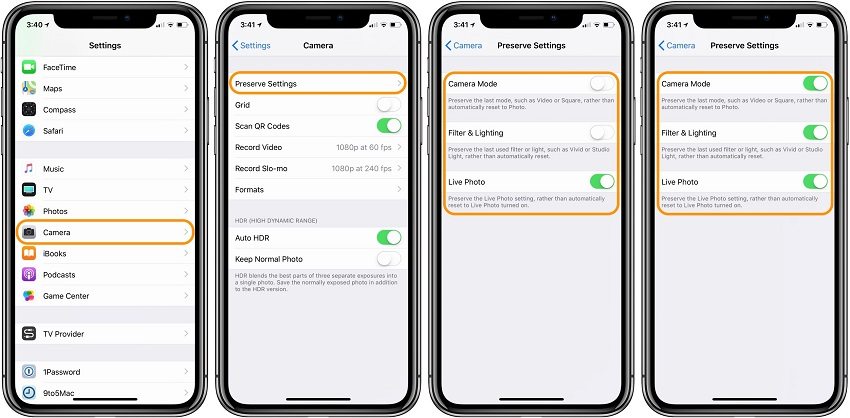
Another thing you can try is resetting your iPhone camera settings to default. One way to do that is by preventing the settings from saving automatically the next time you change them.
- Go to Settings > Camera > Preserve Settings.
-
Toggle off all the options there.

If you want to bring all of the settings to default, you will have to Reset All Settings on your iPhone as mentioned before.
Part 3: Fix Front/Back Camera Not Working on iPhone Due to System Glitches
Sometimes software glitches are the reason behind your iPhone camera not working properly. In this case, the simple methods won’t work and you’ll need to repair your software. Tenorshare ReiBoot is a powerful iPhone system repair software that can safely remove deep system errors preventing your iPhone cameras from functioning properly.
What makes Tenorshare ReiBoot the best option? The fact that it keeps all your data safe during the process and successfully solves all your iPhone problems that are related to software. You don’t even have to be a tech-expert to fix your iPhone. Within a few clicks, you can have your iPhone free of all system glitches.
Just follow these simple steps to get your iOS repaired with Tenorshare ReiBoot.
-
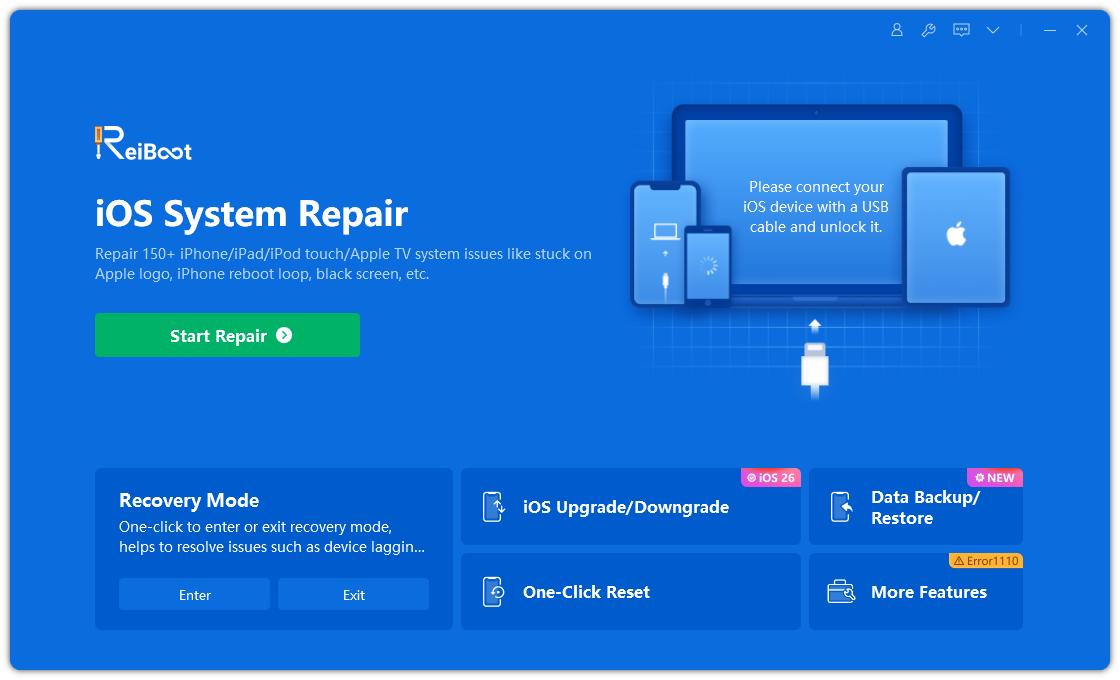
Download and install Tenorshare ReiBoot on your computer (PC or Mac). Connect your iPhone with the computer via thunderbolt cable. Once the program launches, click on Start Repair.

-
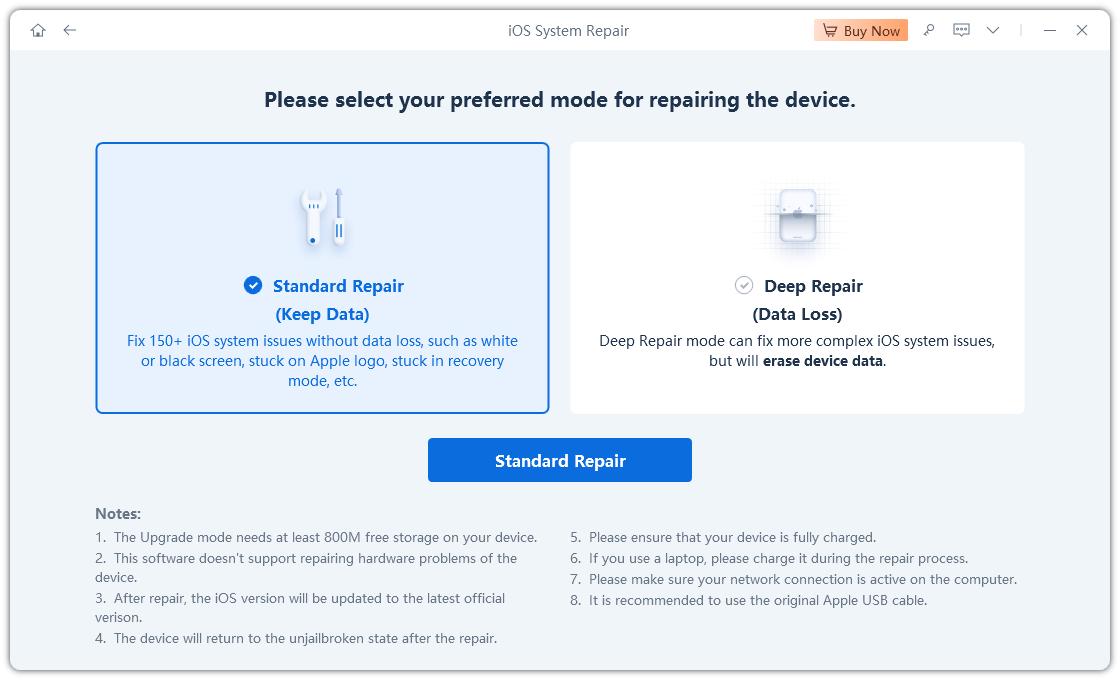
Choose Standard Repair. Also, read the instructions below to get an idea about the requirements of the tool.

-
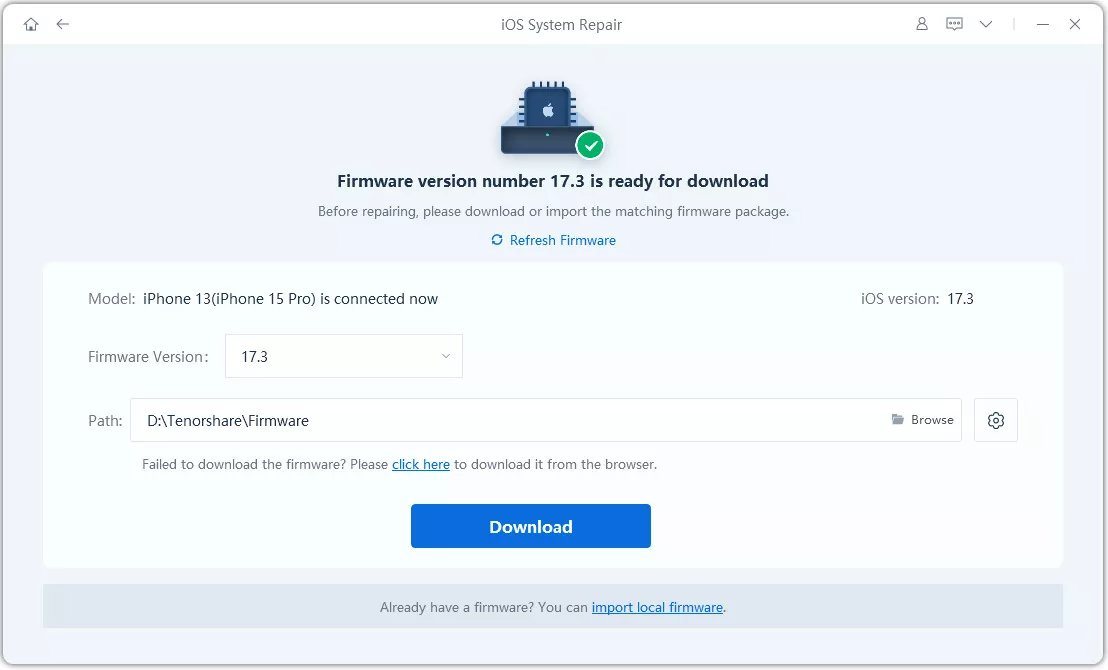
Once your device is detected by Tenorshare ReiBoot, you can continue to download the latest firmware package by clicking the Download button. Wait until the firmware gets downloaded.

-
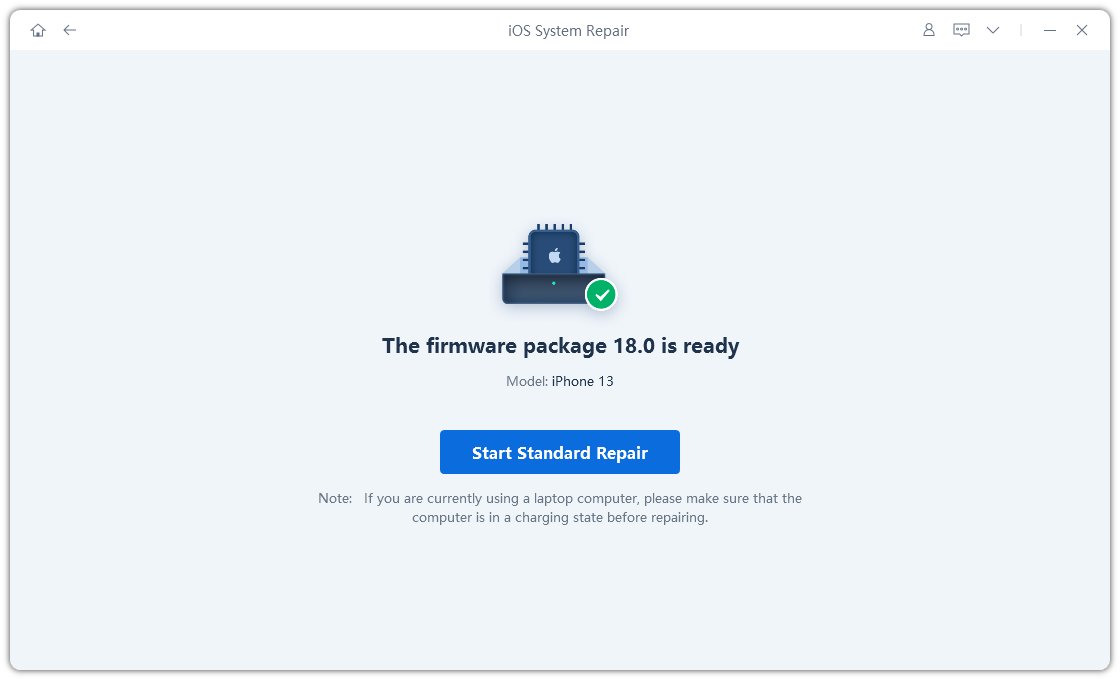
Click Start Standard Repair.

-
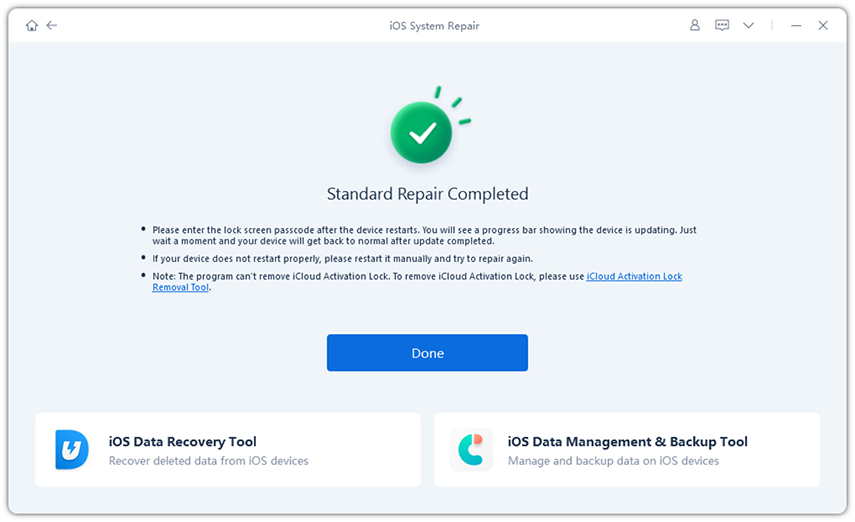
Wait until the progress bar gets completed. You’ll see a confirmation message once it’s done. Click Done when it's finished.

Conclusion
In this guide, we covered the top fixes to solve your iPhone's front or back camera not working properly. If the simple solutions don’t work, Tenorshare ReiBoot provides a safe and easy way to completely repair your iPhone without losing any data.
Speak Your Mind
Leave a Comment
Create your review for Tenorshare articles
