How to Create Contact Groups on iPhone Using Mac or iCloud
Nowadays, everyone’s a contact on your iPhone. From your boss to your best friend to your mother, all of their phone numbers, email addresses, and even social media accounts are linked to the included Contacts app. However, as you keep adding more entries to your address book, keeping them organized becomes increasingly difficult.
Luckily, you can organize your contacts by creating Groups. In this article, we’ll show you how to create and use Groups on iPhone using iCloud or Mac.
Before We Start
Please note that you can’t create groups on your iPhone or iPad, so you’ll need to use your Mac or PC to create them. Mac users can follow the Mac guide and Windows and Linux users can follow the Web section.
Before we start, make sure your contacts are syncing between your computer and iPhone using iCloud. To enable iCloud contact syncing on your iPhone, do the following:
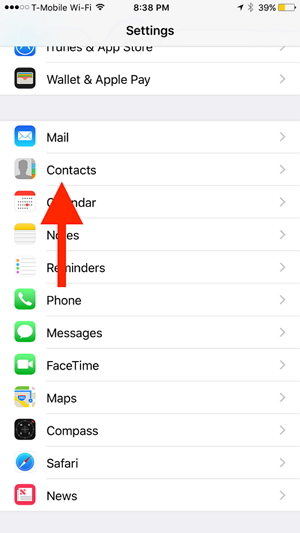
- Open the Settings app by tapping on it.
- Scroll down and tap on the Contacts option.
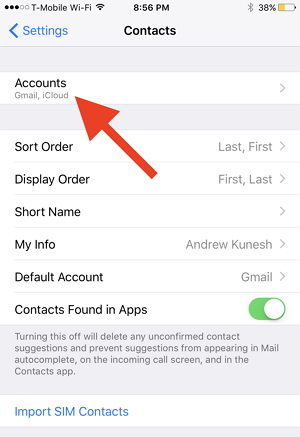
- Tap Accounts from the top of the screen.
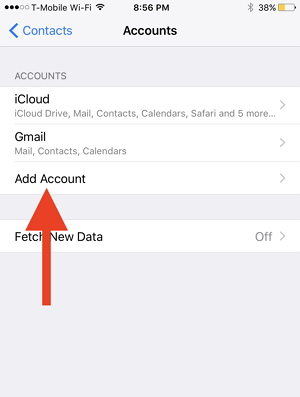
- Tap Add Account at the bottom of the screen and tap iCloud. Then, sign in with your Apple account and your contacts will be synced to the cloud.

On your Mac, enable iCloud contact syncing by doing this:
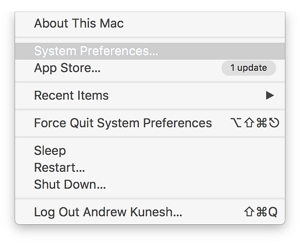
- Open System Preferences on your Mac by clicking the Apple button at the upper left-hand corner of the screen and selecting System Preferences.
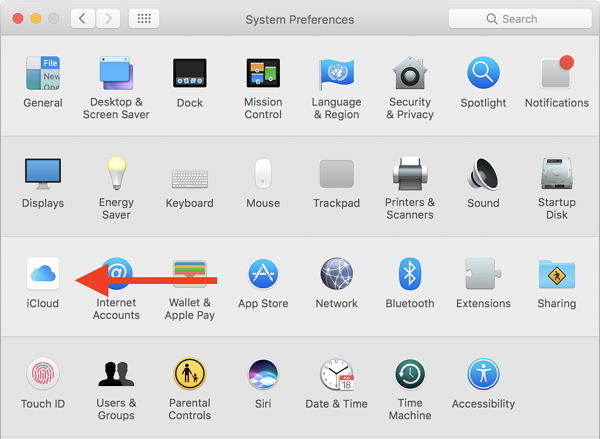
- Click iCloud at the right-hand corner of the screen and sign in.
Creating Contact Groups on Mac
The easiest and most straightforward way to create a contact group is using the Contacts app on your Mac. To make your first group, follow the steps below. Note that Contacts is pre-installed on all Macs.
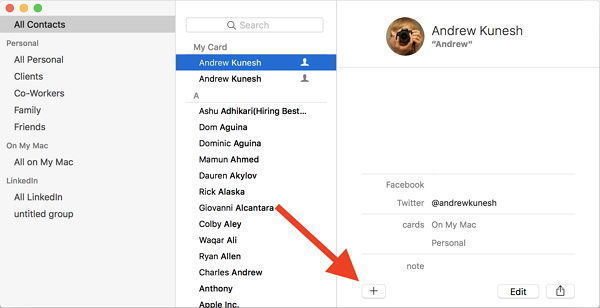
- Open the Contacts app on your Mac. Look at the bottom of the Contacts window and click the Plus button. Then, click New Group from the drop-down menu. Your new group will now be created.
- Look at the left-hand side of the Contacts window where you’ll find your new group. Type in the desired name and press the Return key on your keyboard to save it.
- Now for the fun part: adding contacts to your group. Doing this is simple, just browse your Contacts app for contacts and drag-and-drop their name into your newly created group. Your groups and the contacts you’ve added to them will automatically sync to your iPhone via iCloud.
Creating Contact Groups — Web (Requires iCloud)c
If you’re a Windows or Linux user, you have to create your groups using iCloud.com on the web. This process is also very simple — we’ll show you how to do it below!
- Open your web browser and navigate to iCloud.com. Log-in to your iCloud account once the page loads.
- Click on the Contacts icon on the iCloud.com dashboard. Look towards the bottom, left-hand corner of the iCloud window and click the Plus button. Then, click New Group from the pop-out window.
- Look at the left-hand side of the iCloud window where you’ll find your new group. Type in the desired name and press the Enter/Return key on your keyboard to save it.
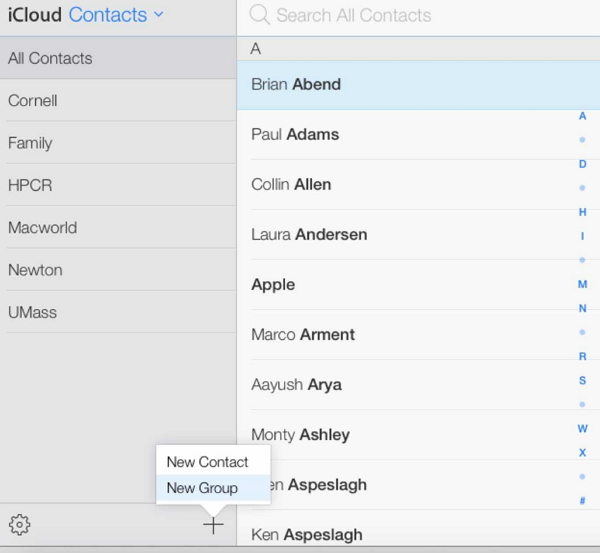
Like using the Contacts app, add new contacts to your groups by searching for their names in the iCloud Contacts app and then dragging-and-dropping them into the newly created group. Your groups will be automatically synced to your iOS devices via iCloud.
Enjoy A More Organized Contacts App!
And there you have it: creating contact groups for your iPhone’s contacts. We think that contact groups are a great way to keep your iPhone’s contacts organized, so you can quickly and easily find the people you want to contact. Moreover, if you need to keep your contacts well organized, you can use an app called Tenorshare iCareFone to help you add, delete, and merge duplicated on iPhone efficiently.


Speak Your Mind
Leave a Comment
Create your review for Tenorshare articles

Tenorshare iCareFone
Best Free iPhone Transfer & iOS Backup Tool
Easily, without iTunes


