How to Share Wi-Fi Connection from a Mac to an iPhone
by Jenefey Aaron Updated on 2020-06-24 / Update for iPhone Data
Imagine you are in a hotel, and there is no wifi. But Ethernet jack is available with your Mac. Under this condition, you want to surf the Internet free on you iPhone, or other iOS 14 beta/13/12 devices like iPad or iPod. What can you do?
Actually, it can't be easier. 6 steps can help you share WiFi connection from Mac to iPhone, iPad, or iPod. Let's go through it together.
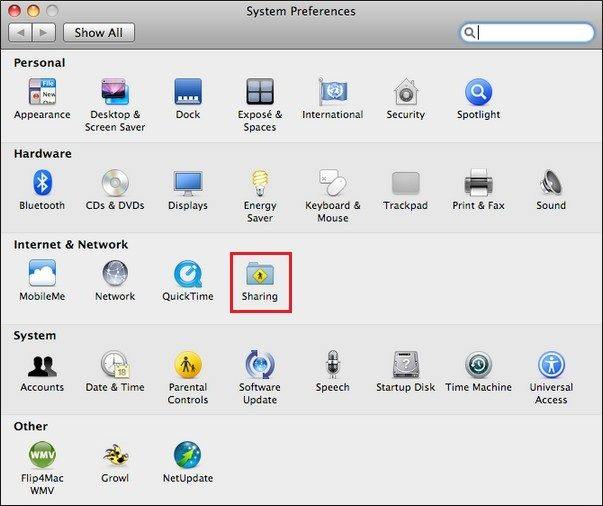
Step 1. Open System Preferences and Select "Sharing"
Locate the Apple icon at the top-left corner of Mac screen. Click it and you will see System Preferences. Select it and then click "Sharing" option in it.

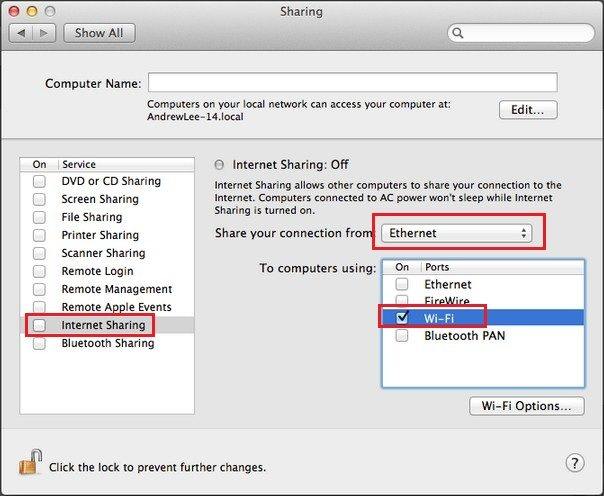
Step 2. Select Internet Sharing
In Sharing window, tick "Internet Sharing", "Ethernet" after "Share your connection from" and "Wi-Fi" under "To computers using". By this step, you have created a wireless network between Mac and iPhone.

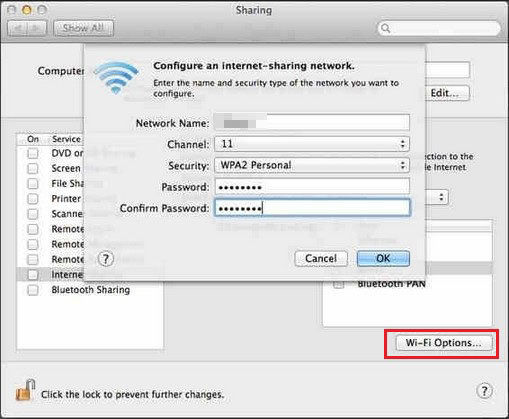
Step 3. Set a Password (Optional)
At the lower right corner of Sharing window, click "Wi-Fi Option" to set a password to protect your WiFi account. Then click OK. This is highly recommended if the WiFi account is personal.

Step 4. Confirm Internet Sharing
A sub window "Are you sure you want to turn on Internet sharing" pops up, click "Start to confirm it.

Step 5. Select the WiFi on iPhone
Go to Setting on your iPhone to turn on Wi-Fi button. Then choose the network name to connect wifi on your iPhone.
Step 6. Enter Password to Connect WiFi
If you have set a password in Wi-Fi option when you share the Internet on your Mac, you need to enter to password to get an access on your iPhone.
Now you can wirelessly share internet connection from a Mac to an iPhone all by yourself. Enjoy Internet surf!


