Solved! How to Save Gmail Emails to A Flash Drive
If you are looking to know how to save emails to a pen drive, then you just came to the right place. As on this page, you will get to know everything about how to copy emails to Pendrive.
Part 1. Can You Download All Emails from Gmail?
Yes, of course, you can download all the emails from your Gmail account. You can easily download all of your Gmail data that has not been deleted yet. You can also create your archive in order to keep a record of all of your deleted data as well.

Part 2. How to Save Emails from your Gmail to A Flash Drive Manually
There are a number of reasons to copy Gmail emails to a flash drive like you might need to use your Gmail emails on another PC without a Wi-Fi connection or for any other purpose. No matter what the reason is, you can easily copy single as well as all the emails from your Gmail account to your flash drive manually without having any limit.
Following are the steps you will have to follow to save your Gmail emails to a flash drive:
- Open Gmail account on your PC.
- Open the email that you want to copy on a flash drive.
- Hit on a three-dot icon, and after that, select the "Download Message" button.
- Opt for the path of your flash drive and then press the "save" button.
If you want to copy multiple emails from your Gmail account into the Pendrive, then you will have to repeat this process.
You may also want to know How to Delete Files off A Flash Drive?
Extra Tip: How to Recover Lost Data from Flash Drive
In order to recover lost data from your Pendrive or flash drive, Tenorshare 4DDiG is the most recommended tool. It is an outstanding and ideal tool to rescue you from data loss situations. No matter how you lost data, whether your system crashed suddenly, accidentally deleted data, emptied recycle bin infected by malware, etc. Tenorshare 4DDiG tool has the ability to makes the recovery of your lost data possible.
Below are the detailed steps to recover your lost data from windows:
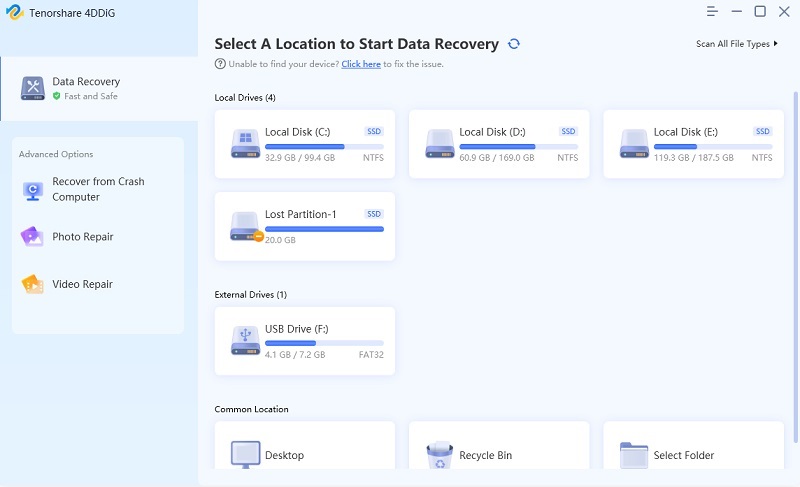
Once you get started with the software, you will come across the main screen first, displayed below in the picture. From there, choose the location you need to recover.

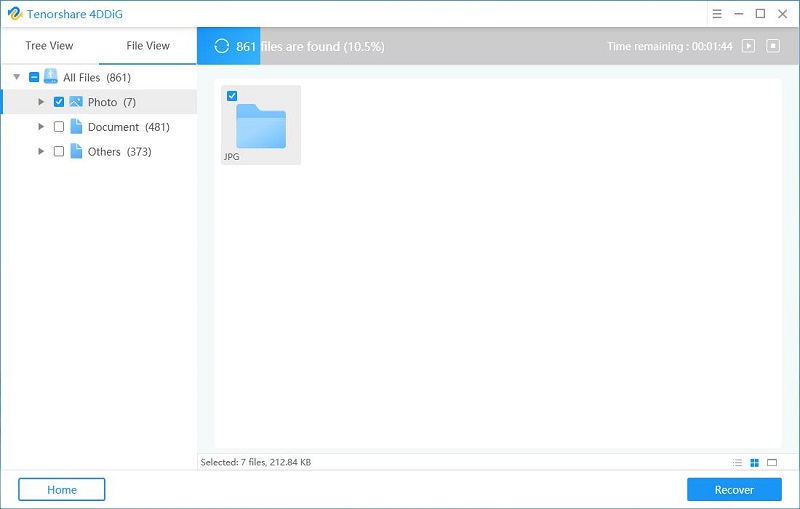
In this step, Tenorshare 4DDiG starts scanning the location that you choose, and a progress bar will be shown to you on the screen that displays how much it has been completed. And you can also have the option to stop this process if you need to.

You will also see the result of scanning, which displays how many files are recovered. If you still do get any recovered files, you can press the "Deep Scan" button placed on the screen to recover lost files; it will take a bit longer time to recover.
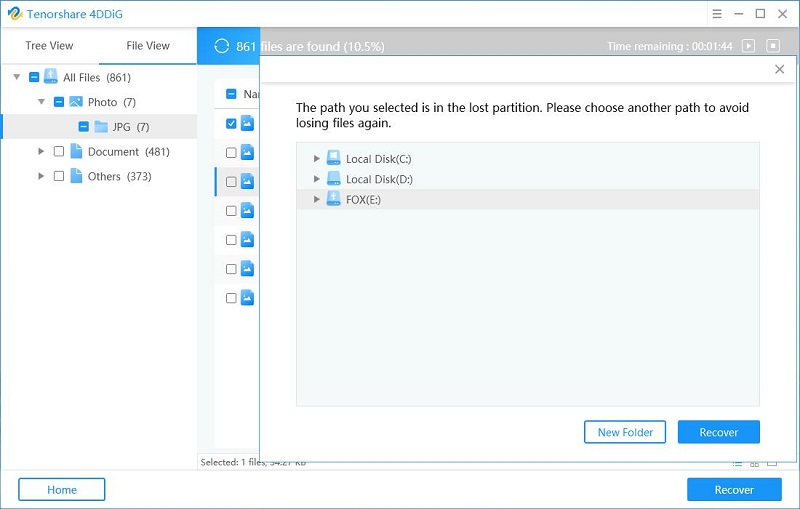
You can now preview the recovery files by their type, the deleted files will be placed on the left side your screen, and the deleted information will be shown on the right side. Opt for one file from the right pane and double click on it in order to view the data, and press the "recover" button.

After this, you can choose the files that you want to save on the destination on your PC and then click the "Start Saving" button.
Next, you will get notified on the screen how many of your files have been recovered successfully.
Related Video:
Speak Your Mind
Leave a Comment
Create your review for Tenorshare articles


