Why Can't I Send Text Messages on My Android and How to Fix

Updated on 12/24/2019 / Fix Android
100 % Helpful
Texting has all of a sudden become one of the fastest and easiest methods for communicating our family and friends. When not available to pick calls, a decent text from you can simply notify the caller to call back later. Apart from that, texts can get as interactive and engaging as instant messaging services, depending on how both people involved use it.
The good thing is that all mobile phones, regardless of price and make, can send text messages once they have a sim. However, frustration might set in when users find their android not sending texts. If you are facing this challenge or know somebody who is, we are here to proffer some solutions.
- Part 1: Why Can't I Send Text Messages on My Android?
- Part 2: How To Fix Text Messsage Not Sending Android Issue
- Part 3: One Click to Solve Android Not Sending Texts Problem
Part 1: Why Can't I Send Text Messages on My Android?
There are various reasons why an android device may not be able to send text messages. Below are some reasons.
- Insufficient internal memory
- Service providers network
- Faulty SMS configuration settings
- Software problems
- Messaging app issues
There may be other reasons but we have found that the above reasons are oftentimes the culprits behind failed SMS sending or delivery.
Part 2: How To Fix Text Messsage Not Sending Android Issue
Here are some suggestions that you can use to fix text messages not sending the Android issue. If you are able to identify the issue immediately, you can choose the solution that best suits the problem. However, if you cannot identify the problem, you can try a number of steps listed below and confirm if they worked.
1. Be Sure Your Android Has Registered Your SIM
We know that sometimes when we don’t insert sim properly into our devices, they may not register. If your Samsung galaxy s7 failed to send a message, simply remove and re-insert the sim card to be double sure that the sim is placed correctly. After you insert the sim, send a new text message. The message should send unless there is another problem that needs fixing.

2. Check If Airplane Mode is Active
Also, be sure that you have not mistakenly activated airplane mode. Airplane mode will not allow you to make calls or send text messages. Simply go to the home screen and swipe down to see if airplane mode is activated or not. If airplane mode is activated, you should see the airplane icon colored blue or green. Simply deactivate airplane mode by tapping the airplane icon. Once the color is gone, it means airplane mode has been deactivated. You can then proceed to check signal strength.
3. Check for Your Signal Strength and Network Connection
If after re-inserting your sim, text messages still do not send, try checking out your network connection. Go to the home screen and check the bars on top of the screen. How many bars are indicating the signal strength? Insufficient signal strength can prevent sending text messages. You may have to wait until the signal strength improves or change your location and try sending a text message.
4. Check Your Battery Level
LG phone not sending text messages can occur when the battery level is very low, the android phone can automatically switch to power-saving mode. Some major functionality such as sending or receiving text messages may be disabled. If you notice that your phone battery is low, charge your phone full and try resending the text message.
5. Confirm Your Subscription with Your Network Provider
It is probable that you may not be able to send text messages when your subscription is expired or exhausted. Once you confirm from your network provider if your subscription is exhausted or expired, you can renew it to continue to use the short messaging service.
6. Test the SIM Card in Another SIM Slot or Phone
Some people may complain of their text not being sent from their iPhone or Samsung android. If you are wondering, “why won’t my iPhone send texts to Android”, you can try putting your sim in another phone and resend the message. If the new phone sends the message, it means your sim is probably okay. You may need to call your network provider to help if your Samsung Galaxy S8 not sending texts to persist.
7. Clear Messaging App Cache
For most smartphones, using a particular app so often makes it build up the cache. It is important to clear cache occasionally in order not to hinder the app function. This may also apply to your messaging app. Try clearing messaging app cache if Samsung S9 failed to send a message.
- Go to Settings and select Apps. Locate your messaging app on the list and select it. You should be able to see the storage space used by the messaging app and the cache.
Chose Clear Cache option to free device memory for message function. After you have cleared cache, you may be able to send and receive text messages.
8. Force Stop the Message App
Sometimes the messaging app can be the cause of your inability to send text messages. If you cannot send text messages but can receive android, you may Force stop the app and restart your phone. You can force stop your message app by following the steps below.
- Go to Settings and choose Apps.
- Scroll down the list to find the messaging app.
- When you find the app, click on it. You should see the force stop option. Click it and restart your device.
Part 3: One Click to Solve Android Not Sending Texts Problem
ReiBoot for Android is Tenorshare created repair app that helps fix booting issues in Android. It also helps with other issues such as freezing in phones and inability to use the home button, the app helps restore the phone to a working state.
- ReiBoot supports almost all Android phones from version 2.0 up irrespective of the maker.
- Works with different boot modes available on different phones.
- Its versatility makes it the one stop shop for a whole lot of android phone issues.
How to Use ReiBoot to Repair Your Android System
A faulty Android system is likely to disturb app performance. Once you suspect your message app is faulty, you can easily use Reiboot to repair it and start using your phone in excellent working condition.
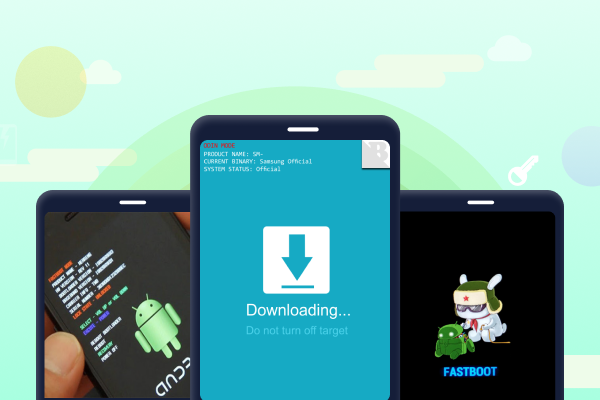
Visit ReiBoot for Android official website to download the software on your PC. After the download is complete, install and run the app. Connect your Android to the PC using USB via USB Debugging mode. Click Repair Android System to continue.

Select "Repair Now" as you continue the process.
- If you can't find your device listed above, select "?" next to the scroll bar to locate your device.
The right firmware would follow suit as soon as the installation package is downloaded.
Click "Repair Now" to fix the Android system, after the firmware package has been downloaded on the PC.
- Note: Pay attention to the pop-up interface and select "Continue" to proceed. Follow the steps as outlined to enter download mode and commence Android system repair.
The entire Android repair process may take up to 10 minutes. Ensure that your device remains connected throughout the process. After successful Android repair, your Android device should boot normally.
Conclusion
We have outlined a number of ways to solve Android messages not sending problems. If you have tried all the steps and the problem persists, we recommend that you use the one-in-option, which is the Tenorshare ReiBoot for Android. ReiBoot will help resolve all text message issues in one run.
Speak Your Mind
Leave a Comment
Create your review for Tenorshare articles
Don’t forget to share this post!


