Android Emergency Calls Only, Why and How to Fix
The Android emergency calls only message appears for several reasons on your Android phone. When this message pops-up on your screen, the only type of phone calls you can make is emergency. You are prohibited from making regular phone calls.
You will probably want to get rid of this issue as soon as possible, so you can resume your normal calls. This guide shows how you can do that.
- Part 1. Why Does My Android Phone Say “Emergency Calls Only”?
- Part 2. How to Fix Emergency Calls Only on Android?
- Part 3. The Ultimate Android Emergency Calls Only Solution If All Failed
Part 1. Why Does My Android Phone Say “Emergency Calls Only”?
If this is the first time that you are seeing the emergency calls only Android message, you might be curious to know why this message appears. Here are some of the possible causes.
- Missed Carrier Payment: you have missed making a payment to your cellular carrier and they have stopped your calling features.
- SIM Card Issues: the SIM card is not properly inserted into your Android phone.
- Weak or No Signal: You might have weak or no signal from your carrier which will not let you make calls.
- Damaged SIM Card: If Your SIM card is corrupted or physically damaged, that may be why you see the Android emergency calls only message on your device.
- Carrier Issues: Sometimes, it is not your phone but your carrier that has an issue which prevents your phone from being able to place new calls.
Part 2. How to Fix Emergency Calls Only on Android?
You now know why the issue occurs, and it is time to take a look at some of the Android emergency calls only solution.
1. Pay Carrier Bills
You must ensure that you have paid all of the bills from your carrier. If you have not, go ahead and make a payment for the due amount. Once that is done, your carrier will resume the call features for your phone number.
2. Reboot Your Phone
If there is a minor issue on your Android phone, you can fix it by simply rebooting your device. This will then allow you to place regular calls from your phone.
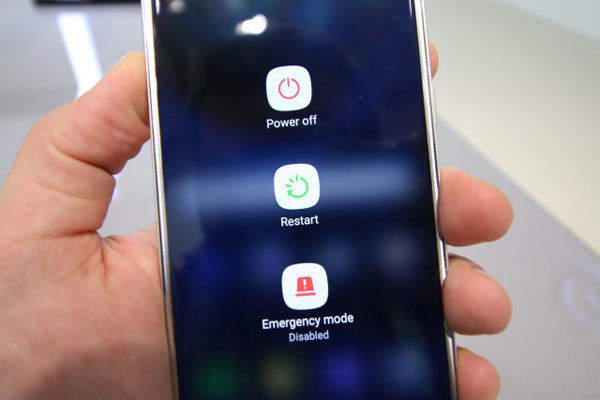
- Press and hold down the Power button on your phone.
Select Restart to reboot your device.

3. Insert the SIM Card Properly
If the SIM card is loose and is not properly inserted, you need to take it out and put it back in properly. Here is how you can do that.
- Turn off your phone.
- Pull the SIM card tray out of your device.
- Take the SIM card out of the tray.
- Put the SIM card properly back into the tray.
Insert the tray into your phone and turn on your phone.

4. Manually Select Your Carrier
Sometimes, your phone experiences issues automatically finding your cellular carrier. One way to get around this issue is to manually choose the carrier. You can do this from the Settings app.
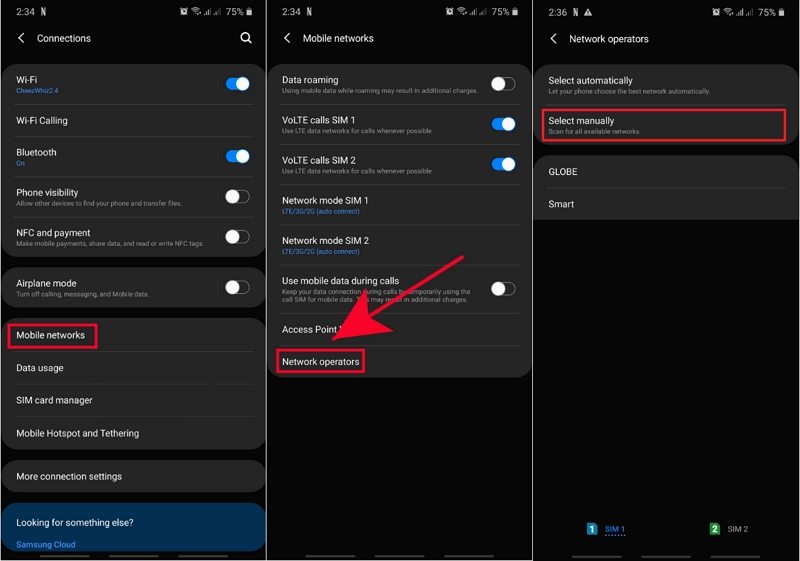
- Head to Settings > Network & internet > Mobile Network and choose your SIM card.
Tap Network operators and then tap Select manually.

- Your phone will search for available networks. Once it’s done searching, select another network to connect to.
5. Change Your Network Mode to GSM Only
In some cases, changing your current network mode to GSM helps fix the Android phone emergency calls only issue.
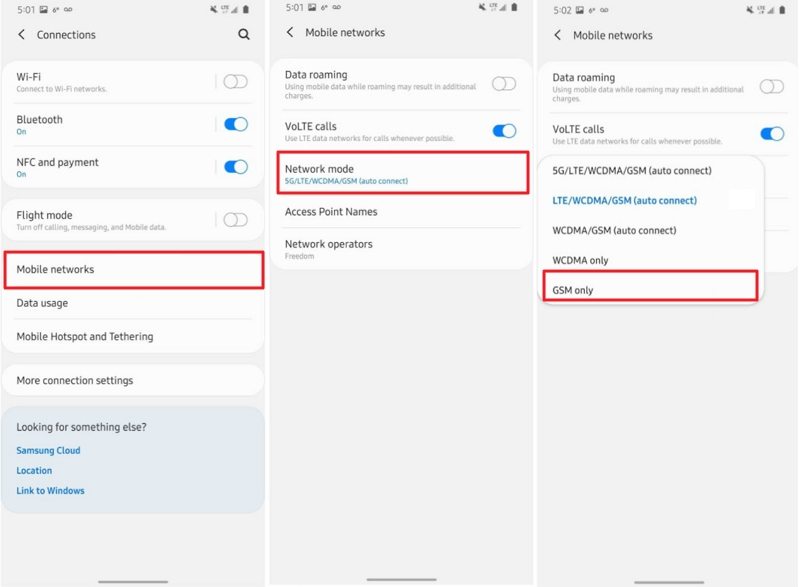
- Go to Settings > Network & internet > Mobile Network > Advanced on your phone.
Tap Preferred network type and choose GSM only or 2G only.

- Close the Settings app.
6. Check for a Damaged SIM Card
You need to ensure that your SIM card is not damaged. Pull the SIM card out of your phone and check if there are any visible signs of damage. If there are, get the SIM replaced from your carrier.
If there are no signs of any damage but you believe the card is corrupted for some reason, it is still a good idea to get it replaced from your network provider.
Part 3. The Ultimate Android Emergency Calls Only Solution If All Failed
If nothing else works, you can turn to a professional repair tool to help you fix the emergency calls issue on your Android phone. Tenorshare ReiBoot for Android, a nifty software tool that helps you to fix the operating system of your device. If you are unable to make phone calls because of a system, this tool will fix it in no time. Also, you do not need to do much manually as it takes care of most of the tricky tasks for you.
The following is how to fix emergency calls only on Android with this tool.
- Enable USB debugging on your Android device from Settings > System > Developer options on your phone and connect your phone to your computer.
- Download the aforementioned software and install it on your computer.
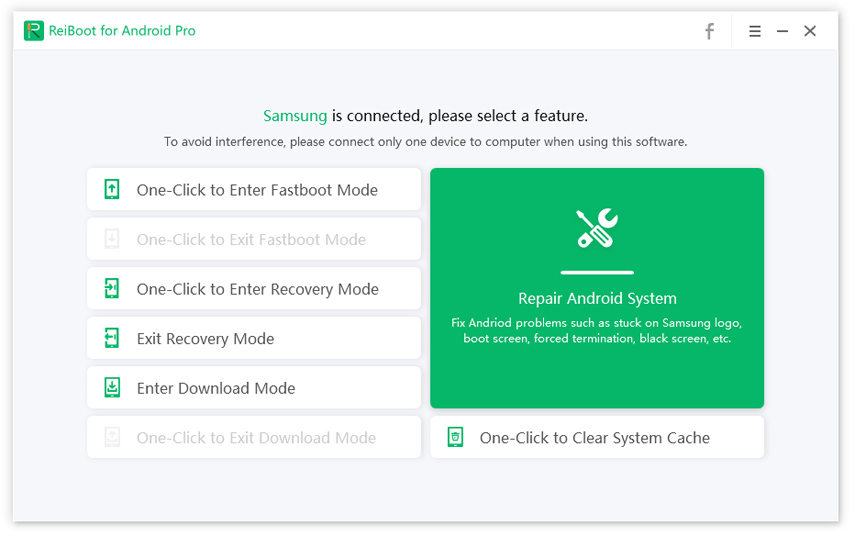
Run the software and click on Repair Android System to repair your device.

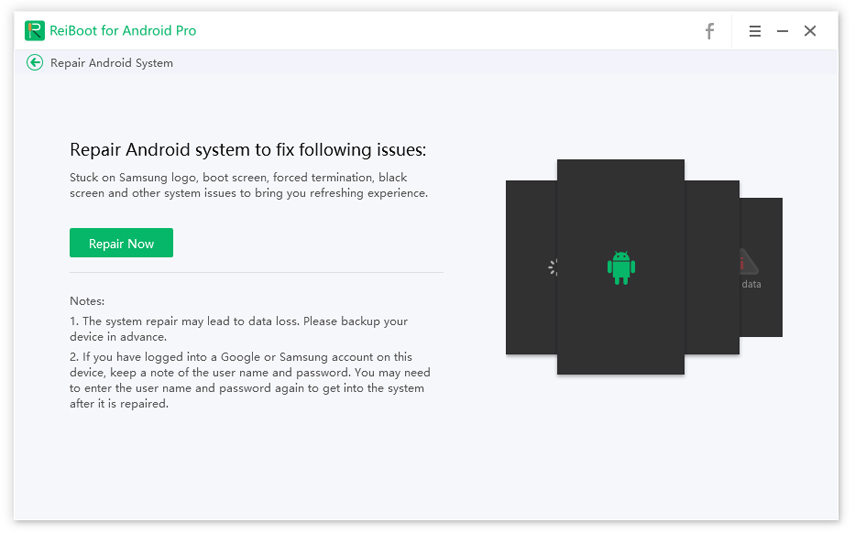
Click on Repair Now on the resulting screen to fix your device.

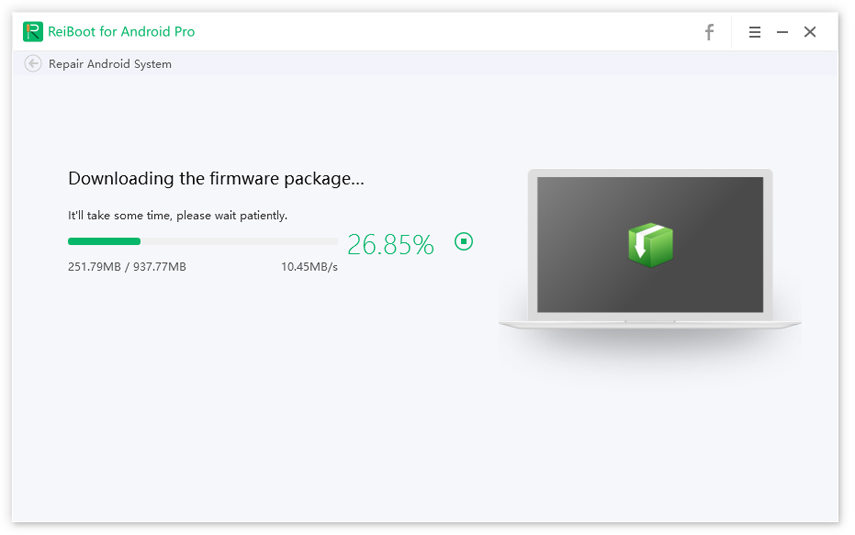
Choose your phone model from the dropdown menus and click on Next to download the firmware for repair.

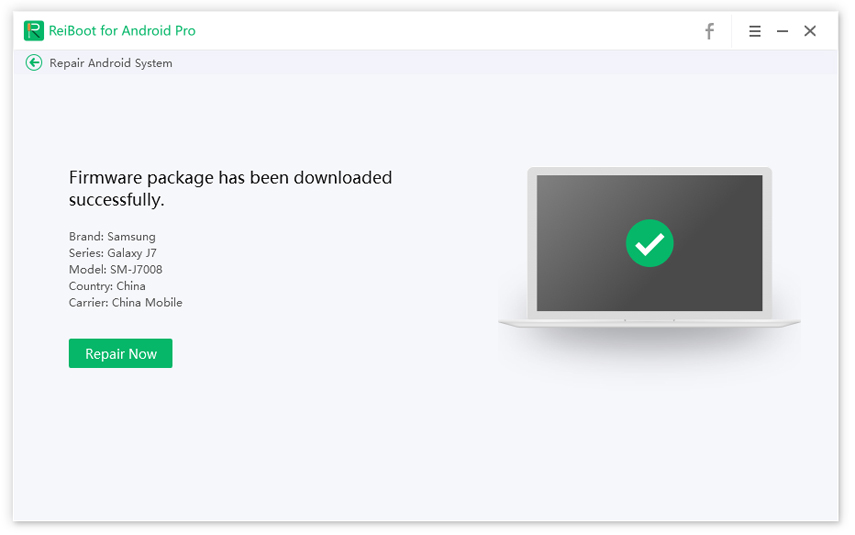
Click on Repair Now and it will start repairing your phone.

The software will let you know when your phone is repaired. You should now be able to make regular calls from your phone.
Summary
There are several reasons why your Android phone only lets you place emergency calls. Using the methods above, you should be able to get rid of that limitation and start making regular phone calls like you used to do. If other methods do not work, the last one - Tenorshare ReiBoot for Android will certainly work as it fixes your phone’s entire operating system.
Speak Your Mind
Leave a Comment
Create your review for Tenorshare articles
