iPhone/iPad Guided Access Not Working – How to Fix
Many users have reported that their Guided Access is broken in iOS 12. No matter how useful the Guided Access is, it can also suffer from working issues. You don't need to panic if you find iPhone Guided Access is not working properly. This can happen to any user. So, if you are one of the unlucky ones, then go through this article.
So, in this article, we are going to explore the methods to fix the Guided Access not working in iOS 12.2/12.1/12 on iPhone/iPad. Hopefully, one of the listed methods would fix the problem in your iPad/iPhone.
Methods to Fix the Guided Access Not Working
There are several methods to fix the Guided Access bug in iOS 12 and the best methods are given below.
- Method 1. Restart/Force Restart iOS Device
- Method 2. Disable Guided Access
- Method 3. Repair iOS System to Fix Guided Access Not Working without Data Loss
- Method 4. Reset iPhone
- Method 5. Restore iPhone
Method 1. Restart/Force Restart iOS Device
If you are trying to resolve the Guided Access broken problem, then the first method you can try is a simple restart or Force Restart.
To restart an iPhone/iPad, press and hold the Power button and wait until the slider appears. Then drag the slider to right and switch off the iPad.
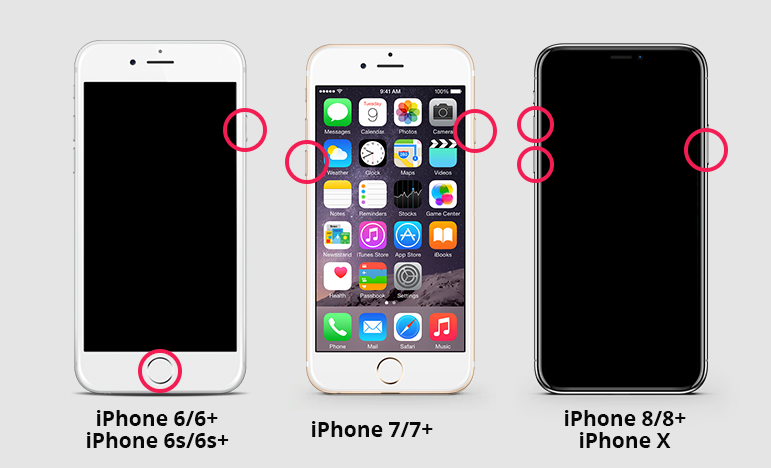
If simple restart does not remedy the problem, you can hard reset iOS device to have a try. The steps are different for different iPhone models.
- On an iPhone 8 or later: Press and quickly release the Volume Up and Volume Down button. And then press and hold the Side button until you see the Apple logo.
- On an iPhone 7 or iPhone 7 Plus: Press and hold both the Side and Volume Down buttons for at least 10 seconds, until you see the Apple logo.
- On an iPhone 6s and earlier, iPad, or iPod touch: Press and hold both the Home and the Power/Sleep buttons for at least 10 seconds, until you see the Apple logo.
Method 2. Disable Guided Access
If you think that guided access is broken in iOS 12, then you can also try disabling the session. The process of disabling guided access is very easy. To disable guided access in your iPad, follow the steps below:
Step 1. Triple-click on the Home button and you will be prompted to enter your guided access passcode.
Step 2. After entering the passcode, click on the End button.
If you have entered a Face ID or Touch ID as a passcode for guided access, then double-click on the Home button and disable the guided access session.
Method 3. Repair iOS System to Fix Guided Access Not Working without Data Loss
The best solution you can try is iOS System Repair software Tenorshare ReiBoot. With the help of this tool, the users will be able to fix all kinds of iOS issues without data loss. So it is worth using to fix Guided Access problems, or other iPhone problems like recovery mode loop, Apple logo stuck, iPhone won't turn on, etc.
Follow the steps given below to fix your device's Guided Access system:


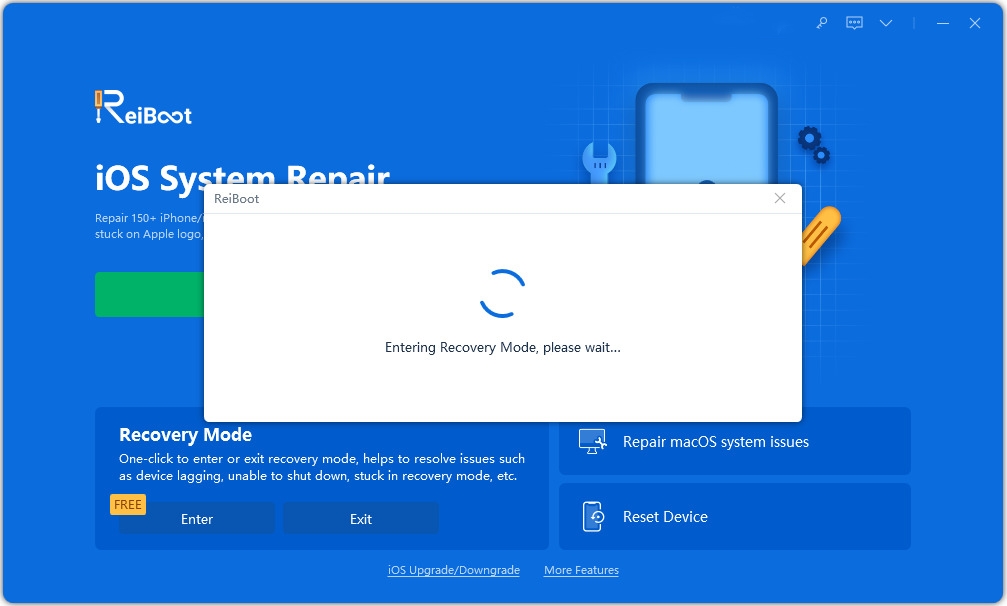
Step 1. Get started by downloading the software on your computer and installing it properly. Run the software and connect your iPhone/iPad with it. Then from the main interface, click on the Repair Operating System option and get to the next step.
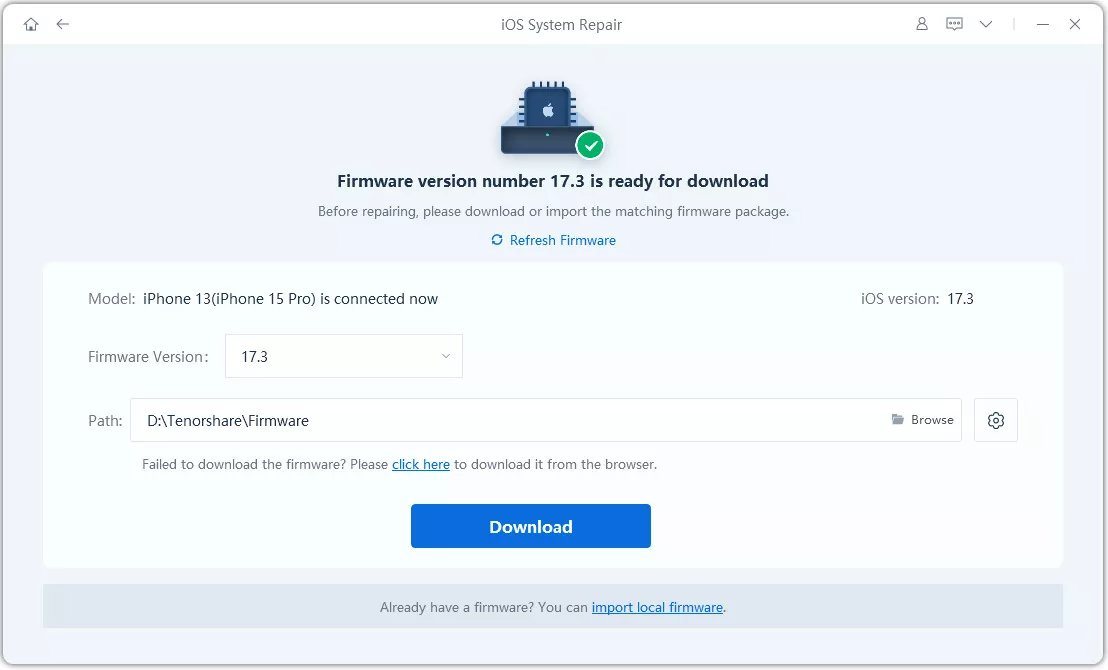
Step 2. When you start the process, you will need a firmware file at first. The software will detect the iOS version of the device and provide you with a suitable firmware package. Tap on the Download option and wait until the package is downloaded.
Step 3. Now you are ready to start the repair process of your iPad. Click on the Repair Now option and the process will be initiated. It will take some time to finish the task and when it does, your iPad will reboot itself.
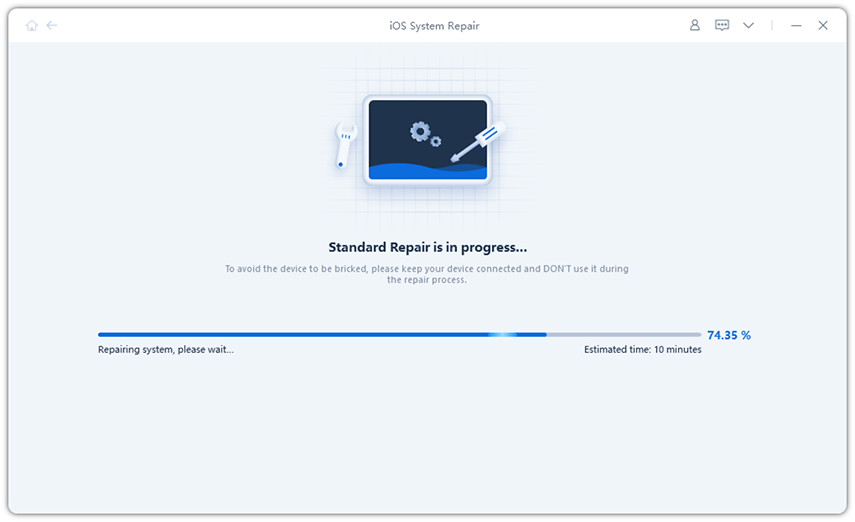
When the device turns on, you have access to it and still have all your data in the device. You can use this tool to repair over 50 kinds of issues in the device.
Method 4. Reset iPhone
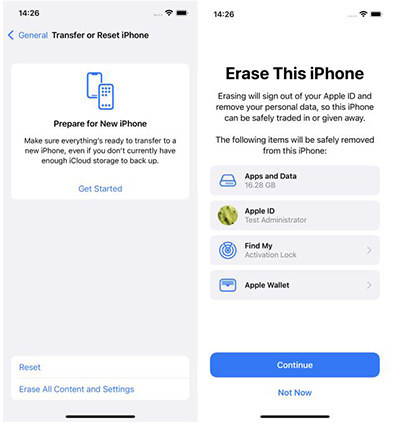
One other method that can be tried is to reset iPhone. Go to Settings app > General > Reset. Reset All Settings will reset all settings, and won't wipe out data. If you don't have that much data stored on your device, you can choose Erase All Contents and Settings that will lead to data loss.
Method 5. Restore iPhone(Data Loss)
You can opt to this method to fix Guided Access problems. To perform a restore with iTunes, follow the steps below:
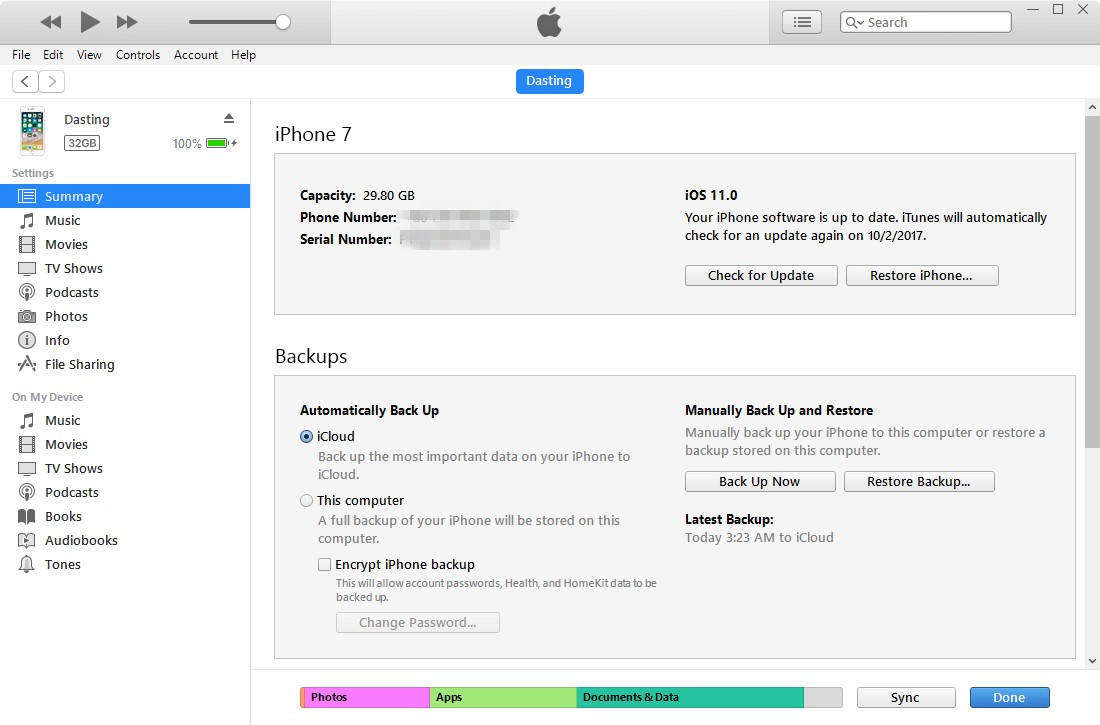
Step 1. Launch iTunes on your computer and connect your device with it. The device will be detected by iTunes and the device icon size will be highlighted. Tap on the option and go to the Summary tab.
Step 2. In the Summary tab, click on the Backup Now option first to create a backup of your data. Then tap on the Restore option and iTunes will erase all your content and settings from the device.
You will be directed to the setup screen after the device is restored. To restore the backup, get to the Apps and Data screen and choose the backup file from iTunes.
Part 3: What is Guided Access and How to Use It
Guided Access is a feature in the iOS device, which comes in handy when device owners have to give their device to someone to use it. The Guided Access will prevent the unknown users from moving to another screen and having a free access to the device thereby keeping the information and data stored in the device safe from breach and theft. That's why when some users find out that their device's Guided access is broken they freak out and try every possible method to fix it.
It is very easy to use and operate once you get a hang of the feature. It will take a few attempts to learn to use the feature perfectly. You can turn the feature on from the Accessibility settings of the General menu in the Settings app. You will also need to set a passcode for the guided access. Once you have successfully enabled the feature, follow the steps below to activate it:
Step 1. Launch the app, which you want to use and triple click on the Home button.
Step 2. Then use your fingers to circle the areas where you want to disable the touch. If you mistakenly circled any part, then you can cross it by clicking on the X button. Finally, tap on the Start button and the guided session will be activated.
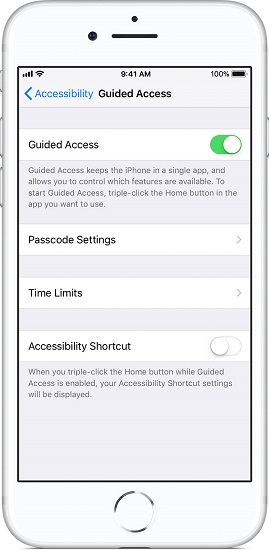
Now when some other person wants to access your device while guided access session is active, they will be prompted to enter the passcode of your device.
Thus, now we know the possible methods to fix the Guided Access not working iPhone/iPad in iOS 12.2 or iOS 12.1/12/11. Trying any one of the above-listed methods will fix the issue. Tenorshare ReiBoot is the recommended way to fix iOS problems with high success rate and no data loss.
Speak Your Mind
Leave a Comment
Create your review for Tenorshare articles
