iOS 17 Assistive Access Not Working? How to Fix
Some users have reported occasional issues with Assistive Access in iOS 17, ranging from non-functional call apps to disappearing apps and missing time displays on the home screen. If you've encountered these challenges, fret not. This article serves as your guide to resolve the issue when iOS 17 Assistive Access is not working through straightforward solutions.
- Part 1: Why Is iOS 17 Assistive Access Not Working?
- Part 2: How to Turn on Assistive Access on iPhone and iPad in iOS 17
- Part 3: [Top 4] How to Fix iOS 17 Assistive Access Not Working
- Best Choice: Quick Fix iOS 17 Assistive Access Not Working in 1-Click
Part 1: Why Is iOS 17 Assistive Not Working?
iOS 17 assistive access not working can result from various factors, including software glitches, settings misconfigurations, or compatibility and connectivity issues.
- Software Glitches: Sometimes, iOS may have undiscovered or intermittent system bugs that affect assistive features. These bugs can result in features not working as expected. Also, certain apps may conflict with iOS's accessibility features, leading to glitches or crashes. Developers may need to release updates to address these issues.
- Settings Misconfigurations: User error or incorrect settings can cause problems with assistive features.
- Compatibility Issues: Hardware, app, and iOS version compatibility can affect the functionality of assistive features.
- Network and Connectivity Issues: Connectivity problems can disrupt features requiring an internet connection.
Part 2: How to Turn on Assistive Access on iPhone and iPad in iOS 17
Is iOS 17 Assistive Access not working? To activate Assistive Access on your iPhone or iPad running iOS 17, follow these simple steps:
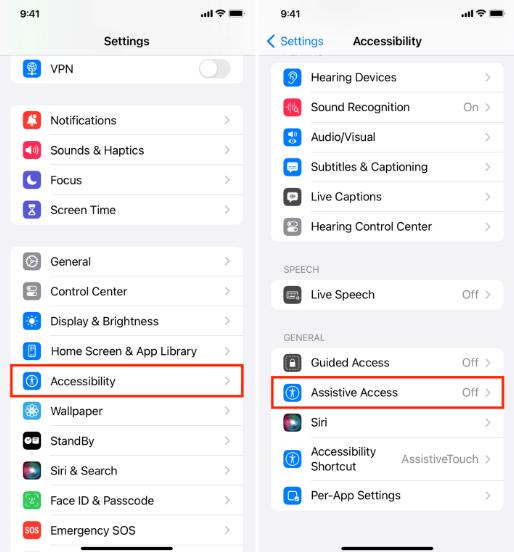
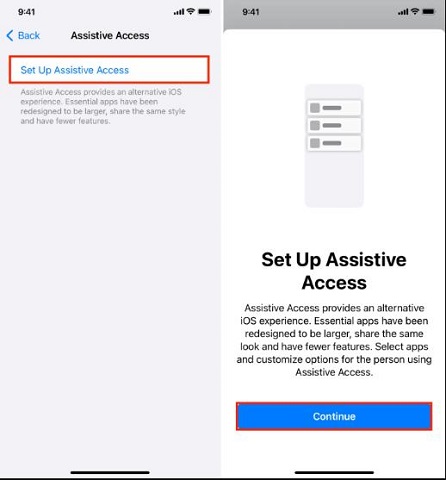
Access your device's Settings, then tap on Accessibility and select Assistive Access. Choose Set Up Assistive Access and tap Continue.

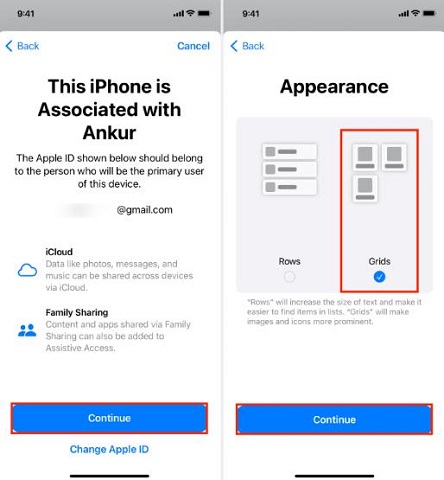
Pick the Apple ID associated with the intended user of the device in Assistive Access mode. If necessary, you can change the Apple ID at this stage.

Decide between two home screen layout options: Grid (displaying four apps per page) or Row (showing one app per page).

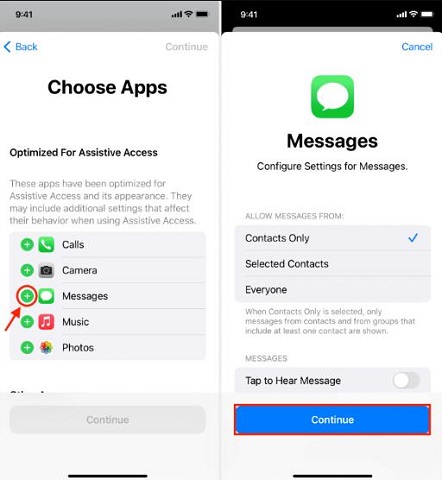
Tap the plus icon next to the apps you wish to include on the home screen. Further, personalize app features by tapping on them. For instance, you can configure the Camera app to exclusively capture selfies or restrict the Music app to a specific playlist.

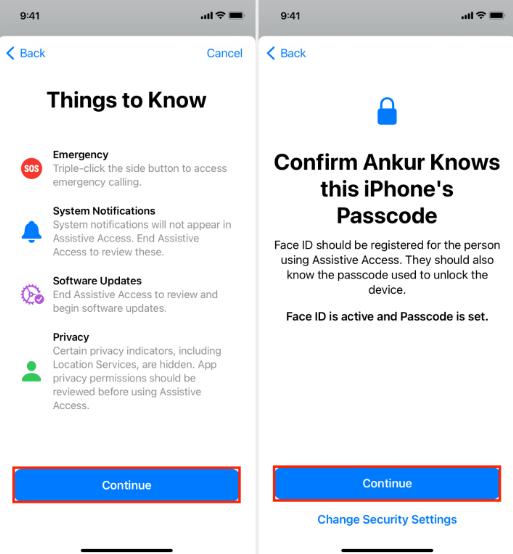
After adding and customizing the desired apps, tap Continue. Confirm that you've added the Face ID and passcode for the person who will use the device in Assistive Access mode by selecting Continue.

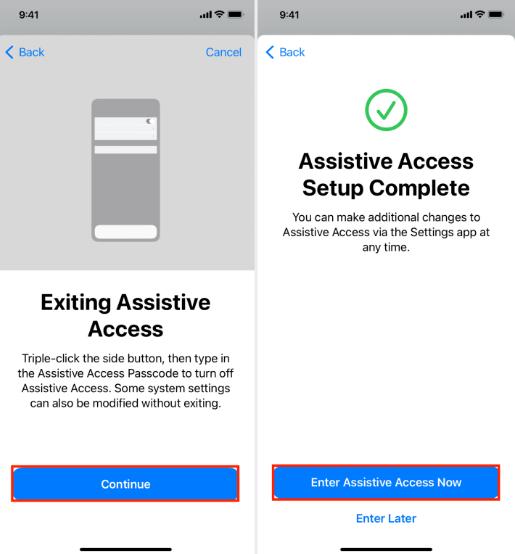
Create a unique password for Assistive Access mode. This password differs from the device passcode and is the key to exiting Assistive Access mode.

- Verify your identity and activate Assistive Access mode by entering your Apple ID and password. Access Assistive Access by selecting Enter Assistive Access Now and providing the password.
Part 3: [Top 4] How to Fix iOS 17 Assistive Access Not Working
If you are having problems with iOS 17 Assistive Access not working mode, such as the calls app not working, apps not appearing on the screen, time not showing on the home screen, and other glitches, you can try these four solutions to fix them:
Solution 1: Restart Your Device
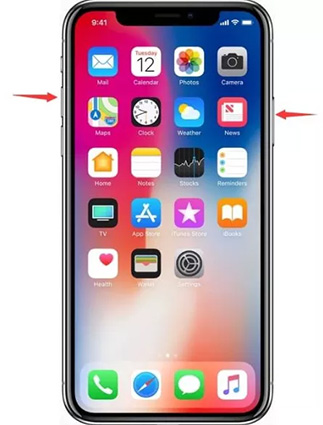
iOS 17 Assistive Access not working, such as app malfunctions or screen display problems; consider starting with a simple device restart. To do this, press and hold the power and volume buttons until the power-off slider appears.
Slide it to power off your iPhone or iPad. After a brief pause, press and hold the power button again until you see the Apple logo. This straightforward action can often resolve minor bugs and glitches.
Solution 2: Check Assistive Access and Location Settings
Ensure that Assistive Access mode is properly enabled and that Apple Maps has the necessary location access permissions. Navigate to Settings, then Accessibility, and select Assistive Access to verify your Assistive Access settings.
Additionally, confirm your location settings by accessing Settings, followed by Privacy & Security, and selecting Location Services. Make sure that Location Services is activated, and for Apple Maps, set the access to "While Using the App or Widgets."
Solution 3: Reset Assistive Access
Resetting it is an option for those who wish to start anew with Assistive Access mode. Navigate to Settings, Accessibility, and select Assistive Access. Then, choose Reset Assistive Access. To confirm, enter your Apple ID and password. This action will erase all customized settings and apps associated with Assistive Access mode, allowing you to begin the setup process again.
Solution 4: Clear Accessibility Cache
If previous solutions do not yield the desired results, clearing the accessibility cache may resolve some Assistive Access-related issues. Begin by selecting Settings, Accessibility, and then Accessibility Shortcut, where you should choose None. Next, navigate to Settings, choose General, and then Shut Down.
After a brief pause, power on your device once more. This action clears the accessibility cache and may help alleviate your difficulties with Assistive Access mode.
Best Choice: Quick Fix iOS 17 Assistive Access Not Working in 1-Click
If you are looking for the best choice to quickly fix iOS 17 Assistive Access not working on your iOS, you can try Tenorshare ReiBoot. This powerful software can repair various iOS system issues without losing any data. You can use it to fix iOS 17 Assistive Access problems, such as the calls app not working, apps not appearing on the screen, time not showing on the home screen, and other glitches.
Here is how this innovative software can help you resolve this issue:
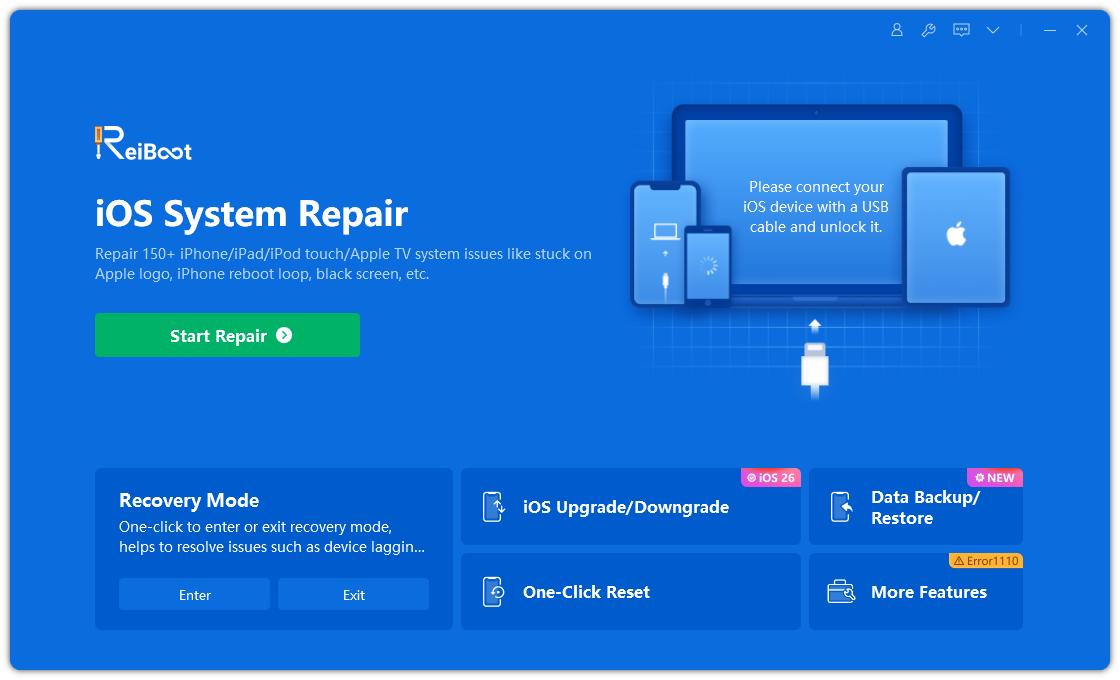
Download and install Tenorshare ReiBoot on your computer. Launch the Tenorshare ReiBoot application and link your iOS to your computer using a USB cable. Click Start option to proceed.

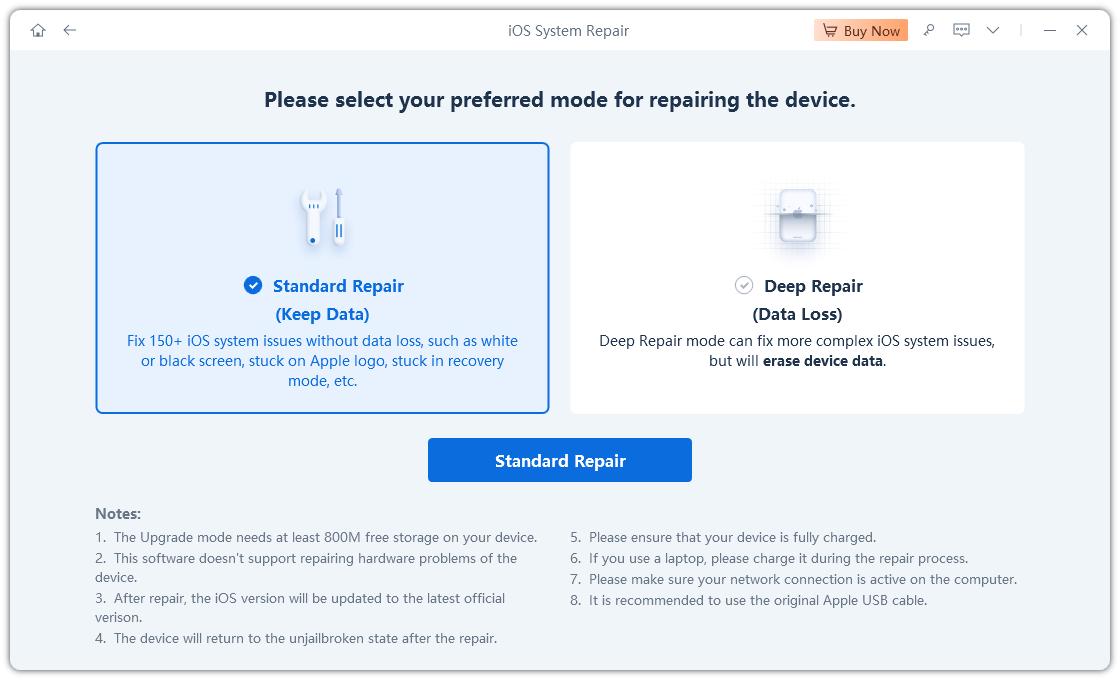
Locate and click on "Standard Repair" to initiate the repair process

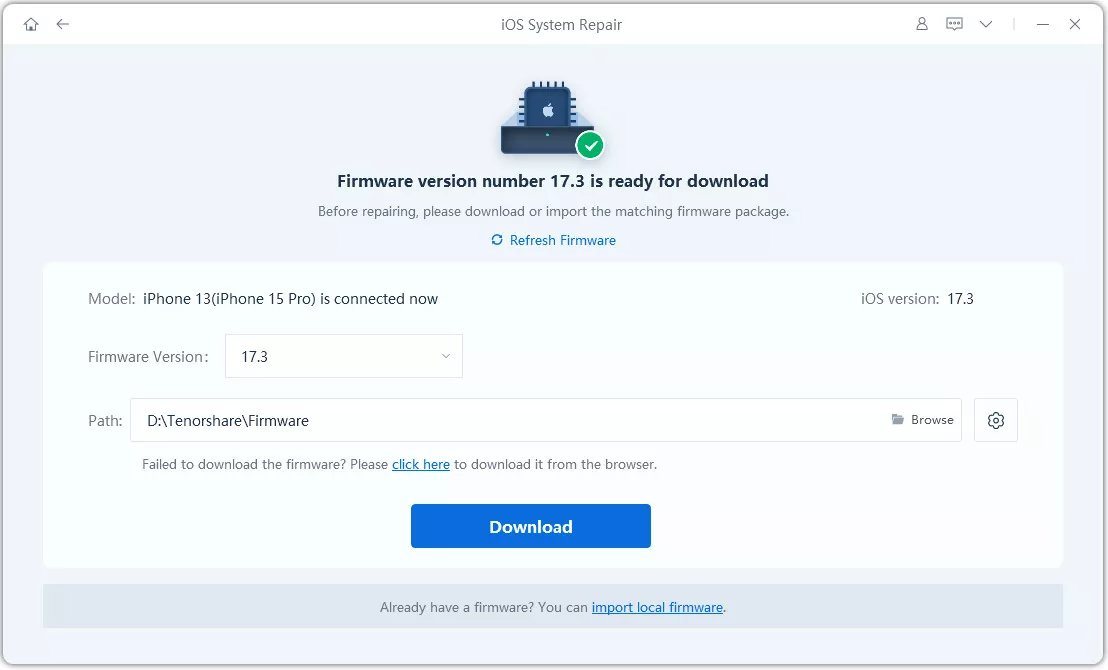
You will be prompted to download the latest firmware package tailored to your specific device. Click "Download" to proceed.

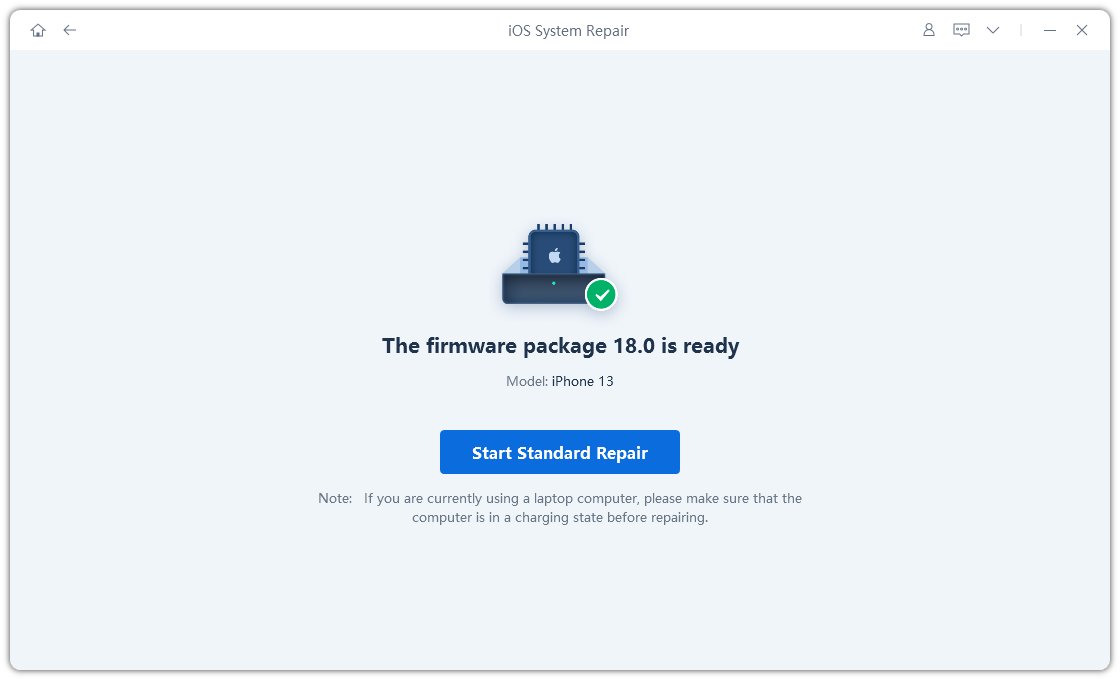
Upon completion of the firmware download, select "Start Standard Repair" to initiate the system recovery process.

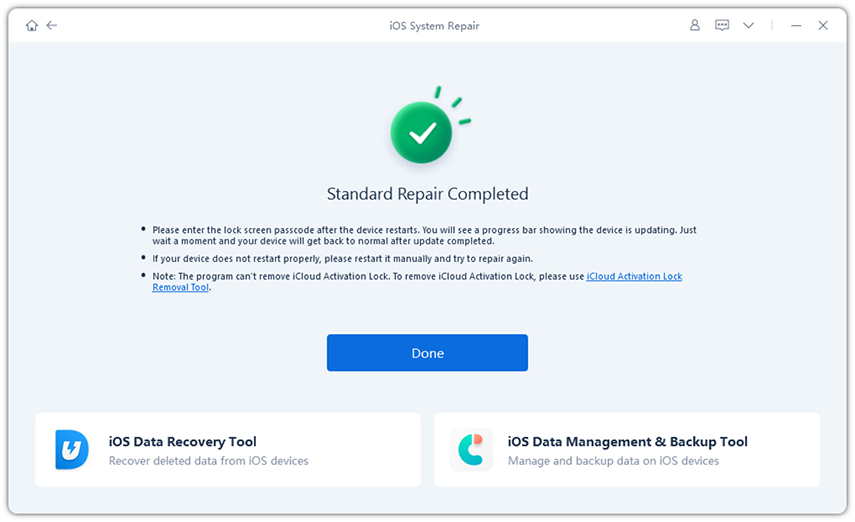
Allow the software to work its magic. Your device will restart automatically, re-entering Assistive Access mode in its corrected state.

Conclusion
iOS 17 Assistive Access can be a powerful tool for customizing your iPhone or iPad, but a quick and effective solution is essential when issues arise. Tenorshare ReiBoot emerges as the optimal choice for resolving Assistive Access-related problems.
With just a single click, Tenorshare ReiBoot can restore your device to full functionality, ensuring a seamless experience for users who rely on this vital feature. Farewell to Assistive Access woes and enjoy a more accessible iOS 17 experience with Tenorshare ReiBoot.
Speak Your Mind
Leave a Comment
Create your review for Tenorshare articles
