iPhone 13 Not Accepting Wifi Password, Here is the Real Fix
by Sophie Green Updated on 2021-09-24 / Update for iPhone Fix
If you happen to frequently use the WiFi service on your iPhone, you have likely run into the iPhone not accepting WiFi password issue at least once in your lifetime. This happens when you try to connect your iPhone to a WiFi network, but your iPhone simply refuses to successfully connect and let you enjoy the network access on your device.
Fortunately, there are a few fixes available that help you resolve the iPhone not accepting password issue for WiFi networks on your device. These fixes make changes to the configuration on your iPhone and ensure it is compatible so that you can connect to your WiFi network from your iPhone.
Let's check out how to get rid of the issue and enable your iPhone to connect to your WiFi network:
- Part 1. Why iPhone Not Accept WiFi Password?
- Part 2. Top 8 Ways to Fix iPhone Not Accepting WiFi Password
Part 1. Why iPhone Not Accept WiFi Password?
We are sure you would like to learn why the issue has occurred in the first place. Well, there are multiple reasons as to why your iPhone is not accepting the WiFi password. The following are two of the most common reasons listed out so that you know what's causing the issue on your device.
Reason 1. Wrong WiFi Password
Well, whenever you receive some content, say a text message from someone on your iPhone, your iPhone tries to find out who sent the message. Next time you get a call or a message from them, your iPhone tells you maybe it's them who messaged you earlier.
If you find this feature to be a little strange and would not want it any further on your device, here's how to get rid of it.
Reason 2. Bug in the Software
If you are sure you have entered the correct WiFi password on your iPhone, but your iPhone won t accept WiFi password still, then there could be a bug in the software of your device. The bug may be preventing you from being able to connect to your wireless network.
Part 2. Top 8 Ways to Fix iPhone Not Accepting WiFi Password
Now that you know the reasons that caused the issue, let's check out the fixes to get around the issue and to be able to connect your iPhone to a WiFi network successfully. Many of the solutions that you will find below can easily be applied using the built-in options on your device and you don't need to download or install anything on your device.
Fix 1. Turn Your WiFi Off/On
This is the most basic yet working fix for the issue. Sometimes toggling the WiFi option on your iPhone as well as on your router can fix issues like not being able to connect to a WiFi network and the following is how you do it.
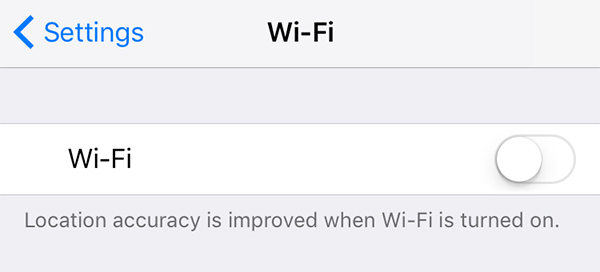
To toggle the WiFi option on your iPhone, launch the Settings app and tap on Wi-Fi to open the Wi-Fi settings menu. Then, turn the toggle for Wi-Fi to the OFF position so it gets disabled on your device. Wait for about a minute and then turn the toggle back to the ON position.
See if you are now able to connect to your WiFi network.
Fix 2. Restart your iPhone
If it is a minor software glitch causing the issue on your iPhone, you can try rebooting your iPhone to see if it helps resolve the issue. In many cases, rebooting the device often fixes the issue and it should hopefully work for you, too.
To restart your iPhone, press and hold down the Power button for a few seconds. Drag the slider and your iPhone will turn off. Press and hold down the Power button again for a few seconds and your iPhone will boot-up.
Fix 3. Turn Off WiFi Assist
In order to help you enjoy uninterrupted Internet services on your iPhone, Apple has included a feature called Wi-Fi Assist in your iPhone that automatically switches to cellular data when it detects that your WiFi signal is weak. It could be interfering with your current situation and may be the reason of the issue. Therefore, it is advised that you turn it off for a while and see if it resolves the issue for you. The following is how to do it.
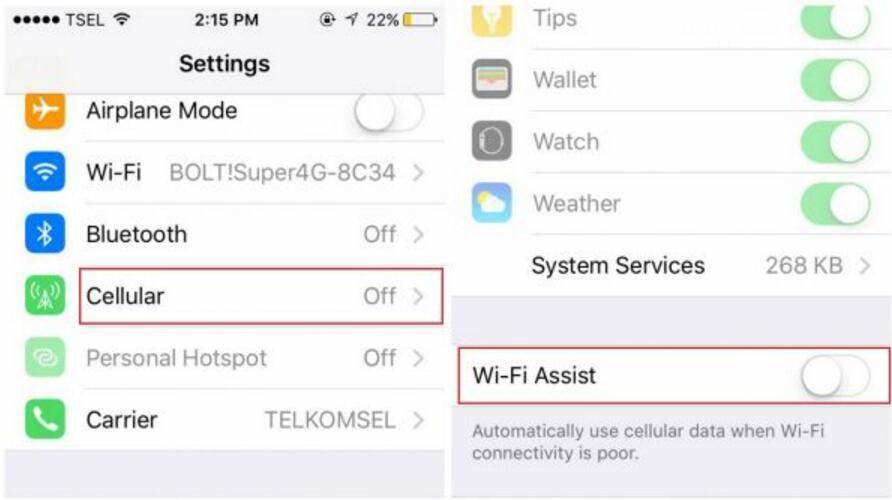
Launch the Settings app on your iPhone and tap on Cellular. Then, turn the toggle for Wi-Fi Assist to the OFF position. You've done it.
Fix 4. Forget WiFi Network and Rejoin
It is also advised that you forget the network and then rejoin it to freshen everything up. The following is how you can do it on your iPhone.
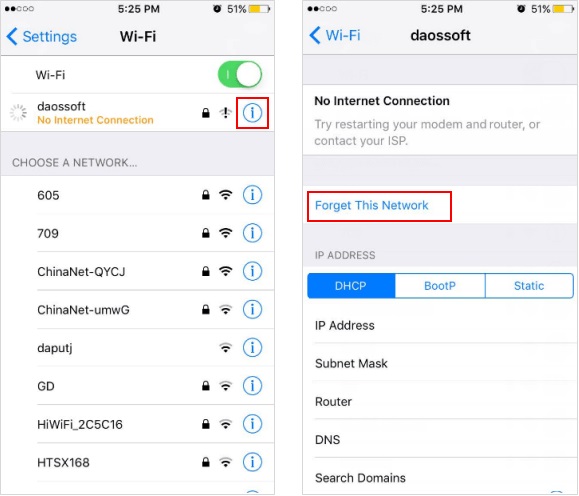
Launch the Settings app and tap on Wi-Fi. Select your WiFi network and tap on the i sign next to it. Tap on Forget This Network and then you may rejoin the network.
Fix 5. Disable Location Services For WiFi Network
You may try disabling the location services for WiFi networks on your iPhone. This could help you get rid of the issue you are currently facing on your iPhone.
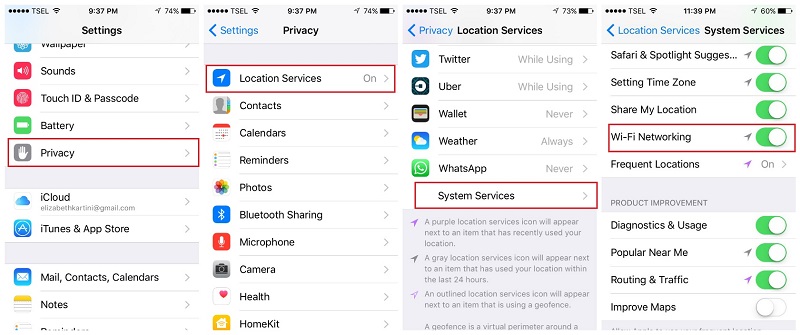
Open the Settings app on your iPhone and tap on Privacy followed by Location Services. Tap on System Services and disable the option that says Wi-Fi Networking.
Fix 6. Reset Network Settings
Network settings are what define how you connect to various networks on your iPhone and if there's a misconfiguration in these settings, you will likely face network issues on your iPhone. You can reset these settings to the factory defaults as shown below. It should help you fix the issue on your device.

Open the Settings app and tap on General followed by Reset. Tap on Reset Network Settings and it will get the job done for you.
Fix 7. Switch to Google DNS
If you are using a not so good DNS provider on your iPhone, it could be causing your iPhone not to accept your WiFi passwords. Here's how to change those DNS servers to more reliable Google DNS servers.
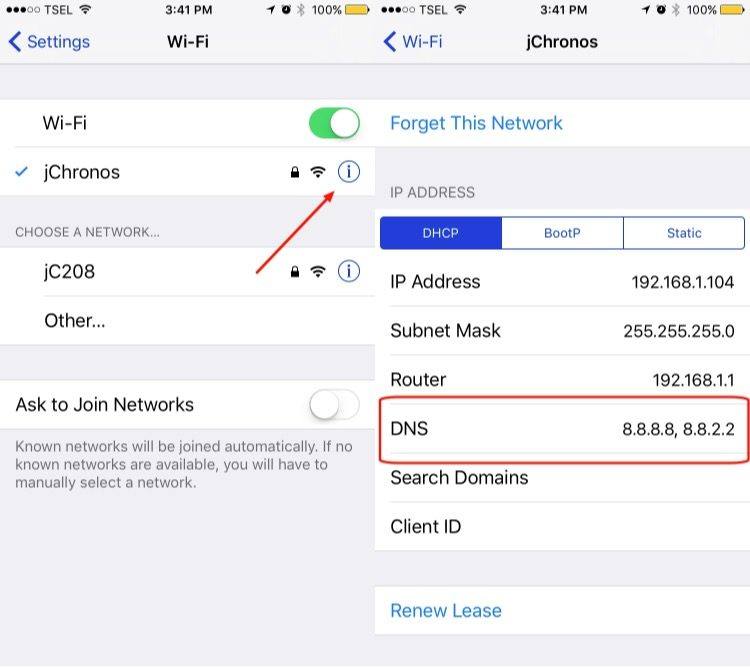
Open Settings and tap on Wi-Fi. Tap on your WiFi network and then tap on the numbers shown next to DNS. Change those to 8.8.8.8 and 8.8.4.4 and you are good to go.
Fix 8. Repair Your iOS to Fix iPhone Won't Connect to WiFi
If your iPhone will not accept WiFi password even after applying the above fixes, you may need to use a third-party software to fix the issue on your iPhone. Sometimes the built-in fixes don't work, and you need to use a software that has been developed specifically to deal with issues like yours.
Enter Tenorshare ReiBoot, a software that helps iOS users fix numerous kind of issues on your devices. It focuses on helping users fix almost all kind of iOS issues on your iPhones and iPads and the following shows how you can use it to fix your WiFi issue:
Step 1: Download and run the software on your computer. Connect your iPhone to your computer and click on Repair Operating System in the software.
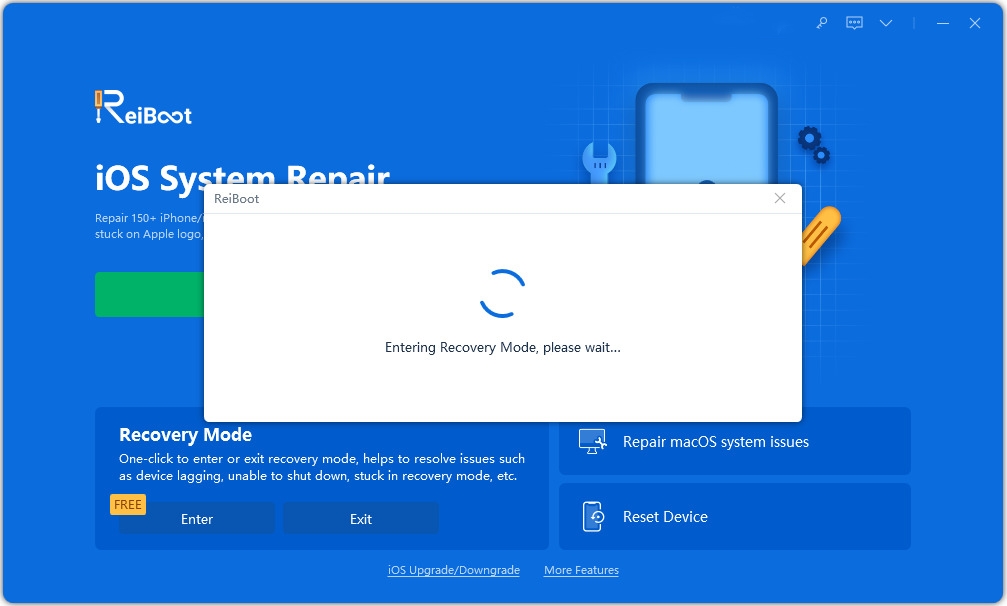
Step 2: Click on Start Repair on the following screen and download a firmware package for your device by clicking on Download.
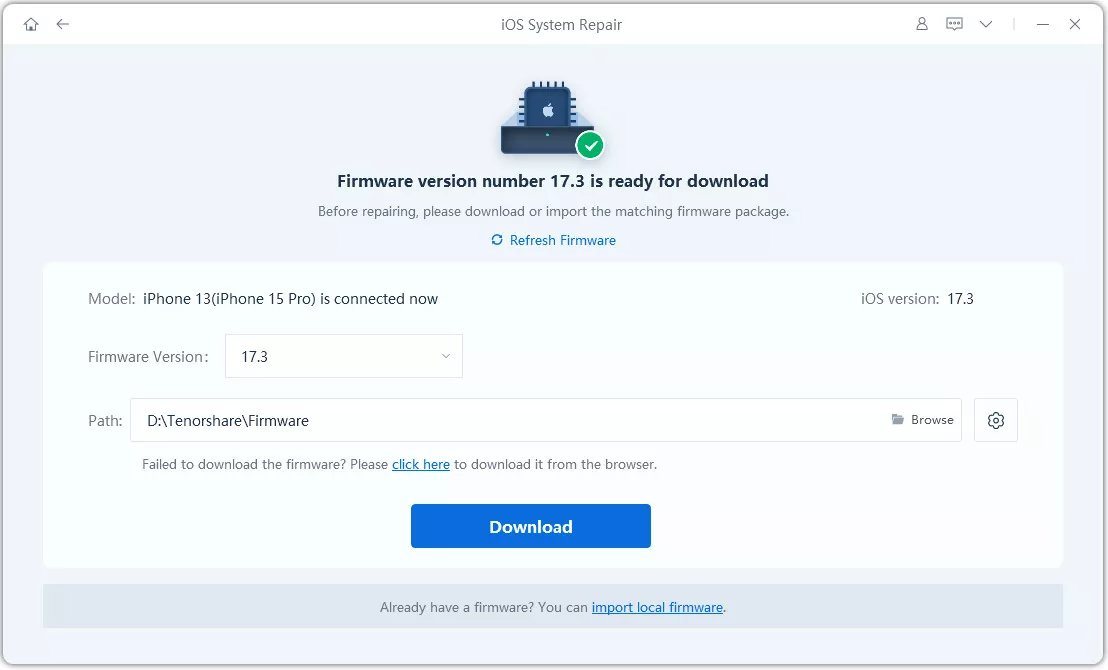
Step 3: Click on Start Repair when the firmware is downloaded to start repairing your iPhone. You will see the following when your iPhone is repaired.
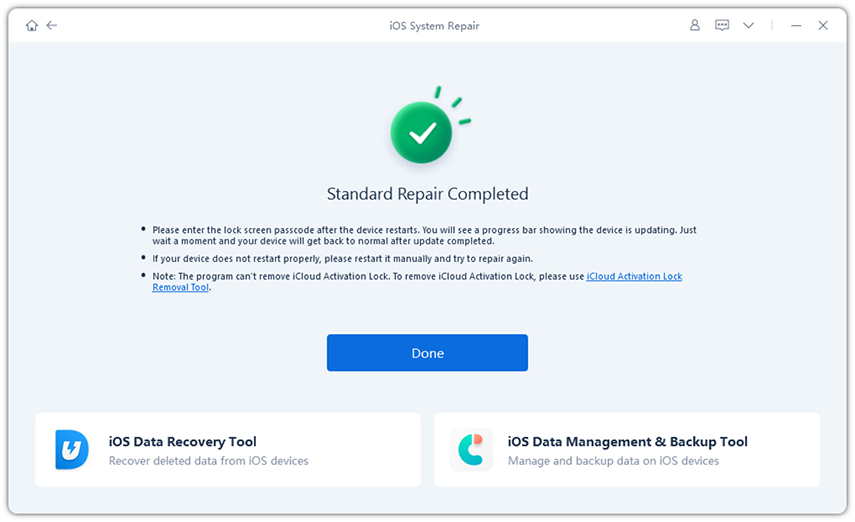
You have gotten rid of the WiFi issue on your iPhone and you should be able to connect it to your chosen WiFi network without any issues from now onwards.
Conclusion
If your iPhone XS/XS Max/XR/X/8/7/6s/6 not accepting WiFi password, you have got plenty of fixes as shown above to get around the issue on your device. If nothing works, ReiBoot is the way to go.

