How to Download Photos from iCloud to Mac – Top 3 Simple Ways
Apple has gone in lengths to make sure you have all your photos on all your Apple devices. That means that every photo you take with your iPhone or iPad, it goes directly to the iCloud Photo Library. However, that also means that you need to pay for even more iCloud storage. Instead, what you can do is learn how to download photos from iCloud to Mac, which will ensure your photos are saved on a device with many times more storage than an iPhone.
- Part 1: How to Download Photos from iCloud to Mac Directly
- Part 2: One Click on How to Download All Photos from iCloud to Mac
- Extra Tips: How to Manage iPhone Photos and Data on Mac Easily
Part 1: How to Download Photos from iCloud to Mac Directly
There are a number of reasons why you would want to download iCloud photos to Mac. For starters, as mentioned previously, you want to remove the photos from your iPhone, but still have them stored somewhere.
Or, you might want to download the photos so you can make a backup on your Mac. Or you want a full-resolution photo you can use for a presentation, or to send to a friend. The photos Apple uploads to your iCloud are full resolution, while the ones on your iPhone are low resolution. So, if you want to take full advantage of the photo, you have to download to your Mac.
Whatever the case might be, today, we will talk about how to download pictures from iCloud to Mac. There are two ways you can do this directly.
1.1 Download Photos from iCloud to Mac Using Photos Application
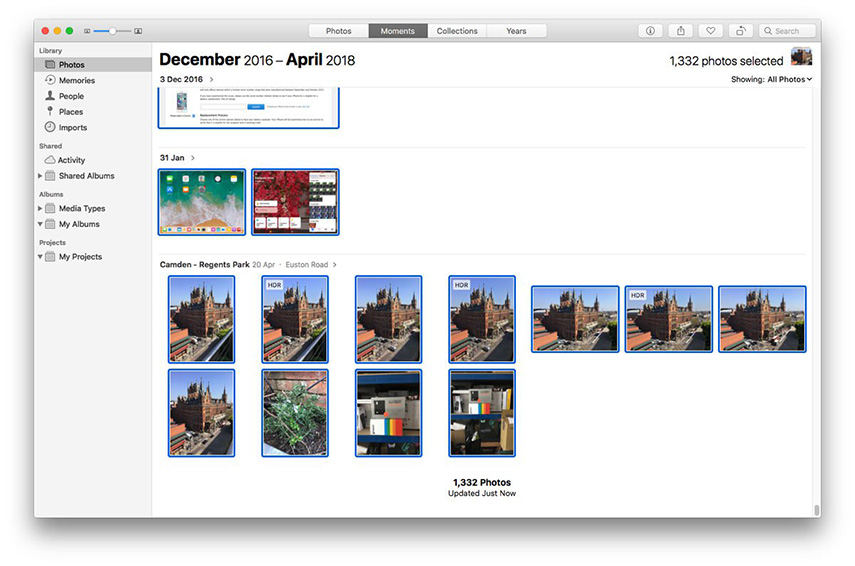
This is the best way for downloading iCloud photos to Mac when you want to use them in full resolution. In order to be able to do this, you need to have iCloud Photo Library activated, and set up Photos application on your Mac. Check if that is the case by going to Photos > Preferences > iCloud. Notice if there is a tick in the box beside iCloud Photo Library. With that in mind, here are the steps to download the pictures.
- 1. Locate the photo you want to download in the iCloud Photo Library.
- 2. Click on the photo, and just drag it to your desktop, or any other folder where you want to save it.
- 3. You now have a backup of the photo, and you can delete the original from iCloud.
1.2 Download Photos from iCloud to Mac Using icloud.com
You can also use the iCloud application to download the photos onto your Mac, or any other PC. Here are the steps you need to take.
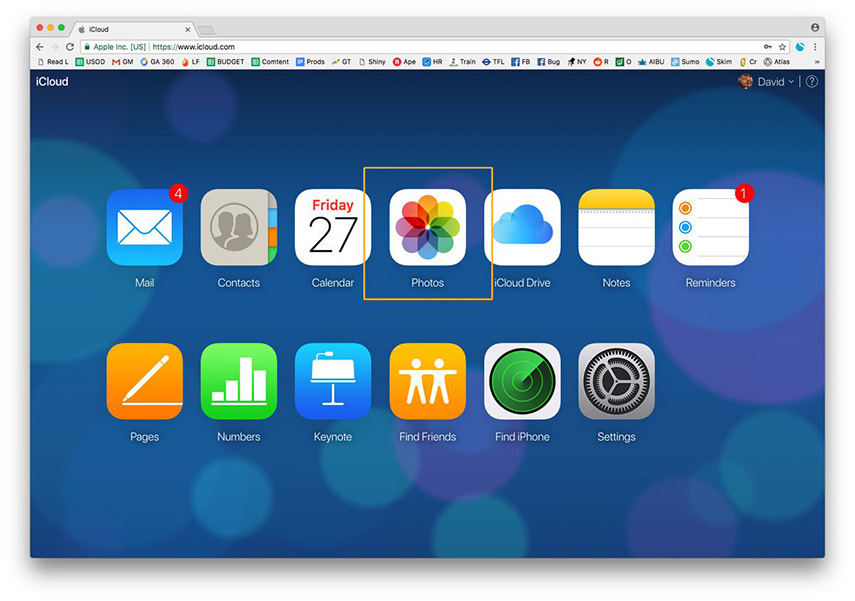
- 1. Log into your iCloud account with your Apple ID and password.
- 2. Click on Photos to see all the images that are saved in your iCloud account.
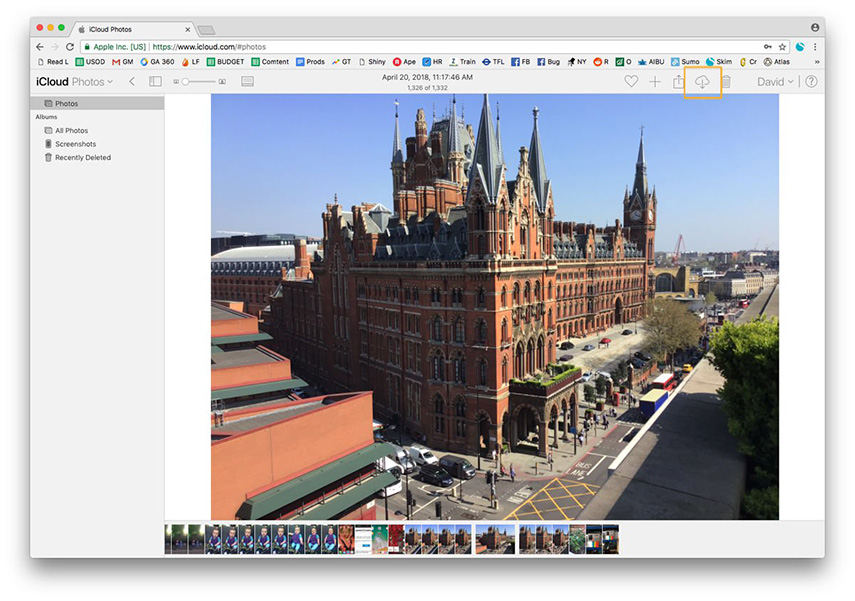
- 3. Locate the photo you want to download, and click to highlight, or double-click to open.
- 4. You will see various icons at the top right, one of which is "Download". Click this icon, and wait for the system to finish the download. The image will then appear in your downloads folder.
Downsides of Downloading Directly
While Apple has provided two simple ways for downloading photos from iCloud to Mac, there are downsides to these guides.
No matter which way you choose, either by Photos or iCloud, you cannot download a large numbers at once. For example, if you want to download all 100 photos of your holiday, you need to download them one by one, following the steps at all times. There is no option for bundle download, or "download all photos".
Part 2: One Click on How to Download All Photos from iCloud to Mac
As mentioned previously, using Photos or iCloud to download photos to Mac only helps you get one by one pictures. Users often ask if there is a way to download or selectively download photos from iCloud backup. Yes, there is. One of the best applications to do that is UltData, an app that is essentially recovery app for data. But you can use it to download the photos to Mac. Here is a step by step guide.
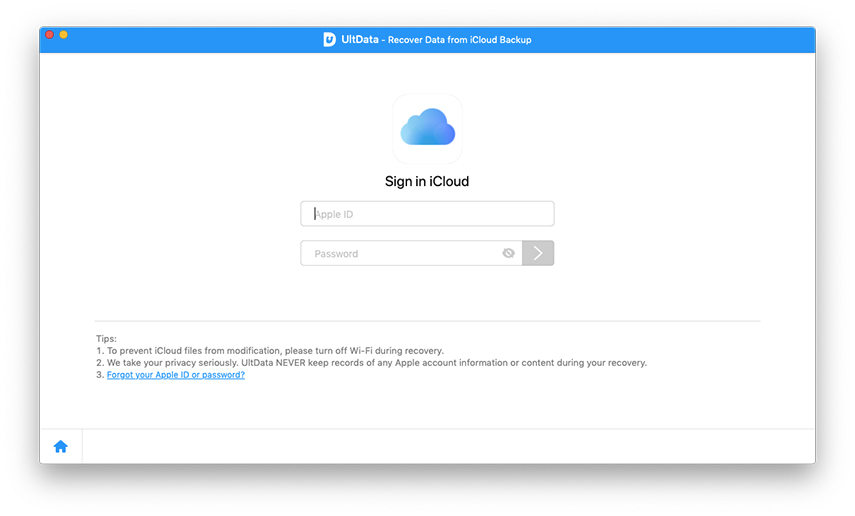
Step 1 Sign into your iCloud accounting using your Apple ID and password. Switch to "recover from iCloud backup file".
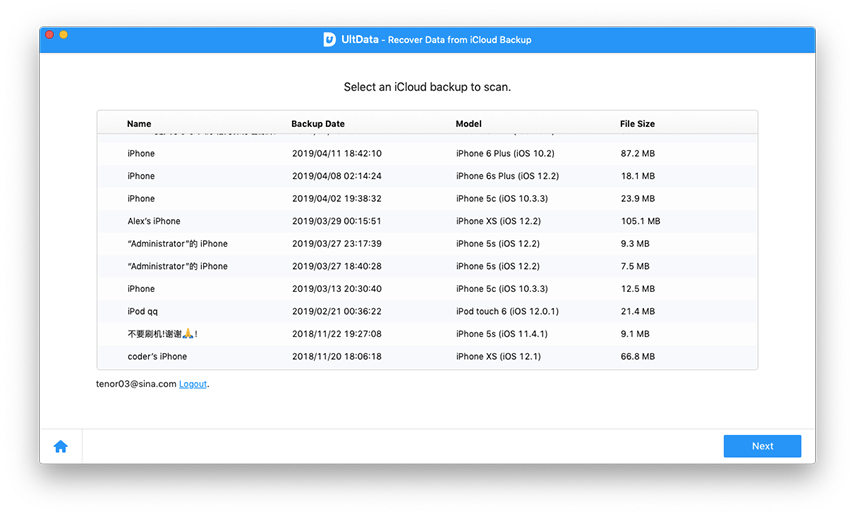
Step 2 Once you log in, you will be presented with a list of all the backups associated with your Apple ID. Check the details of the backups, including name, date, size, and version. Choose the one that contains the photos you want to download.
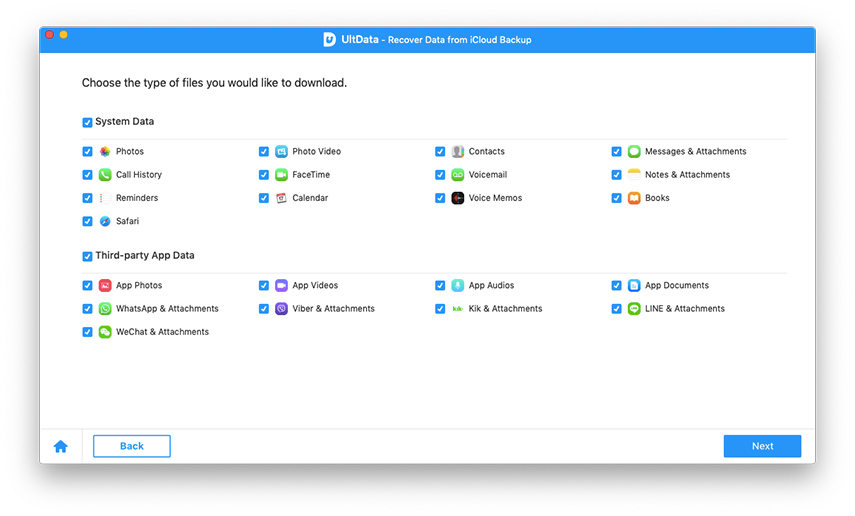
Step 3 The app will allow you to select the file types for downloading. If you want to download only photos, check just the Photos and Videos box. Click on "Next" to start the downloading process. The process will take a while, depending on the size of your backup and your internet speed. Once the process is finished, UltData will automatically scan data and allow you to preview detailed items.
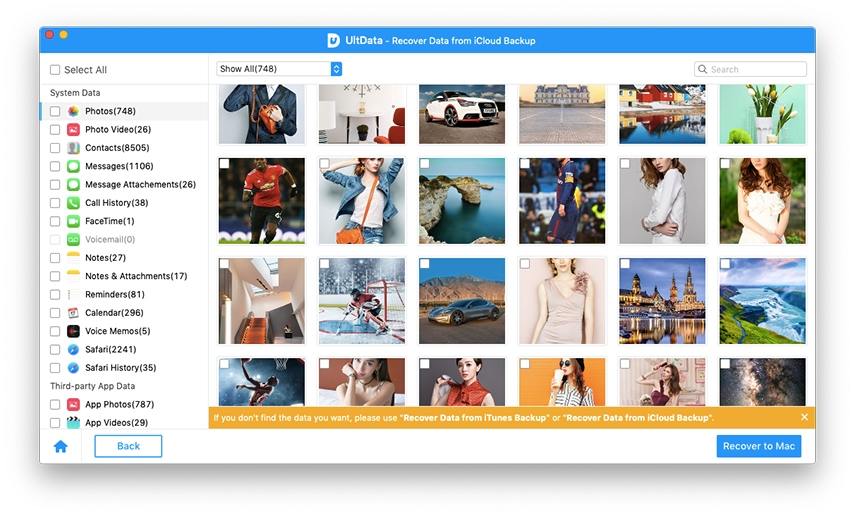
Step 4 As mentioned, the app will give you a result of all photos for previewing and recovering. On the left, there are categories you can click and expand them. Results contain existing and deleted info from your backup. You can further filter photos. For example, clicking on "Show only deleted" will show only the photos you've deleted.
Step 5 Pick up all the items to want to restore, and click on "Recover" button. Remember, you can selectively download photos to Mac, something that you are not able to do using Photos or iCloud app. Also, you can click on the output setting button located in the top right corner. This will allow you to select the formats for different files.
Extra Tips: How to Manage iPhone Photos and Data on Mac Easily
All of what we discussed previously points to the conclusion that it is not easy to manage data on an Apple device, be it iPhone, iPad, or Mac. Luckily, there are apps that help you take control of your data. We talked how you can use UltData for downloading and recovering your iOS data.
Another application you can use to manage your data is iCareFone. This application allows you to import, export, delete, or de-duplicate multiple files in one click. Essentially, it is an app that helps you create backup and restore items to your computer without any limitation. You can easily transfer files across devices, without restriction of Apple ID requirement. The three most important features of the app include:
- Selective transfer, which includes single or batch transfer, 2-way transfer, all for making your file sharing more flexible.
- Free backup, which allows you to backup your device without any limitations.
- Preview backup before restoring.
Speak Your Mind
Leave a Comment
Create your review for Tenorshare articles
