Smart Tips on How to Upload Photos from iPhone to iCloud
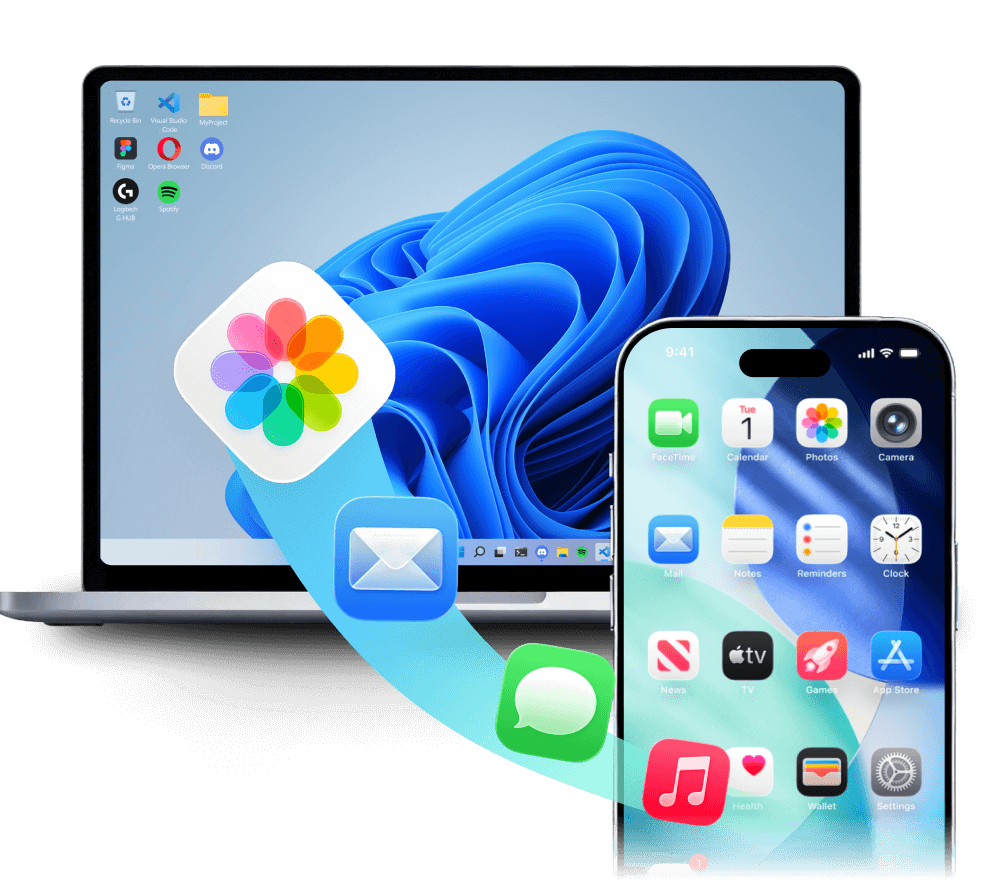
People all around the world love to use iPhones for taking pictures and selfies. The camera quality of the iPhone is up to professional standards and provides users with realistic effects in their pictures. As these pictures are of professional quality, many people prefer to use iCloud for the storage of these pictures. iCloud not only keep your photos safe in case of any malfunctioning but also allows users to access them via multiple sources like windows, Mac etc.
Users can upload photos to iCloud from iPhone, windows computer, or Mac. In the text below, we will discuss how to upload photos from iPhone to iCloud.
- Part 1: Guide on How to Upload Photos from iPhone to iCloud
- Part 2: How to Upload Photos from Mac to iCloud
- Part 3: How to Upload Photos to iCloud from Windows
- Part 4: FAQS about How to Upload Photos from iPhone to iCloud
- Bonus Tip: How to Transfer iPhone Photos to Mac with One-Click
Part 1: Guide on How to Upload Photos from iPhone to iCloud
You can access the iCloud library anytime from any device as it saves all the videos and photos that you keep in iCloud. If you change something in the collection, it is changed on other devices also.
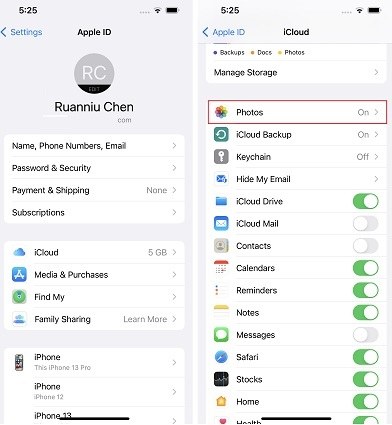
iCloud organizes your photos in order of days, months, and years but how to move photos into iCloud is a common concern of iPhone users. So, to learn how to transfer photos from iPhone to iCloud, first enable iCloud photos on your iPhone. Here are the steps:
- Go to the iPhone’s settings.
- Tap on your name on the device.
- Then tap on iCloud.
Finally, tap on the photos to enable the iCloud photos.

Part 2: How to Upload Photos from Mac to iCloud
Many iPhone users ask how do I upload photos to iCloud from Mac. You can upload photos by dragging and dropping the selected photos in the photo library. The photos, files, and videos kept here will be uploaded to iCloud. This can include photos, saved or shared content, and videos in a file format. To know how to put photos on iCloud via Mac, follow these steps.
- Turn on the iCloud on your Mac first. Open Photos app on Mac.
- Select the photos menu by tapping on the menu bar that is located at the top left corner of the Mac screen. If you don’t want to upload all photos in the Photos app, manually select the photos by tapping on them.
Select system preferences and then tap on the box next to the iCloud photos.

Now you will be given two options to save the photos.
In the first option, iPhone will have low-resolution photos whereas iCloud will save high-quality, full-resolution photos which will be available only when the phone has an internet connection.
The second option enables you to download photos and videos in high resolution. However, more space will be required for this.
- Now click on “iCloud photos”. All or selected pictures begin to upload on the iCloud. The time required for uploading depends on the number and quality of images.
Part 3: How to Upload Photos to iCloud from Windows
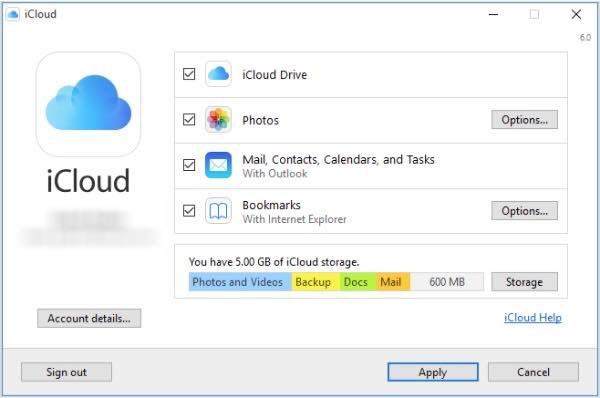
iCloud is an amazing Apple service that allows you to save your photos in high resolution and provides backup. Therefore, it is very important to learn how to sync photos from iCloud. iCloud allows you to save and upload your photos to the iCloud even from a different device like windows. However, it will take some more steps to do this but it becomes very easy when you know the process which includes the following steps.
- First, you will visit Apple support and download iCloud for windows.
- After its installation, open the iCloud for windows.
- Click on options and from there choose the iCloud library.
Then select done and then apply to set the preferences.

- After this, you have to turn the iPhone’s iCloud library on, to permit sync. You are now able to choose what you want to share between your iPhone and windows. Furthermore, you will also select whether you want the images to upload automatically, or not. Otherwise, you have to upload the images manually. To do so, follow the steps given below.
- Open the windows explorer and then click on iCloud photos.
- Click on upload photos and select images that you need to upload. Finally, select the “Done” option. Now you have successfully uploaded photos to iCloud.
Once you learn how to upload all photos to iCloud, you can easily transfer all your important photos from iCloud, Mac, or windows to the iCloud library.
Part 4: FAQS about How to Upload Photos from iPhone to iCloud
Many FAQS that we usually read are that how to upload pictures to iCloud. Some questions that are frequently asked are as follows.
1. Do photos stay on iCloud if deleted from iPhone?
If you have turned the iCloud photos on, and then you delete photos on the Photos app on iPhone, the photos will also be deleted from the iCloud as well as from all the devices that are using the similar Apple ID. Nonetheless, you should frequently check the iCloud library or the recently deleted album. In case if the deleted photos are there, you can easily recover them. On the contrary, if you desire to save photos in iCloud but remove them from your iPhone, then iCloud photos should be turned off.
2. How do I delete photos from my iPhone but keep them on my Mac?
When your iCloud photos are enabled and you have signed in to the iCloud on your Mac, then if you delete photos from your iPhone, the photos will also be removed from Mac’s iCloud as well. Alternatively, if you want to delete the photos from your iCloud but not from Mac, then you should first transfer the photos to your Mac using Tenorshare iCareFone. So, you can save your photos in Mac’s iCloud from iPhone, and then you can remove the photos from iPhone without the fear of losing pictures from the Mac.
Bonus Tip: How to Transfer iPhone Photos to Mac with One-Click
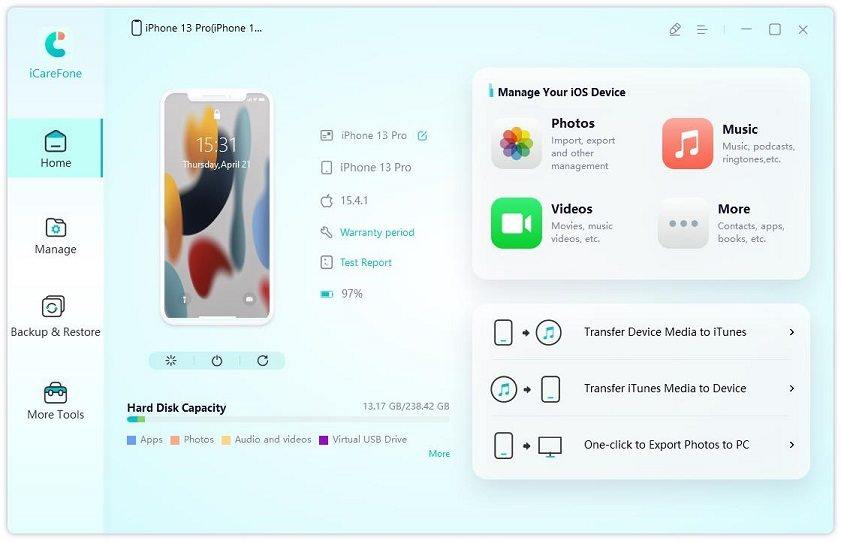
Apple users now can use iCareFone for the transfer of data like photos, audio, videos files etc between iPhone and Mac. iCareFone is a data transferring and handling tool specially built for iOS devices. iCareFone offers surprising features and functions to iPhone users such as cleaning the cache, junk, and cookies, transferring files between different devices, and restoring data. As compared to other iOS data transferring tools available online, iCareFone is more efficient, fast and user friendly than any other tool.
The one-click functioning of iCareFone allows users to transfer iPhone photos to Mac within no time. If you are looking for guidelines about how to transfer photos from iPhone to Mac by using iCareFone, you are in right place. The steps to use iCareFone for this purpose are as follows.
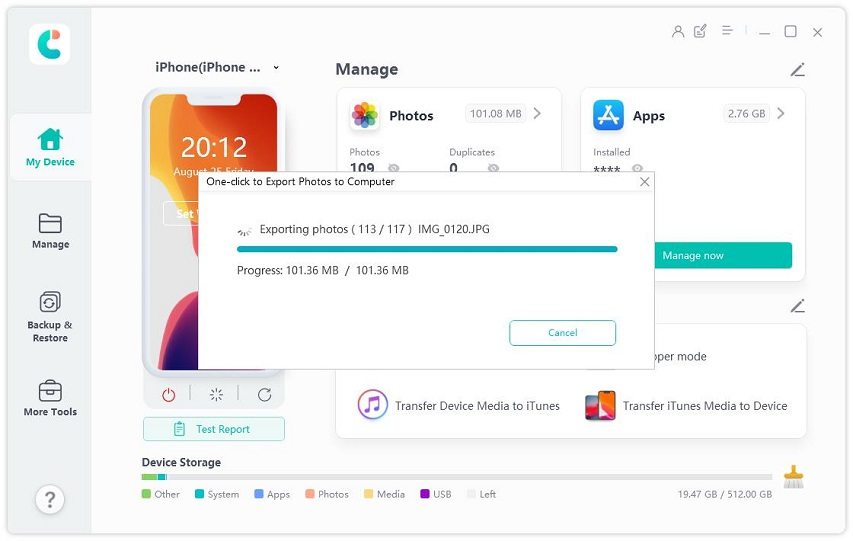
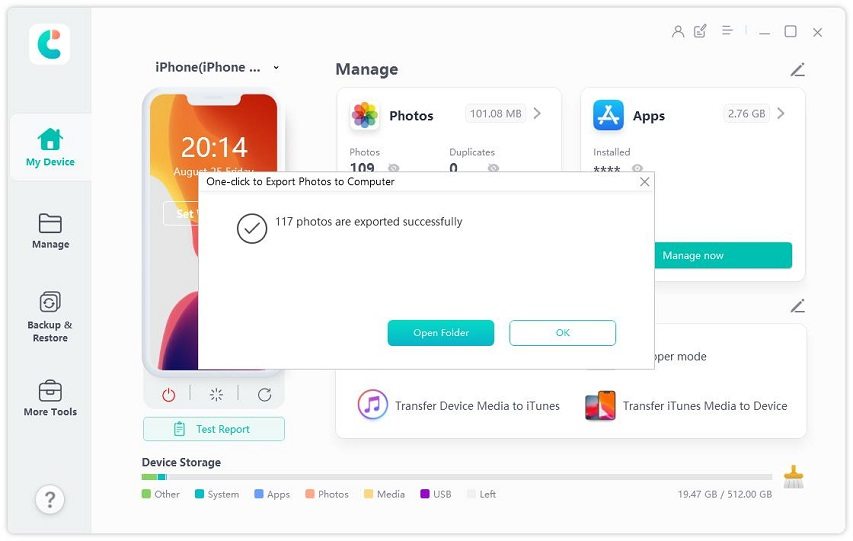
Install the Tenorshare iCareFone on the computer or Mac. Then connect the iPhone with it. A pop-up message will appear asking “trust this computer”. Now unlock the iPhone and enter the password on your iPhone. Once the iPhone is connected to the computer, select the "One-click Export Photos to PC" option for starting the export quickly.

The photos on your iPhone as well as the online downloaded photos will then be transferred to the computer. After the completion of the transfer, the destination folder will appear on the screen. Otherwise, you can click on the “Open folder” option to view your photos that have been transferred.


Conclusion
Transferring the photos to the iCloud library from iPhone can be problematic for some users. However, you can upload photos to the iCloud library from iPhone, Mac, or computer so that you can access your photos anytime you want. You can easily know how to send photos to iCloud after going through this article.
Speak Your Mind
Leave a Comment
Create your review for Tenorshare articles

Tenorshare iCareFone
Best Free iPhone Transfer & iOS Backup Tool
Easily, without iTunes
