Move iPhone Storage to iCloud: Here’s How to Do It
Hello there. I’d like to know how to move iPhone storage to iCloud because I want to free up my storage space. Could you help me out? Thanks in advance.”
Having a full device storage is always a difficult situation to find yourself in. After all, who wants to see a message saying their storage is full when trying to take a photo with their camera?
That’s why a lot of people ask how to move photos from iPhone to iCloud storage to free up device storage.
Well, this article covers this subject in full detail. By the end of this post, you will be able to easily move your data to the cloud to free up cloud storage.
- Part 1: Why You Should Move Your Data to iCloud Storage
- Part 2: What to Do Before Moving Your Data to the Cloud
- Part 3: How to Move Things to iCloud to Free Up Space
- Alternative: Move Your Data to a Computer as a Backup
Part 1: Why You Should Move Your Data to iCloud Storage
Before we talk about how to move photos to iCloud storage, you should know the benefits you will be getting for doing that.
- First and foremost, moving your data to the cloud will help you free up device storage. If your internal memory is getting full, you can free it up by moving your data to cloud storage instead.
- Another reason why you should keep your data in the cloud is safekeeping. Your data in the cloud stays safe, at least until you don’t lose your Apple ID credentials. Even if your phone gets stolen or lost, you can retrieve your important data from the cloud from any device.
Part 2: What to Do Before Moving Your Data to the Cloud
Before we tell you how to move storage to iCloud, you need to know some things first.
The most important thing is to have enough cloud storage left to hold all of your important data.
For example, say you have 15GBs of photos, but you only have 5GB iCloud storage, then you can’t move them to the cloud. In this case, you will have to buy more iCloud storage.
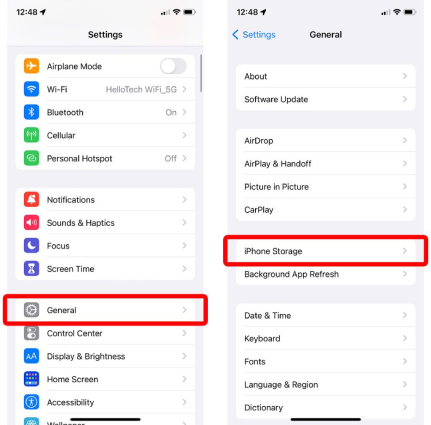
Step 1. Here’s how you can check the size of your photos in your internal storage:
- Open the Settings app.
Go to General > iPhone Storage.

- Find the Photos app. The size of your photos and videos will be written right next to the name of the app.
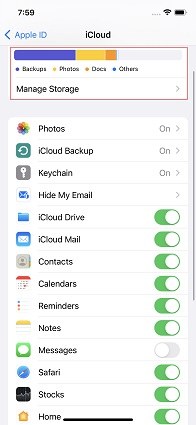
Step 2. Now, you need to find out how much iCloud storage you have left. To do this, follow the steps:
- Open the Settings app.
- Tap your Apple ID name at the top.
- Tap iCloud.
You will see your iCloud storage at the top.

Step 3. Now, if the size of your photos and videos is less than the available iCloud storage, you can move them to the cloud without a problem.
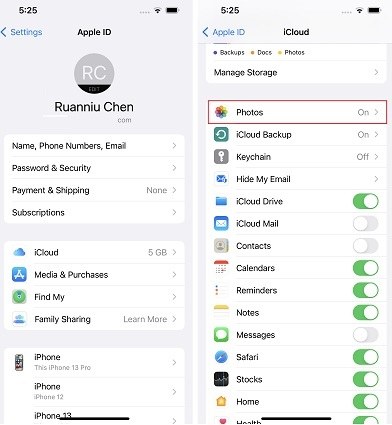
Step 4. However, if you have less iCloud storage space, you will need to buy more of it. Here’s how you can do that:
- Open the Settings app.
- Tap your Apple ID at the top.
- Tap iCloud > Manage Account Storage > Change Storage Plan.
Choose a new iCloud plan. You can either pick a 50GB, 200GB, or 2TB plan.

Part 3: How to Move Things to iCloud to Free Up Space
1. Move Photos to iCloud
To move all of your photos to iCloud, follow the steps below.
- Open the Settings app.
- Scroll down and tap Photos.
Turn ON the toggle for iCloud Photos.

- Under the toggle, you will see two options, “Optimize iPhone Storage” and “Download and Keep Originals”. Make sure to choose the first one. This will make sure your phone storage is freed up after your photos get backed up to the cloud.
- Connect your phone to stable and fast WiFi and open the Photos app.
- You should see the sync progress at the bottom, simply wait for it to complete.
Related read Fix iCloud Photos Not Loading on iPhone.
2. Move Documents to iCloud Drive
You can also move your documents in the Files app from your internal storage to your iCloud Drive. Here’s how.
- Open the Files app.
- Select the Browse tab at the bottom.
- Go to On My iPhone.
- Find the files you want to move, tap and hold on to them and select “Move”.
- You will be asked where to move them. So, simply select any folder in the iCloud Drive.
3. Move Music to iCloud
Here’s how to move music to iCloud storage.
- Open the Settings app.
- Scroll down and hit Music.
With iCloud Music Library turned ON, enable the toggle for “Sync Library”. Note that you should be subscribed to Apple Music to use this feature.

- If you’re not subscribed to Apple Music and you have your music as MP3 files, you can use the method in the previous section to move music files to iCloud Drive.
Related read Updating iCloud Music Library Stuck? How to Fix.
Alternative: Move Your Data to a Computer as a Backup
Now you know how to move things to iCloud, but what do you do if you don’t have enough iCloud storage and don’t want to purchase more?
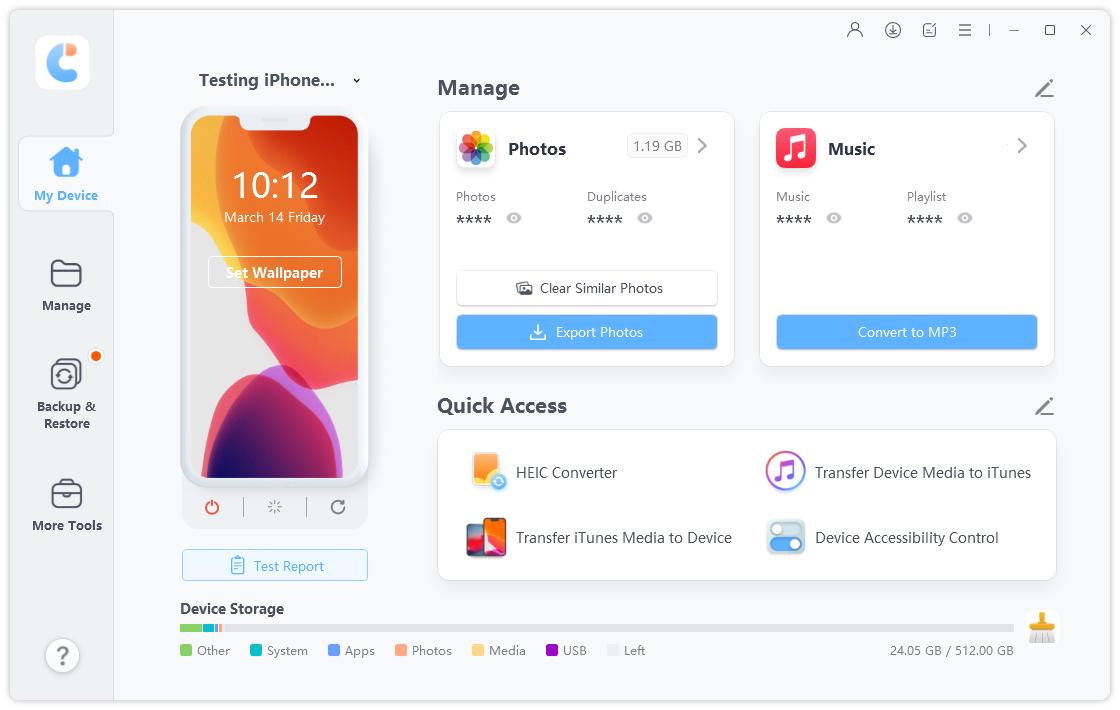
Well, in that case, you can use Tenorshare iCareFone to move your data to a computer instead. This will free up space on your phone’s internal storage.
Here’s how it works.
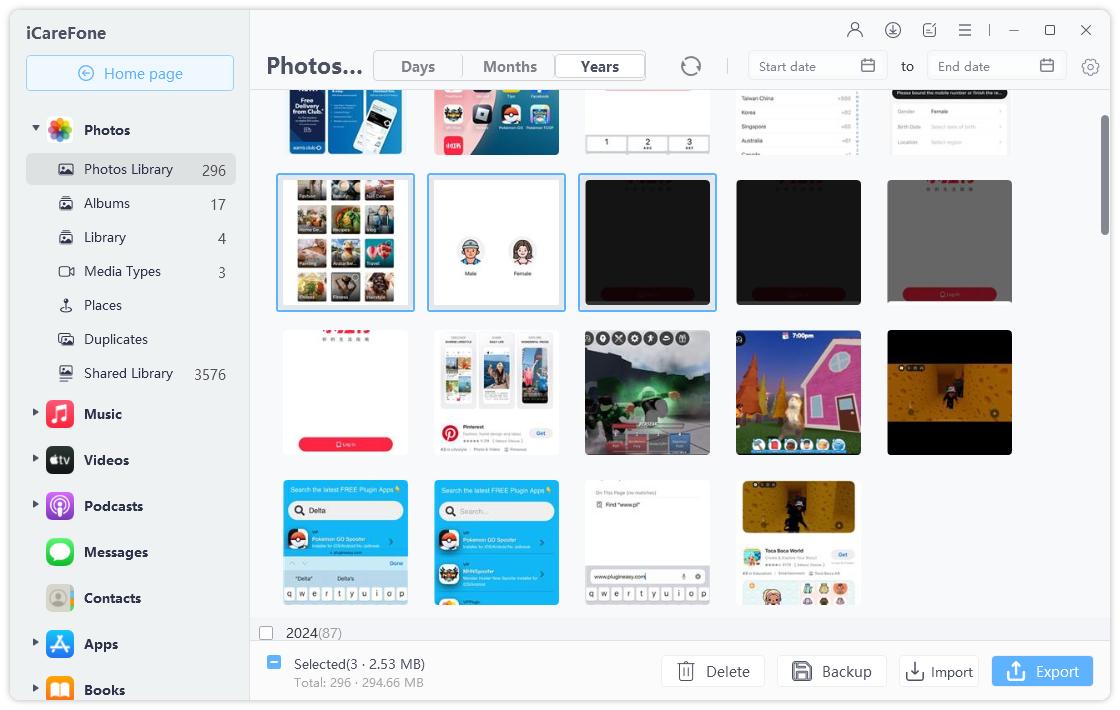
Download and install iCareFone on your computer. Open it. Connect your phone using a USB cable. Hit the Manage tab.

Choose what you want to move. In this example, we’re going to choose photos.

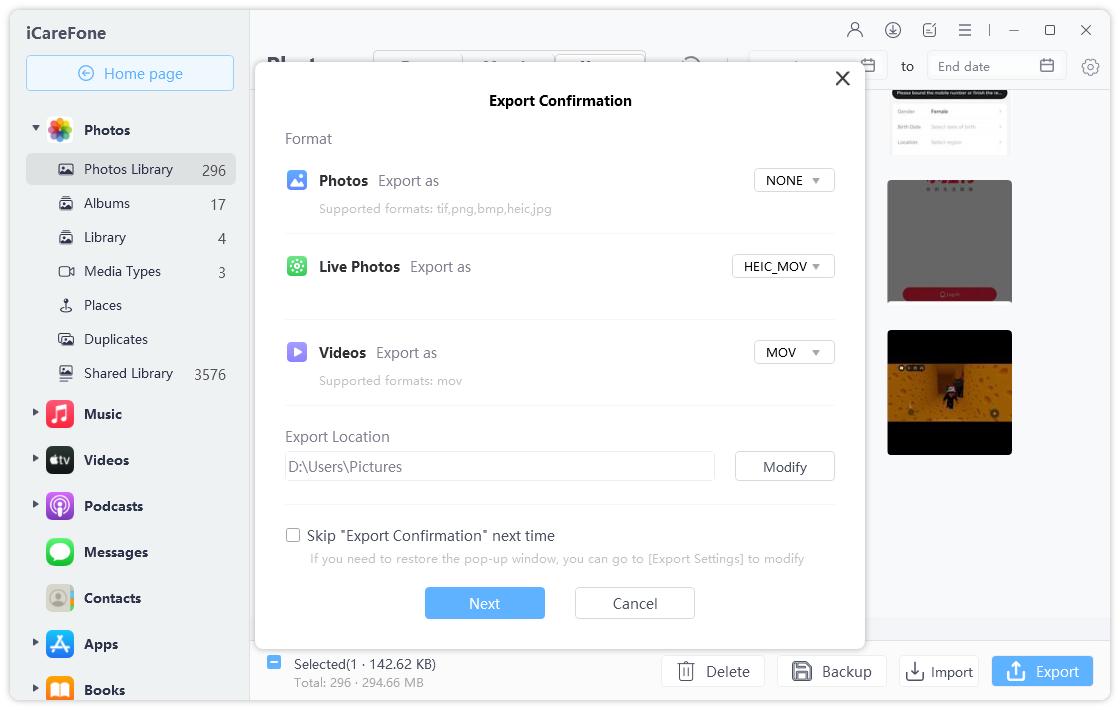
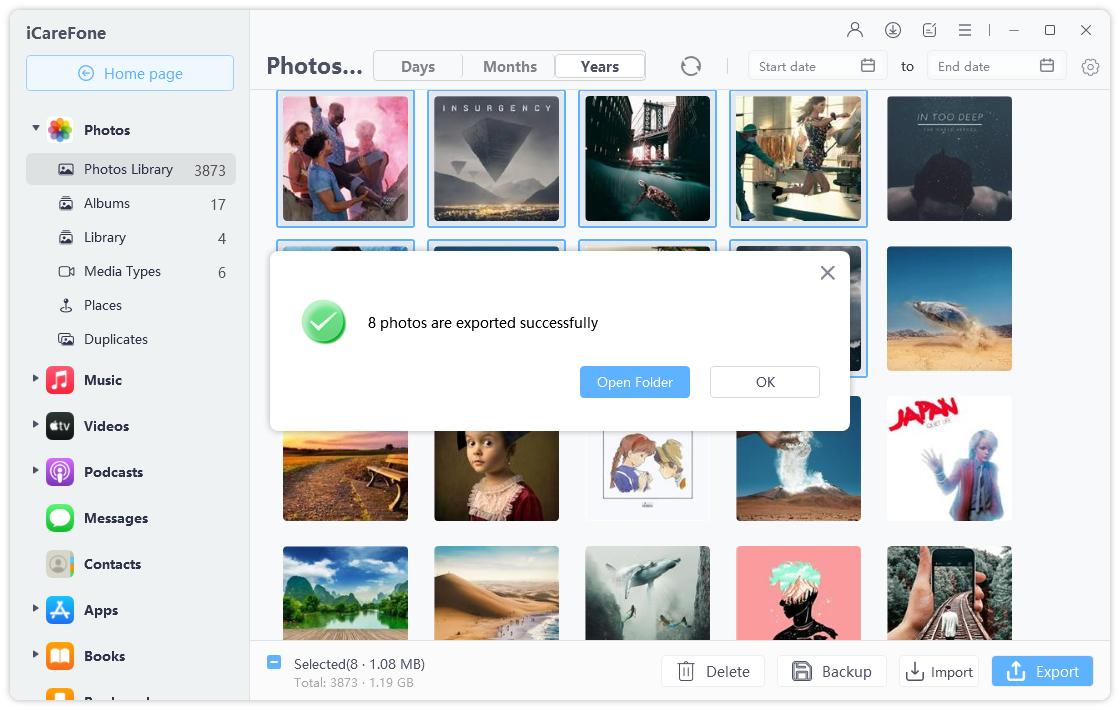
Select all the photos and videos you’d like to move. Then hit the “Export” button at the top. Select your export settings and hit Ok.

Your photos and videos will be moved in no time!

Now, you can delete the moved photos from your phone’s storage to free up space.
The Bottom Line
There you go — that’s how to transfer iPhone storage to iCloud and free up your internal space.
If you don’t have enough cloud storage and don’t want to purchase more, you can use Tenorshare iCareFone to move your data to a PC instead.
Speak Your Mind
Leave a Comment
Create your review for Tenorshare articles

Tenorshare iCareFone
Best Free iPhone Transfer & iOS Backup Tool
Easily, without iTunes
