
then write your review

Cleamio: All-in-One Mac Cleaner & Optimizer
Clean junk files, free up space, and boost Mac performance
No.1 Mac Cleaner & Optimizer
Clean, speed up, and optimize your Mac
If your Mac feels cluttered with scattered documents, downloads, and screenshots, you’re not alone. Many users struggle to keep their files structured and easy to find. Learning how to organize files on a Mac can dramatically improve productivity, reduce stress, and make everyday tasks faster. This guide explains practical strategies that actually work, helping you build a clean and efficient file system.

Many Mac users start with a clean system, but over time, files accumulate everywhere, on the desktop, in the Downloads folder, and inside random directories. Without a system for macOS file management, it becomes harder to locate documents and maintain an organized workspace.
Here are some of the most common issues users experience:
These problems often appear gradually. As you continue saving files and installing apps, your system becomes cluttered.
Good Macintosh file management helps you stay productive and prevents storage problems. When files are organized properly, you can quickly locate documents, reduce duplicate files, and maintain a cleaner system. Benefits of organized file management include:
Once you understand why file organization matters, the next step is learning the best way to organize files on a Mac, so your system stays structured long-term.
Building a simple and consistent system is the foundation of an effective MacBook organisation. Two of the most important techniques include creating a clear folder structure and using consistent file names.
A structured folder system makes it easier to manage files on a Mac and quickly find important documents.
Instead of storing everything randomly, organize files into logical folders such as: Work, Personal, Photos, Projects, Downloads Archive, etc. Inside each folder, create subfolders when needed.
Steps to Create Organized Folders:
Open Finder and navigate to the location where you want to create a folder.
Click “File” then “New Folder” and give the folder a clear and descriptive name.
Move related files into the folder.
This simple structure helps keep files grouped logically and makes how to organize folders on Mac much easier.
Another major problem with file clutter is inconsistent naming. Files named “Document1”, “Final”, or “Untitled” quickly become impossible to track. Using a clear naming structure improves Mac file organizer efficiency and makes searching much easier. Example naming system: ProjectName_Date_Version
When managing large numbers of files, manually renaming each one can be time-consuming. Tools like Tenorshare Cleamio make the process much easier by allowing users to batch rename files automatically. With Cleamio, you can rename multiple files at once using information such as:
Steps to Batch Rename Files on Mac Using Cleamio:
Install and open Tenorshare Cleamio on your Mac, then click the "AI File Renamer" feature. Hit “Start” afterward.

Select one or more files (images or documents) you want to rename and add them by clicking the “+” button.

Select an output language and renaming preferences such as “Content_Owner_Date”. Then hit “Start Renaming” or “Start”.

Click “Confirm” to apply the changes to rename all files instantly after previewing.

Batch renaming is especially useful when organizing photos, videos, or project files.
Finder is the central tool for macOS file management. Learning to use its built-in features can greatly improve how you organize and access files.
Finder allows you to sort files by different attributes such as name, size, type, or date.
Steps to Sort Files:
Open “Finder” and navigate to a folder.
Click “View” then “Show View Options," (or press Command + J) and you can select the sorting method you prefer.
In the pop-up, use the Sort By pop-up menu to choose an option like Name, Date Modified, Date Added, Size, or Kind.

Sorting files helps when you need to quickly locate recent downloads or large files.
Tags are a powerful feature that allows users to categorize files visually. Instead of moving files into multiple folders, tags help you label them for quick access.
Steps to Use Finder Tags:
Right-click a file and hover over “Tags”.
Choose a color tag or create a new label.

Smart Folders take organization even further by automatically grouping files based on rules such as file type or date created.
Steps to Create Smart Folders:
Open “Finder”, then click “File” and choose “New Smart Folder” (or press Option + Command + N).

Add filters like file type or date, then save the Smart Folder.
Smart folders are extremely useful for how to organize music or video files on a Mac, since they can automatically group media files.
A messy desktop is one of the biggest signs of poor file organization. Fortunately, macOS provides tools that make desktop organization easy.
Stacks automatically group similar files together, instantly cleaning your desktop.
Right-click on the desktop and select “Use Stacks”.

Choose how files should be grouped.
To change grouping: Go to View > Group Stacks By and select Kind, Date Added, Date Modified, Date Created, or Tags.
Click any stack to expand it and view/access files. Click the stack again or outside to collapse.
Files will automatically group by type, date, or tags.
You can also organize icons neatly using the built-in arrangement tools.
Right-click the desktop and select “Sort By” or “Clean Up By”.
Choose Name, Kind, or Date, etc.

A good rule for MacBook organisation is to treat the desktop as a temporary workspace. Keep only the files you are currently using, and move completed documents into organized folders. This keeps the desktop clean and reduces visual clutter.
Review all items on your Desktop and decide what truly needs to be there (e.g., current project files or downloads you're processing today).
For permanent items, drag them into your structured Documents folders (or other organized locations).
Create a "Temp" or "Inbox" folder on the Desktop for short-term files, then review and clear it weekly.
Enable Stacks (as above) to automatically manage whatever remains.
The Downloads folder often becomes one of the messiest places on a Mac.
Instead of storing everything in one place, create subfolders such as:
This makes it easier to organize computer files on a Mac.
Open “Downloads” in Finder and create new folders by clicking "File" then "New Folder."
Move files into their appropriate categories.
Downloads should be temporary storage. Important documents should be moved into permanent folders, such as:
This helps manage files on Mac more efficiently.
Open a "Finder" window, open "Downloads", and open the destination folder in another Finder window.
Drag and drop the important files from Downloads to the destination folder.
Over time, the Downloads folder fills with duplicate installers, images, and documents. Tools like Tenorshare Cleamio can help declutter or debloat Mac storage by scanning for duplicate files, junk files, and large, outdated files. The software analyzes your system and suggests which files are safe to remove.
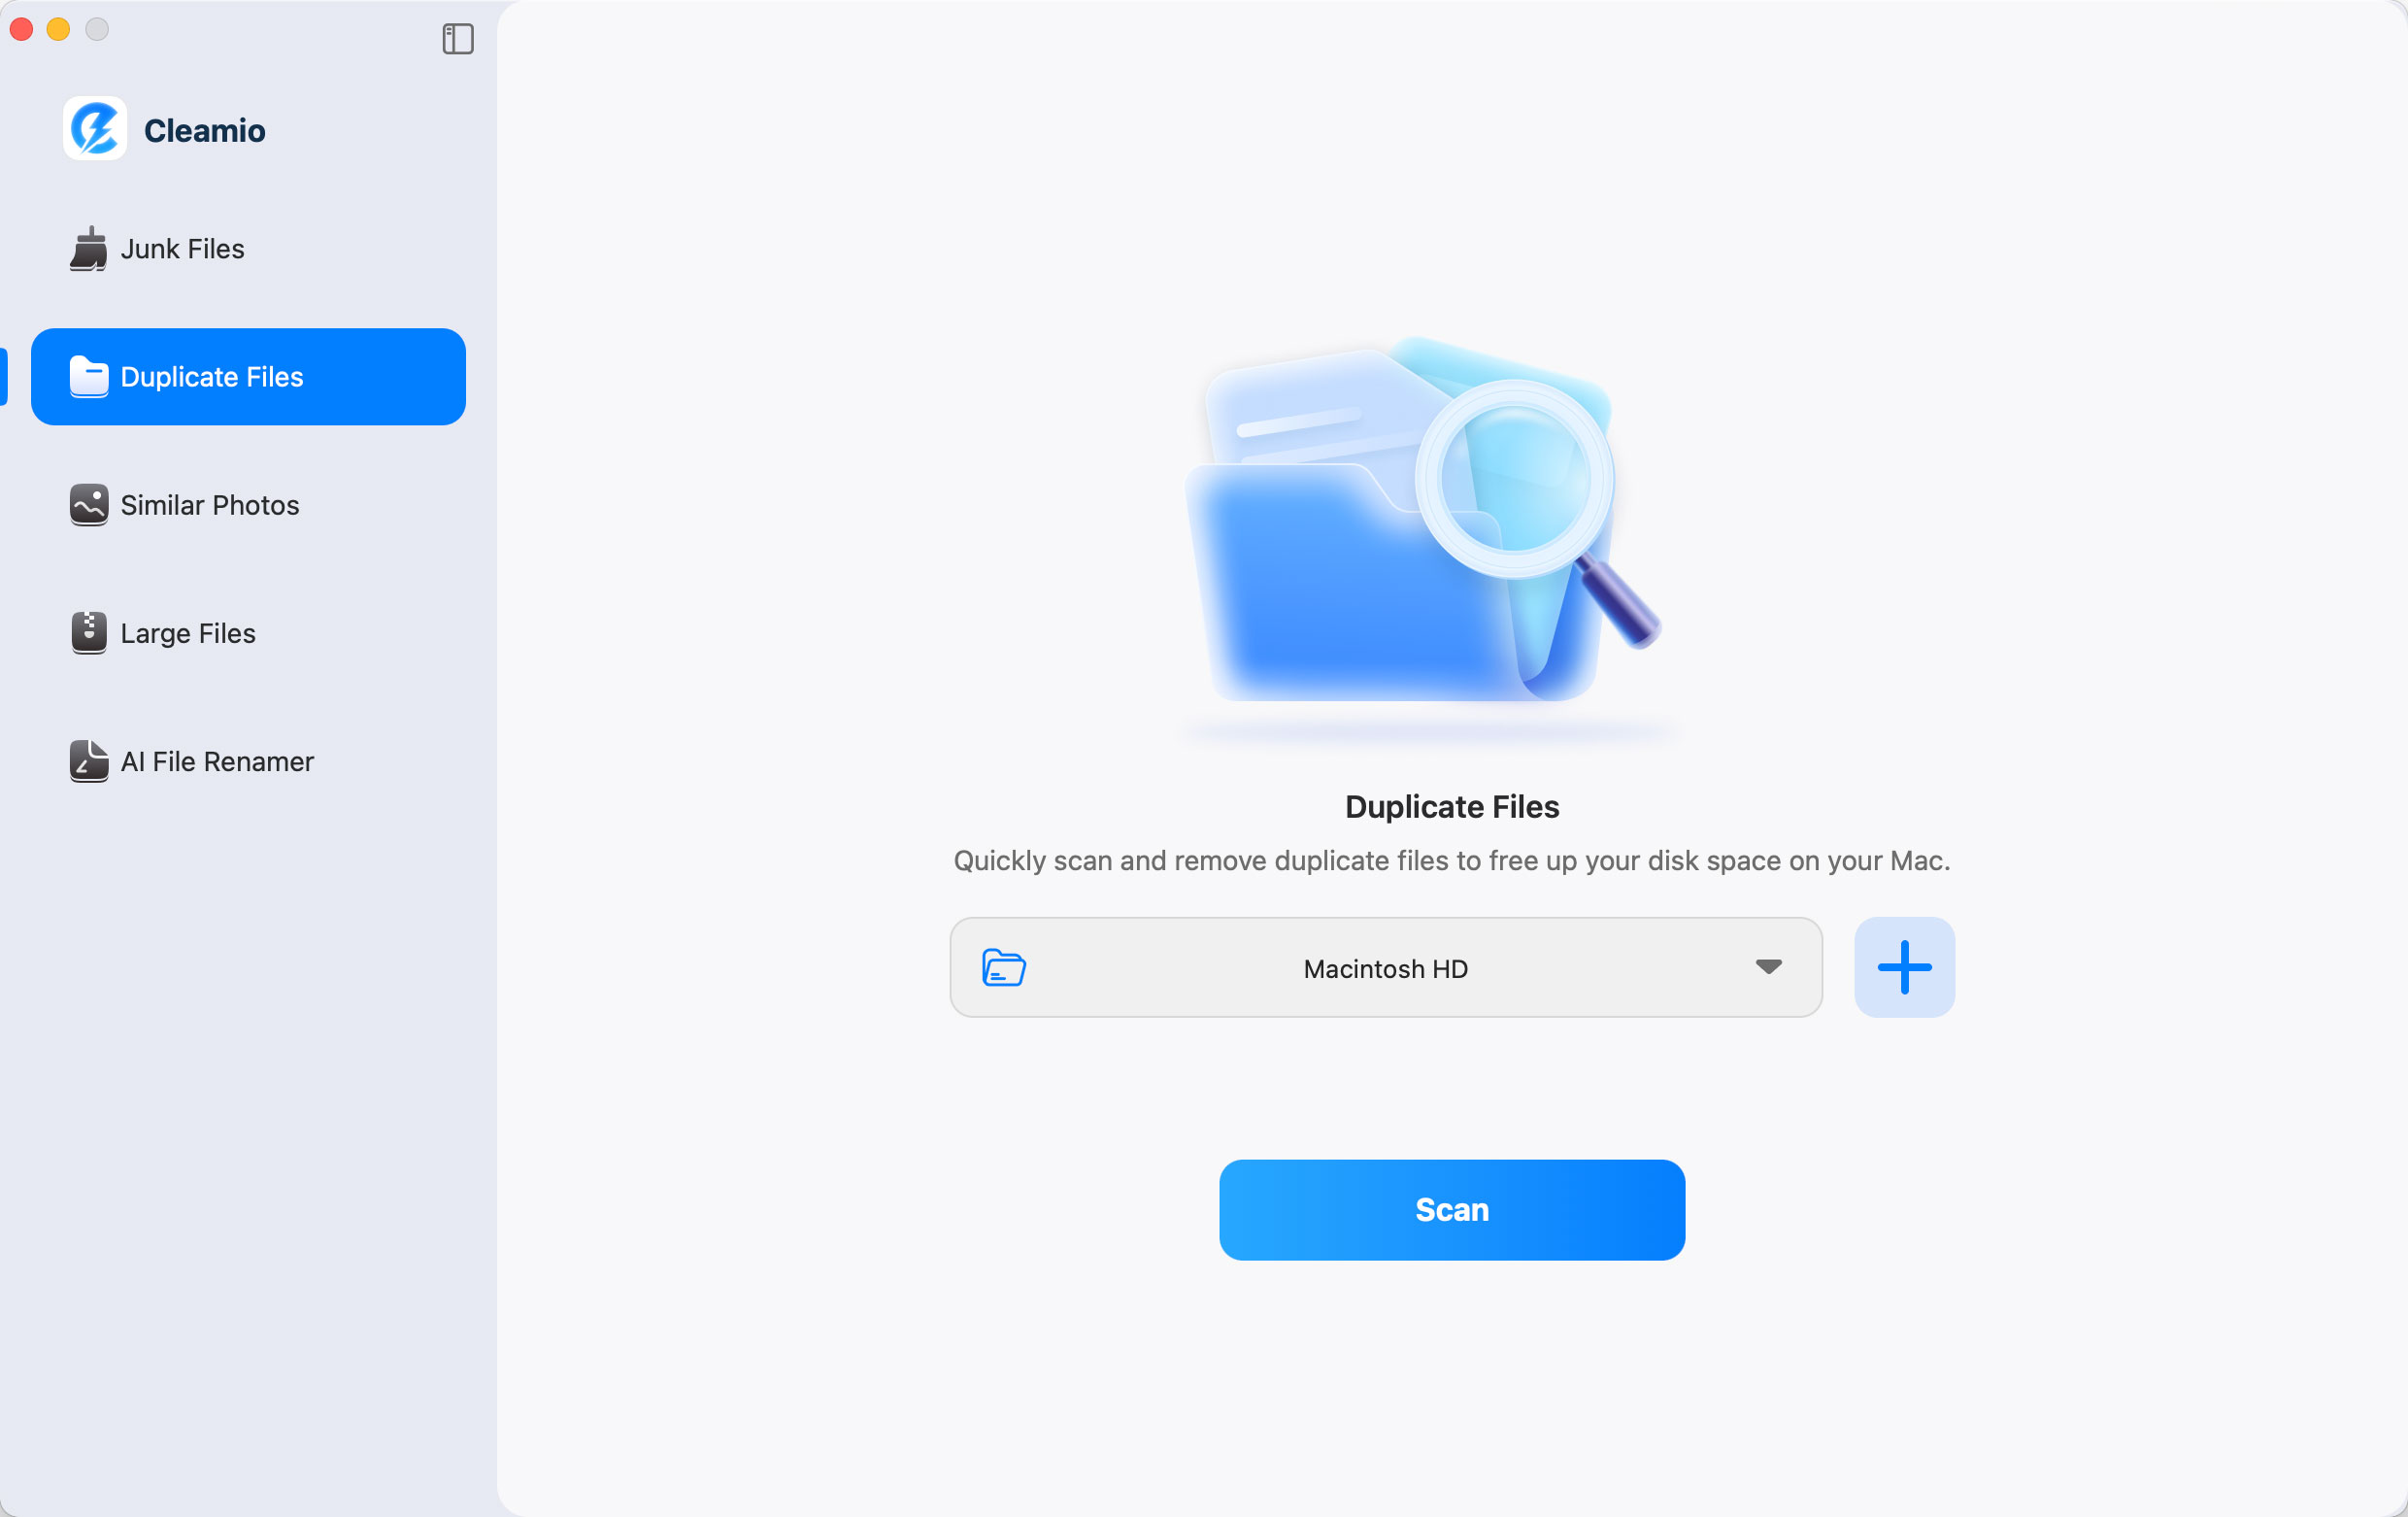
Steps to Delete Duplicate Files Using Cleamio:
Install and open Tenorshare Cleamio. Select the “Duplicate Files” feature and choose folders to scan, such as Downloads. Then click “Scan” to let the tool analyze your files and preview the results.
Review the duplicates and delete unnecessary copies by selecting them and clicking "Remove."
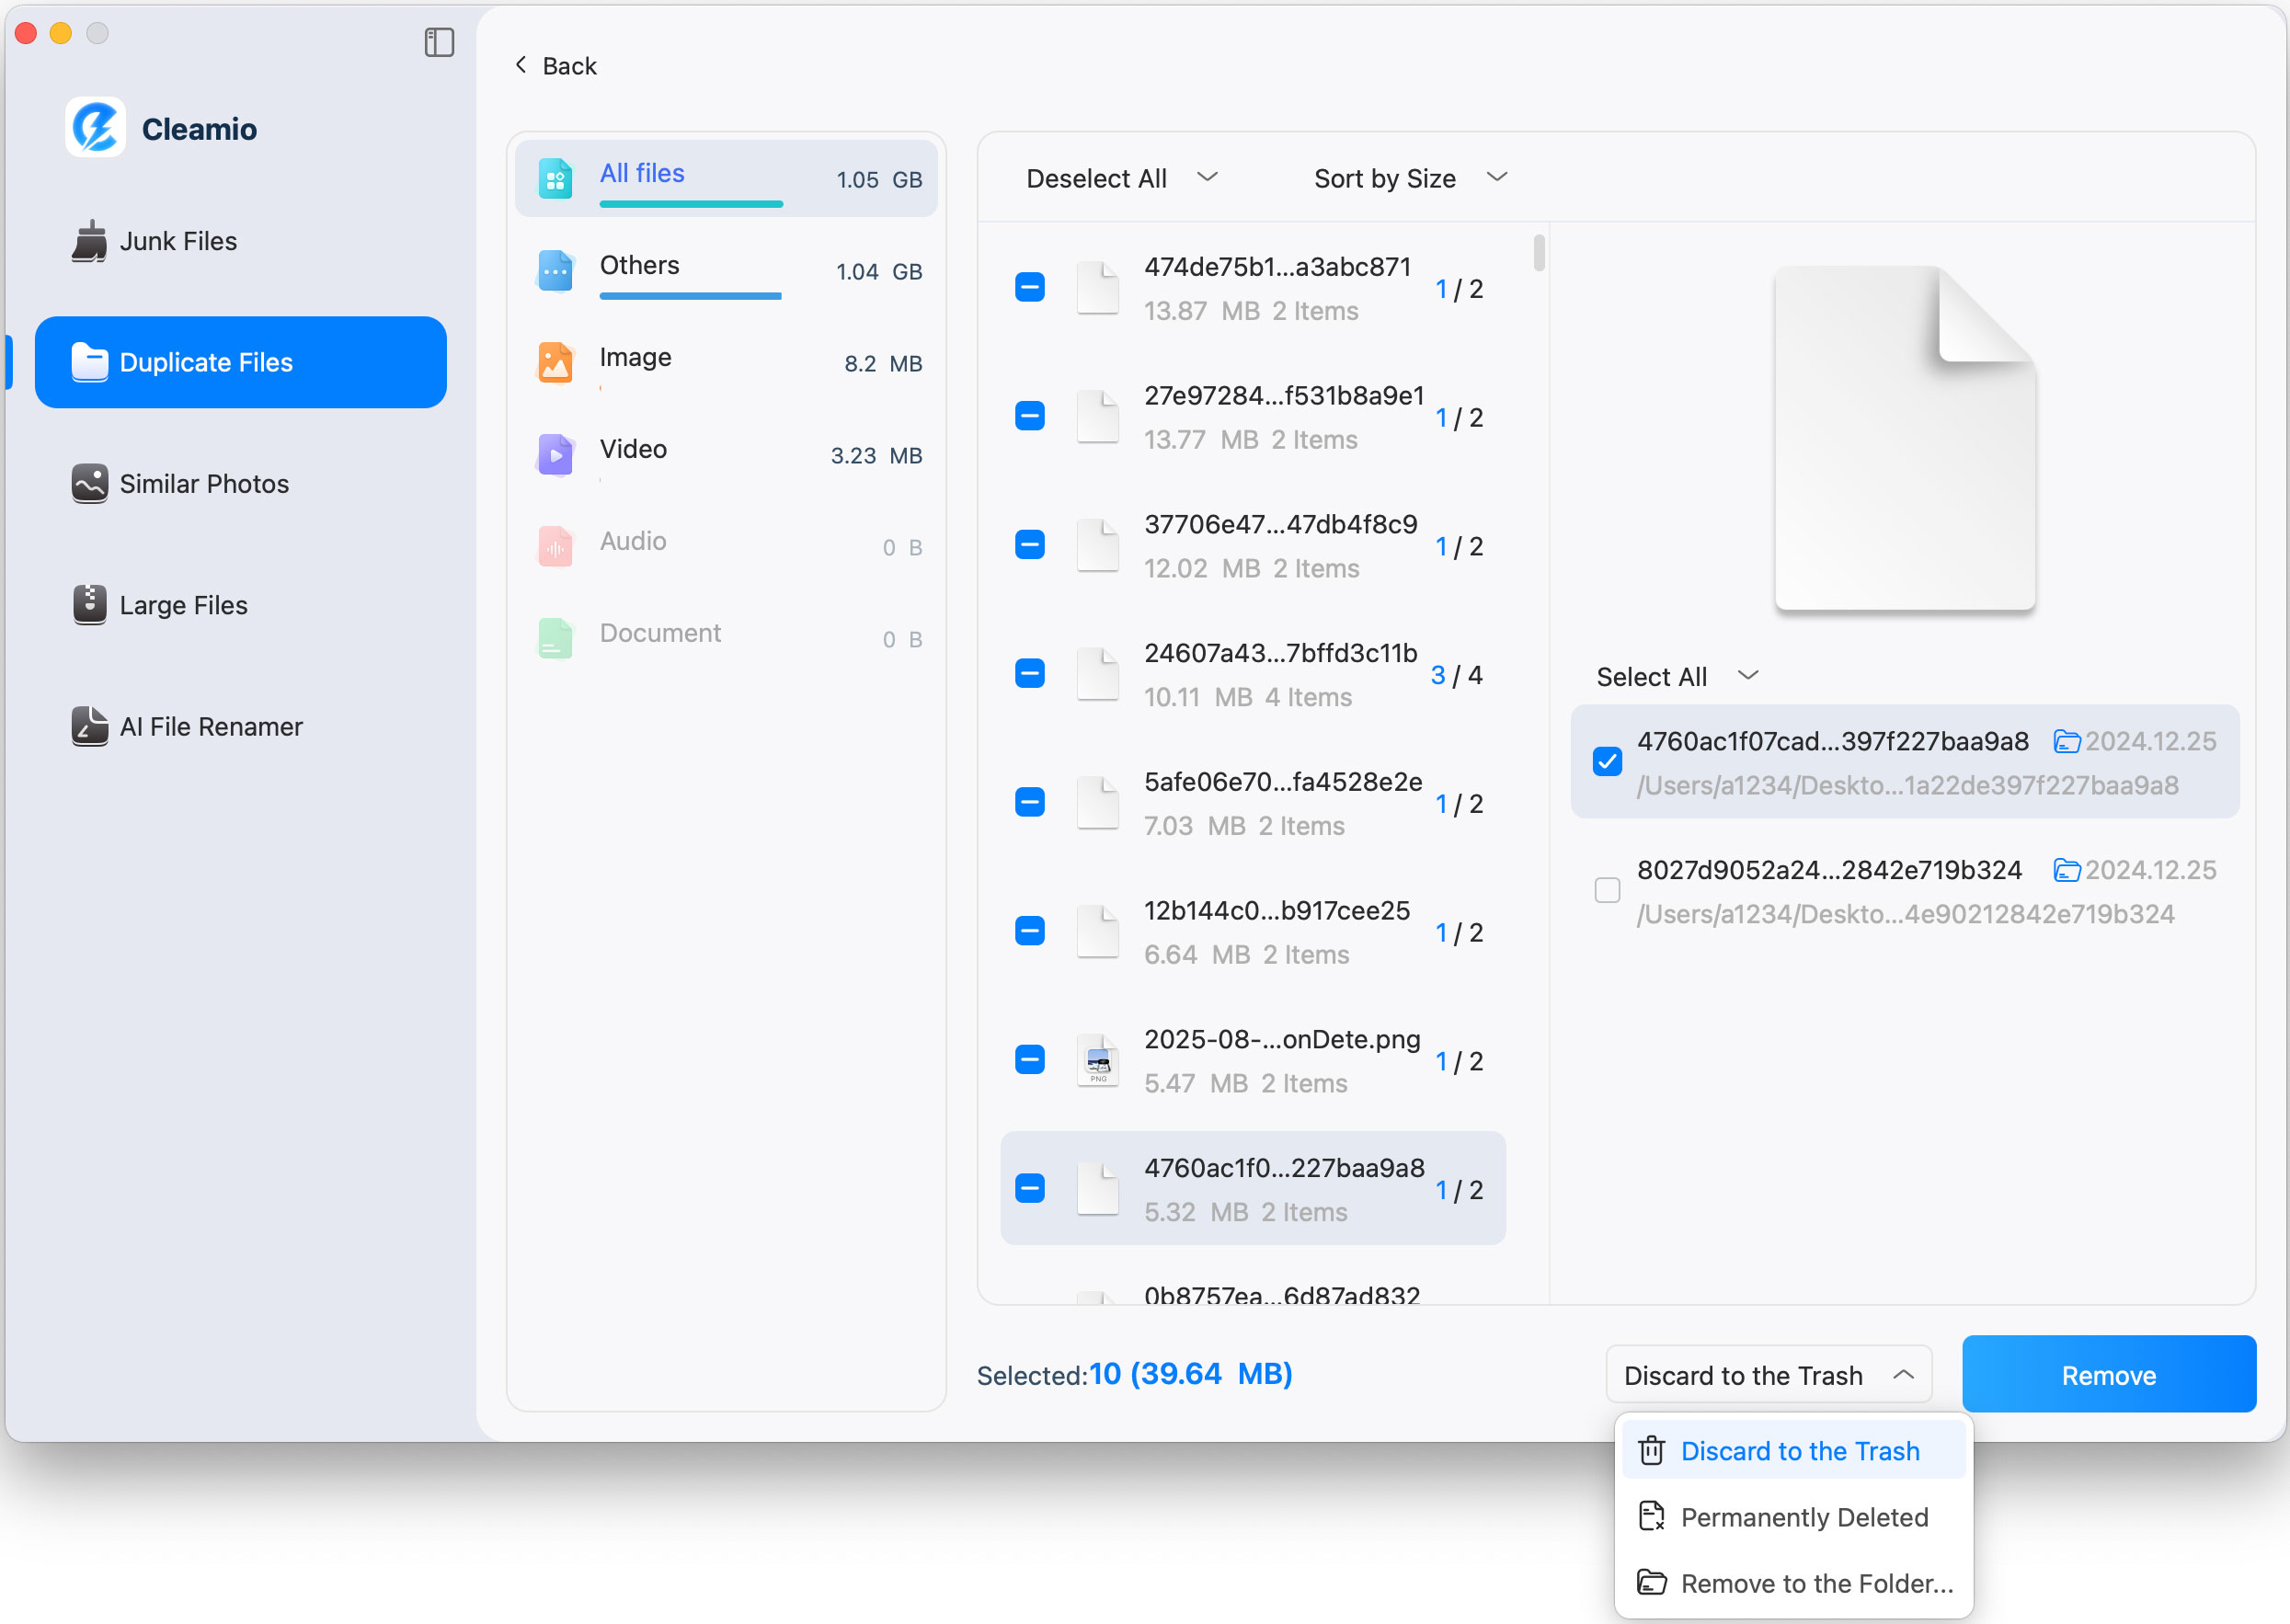
This process frees up storage and keeps your system organized.
Once your files are organized, maintaining the system becomes much easier. Here are several habits that help maintain a clean Mac:
1. Weekly File Cleanup: Spend a few minutes each week deleting unnecessary downloads, screenshots, and temporary files.
2. Archive Old File s: Move old projects or inactive files into an Archive folder to keep active folders clean.
3. Use Spotlight to Find Files Faster: Press Command + Space to open Spotlight search and quickly locate files.
4. Auto-Sort Files with Automator: Automator can create workflows that automatically move files into specific folders.
5. Optimize Storage with iCloud Drive: iCloud Drive allows files to remain accessible while freeing local storage space.
Following these practices will help you maintain efficient Macintosh file management long-term.
Learning how to organize files on a Mac can transform a cluttered system into a productive workspace. By creating clear folder structures, using consistent file names, organizing Finder and desktop files, and cleaning the Downloads folder regularly, you can maintain an efficient system.
Tools like Tenorshare Cleamio make the process even easier by helping rename files, remove duplicates, and free up storage space automatically.
then write your review
Leave a Comment
Create your review for Tenorshare articles
All-in-One Mac Cleaner & Optimizer
Cleamio: All-in-One Mac Cleaner & Optimizer
Clean junk files, free up space, and boost Mac performance
No.1 Mac Cleaner & Optimizer
Clean, speed up, and optimize your Mac
By Jenefey Aaron
2026-07-09 / File Tips