[Full Guide]How to Free Up Disk Space on Mac
"My storage space on Mac has got alarmingly low. The whole system has been slowed down. I guess I need to free up some space. Is there any way to free up storage space easily? Please help."
A Mac device does not provide you with infinite space, the storage space is exceptionally large but it is bound to run out any day at any time. One question that has been all over the internet is how to free up storage on Mac. Surprisingly Apple has already provided the solutions for the users who are in need. So, in this article, we are here to elaborate all these quick methods in details.
How to Free Storage on Mac
If you are using MacOS Sierra or any later version of the Operating System then you should know how to clear disk space on Mac. It is very easy and you would be able to free your hard drive space by storing a few or all of your data in the cloud. Depending on how much space you have in your cloud account! Except for cloud storing, there are also several new tools that are designed to free up space by deleting unnecessary data.

So, if you want to clean up Mac hard drive first you have to be sure how much space you have left on your Mac. So, you need to go to the Apple menu from your Mac device and click on the Storage option. You will be provided with a clear view of your storage space and they will be divided by categories. Now, if you click on the manage button you will be provided with a few recommendations on how to perfectly manage your hard drive. The options are discussed below…
1. Store data in iCloud
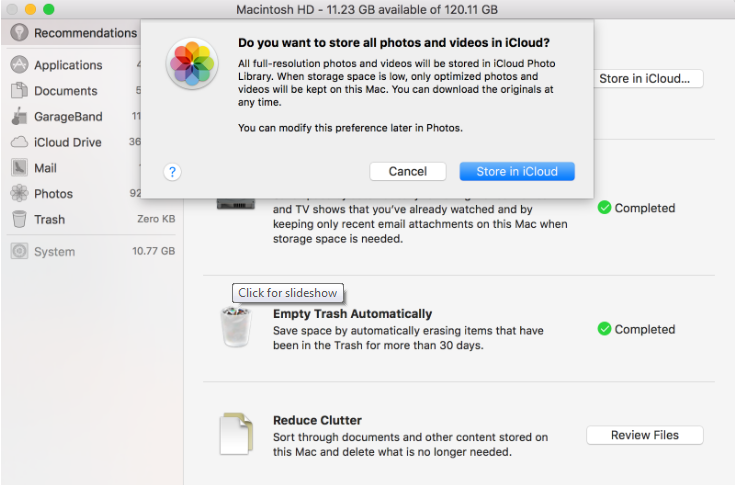
So, when you click on the manage option and get the recommendations, you need to select the "Store in iCloud" option and choose between the following options to clear space on Mac. Keep in mind; you only get 5GB of free space. If you need more, you have to opt for a paid subscription with more storage.
Desktop and Documents
You can store all of your files and data in these two particular locations when you transfer them to iCloud. So, basically when you are in need of free space, the only files available on your Mac are the files you have used recently, others will be saved safely on iCloud. It will help you focus on your work and if you need any of the original files, you can get them by clicking on the "Download" icon beside them. Just double-click on the icon and the files will be downloaded.
Photos
Any kind of photos and videos that you have collected till now, can be stored in the iCloud Photo Library. So, basically, when you are in need of space, Mac will start saving those high-definition photos in low quality, just to save space. So, it would be best for you to save them in iCloud Photo Library and download then when you need them. But the problem here is whenever you turn on iCloud Photo Library option, all your photos from other connected devices will be synced automatically.
2. Optimize your storage
You can easily optimize your storage when you are in need of space by clicking on the Optimize button. There are a few options you can choose from, they are elaborated below:
Watched iTunes movies and TV shows
So, when you need to clear storage space all the iTunes movies and TV shows and other videos that you downloaded and already watched will be removed from your computer automatically. If you need them again then just click on the "Download" icon beside the movie and TV shows to get them.
Download only recent attachments
Your Mac actually lets email to download the attachments the moment you receive them. But if you are looking for how to free up disk space, you should change this and manually download the attachments if you need them.
Don't automatically download attachments
As mentioned earlier, your email will download the attachments automatically on your hard drive, but change the settings and download only when you open the mail or the attachment itself.
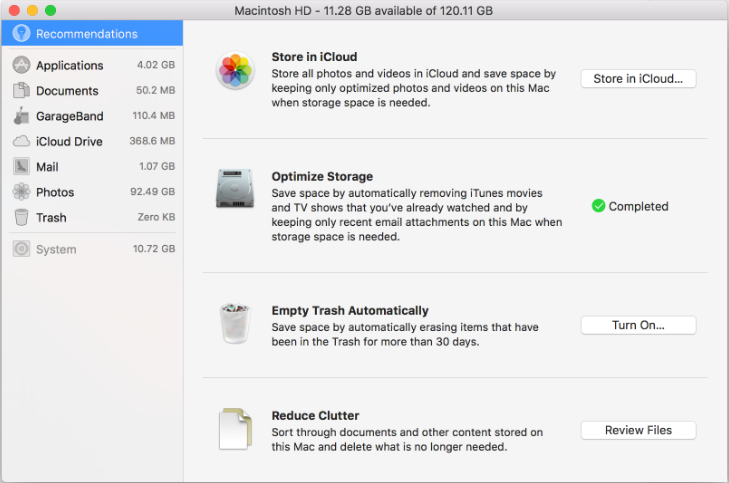
Another thing about Optimizing Storage space is that, when you optimize the movies, videos, photos or the attachments on your hard drive you do not need the storage space provided by iCloud.
3. Discard the Trash
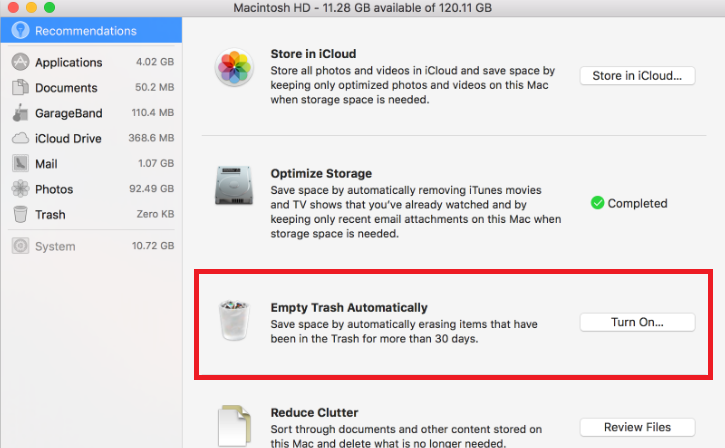
Try to empty the Trash bin or change your settings to automatic, so that the Trash will be deleted completely if it stays there for more than 30 days.
4. Reduce Clutter
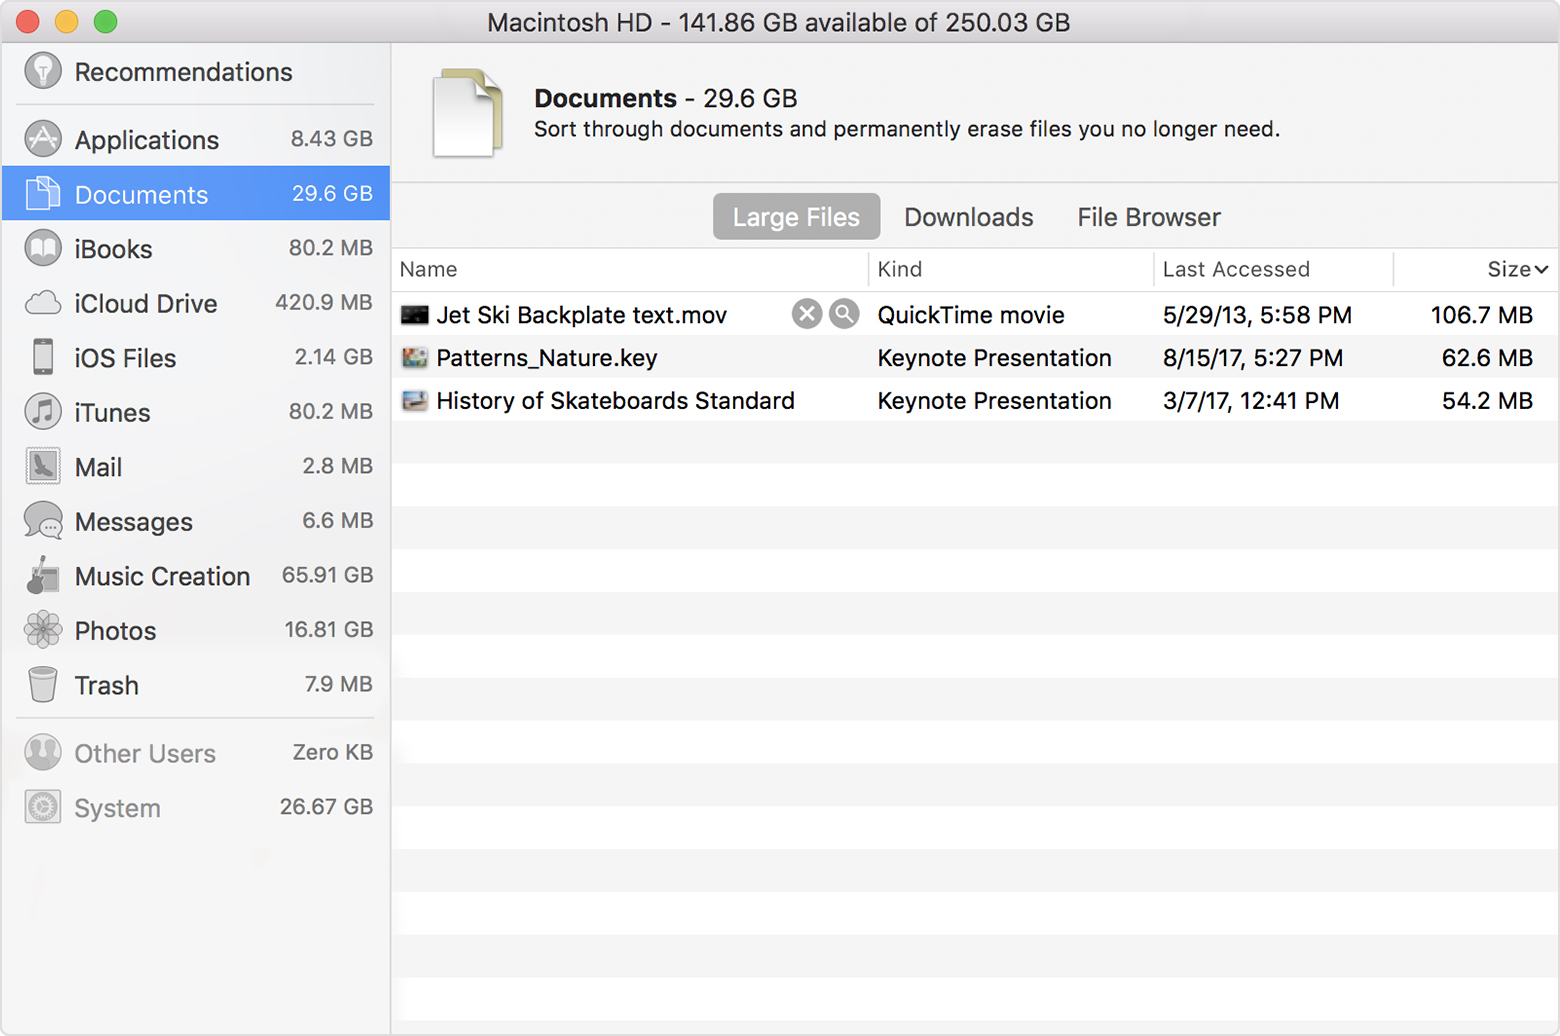
The Reduce Clutter option will help you to locate the large files or the files you do not need anymore. If you want to use this option, you need to click on the "Review Files" option and choose the categories. The options will be on the left side on the panel and the options will include Applications, Documents, and other iOS files on Mac, iTunes or even Trash.
- Some of these options will let you delete the files directly from the panel, you just have to go to the file and click on the permanently delete option to remove it. If the data you just deleted was purchased from App Store or iTunes Store you will be able to download it again.
- The other categories will show you all the storage space taken by the files provided by every single app. You can just open the files and delete the files from there.
5. Manually Clear Space
Do you know how to clear up space on Mac? It is very easy. Although using the Optimized Storage option is the most logical choice but you can also clear your storage space manually. You can easily take the following steps to manually clear your disk space.
- Simply delete or remove the files you do not need anymore, send them to the Trash and empty the Trash bin daily.
- You can always move some data or files to an external drive.
- You can also compress the large files.
- You can also erase junk mails and also try to clear the Trash mailbox.
Conclusion
So, basically, it is not a very difficult task to keep your computer clean. Even without the Optimized option if you can just get rid of unwanted files and empty the Trash regularly. But if after doing all these, your Mac system takes up a lot of space, then the iOS data management option will sort it out for you. Also if you have somehow deleted any important file during the removal of unwanted data then you can just use Tenorshare Any Data Recovery app to recover that data instantly. It is a versatile data recovery tool for Mac as well as for Windows. It is extremely fast and effective!!
- Recover data deleted, formatted or lost on Mac;
- Restore files from hard drive and external storage devices;
- Recover data from failed/crashed/dead MacBook;
- Fully supported latest macOS 26 Catalina;
Speak Your Mind
Leave a Comment
Create your review for Tenorshare articles

