4 Methods to Enable USB Debugging on Locked Phone
Are you searching for how to enable USB Debugging on your locked Phone? As this is the most searched issue so, today we are going to list 4 remarkable and simple methods that will assist you in enabling USB debugging on your locked smartphone.
- I. Background Knowledge: What Is Android USB Debugging
- II. How to Enable USB Debugging on Locked Android Phone
- Frequently Asked Questions about USB Debugging
I. Background Knowledge: What Is Android USB Debugging
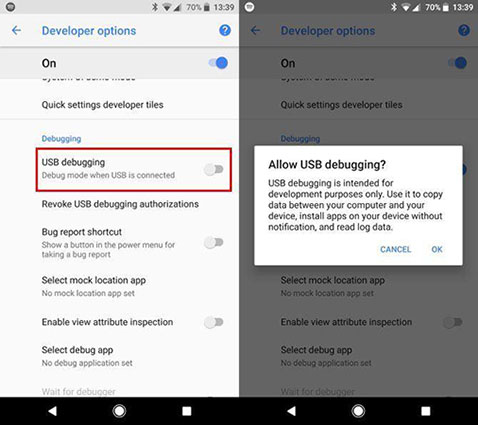
USB Debugging is a mode that you could not be able to skip if you are an Android user. The first and foremost function of this mode is to create communication between a computer with Android SDK (Software Development Kit) and an Android device. So, it will become enabled in your Android device right after connecting it directly to a PC by using a USB. This USB debugging mode is also called developer mode in a few versions of Android.
II. How to Enable USB Debugging on Locked Android Phone
Follow the below-mentioned steps to enable USB Debugging on locked Android Phone:
- First Open the Settings app. Then, Select System.
- Go to the bottom and select the option About Phone.
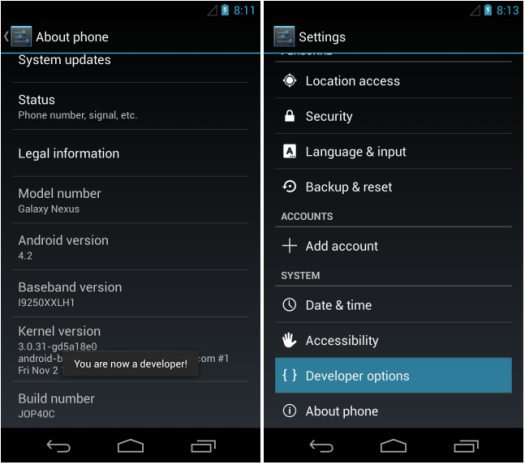
- Go to the bottom and tap 7 times on a built number.
- Get back to the initial screen to find Developer options near the bottom.
Scroll down and enable USB debugging.

Method # 1: Bypass Android Lock Screen Using 4uKey for Android (Effective)
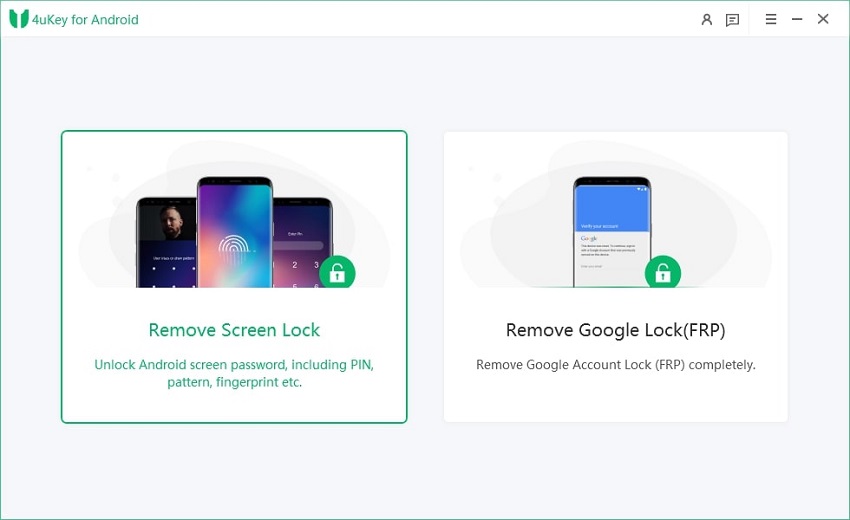
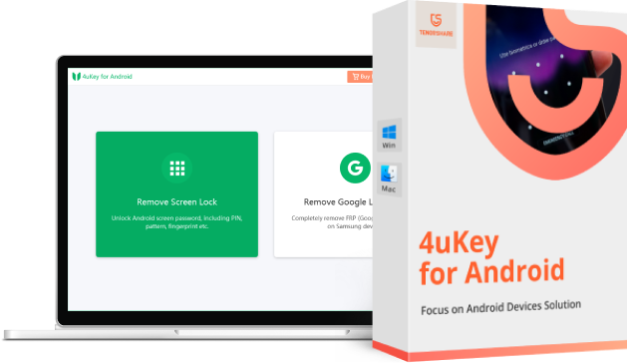
Tenorshare 4uKey for Android is a great Android lock screen removal tool focusing on quickly bypassing the unknown passcode, including PIN, pattern, fingerprint, and password to enable you to reaccess your Android Phone without any security lock.
To begin with, first, download and then install Tenorshare Android Unlocker on your PC.
Launch the program, select feature "Remove Screen Lock" and connects your phone to the PC through a USB cable. The program will install the driver for your device automatically once you run it.

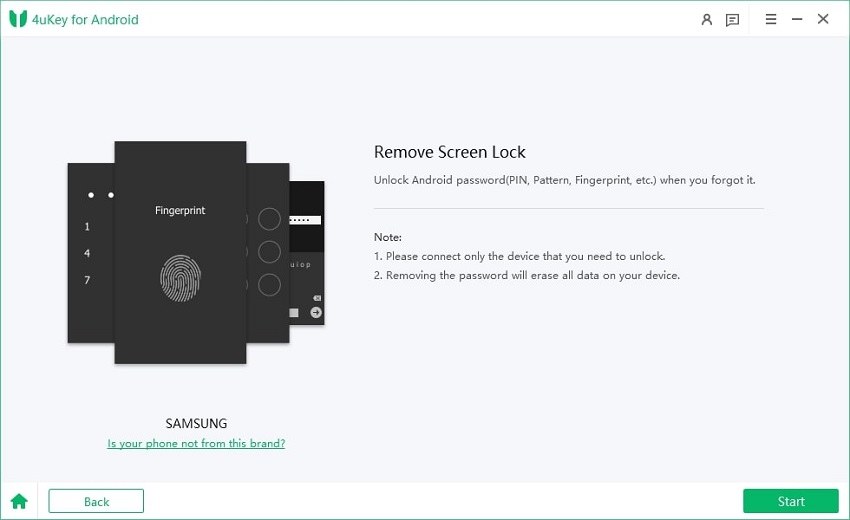
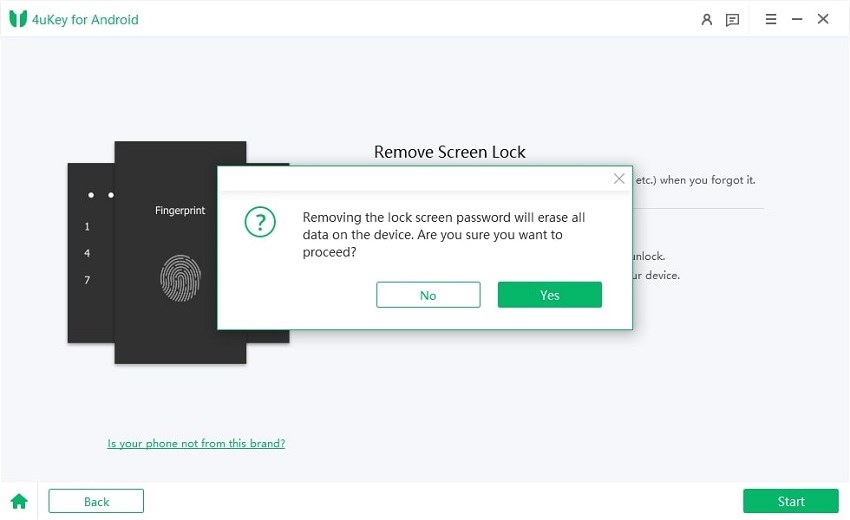
The software will notify you when your Android Phone gets connected. After that press "Start" button to remove the forgotten lock screen lock code.

After that, you should confirm that "Removing the lock screen password will eradicate all of your data on the Android device". If you are sure, go and press the "Yes" button. Tenorshare 4uKey for Android will begin to remove the lock screen automatically.

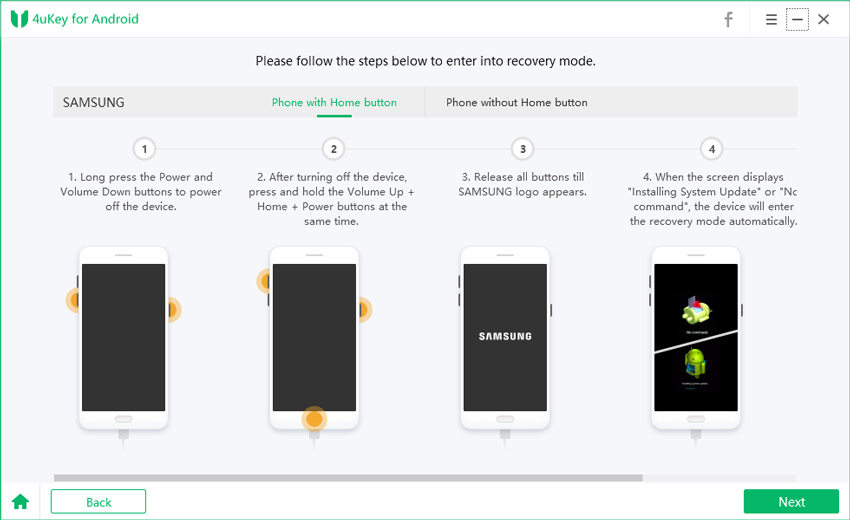
When you have the removal process, you will be asked to enter into the recovery mode. Shut down your Android device and click and hold on the "Volume up" + "Home" + "Power" button together.

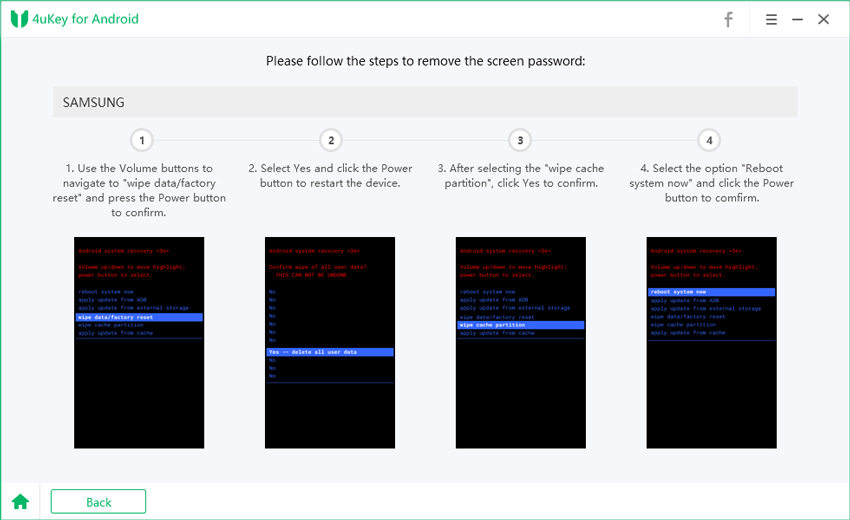
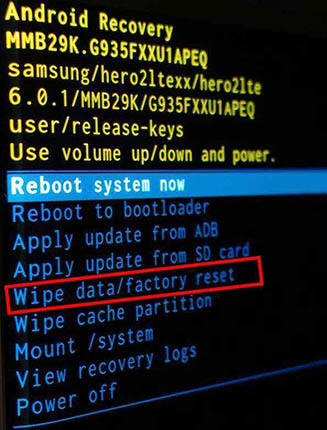
Then, select the option by using the power key and Volume keys to confirm the reboot system. factory reset/ wipe data > confirm > wipe cache partition > confirm > ReoBoot system now > confirm.

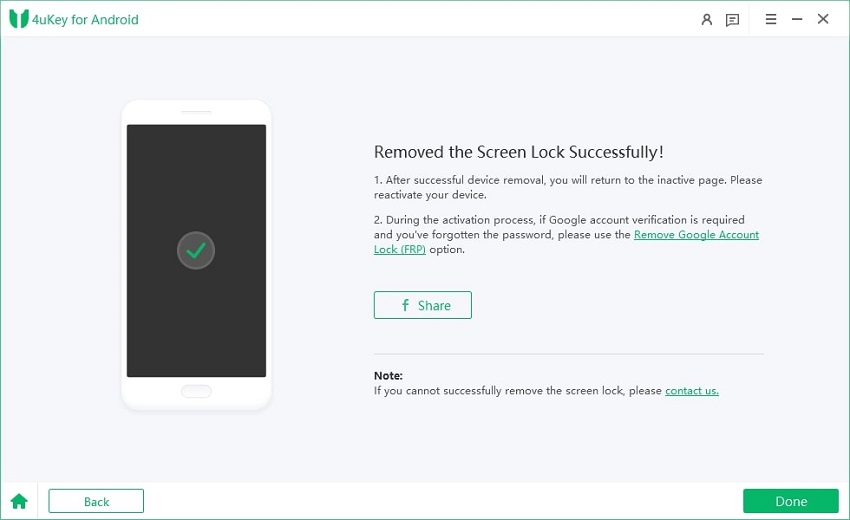
In the end, 4uKey for Android will automatically remove the lock screen. After a few minutes, you will see the whole process gets completed.

The disadvantage of using this method is that it is not free of cost.
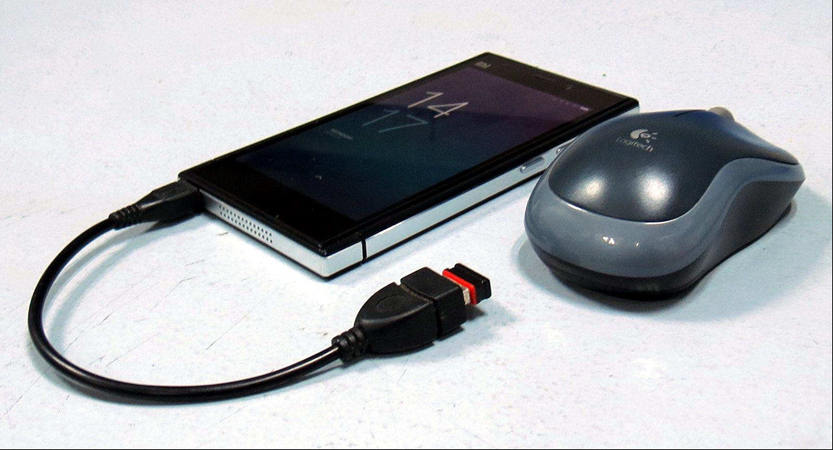
Method # 2: Enable USB Debugging by Using OTG Adapter and USB mouse (Difficult)
One of the best methods to enable USB debugging on Android, specifically when the device is locked by using a USB mouse and OTG Adapter. Both these works successfully and could help you in serious situations.
But before using it, you must also check if it supports your Android version that is running into your Phone or not. You could do this on any Android device such as Huawei, Samsung, LG, HTC, Asus, Sony, Lenovo, Xiaomi, etc. Do follow these steps to enable USB debugging on locked Android phone:
Connect your Android device with an OTG adapter and mouse.

- After that, click on mouse to unlock phone and after that turn on USB debugging option on Settings.
- Connect your broken Android phone to the computer, and it will recognize it as external memory.
Now, from the computer, open the folders of the Phone and copy the data such as photos, videos, music, contacts, etc. that you want.

A disadvantage of this method is that it is a bit difficult to use it.
Method # 3: Using ADB Command to Enable USB Debugging FRP (Risky)
ADB command is another powerful method to unlock an Android phone. When the command is executed, the data could easily be taken out from a locked Android device with USB debugging. Follow these steps:
- Install the ADB tool on your PC and then take out the zip file on the computer.
- Generally, it requires connecting the Phone by USB debugging but as USB debugging mode is turned off on your device or phone, so here you must boot the device in the ClockworkMod Recovery mode.
- When your device is in recovery mode, remember to launch ADB tool and after that connect the device to the PC with the help of a USB cable.
- Next, type the command prompt: adb devices
After that, type the below command for backing up the data you’re your locked phone. adb pull / data / media / clockworkmod / backup ~ / Desktop / Android-up
One of the disadvantages of using this method is that it is somehow risky. If you don't have the proper knowledge about the ADB tool, command, and fast boot, then trying this process will become risky. Your Phone might break and will be complete damage to the device.
Method # 4: Via Recovery Mode (Wipe Data)
The fourth method that will assist you to enter USB debugging mode on locked phone or device is by getting into the recovery mode. Once you enter into the recovery mode, you will have to run a factory reset/ wipe data process to unlock a locked Android device.
Do follow these below-mentioned steps:
- Turn your Android device off.
Then click the "Power Button + Volume Up Button + Volume Down Button" to get entered into the recovery mode. However, the key might change from Phone to phone, but you must follow the key combination according to the model.

- Now, the Android bootloader menu gets open, then select the "Recovery Mode" and click the Power button to enter recovery mode.
- Once you successfully get entered into the recovery mode, choose the "factory reset or Wipe data" option via the Volume down key and click the Power button for selection.
- When you get done with the selection, your Android device will start the process.
- And finally, reboot your Android device when the process is over.
Once this process is finished, your Phone will turn on normally without a pin, pattern, password, or fingerprint lock.
There is one disadvantage of this method that all of your data on the phone will be wiped off completely.
Frequently Asked Questions about USB Debugging
Q1. How to Enable USB debugging on your Android Phone
For Android 4.2, do follow these steps:
- On your device, go to Settings and then go to About.
- Tap the Build number seven times to make Settings and then go to Developer options available.
- In the end, enable the USB Debugging option.
Q2. Is USB debugging harmful?
No, USB debugging is not harmful. If you are a developer, then you will need to leave USB debugging enabled always. Otherwise, you don't need to keep it enabled at all times; you can enable it when you have any need of using it, then after that, you will dis-enable it once you are done with it. And this is the fastest way to handle it properly. It would be a bit inconvenient, but it is worth it.
- Remove Android password, pattern, PIN, and fingerprint lockin one click
- Bypass FRP for Samsung, Xiaomi, Redmi, Vivo, OPPO, Huawei, etc. (Android 6-14)
- Compatible with 6000+ Android phones and tablets
- The unlocking success rate is up to 99%, in 3 minutes
Speak Your Mind
Leave a Comment
Create your review for Tenorshare articles
