How to Root Samsung Galaxy Note 3 on Android 5.0
Android is by far the most customizable mobile operating system we've ever seen and there's an ever-growing number of smartphones that run it today. Even if you own devices like Samsung's Galaxy Note 3 which runs Android under the skin, there are tons of customizations you can do on it if you can root the device. The standard stock firmware might offer restrictions but the rooted Note 3 is in a different league with respect to customizations. Here's your quick guide to root Samsung Galaxy Note 3 on Android 5.0.
Root Galaxy Note 3 on Lollipop without a PC
Fact is, to root a Galaxy Note 3 you don't even require a PC. All you need is to download an app, install it, and run it on your device.

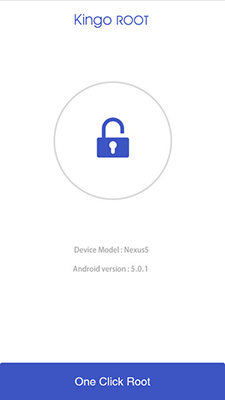
Open a web browser on your device and head over to the KingoRoot website. Once there, download the KingoRoot APK file and save it to your device. Before you install the app, head to Menu > Settings > Developer options and turn on Unknown sources. Then, tap on the APK file to install the app. Open the app when it's installed and tap on One Click Root to begin to root your device.
Within a couple of minutes, the app will have rooted your Galaxy Note 3 device running Lollipop. If you need further confirmation, just try a root checker app to verify the rooting process.
Root Galaxy Note 3 on Lollipop using Odin on a PC
If the first method did not work, then you always have the old-fashioned solution with your PC. You need to download a software tool on your PC for the process.

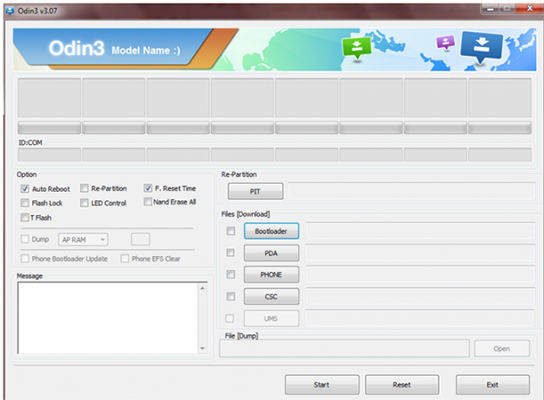
Head over to the Odin and CF-Root websites and download both the tools to your PC. Extract files from both Odin and CF-Root archives. Then, launch the Odin tool, click on PDA, and select the CF-Root file you have extracted earlier.
Turn off your Galaxy Note 3 and turn it back on in download mode by pressing and holding down Volume Down + Home + Power buttons at the same time. Plug in your device to your PC and click on Start in the Odin. It will begin to root your device.
Once Odin's done flashing the file, your Samsung Galaxy Note 3 will be rooted on Android Lollipop. You may now exit Odin and eject your device from your computer. You can head over to the Play Store and download a root checker app to confirm you have root on your device.
Recover Lost Data on your Samsung Galaxy Note 3 after rooting
If by any chance, you lost some files due to the rooting, then you can use a data recovery app to get them back in the original condition.
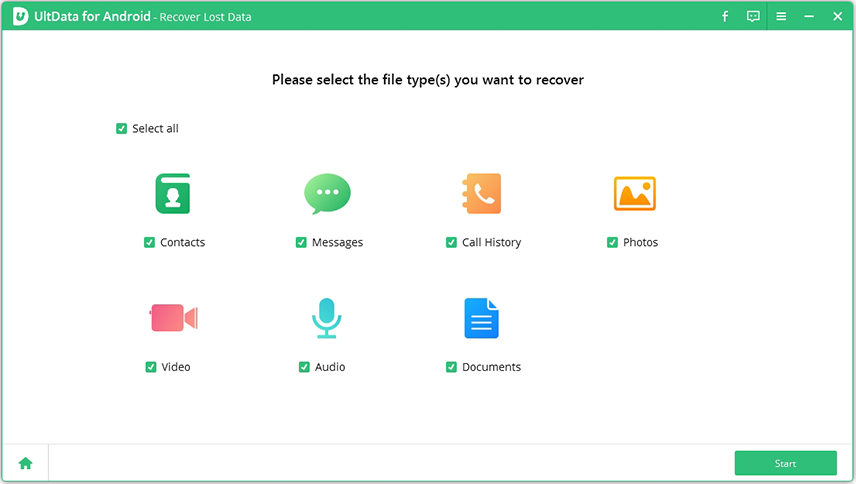
One of the most well-known data recovery apps is Tenorshare Android Data Recovery. It does a brilliant job of helping you recover your valuable lost data on Samsung and other Android devices. Install the app on your computer and plug in your device to your PC/Mac. Then, choose either Quick Recovery or Deep Recovery to recover files. Follow the on-screen instructions and you should be able to recover your lost files.

We hope this guide helps you root your Samsung Galaxy Note 3 on Android Lollipop. If you face any data loss problems after rooting, we have mentioned the perfect Android (Samsung) Data Recovery solution to retrieve your data as well.


Speak Your Mind
Leave a Comment
Create your review for Tenorshare articles

Tenorshare UltData for Android
Best Android Data Recovery Software
Highest Data Recovery Rate


