Details about Android Custom ROM and How to Flash a Custom ROM to an Android Phone
Wonder what the whole Android custom ROM is all about? Or perhaps you already know it and look for ways to flash a custom ROM to your Android phone? No matter where you are, this article will show details about custom ROM and how to install a custom ROM to Android devices running from Android 2.3 to the latest Android 5.0.
- Part 1: Things to Know before Installing a Custom ROM
- Part 2: How to Flash a Custom ROM to an Android Phone
- Part 3: Restore a Previously Backed up ROM
Part 1: Must-know Info before Installing a Custom ROM
What ROM Stands for
"ROM" stands for "Read-only memory". A custom ROM replaces your device's Android operating system - normally stores in read-only memory - with a new version of the Android operating system. Custom ROMs are different from acquiring root access.
Why Install a Custom Android ROM
- Using custom ROMs results in more frequent updates that fix bugs and introduce new features.
- Custom ROMs are faster, more efficient and use less memory.
- Custom ROMs come with the ability to install applications to the SD card.
Part 2: Detailed Steps to Flash a Custom ROM to an Android Phone
The following are the 5 steps to finish the android flash ROM process. Read on to know more.
Step 1: Root Your Android Phone
The first thing is to root your phone, which will bring 10 bebnefits to Android device. We already have a post covering some versatile Android root apps to help you. This usually takes you about 5 minutes. Wait patiently until it finishes.
Step 2: Install ROM Manager App
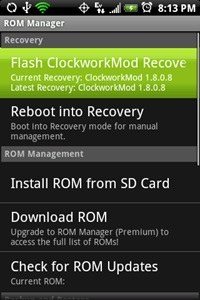
Go to the Android Market on your phone and install ROM Manager. This application handles backing up and restoring, as well as flashing new ROMs. If you have installed this app, you can directly go to the third step.
Step 3: Backup Your System, Apps and Data
Before you make a change to your system, we suggest a Nandroid backup.
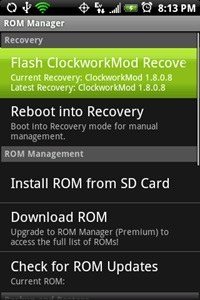
- To get Nandroid onto your phone, we use the ClockworkMod ROM Manager application. Go to Android Market > search for ROM Manager > install ClockworkMod ROM Manager.
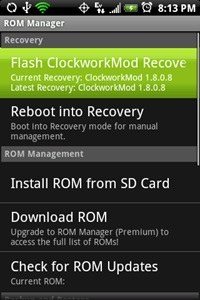
- Install a Recovery Image specific to your phone. ROM Manager will do it for you automatically with only a press of a button. Select Flash ClockworkMod Recovery > confirm your autodetected phone model > wait for it to download.
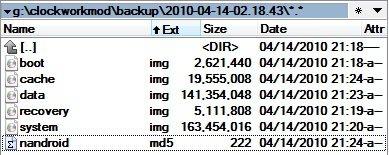
- Start your first backup. Select "Backup Current ROM" and your phone will reboot and start the full backup onto your SD card. After the backup is complete, your phone will boot up normally. The following is what a full backup looks like.
Step 4: Download and Save the ROM You Want to Your Phone
It's important to note that not every ROM is available for every device. So just pay attention to that. If you don't know exactly what you are looking for, you can search Google for help. For reference, CyanogenMod is the most installed Android ROM.
When you've found a ROM that suits you, download it and save it to your phone. It should come in the form of a fairly large ZIP file. You can either download it directly from your phone, or download it on your computer and transfer it over via USB.
Step 5: Flash Your ROM
To flash a ROM, you need to do:
- Open the ROM Manager and click on "Install ROM for SD Card".
- The ROM you download in step 4 should be shown in the list. If not, make sure you've put it in the root folder of the SD card.
- Click on the ROM and you should receive a popup message asking you to back up existing ROM and wipe data and cache. So we suggest you use Titanium Backup to backup your app data before.
The flashing process should take 5-10 minutes installing everything and then 10-20 minutes during the first boot. Please be patient during this process.
Part 3: Restore a Previously Backed up ROM
Since you have backed up your original ROM, you can restore to it if you are having problems with the new one.
- Load up the ROM Manager app in the custom ROM you flashed.
- Use the "Manage and Restore Backups" menu to find your backup and restore it.

After that, you'll be back to the original OS.


Speak Your Mind
Leave a Comment
Create your review for Tenorshare articles

Tenorshare UltData for Android
Best Android Data Recovery Software
Highest Data Recovery Rate


