[4 Ways] How to Downgrade macOS Sonoma to Ventura without Losing Data
Several Apple users have been seeking downgrading guides due to stability and bug issues with the recently released macOS Sonoma public beta version. However, macOS Ventura offers a stable OS with a user-friendly interface and reliable performance. If you're looking about how to downgrade macOS Sonoma to Ventura or how to downgrade macOS Sonoma public beta to Ventura, our guide will provide all the necessary information on how to downgrade macOS Sonoma 14 to 13. Let's dive in without any delays and explore everything you need to know.
- Part 1: Is It Possible to Downgrade macOS Sonoma to Ventura
- Part 2: [Preparation Tips] How to Downgrade macOS Sonoma to Ventura without Losing Data
- Part 3: [4 Ways] How to Downgrade macOS 14 Sonoma to 13 Ventura
- Way 1: How to Downgrade macOS Sonoma to Ventura via Time Machine
- Way 2: How to Downgrade macOS Sonoma to Ventura via macOS Recovery
- Way 3: How to Downgrade macOS Sonoma to Ventura in Few-Clicks
- Way 4: Reinstall macOS Ventura via Bootable Installer
- Part 4: Quick Fix macOS Sonoma Update & Downgrade Bugs and Glithes
- Bonus Tip: Post-Downgrade Considerations You Should Know
Part 1: Is It Possible to Downgrade macOS Sonoma to Ventura
YES! Apple often comes with new OS updates, encouraging users to upgrade to the latest versions. However, you can downgrade to your previous version due to certain bugging, compatibility, or performance issues.
Though the process is feasible, it can prove a daunting task for non-tech savvy out there. You will first need to back up all of your data and files and then move on with sticking to our detailed guide on how to downgrade macOS Sonoma to Ventura from beginning to end.
Part 2: [Preparation Tips] How to Downgrade to macOS Ventura without Data Loss
When preparing to downgrade macOS Sonoma to Ventura, you have to make a backup with Time Machine or iTunes and create a bootable USB installer for macOS 13.
Method 1: Backing up Important Files and Data using Time Machine
Here is how to create a backup with Time Machine on your Mac.
- Connect the external drive to your device and open Time Machine.
- Choose App Backup Disk and select Setup Disk.
- When prompting, select Done to initiate the data backup process.
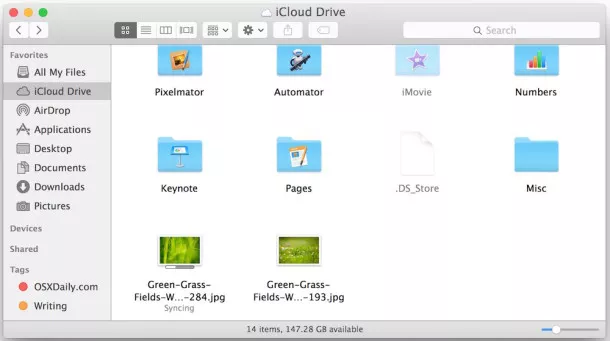
Method 2: Backing up Your Mac using iCloud
- Ensure that you have enough iCloud storage space for your backup.
- Go to Apple menu > System Preferences > Apple ID.
- Select "iCloud" and then click on "Manage" to access iCloud storage settings. nable the "iCloud Backup" option.
Click on "Back Up Now" to start the backup process. This will back up your essential data, such as photos, documents, contacts, and settings, to iCloud.

Part 3: [4 Ways] How to Downgrade macOS 14 Sonoma to 13 Ventura
Before proceeding, ensure your device is compatible with macOS 13, i.e., Ventura. Its supported devices include MacBook Pro (13-inch, 2017, Two Thunderbolt 3 ports) and above, MacBook Air (Retina, 13-inch, 2018) and later, MacBook (Retina, 12-inch, 2017), Mac Pro (2023, 2019), and more.
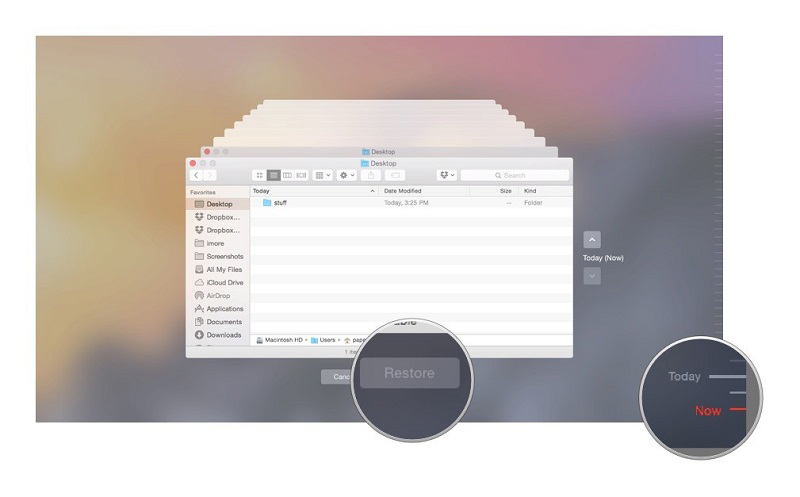
Way 1: How to Downgrade macOS Sonoma to Ventura via Time Machine
Step 1: Attach the Time Machine hard drive to your Mac. Click on the Apple icon in the menu bar and choose "Restart" to reboot your Mac.
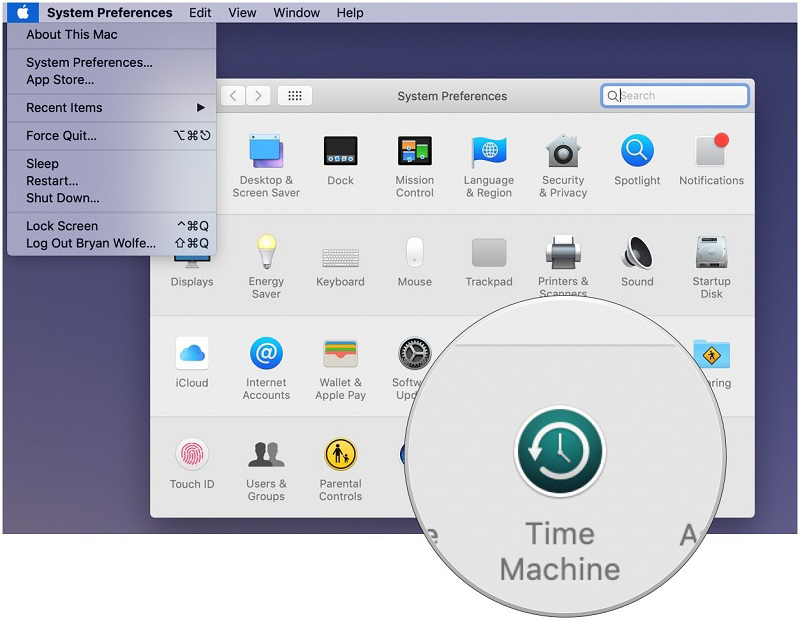
Step 2: During the startup process, hold down the appropriate keys based on your Mac's architecture:
- For Apple Silicon Mac: Press and hold the power button until you see the startup screen, then click on "Options" and choose "Continue."
- For Intel-based Mac: Press and hold Command + R when you see the Apple logo or hear the startup chime.
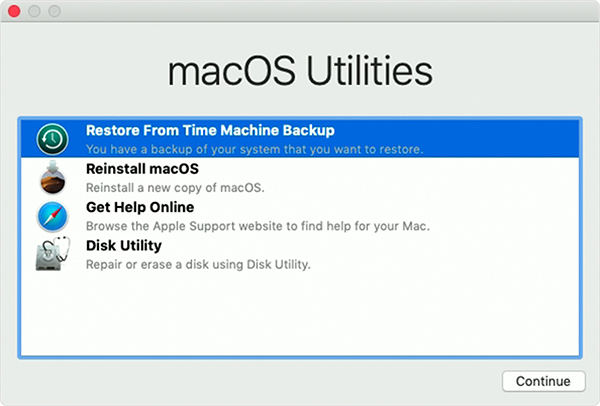
Step 3: Select "Restore from Time Machine Backup" and click on "Continue."
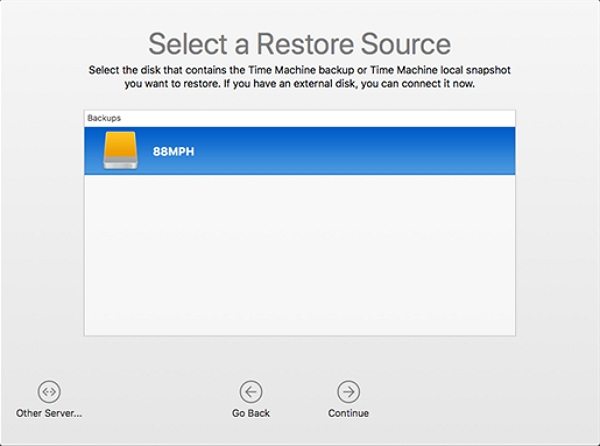
Step 4: Select the recent macOS Ventura backup from the available backups listed and click on "Continue."
Step 5: Follow the on-screen instructions to confirm the restore destination and begin the restore process. Wait for the restoration to complete, which may take some time depending on the size of your backup.
Step 6: Once the restore process is finished, your Mac will automatically restart with macOS Ventura installed.
Way 2: How to Downgrade macOS Sonoma to Ventura via macOS Recovery
1. Turn off your Mac. Turn on your Mac and immediately press and hold one of the following keyboard combinations until the Apple logo appears:
- Command + R: Reinstall the latest macOS version installed on your Mac.
- Option + Command + R: Upgrade to the latest macOS version compatible with your device.
- Shift + Option + Command + R: Reinstall the macOS with which your Mac came or the closest version available.
2. Enter your password and click "Continue." Click "Next" and select "Reinstall macOS," then click "Continue."
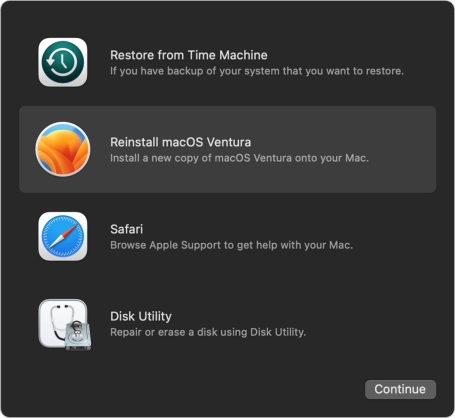
3. Follow the on-screen instructions and select the disk to flash. If prompted to unlock your disk, enter the password for your Mac.
Please note that the available options in macOS Recovery may vary based on your specific Mac model and the macOS versions supported by your device.
Way 3: How to Downgrade macOS Sonoma to Ventura in Few-Clicks
If you want to downgrade macOS 14 to 13 without losing data, we suggest relying on Tenorshare ReiBoot. This amazing software can replace the above-complicated series of steps with a few clicks.
Hop on below to learn how it helps with eliminating the query about how to downgrade macOS Sonoma (public beta) to macOS Ventura free:
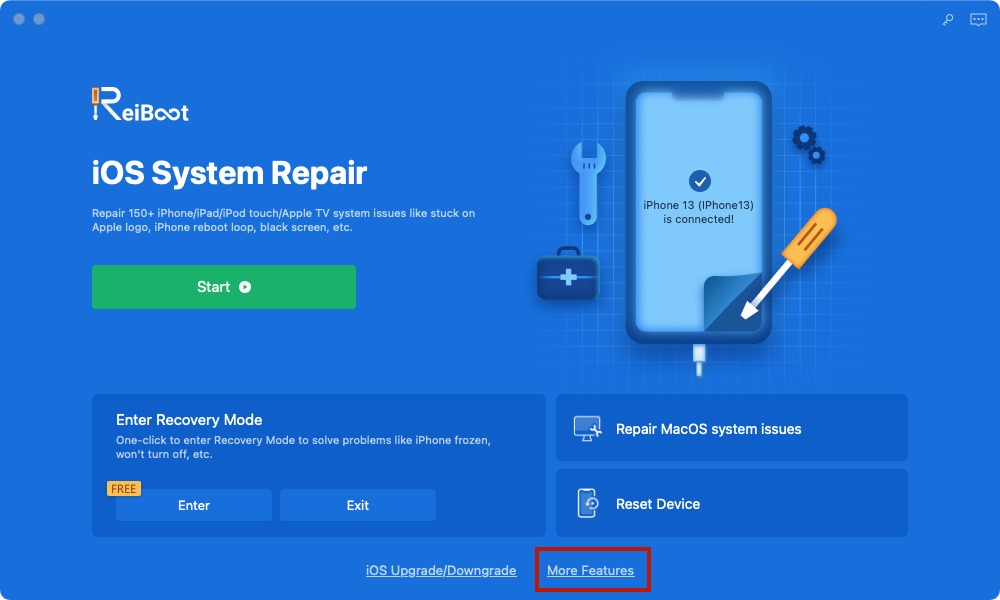
Download and install the software from the official Tenorshare website. Once installed, launch it and connect both Mac devices. On a successful connection, hit the More Features option at the bottom.

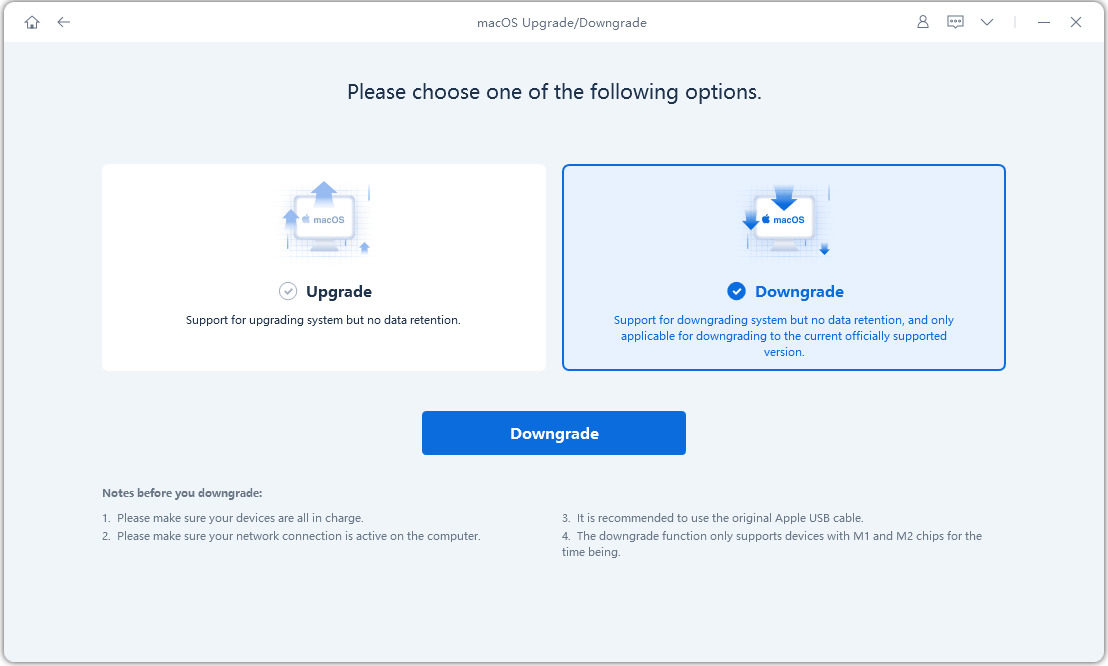
Choose macOS Upgrade/Downgrade. As you want to downgrade macOS Sonoma to Ventura, select the Downgrading System option.

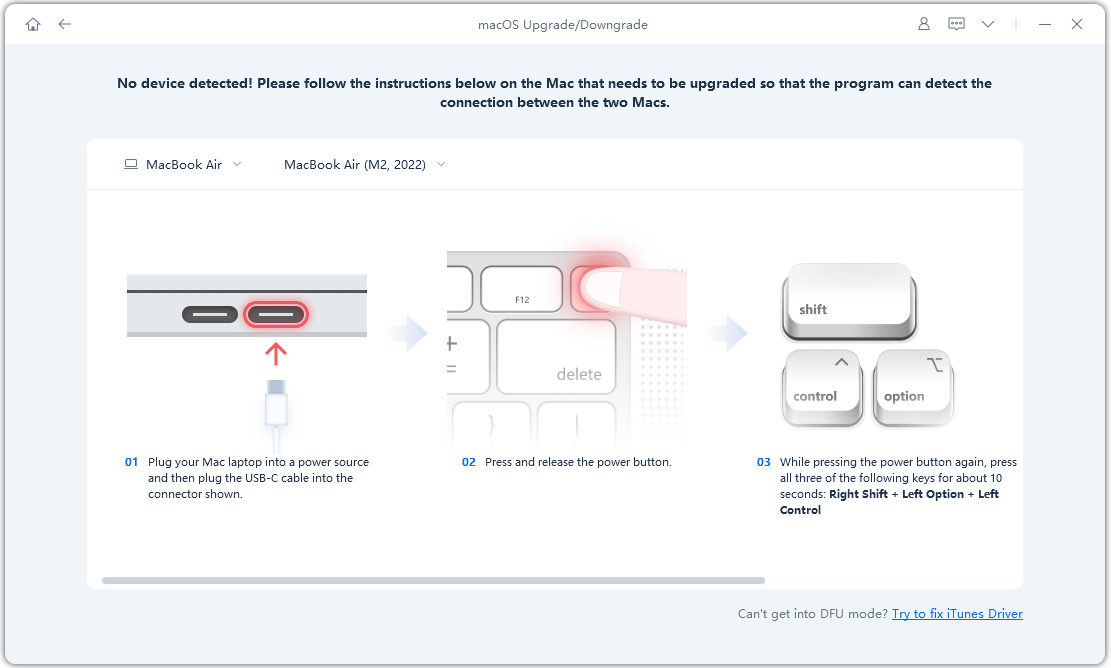
Follow the instructions in the image below to enter the DFU mode. Remember, the steps for entering DFU mode vary with the Mac models. So, ensure to select the right steps for your model.

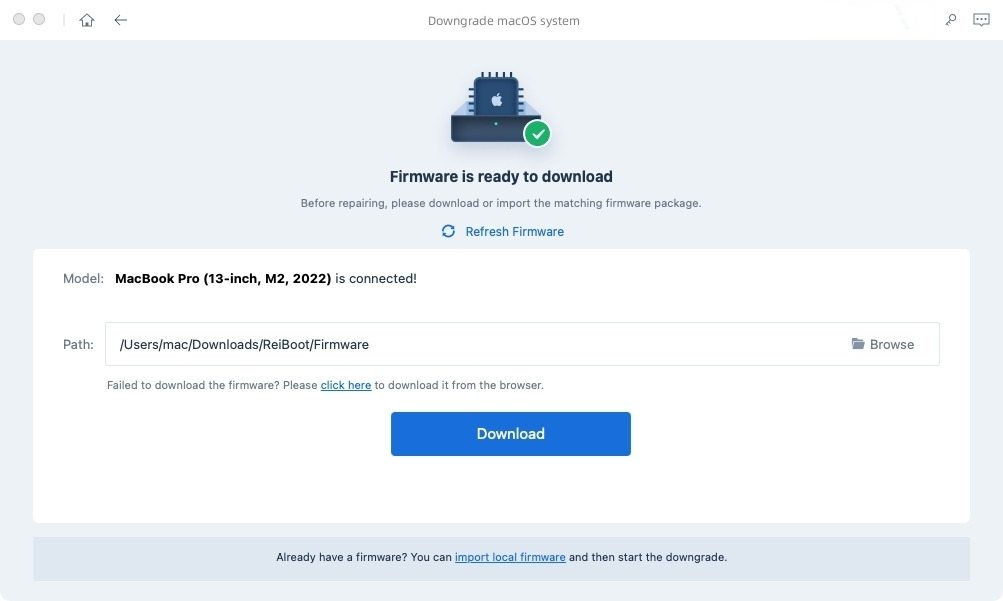
Wait a while until ReiBoot auto-detects your macOS system and down-gradable macOS firmware. Hit Download to get the package on your device. Wait patiently until the download completes.

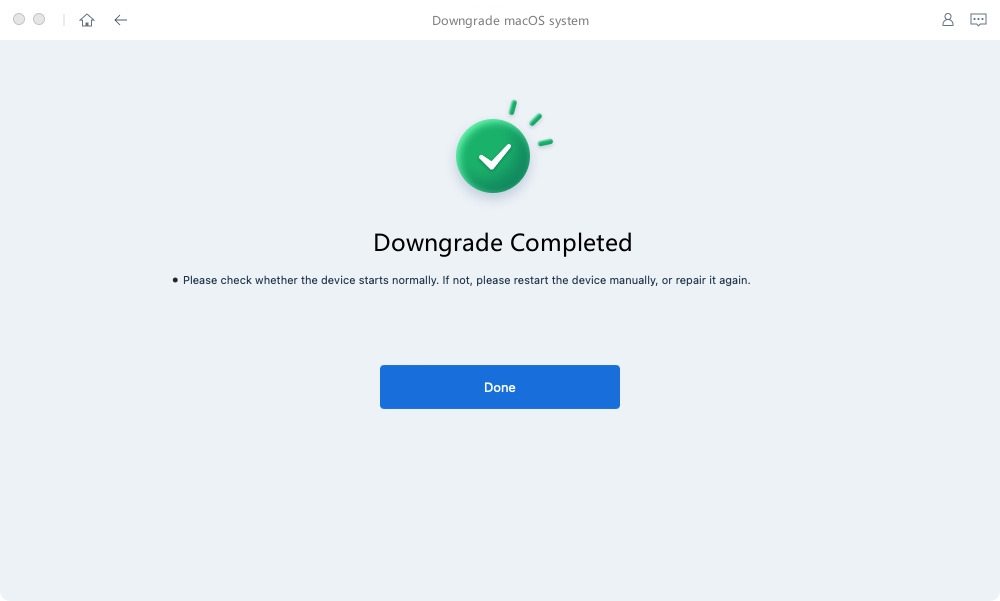
Once done with Downloading the package, select Initiating downgrade. You can see the progress of downgrading on the screen. Please don’t disconnect the device in the meantime. Soon you will witness Downgrade Completed screen.

Now your Mac is now back on the macOS Ventura! This step will erase all the data on your device, but with the backup, there's no need to worry.
Way 4: Reinstall macOS Ventura via Bootable Installer
Step 1: Create a bootable macOS Ventura installer.
- Download the macOS Ventura installer from the Apple website or App Store. Connect a USB flash drive or external hard drive to your Mac.
- Use Disk Utility to format the connected drive and give it a name.
- Open Terminal and enter the command:sudo /Applications/Install\ macOS\ Ventura.app/Contents/Resources/createinstallmedia --volume /Volumes/YourDriveName (replace "YourDriveName" with the name of your formatted drive) .
Step 2: Restart your Mac and hold down the Option key. Choose the bootable installer drive from the Startup Manager.
Step 3: Select your preferred language and click "Install macOS" in the installer. Follow the on-screen instructions to install macOS Ventura on your Mac's internal drive. Choose your Mac's internal drive as the installation destination.
Step 4: Complete the on-screen prompts to set up macOS Ventura, including language, keyboard layout, and Apple ID.
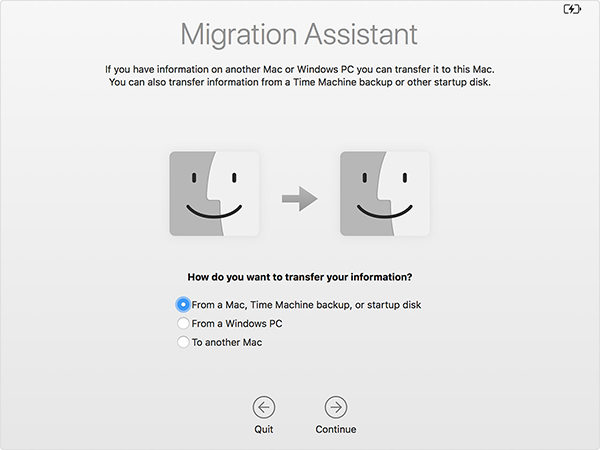
Step 5: If you have a backup, use the Migration Assistant utility in the Utilities folder to transfer your data back to your Mac.
Part 4: Quick Fix macOS Sonoma Update & Downgrade Bugs and Glitches
Let's now have a look at multiple quick fixes to the most common macOS Sonoma update & downgrade bugs and glitches!
1. Unable to Install macOS Sonoma
- Double-check if macOS Sonoma supports your device.
- Restart your device and re-try installing macOS Sonoma.
- Ensure you have enough storage for installation.
- Update your macOS to the latest version before attempting to install Sonoma.
Tip: If you want to skip all the hassle, try out Tenorshare ReiBoot! It effortlessly upgrades and downgrades macOS versions saving you loads of time.
2. Unavailable Drivers
You might get stuck with this issue when downgrading from Sonoma to an older version. Find drivers specific to your current macOS version. If unable to find suitable drivers, get hardware components or contact manufacturer’s Support.
3. Apps and Lock Screen Crashing
- Clear the cache of the app causing issue.
- Update the crashing app and your device’s OS to the latest version available.
- Restart your device to steer clear of temporary issues and refresh the system.
Bonus Tip: Post-Downgrade Considerations You Should Know
Here are some bonus tips for your convenience:
1. Compatibility Checks
Some programs and applications might face compatibility issues or become unstable after downgrading. Here is how you can fix them:
- Check if the particular app or program is compatible with Ventura.
- Try fixing the issue by running the software in virtualization or compatibility mode.
- Find a suitable application compatible with your current macOS version.
2. Optimizing macOS Ventura
You can now optimize macOS Ventura. Some recommended optimizations include:
- Optimize Energy Savers.
- Update iLok drivers.
- Tweak Privacy Preferences.
- Run basic Mac Maintenance.
- Manage login details.
- Optimize Mac storage, etc.
Conclusion
That was everything you need to answer the query about how to downgrade macOS Sonoma to macOS Ventura or downgrade macOS 14 to 13. For quick results and optimal insurance of no data loss, we suggest downloading and installing Tenorshare ReiBoot to downgrade macOS Sonoma public beta to Ventura. It will surely help to ease out the task. Hope you find this guide helpful; stay tuned for more!
- Downgrade iOS 26 to iOS 18 ;
- Fix iPhone won't restore in recovery mode, my iPhone is stuck on the Apple Logo,iPhone black screen of death, iOS downgrade stuck, iPhone update stuck, etc.
- Support all iPhone models and the latest iOS 26 and earlier.
Speak Your Mind
Leave a Comment
Create your review for Tenorshare articles
