How to Solve Erase iPhone Verification Failed 2025
Erase iPhone verification failed? Download 4uKey for free, and quickly factory reset your iPhone with simple clicks. No passcode, Apple ID or tech skills required!
People erase their iPhones due to a variety of reasons. You might want to give your old iPhone to your younger brother or you just plan to sell it to buy a new iPhone.
However, if erase iPhone verification failed while trying to factory reset it, you are left wondering what to do. Don’t drive yourself crazy thinking about how to fix it now. We are here, and we are going to guide you to erase your iPhone successfully.
- Part 1: Why Verification Failed When Trying to Erase iPhone
- Part 2: How to Fix Erase iPhone Verification Failed
- Part 3: Final Method to Fix Erase iPhone Verification Failed and Erase iPhone
Part 1: Why Verification Failed When Trying to Erase iPhone
If you are getting the message saying verification failed when trying to erase iPhone, then you should know why this problem happens in the first place. There are a few reasons that we think could be the root cause of this erase all content and settings failed problem.
- Your iPhone or iPad has a poor internet connection.
- You enter the wrong Apple ID details.
- You have restrictions enabled, such as screen time.
- The date and time settings on your iPhone are incorrect.
- Apple ID servers are down due to maintenance or other reasons.
- Having two factor authentication enabled can also cause this problem as your trusted device might not be accessible.
Part 2: How to Fix Erase iPhone Verification Failed
Let’s put an end to all of your worries. Here are some of the methods you can use to fix erase iPhone verification failed. Try them one by one until the problem is fixed and you can successfully erase your iPhone.
1. Connect to A Stable Network
The first thing to be noted is that since this verification takes place through internet. Many verification failed errors such as Error 7005 are caused by internet problems. So to ensure that, we strongly recommend you to connect to a stable internet connection. That means switching between data or Wi-Fi, whichever works better.
2. Check Apple ID System Status
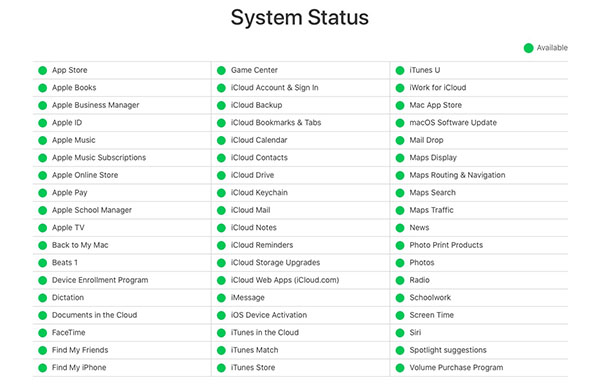
Erase iPhone failed because it cannot connect to server. In this case, if there is something wrong with Apple server, you are going to encounter verification failed when trying to erase iPhone no matter what you do. Check the Apple ID status from Apple’s System Status page.
3. Turn Off Find My iPhone
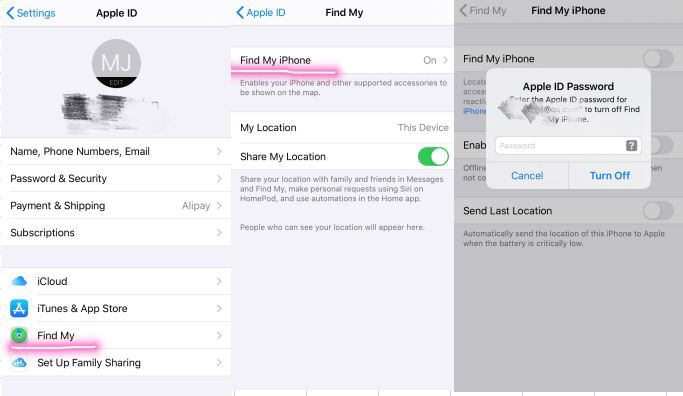
Find My iPhone will stop you from erasing your iPhone in Settings. can cause activation lock to be activated a factory data reset. And if there is some problem with Find My iPhone, then it can cause erase iPhone verification failed. Thus, turn off Find My before the erasing process.
- Open Settings on your iPhone and tap on your profile at the top.
-
Then go to Find My. On the next page, toggle off Find My iPhone.

4. Sign Out Apple ID
You can also try signing out of your Apple ID so that you can erase your iPhone without having to undergo the verification process. Before that, have a backup of your important data.
- Open Settings and tap on your Profile. Scroll down and locate the option of Sign Out.
- Tap on it and enter Apple ID password to confirm your action.
5. Force Restart iPhone
This is a common solution for iPhone issues. Force restarting the iPhone to see if it fixes the erase iPhone verification failed problem. Restarting can fix a lot of problems and thus it’s worth a try.
6. Reset Network/All Settings
Resetting settings back to default when they have stopped working is always a good idea, especially when you do not know the specific wrong settings. So reset network settings or all settings of your iPhone and see if it fixes your Erase iPhone problem.
- Open Settings on your iPhone and go to General > Transfer or Reset iPhone.
-
Tap on Reset again. Next you can either reset All settings or reset network settings as you want.

Part 3: Final Method to Fix Erase iPhone Verification Failed and Erase iPhone
This erase iPhone verification failed problem is mostly related to your Apple ID and network. It is easy to fix internet connection. But when verification failed and you cannot sign out of Apple ID, you can try removing the Apple ID from your device so that you can finally erase your iPhone. And this is done with Tenorshare 4uKey. Follow the directions to remove Apple ID.
-
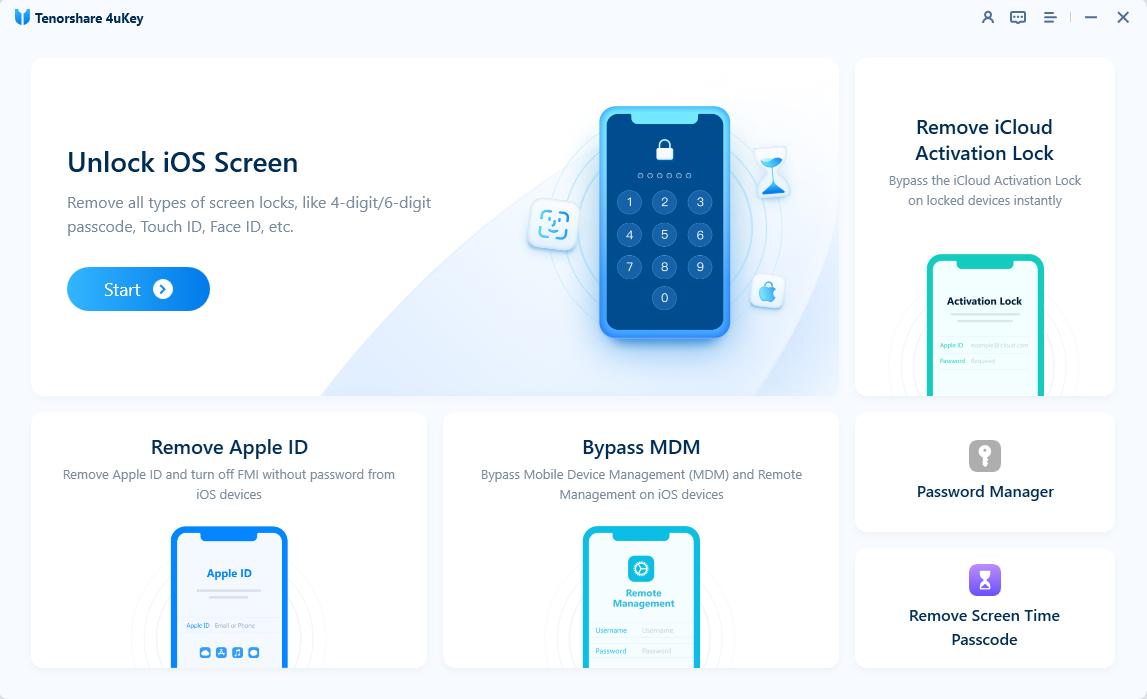
Install 4ukey on your computer and click on Remove Apple ID to start.

-
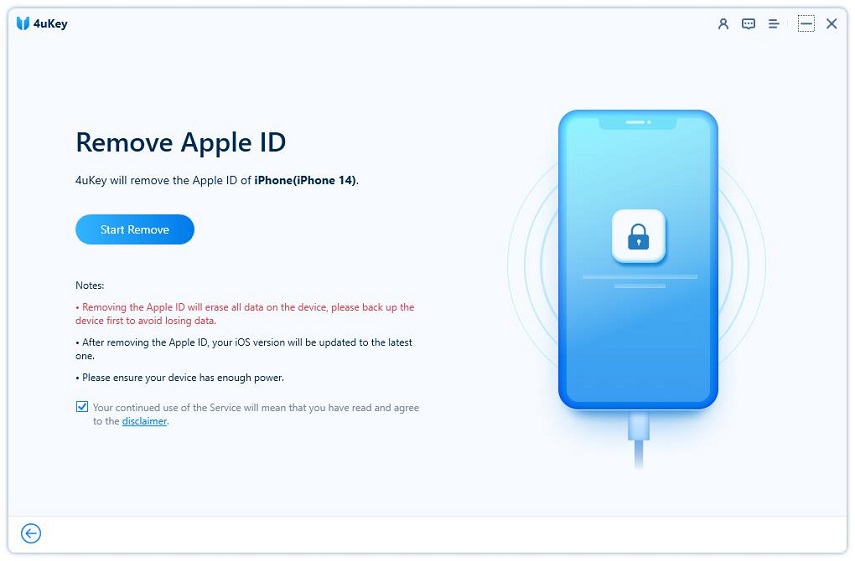
Connect your iPhone to the computer and click on the Start Remove button to proceed.

-
If Find My iPhone has been disabled, the process of removal shall begin automatically.

- If Find My iPhone is on, then you have to set screen passcode and two-factor authentication before continue.
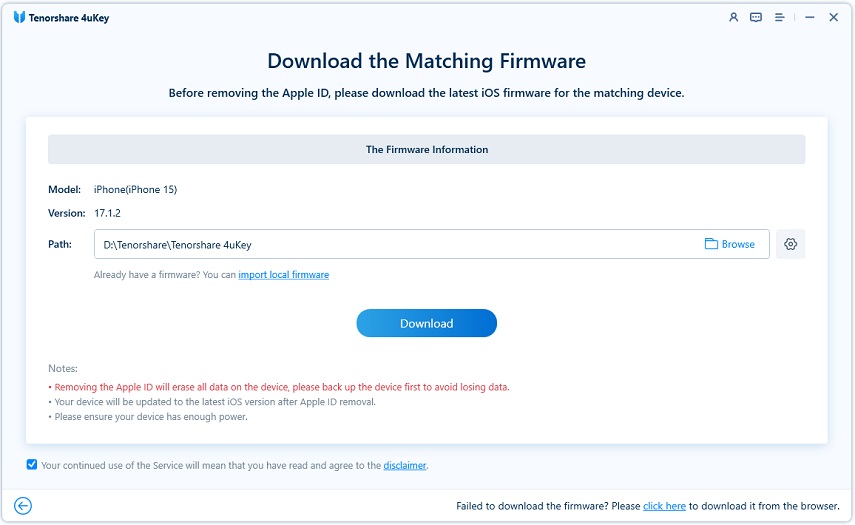
Download the appropriate firmware package on your computer, which takes a few minutes.

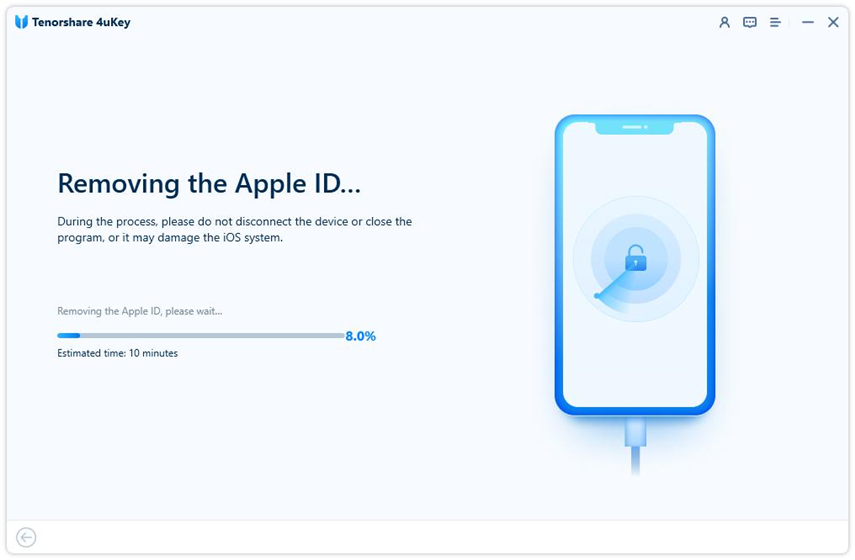
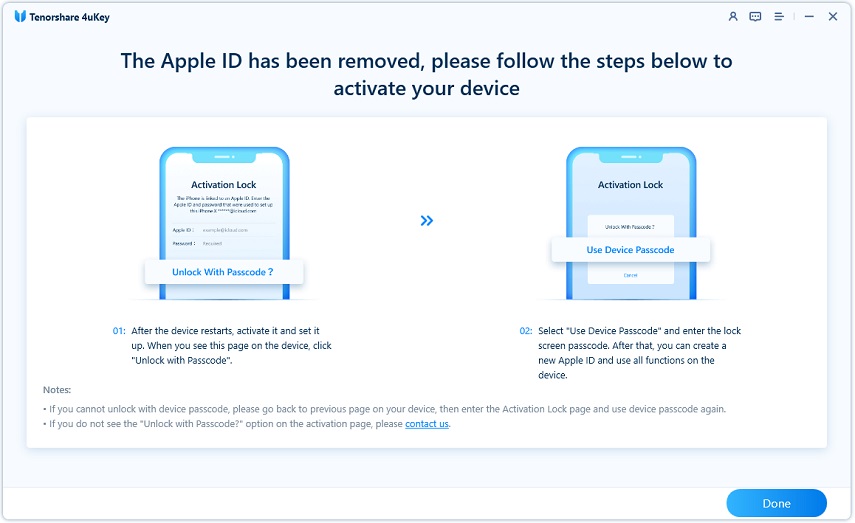
After download, click on Start Remove to start removing Apple ID. Once you see the following screen, it means that the process has completed and follow the instructions to set up your iPhone.

Conclusion
Erase iPhone verification failed is a common problem. It prohibits you from erasing all contents and settings in iPhone. To fix this problem, try all of the fixes we have provided above. And for the Apple ID verification failed issue, we recommend using 4uKey to remove Apple ID and erase your iPhone.
Speak Your Mind
Leave a Comment
Create your review for Tenorshare articles
4uKey iPhone Unlocker
Easily Unlock iPhone passcode/Apple ID/iCloud Activation Lock/MDM
100% successful unlock


