How to Export Photos with Filters on iPhone
When you take a photo on your iPhone, you can apply many of the built-in filters to your photos so that they look the way you want. By applying filters, you can change the appearance of the photos and you can even make them look completely different than what they actually were initially.
Some of the iPhone users have reported that they are not able to export photos with filters on their iPhone. So, what happens is that when a user transfers a photo with a filter from his iPhone to a PC, the filter gets removed and only the original photo gets transferred.
There doesn’t seem to be an official solution to this, however, there are a few workarounds that you can do to transfer your photos with filters to your computers. The guide below should help you with the task so you can keep those beautiful filters in your photos.
Share the Photo to iCloud or via Email
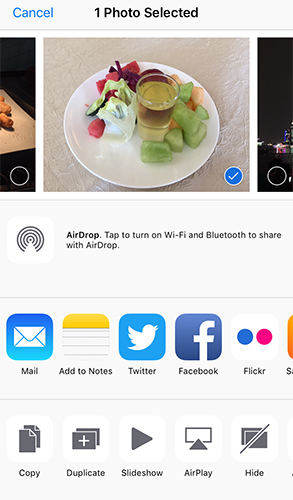
One of the quickest ways to preserve filters while transferring your photos from your iPhone is to use the share option. When you open a photo with filters on your iPhone, simply tap on the Share option.

Then, select either the iCloud option so that the photo gets uploaded to iCloud from where you can then download to your PC or the email option so that your photo gets emailed to yourself and you can download it on your PC. This option works all the time and it’s worth giving it a try.
Use a Dedicated App to Preserve Filters
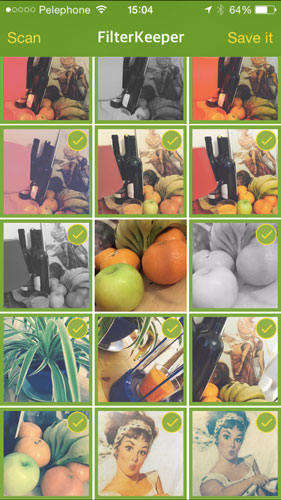
The issue is so big that there’s even a dedicated app that helps you preserve the filters on your photos while you transfer them to your computers. The app that makes this possible is called FilterKeeper and as the name implies, it lets you keep the filters on your photos.
You can head over to the App Store and download the FilterKeeper app on your iPhone. Once downloaded, you can launch it and then follow the on-screen instructions to learn how you can export photos without losing filter effects on them.

The app is sure to save your filters from being removed from your photos and it will let you have the filtered photos transferred to your computers. It does so by saving the edited copies of your photos to your camera roll. That way, you have an original copy of the photo and an edited copy of the photo with the filters on it.
Now that you have the copy of the edited photo with filters on your iPhone, you may want to export it to your computer so you can view it on a bigger screen. While there may be other ways to do that, we would suggest you to use a file manager to do that as this way you will be able to select what photos to be transferred and to what folder on your computer.

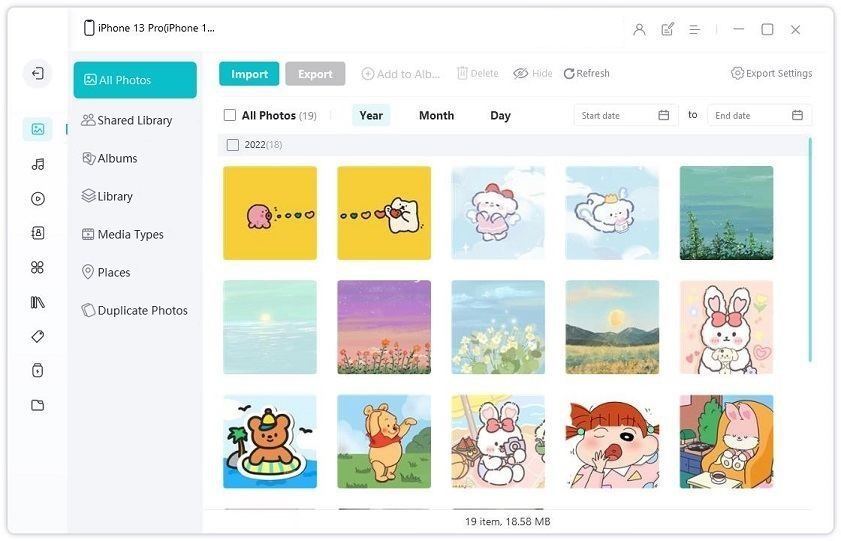
There’s this great app called iCareFone that comes with a file manager for your iOS device. Once you’ve installed and launched the app on your PC, all you have to do is select File Manager and click on Photos. You will then be able to transfer photos from your iOS device over to your PC. While doing so, make sure to select the edited photos to be transferred so that you can preserve the filters.
We hope this guide helps you export photos with filters on your iPhone without any issues.


Speak Your Mind
Leave a Comment
Create your review for Tenorshare articles

Tenorshare iCareFone
Best Free iPhone Transfer & iOS Backup Tool
Easily, without iTunes


