Top 3 Ways to Transfer Audio Files from iPhone to Mac
“I have some recorded audios in my iPhone and want to save them in my Mac, anyone know how do I transfer my audio recordings from my iPhone to my MacBook Air?”
Many people love to record voice on iPhone to make birthday wishes for a friend or record dubbing for entertaining. Sometimes the audio files are so memorable that you want to save them in your computer for later use. In this simple guide, we’ll tell you how to import audio from iPhone to Mac clearly.
- Way 1: Import Audio Files from iPhone to Mac via Email
- Way 2: Sync Audio from iPhone to Mac Using iTunes
- Way 3: Transfer iPhone Voice Memos to Mac without iTunes
Way 1: Import Audio Files from iPhone to Mac via Email
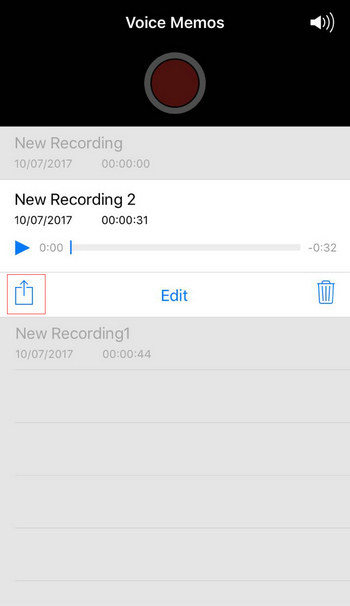
The easiest way of transferring iPhone voice memos to computer is email them directly on your device. The problem is you can only send one item each time, so it would be time-consuming if you have plenty of audio files.
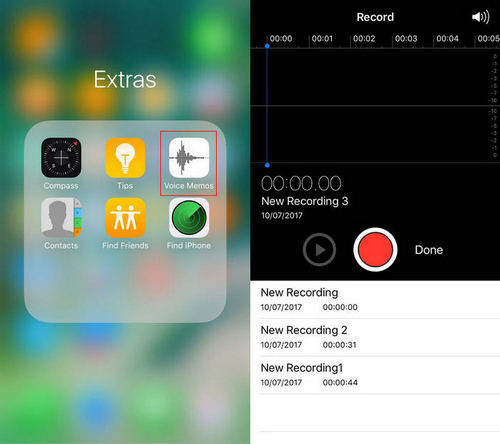
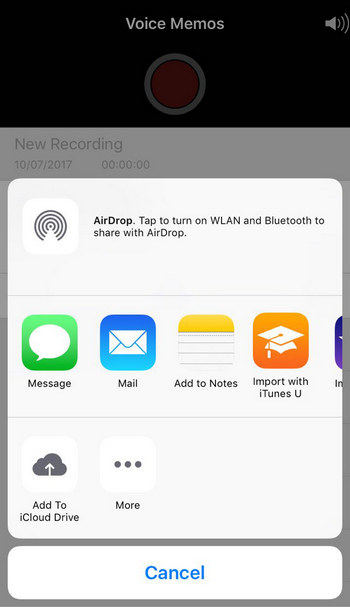
- Launch Voice Memos on your iPhone and choose the recordings you want to transfer to Mac.
- Now tap on the Share button
- Now choose the Mail option in the bottom to email recorded audio to Mac
Way 2: Sync Audio from iPhone to Mac Using iTunes
As is known to all, iTunes is an easy tool to import music to computer from iPhone, iPad or iPod. As voice memo belongs to music type in iTunes, you can also move voice memos from iPhone to Mac just like songs.
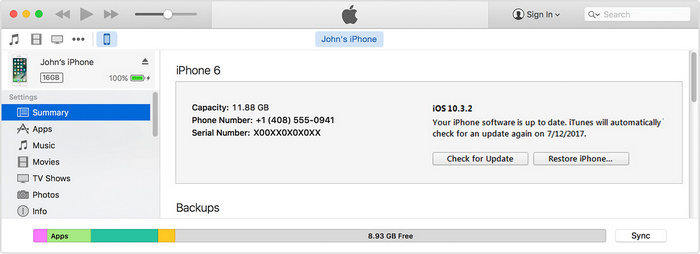
- Run iTunes and connect iPhone to computer
- Click iPhone icon from the main menu
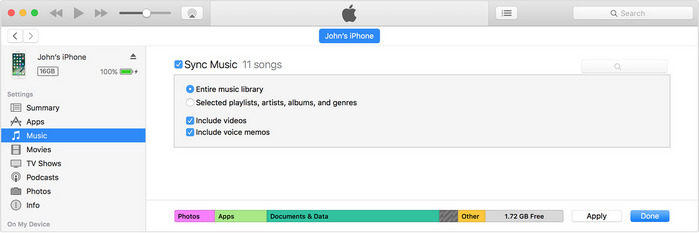
- Now choose “Music” from the left category, check “Sync Music” and "Include voice memos”
- Click “Apply” button to synchronize, all the audio files will be synced to iTunes music list.
Way 3: Transfer iPhone Voice Memos to Mac without iTunes
Some users found syncing audios to iTunes is too complicated as there are many steps involved. That’s why you are recommended to try Tenorshare iCareFone, professional iOS file transferring software to transfer voice memos from iPhone to Mac without syncing. It also supports to move music, photo, messages and other 8 types of files between iPhone and Mac freely.
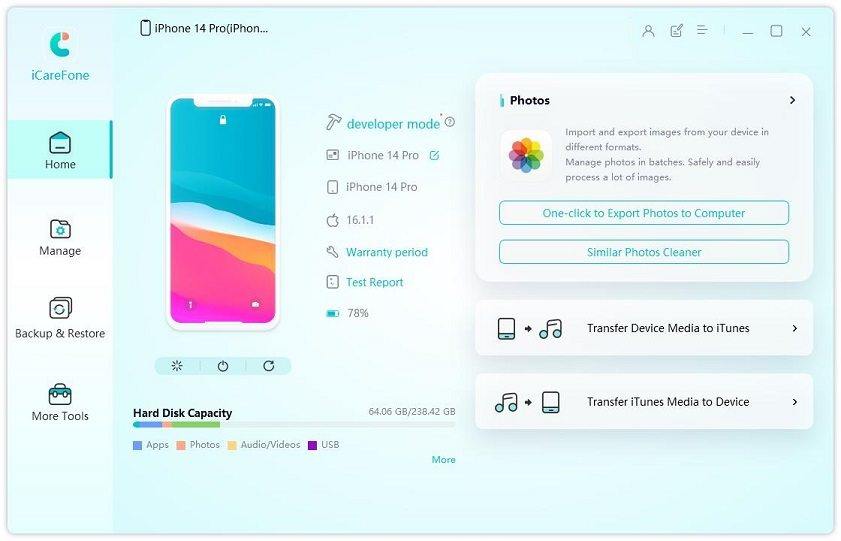
- Download and install Tenorshare iCareFone on computer. Run the program and connect iPhone to PC. Choose “Free Files Manager” once your device is detected.
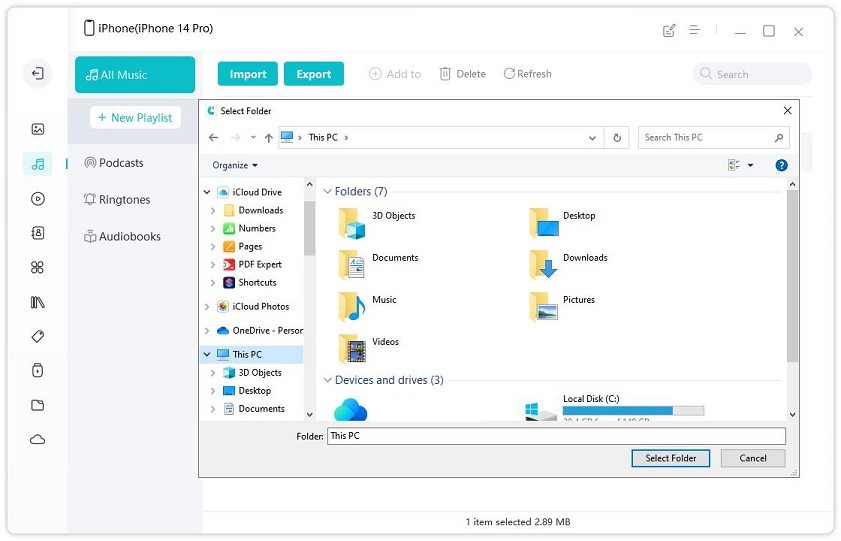
- Select “Music” and the software will automatically load out all the music and audio files in your iOS device. Choose the voice memos and click “Export” to save them in Mac.
Well, after reading this article, you got to know how to transfer audio files from iPhone to Mac, MacBook and iMac clearly. If they really helped you, don’t forget to share this post with your friends!


Speak Your Mind
Leave a Comment
Create your review for Tenorshare articles

Tenorshare iCareFone
Best Free iPhone Transfer & iOS Backup Tool
Easily, without iTunes


