How to Transfer Photos from iPhone to Computer using iTunes
More than a tool with which users can listen to music and podcasts, watch movies and tv shows, iTunes helps iPhone users manage data by backing it up so that they can restore should they lose it at a later time. Users would love to know how to transfer photos from iPhone to computer with iTunes. The reasons behind this are a no-brainer: our computers offer more storage space than our iPhones. Secondly, iPhones don’t have slots for expandable memory. Third, Apple offers a paltry 5GB of free data on iCloud. So let’s get started.
Part 1: How to Transfer Photos from iPhone to Windows or Mac Computer with iTunes
Many users ask, “Can I transfer photos from iPhone to computer via Bluetooth?” iTunes allows users to sync photos between their iPhone and their computers: both Mac and PC. Wondering how to transfer photos from iphone to laptop using iTunes? Follow the procedure below. (Updating iTunes to the latest version is recommended.)
Step 1: Connect your iPhone to your computer using a USB cable and launch iTunes.
Step 2: Click iPhone’s device icon located on the left bar of the main interface and click Back Up Now to begin backing up your device.
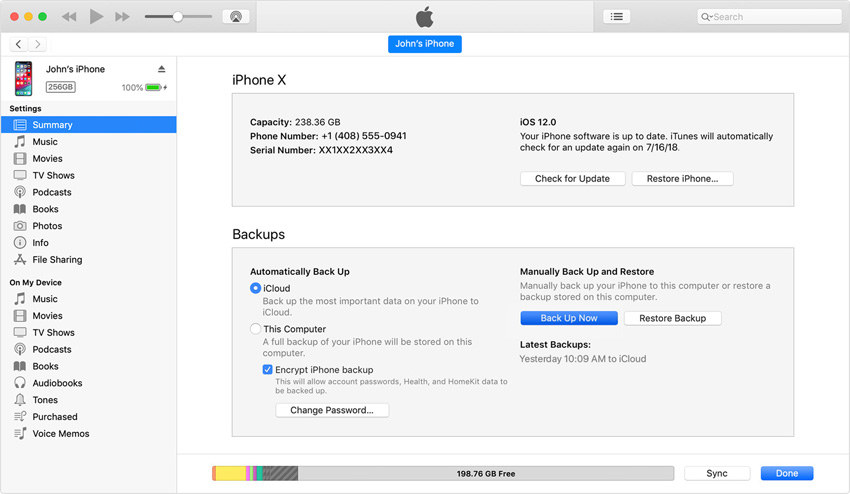
All your photos will be backed up on iTunes. iTunes back up file can be located in C:\Users\username\AppData\Roaming\Apple Computer\MobileSync\Backup. However, you should know that the photos are just backup files and cannot be read directly unless you resort to third-party iTunes backup extractor. So, if you want to view photos after transferring, keep reading.
Part 2: Other Ways to Get Photos from iPhone to Computer
Since transferring photos from iPhone to computer using iTunes has some restrictions, it is only judicious to know how to do the same using other methods. This section details a number of methods to do so.
Way 1: Use Tenorshare iCareFone (Support for both Windows and Mac)
Tenorshare iCareFone is a great tool that allows users to transfer photos from iPhone to their Mac or PCs with simple straight-forward steps.


To transfer photos using Tenorshare iCareFone, follow the procedure below.
Step 1: Download, install and run Tenorshare iCareFone on your Windows 10/8.1/8/7 run PC or a Mac.
Step 2: Connect your iPhone to your computer using a USB cable.
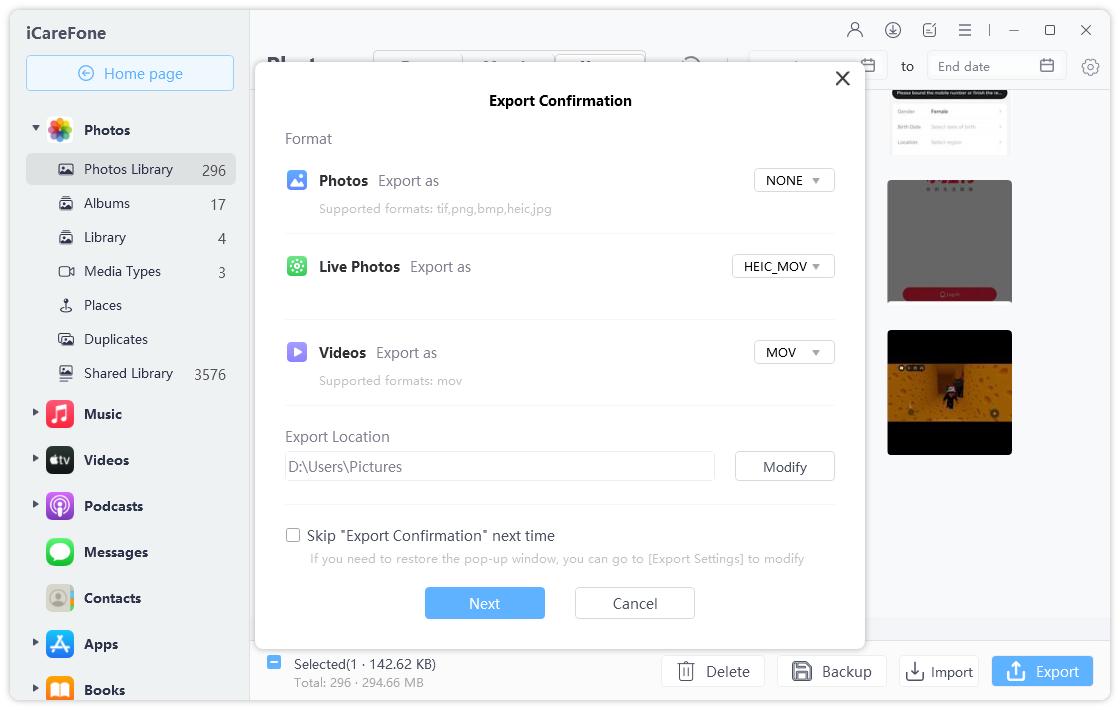
Step 3: The File Manager tab is the default tab of iCareFone. Click the File Manager tab on the home page and click Photos.

Step 4: Tenorshare iCareFone automatically detects all photos and sorts each according to its respective folder so that you can easily locate it. Browse then select the photos you wish to transfer, click the Export button and select a file location to save the photos. (The default location is the desktop.)
Way 2: Use USB Connection
Thinking of another alternative of how to transfer photos from iPhone to laptop through iTunes? You can transfer photos to your Mac or PC using a USB cable. On Windows, as long as iTunes is preinstalled, users can use one of either AutoPlay feature or Windows Files Explorer. On the Mac, users can transfer photos directly using the Photos app.
If you are Windows users:
To transfer photos on Windows using Windows File Explorer, follow the procedure below.
Step 1: Connect your iPhone to your computer using a USB cable.
Step 2: Hit Win + E on your keyboard and navigate to your iPhone under This PC/ My Computer.
Step 3: Right-click your iPhone and select Import pictures and videos.
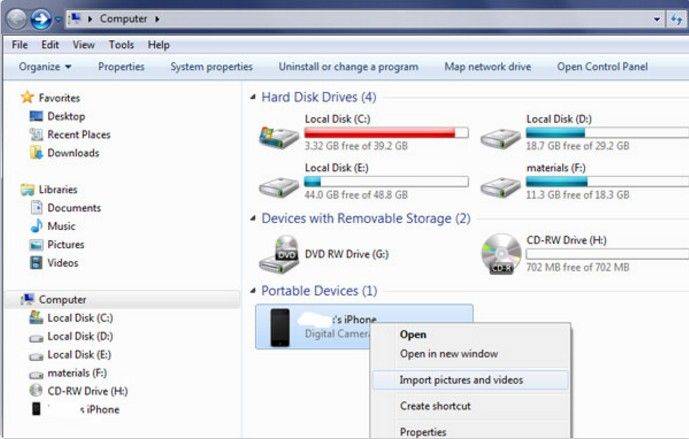
(Alternatively, click “Open device to view files” from the dialog box that will be automatically displayed. Then under This PC, click your iPhone > DCIM

Alternatively, you can use AutoPlay. Follow the procedure below.
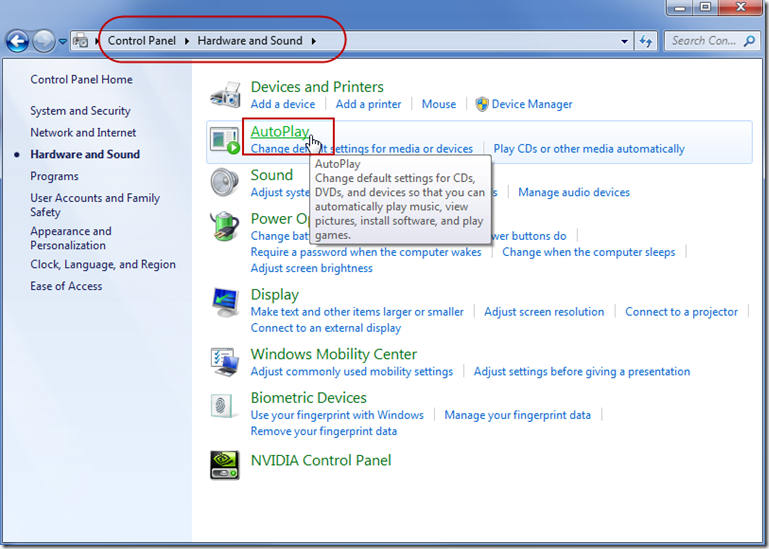
Step 1: To Enable AutoPlay, click the Start Button > Control Panel > Hardware and Sound > AutoPlay. Check the “Use AutoPlay for all media and devices” window checkbox. It is located in the top left corner of the interface and Click Save.
Step 2: Connect your iPhone to your computer using a USB cable and launch the Camera on your iPhone.
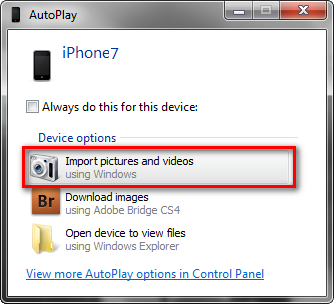
Step 3: The AutoPlay dialog box will be displayed automatically. Click the Import pictures and videos using Windows option.
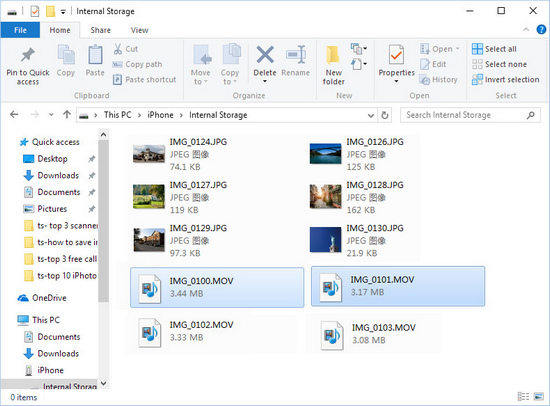
Step 4: Select the photos you wish to import and click Import.
If you are Mac users:
To transfer photos on the Mac using the Photos app, follow the procedure below.
Step 1: Connect your iPhone using a USB cable to your Mac. (Unlock your device by entering your passcode and tap Trust when prompted to do so.)
Step 2: Launch the Photos app if it doesn’t open automatically.
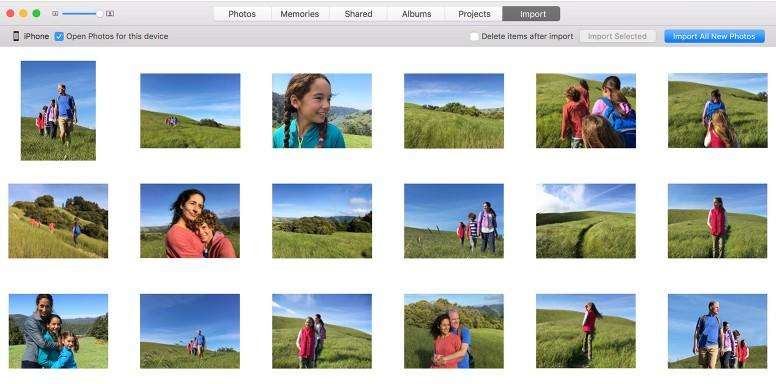
Step 3: Click Import located at the top of the Photos app tab.
Step 4: Select the ones you wish to import and click Import Selected.
Way 3: Use iCloud Photo Library
To use iCloud Photo Library, you’ll need to enable it on your iPhone then download them on their computers. Follow the procedure below.
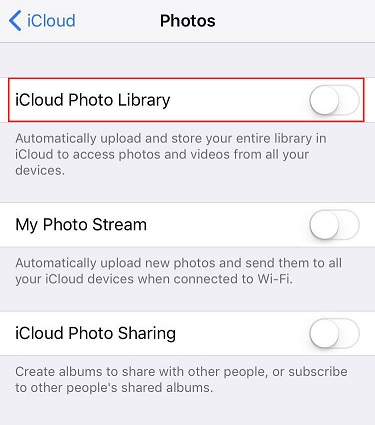
Step 1: Navigate to Settings > Photos & Camera and toggling on the iCloud Photo Library button to enable iCloud Photo Library on your iPhone.
Step 2: On Windows, Download iCloud for Windows install and run it by following the prompts. If you are using Mac, directly launch iCloud.
Step 3: Sign in to iCloud using the same Apple ID credentials you used to set up iCloud on your iPhone.
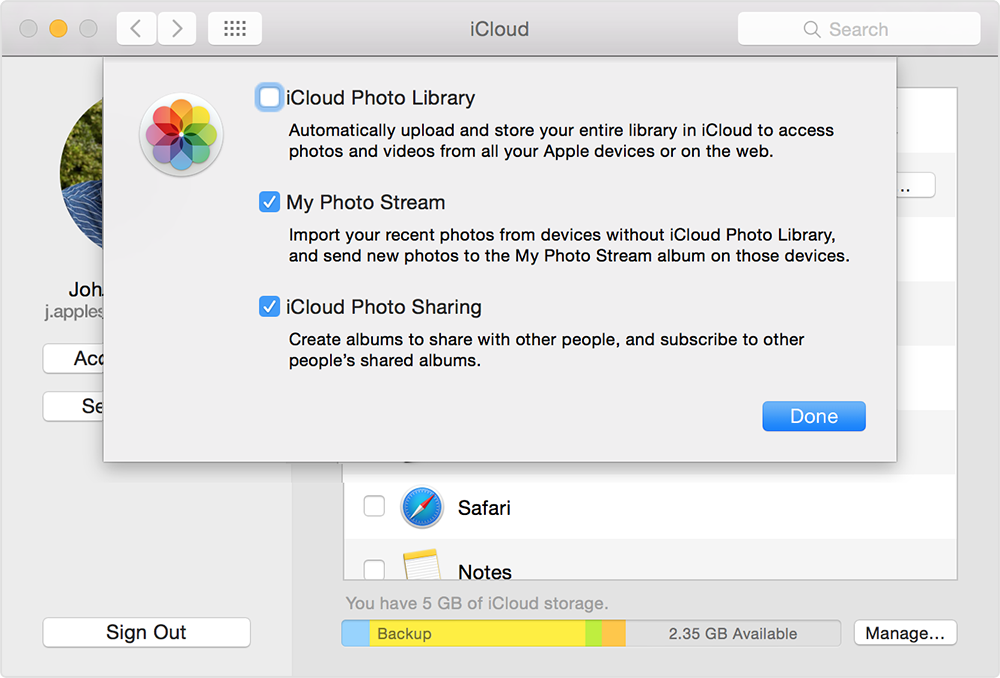
Step 4: Click Options and check the iCloud Photo Library checkbox plus any other options such as My Photo Stream, iCloud Photo Sharing etc. and click Done. All your photos will be synced to your computer.
Your synced photos are located in iCloud Photo under favorites which is accessed using File Explorer.
On the Mac, your photos will automatically appear in the Photos App.
Conclusion
While transferring photos via iTunes is simple, we recommend using Tenorshare iCareFone since it allows users to locate and transfer photos from all folders, it is user-friendly, allows selective preview and transfer of photos and supports iPhone 11/XR/X/8/8+/7/7 Plus/6s/6s/6/5S/SE.


Speak Your Mind
Leave a Comment
Create your review for Tenorshare articles

Tenorshare iCareFone
Best Free iPhone Transfer & iOS Backup Tool
Easily, without iTunes


