How to Transfer Photos from iPhone to PC Windows 10/11 - 5 Ways
"What's the best way to transfer photos from iPhone to PC Windows 10? I've tried a few methods, but they seem slow and sometimes my photos lose quality. Any tips for a safe and fast transfer?"
Losing your valuable photos can be a stressful experience. That’s why many people choose to keep a backup of their photos on their computer. If you own an iPhone and want to transfer iPhone photos to PC , you might be wondering how to do it.
In this article, I will show you how to transfer photos from iPhone to PC Windows 10/11. Whether you're using Windows 10 or the latest Windows 11, the methods for transferring iPhone photos remain the same, also for iPhone 16/17.
- Part 1. How to Transfer Photos from iPhone to PC Windows 10/11 [Safe & Fast]
- Part 2. How to Upload Pictures from iPhone to Windows 11/10 - iCloud
- Part 3. How to Transfer Pics from iPhone to PC Windows 10/11 - iTunes
- Part 4. How to Import Photos from iPhone to Windows 10/11 - File Explorer
- Part 5. How to Transfer Photos from iPhone to PC Windows 11/10 - Photos App
- Part 6. Which Is the Best Way to Transfer Photos from iPhone to PC Windows 10/11
Part 1. How to Transfer Photos from iPhone to PC Windows 10/11 [Safe & Fast]
Best for: Individuals looking for a quick and easy way to transfer entire photo albums from iPhone to PC with just one click.
With Tenorshare iCareFone, transferring photos, videos, music, and more from your iPhone to your PC is a breeze. This all-in-one iOS data management tool allows you to back up, transfer, and restore iOS data between devices and computers efficiently. Whether you’re running Windows 10 or 11, iCareFone is your go-to solution.
Why Choose Tenorshare iCareFone
- One-Click Photo Transfer: Easily transfer photos from iPhone to PC with just a single click, also for iPhone 16/17.
- Supports Multiple File Types: Work with photos, contacts, music, videos, messages, and more.
- User-Friendly Interface: The intuitive and easy-to-navigate interface.
- No Data Loss: Data will remain safe and intact during the transfer process.
- Compatibility: Supports the newest iOS 18 and Windows 11 releases.
How to Transfer Photos from iPhone to PC Windows 10/11
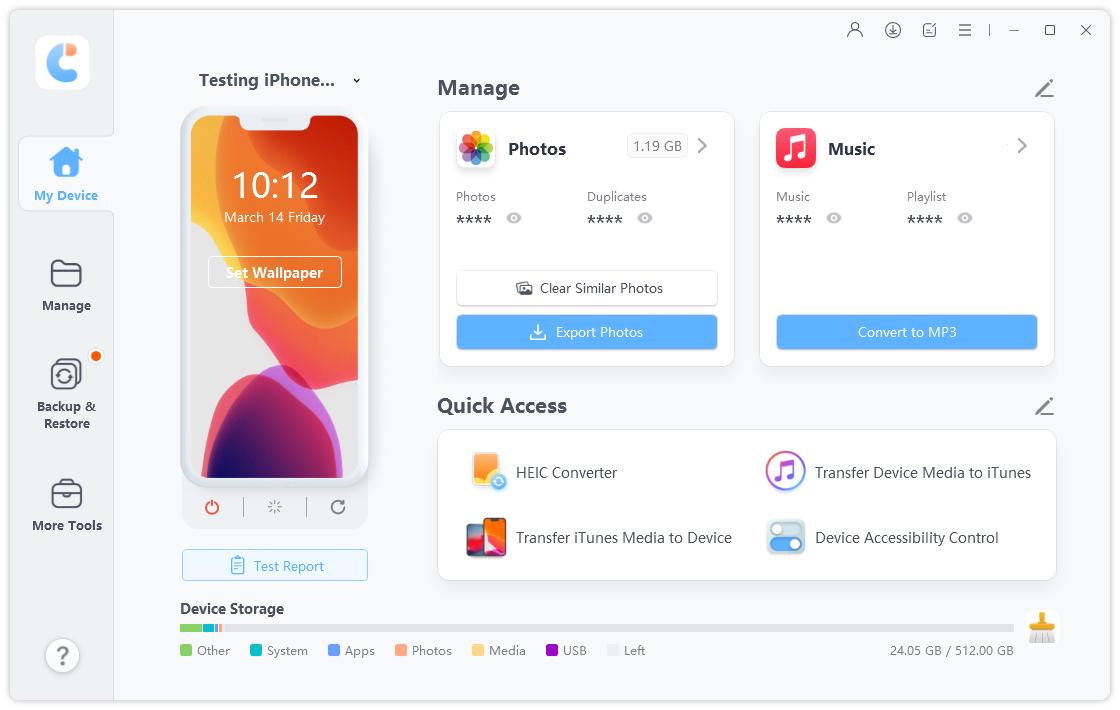
After downloading and installing Tenorshare iCareFone on your personal Windows 10/11 computer, you will need to connect your iPhone to the software.

Once the device has been properly connected, go to the main interface and choose "One-click Export Photos to PC" for a speedy beginning.

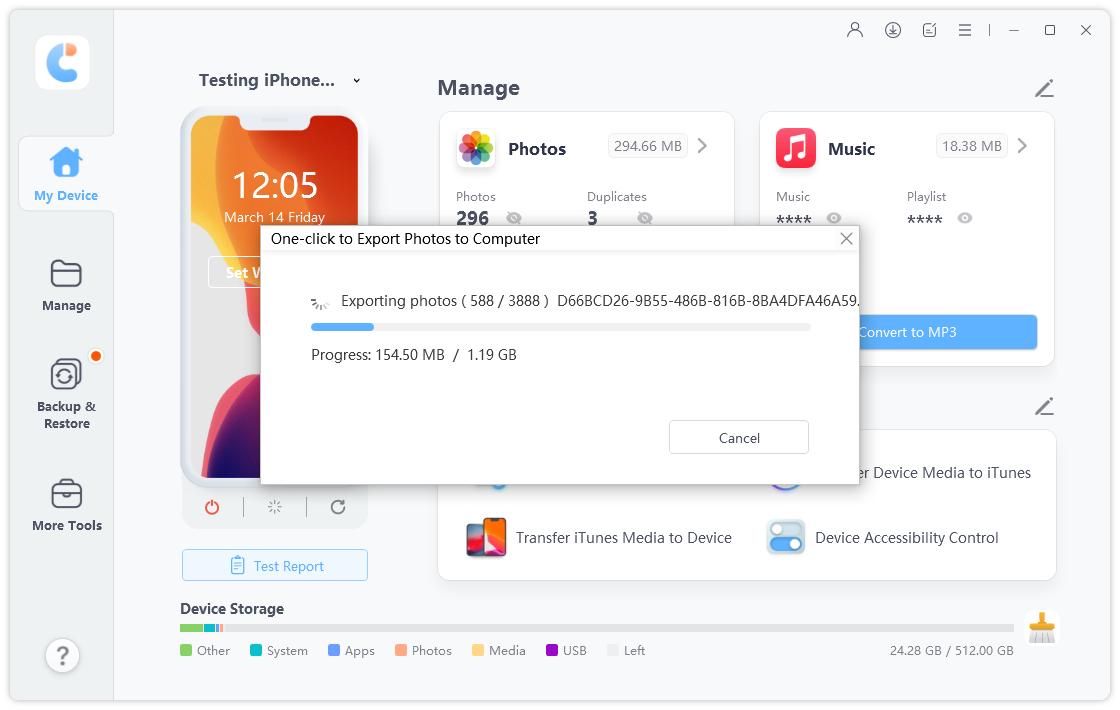
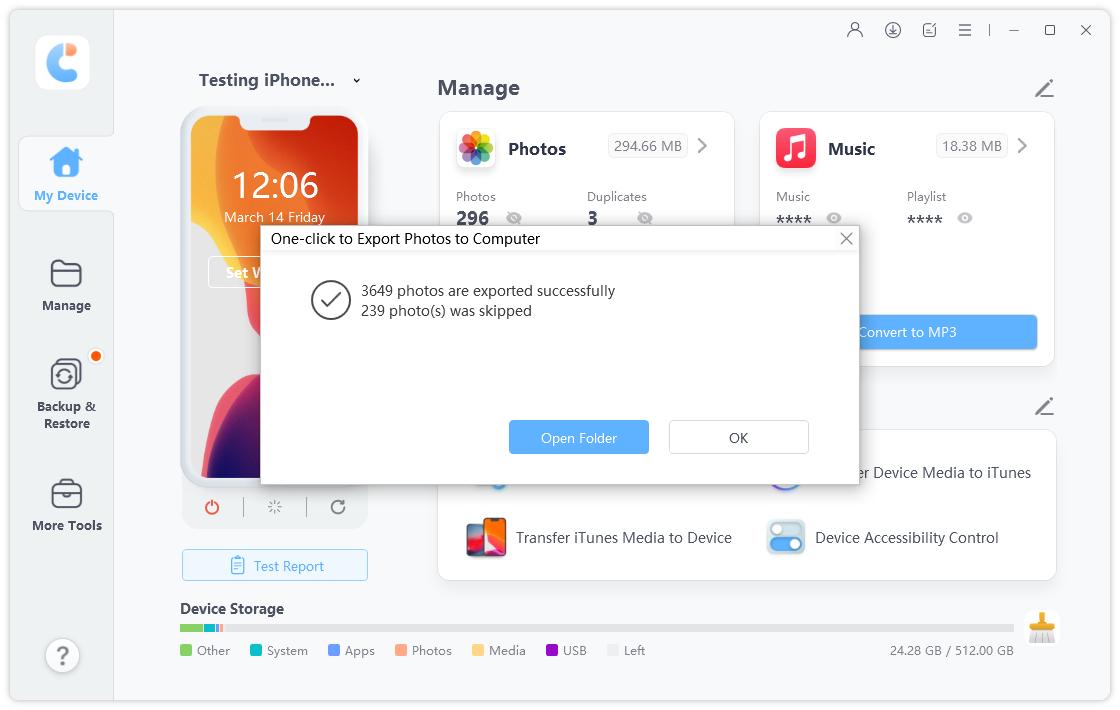
Once you begin the exporting process, all of your iPhone images, whether they were taken by your device or acquired from the internet, will be transferred to your PC Windows 10/11 automatically.

Part 2. How to Upload Pictures from iPhone to Windows 11/10 - iCloud
Best for: Those who don't mind managing limited cloud storage and prefer to synchronize their iPhone images to Windows via iCloud.
It's simple to upload and sync your iPhone images to a Windows 10/11 PC using iCloud. You can use iCloud to transfer iPhone photos to computer after uploading them to iCloud. Nevertheless, there are certain drawbacks to this strategy. It depends on iCloud's storage capacity, which is just 5 GB for free users.
Steps
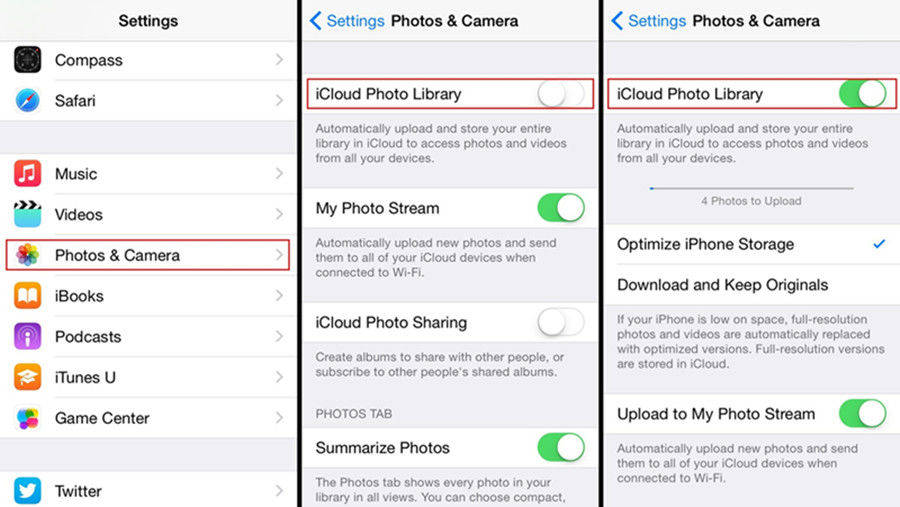
- Go to Settings > Photos and enable the iCloud Photo Library option. Check you have sufficient iCloud storage available for your photos to upload.
- Download and install the iCloud application from Apple’s website.
- Open the iCloud application and log in with the same iCloud account used on your iPhone.
- Click the “Options” button next to the Photos option. Make sure the “iCloud Photos Library” checkbox is selected. Choose a location on your PC where you want the synced photos to be saved.
- Once syncing is complete, your photos will be available in the specified folder on your Windows PC.
Pros:
- Convenient for users already using iCloud.
- Automatically syncs new photos as they are uploaded.
- Accessible from any device with iCloud access.
Cons:
- Free iCloud storage is limited to 5 GB.
- Can be slower due to the time needed to upload and sync photos.
- Requires the installation of iCloud software on your Windows PC.
Part 3. How to Transfer Pics from iPhone to PC Windows 10/11 - iTunes
Best for: People who want a complete photo-synching and transfer solution to a Windows PC and who like to manage their iOS media through iTunes.
You may effectively transfer your media files to a PC by synchronizing your iPhone with iTunes, which Apple provides. However, there are a few limitations to this method: synchronizing settings may overwrite existing data on your PC and it requires the most recent version of iTunes.
Steps
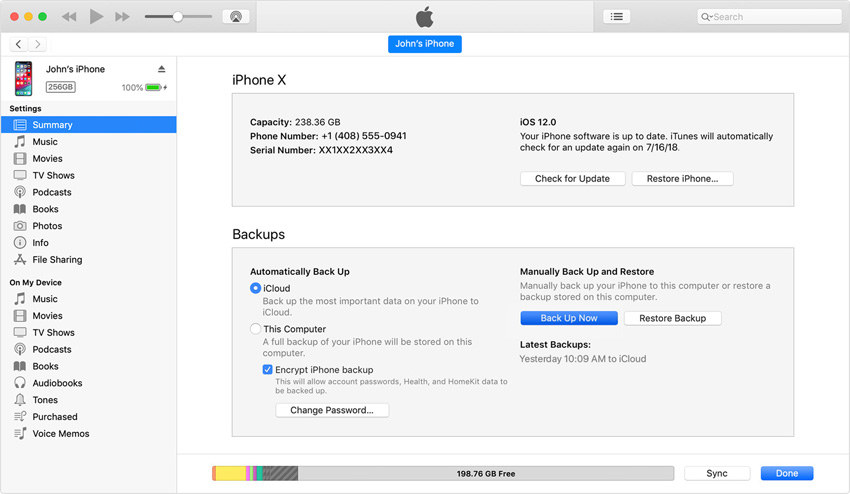
- Make sure you have the latest version of iTunes (12.5.1 or later). Download and install any updates if needed. Open iTunes on your PC.
- Use your iPhone’s USB cable to connect it to your PC. Unlock your iPhone and tap "Trust This Computer" if prompted.
- Click the device icon in the top bar of iTunes to access your iPhone’s settings. In the left sidebar, click on “Photos”.
- Check the box next to "Sync Photos" and select the folder or app from which to sync.
- Select "Sync all photos and albums". Optionally, check "Include Videos" to include videos in the sync.
- On your PC, click the “Start” menu, then select “Photos” to open the Photos app.
- In the Photos app, click “Import > From a USB device”. Choose your iPhone from the list and follow the on-screen instructions. Select the photos you want to import and choose where to save them. Allow a few moments for the import process to complete.
Pros:
- Integrates with other iOS management tasks.
- Can transfer multiple types of media.
- Make sure a full sync of selected content.
Cons:
- Requires iTunes 12.5.1 or later.
- Syncing settings might overwrite existing data.
- More steps compared to other transfer methods.
Part 4. How to Import Photos from iPhone to Windows 10/11 - File Explorer
Best for: Users who need a straightforward way to transfer photos from their iPhone to a Windows PC using built-in tools.
Using File Explorer, you can access the storage on your iPhone and manually copy your images using this method. There is one drawback to this strategy, though: your pictures and movies are only accessible through the DCIM (Digital Camera Images) folder. You won't be able to see or access other file kinds on your iPhone with this method.
Steps
- Use the Lightning-to-USB cable to connect your iPhone to your computer. This is the same cable you use to charge your iPhone.
- On your iPhone, you’ll be prompted to “Trust” or “Allow” the connection. Tap “Trust” to grant your computer access to your photos.
- On your PC, open File Explorer (Windows 10) or Windows Explorer (Windows 7). Under “This PC” (or “Computer”), your iPhone will appear as a connected device. Double-click to open it.
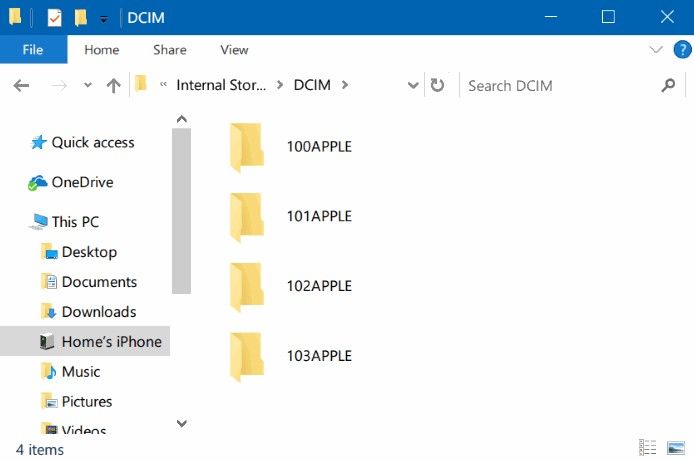
- Inside your iPhone’s storage, locate and double-click the “DCIM” folder. This is where all your photos and videos are stored.
- Open the “100APPLE” folder (or additional folders if you have many photos). You can now view your photos directly and get photos from iPhone to Windows PC. Simply drag and drop or copy and paste them to your desired location on your PC.
Pros:
- Direct access to photos and videos.
- Simple drag-and-drop functionality.
Cons:
- Only the DCIM folder is accessible.
- Lacks advanced features like album organization.
- Cannot access or transfer other types of files.
Part 5. How to Transfer Photos from iPhone to PC Windows 11/10 - Photos App
Best for: Users who prefer using the built-in Photos app on Windows to manage and transfer photos from their iPhone.
The Photos app in Windows is a built-in utility for managing and organizing images. While this method is simple, you must manually select the photos you wish to transfer, which can be time-consuming if you have a large number of images. The software does not include complex capabilities such as folder organization or batch renaming.
Steps
- Use a Lightning-to-USB cable to connect your iPhone to your Windows PC.
- Once connected, trust the computer on your iPhone, allowing access to your photos and videos.
- Launch the Photos app on your PC by selecting it from the Start menu.
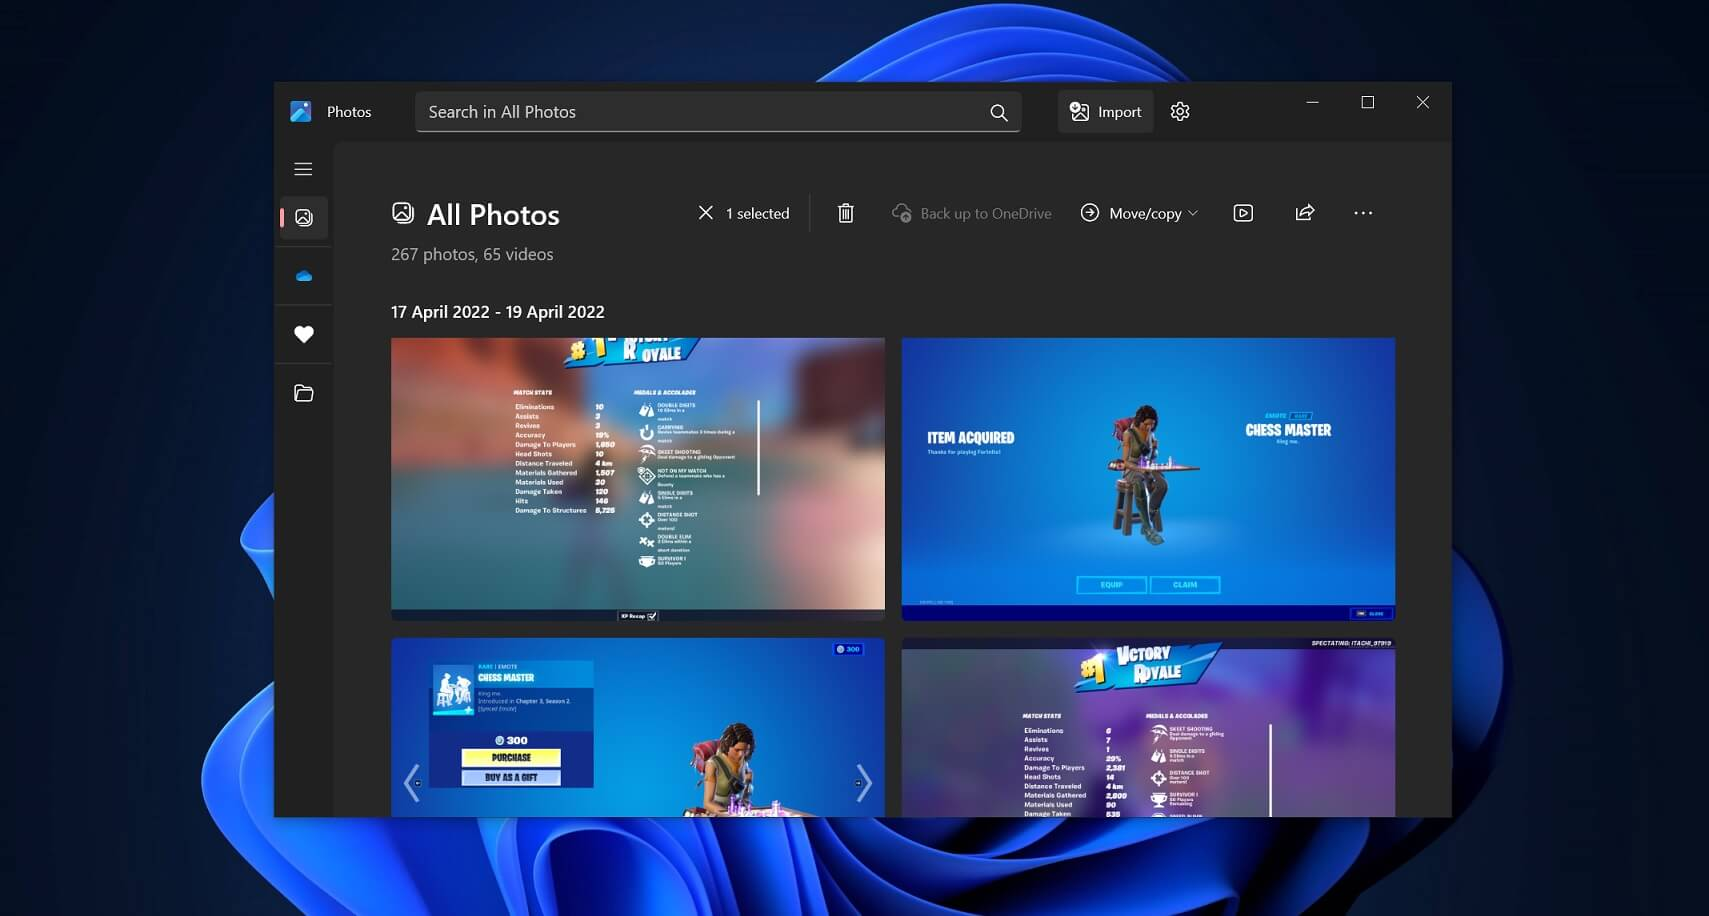
- In the app, navigate to the top-right corner and click the Import icon.
- Choose your iPhone from the list of connected devices. The app will display a thumbnail view of your photos.
- Select the photos you wish to import, click Continue, and wait for the transfer to complete.
Pros:
- Easy and straightforward interface.
- Allows for rapid photo transmission.
Cons:
- Manually selecting photos might be time-consuming.
- Transfers are limited to photos and videos.
- Lacks advanced organizational features.
Part 6. Which Is the Best Way to Transfer Photos from iPhone to PC Windows 10/11
| Method | Ease of Use | Speed | File Types Supported | Recommends |
|---|---|---|---|---|
| Tenorshare iCareFone | Very Easy | Fast | Photos, Videos, Music, Contacts, Messages, etc. | ⭐ ⭐ ⭐ ⭐ ⭐ |
| iCloud | Moderate | Depends on Internet Speed | Photos, Videos | ⭐ ⭐ ⭐ |
| iTunes | Moderate | Moderate | Photos, Videos | ⭐ ⭐ |
| File Explorer | Moderate | Fast | Photos, Videos | ⭐ ⭐ |
| Photos App (Windows) | Easy | Moderate | Photos, Videos | ⭐ ⭐ ⭐ |
Among the five methods how to upload pictures from iPhone to Windows 11, Tenorshare iCareFone stands out as the best way to transfer photos from your iPhone to a Windows PC. It offers the most comprehensive features, including support for multiple file types beyond just photos and videos. Its user-friendly interface and one-click transfer feature make the process quick and efficient.
Conclusion
When considering how to transfer photos from iPhone to PC Windows 10/11, it's essential to choose a method that is not only reliable but also efficient. While options like iCloud, iTunes, File Explorer, and the Windows Photos app provide various ways to get the job done, Tenorshare iCareFone stands out as the most comprehensive solution. For a fast, secure, and user-friendly experience, Tenorshare iCareFone is highly recommended.
- Free backup everything you need on iPhone/iPad/iPod
- Transfer music, photos, videos, contacts, SMS without limitation
- Selectively restore files without erasing current data
- 1-Click to transfer photos from iPhone to PC/Mac
- Sopport the latest iOS 26 and iPhone 16
Speak Your Mind
Leave a Comment
Create your review for Tenorshare articles

Tenorshare iCareFone
Best Free iPhone Transfer & iOS Backup Tool
Easily, without iTunes
