

iCareFone - Free iOS Backup tool & Easy Data Manager
Backup/Transfer/Restore/Manage iOS Data with Simple Clicks
Backup/Manage iOS Data Easily
Backup/Manage iOS Data in Clicks
Help! I've got hundreds of photos on my iPhone that I need to move to my PC. What's the easiest way to transfer photos from iPhone to PC without losing quality? --From Reddit
Want to back up your iPhone photos or just free up some space? Whether you're using Windows 10 or 11, transferring photos from your iPhone to your PC is easier than you think. In this guide, we’ll walk you through several hassle-free methods—USB cable, iCloud, and even third-party tools—so you can choose the one that works best for you.
Before diving into the specific tools, here are a few key factors to consider when choosing the right photo-sharing solution for your needs.
Choose solutions that are quick to set up and don’t require frequent logins. Ideally, they should connect your phone and computer in just a few clicks.
Prioritize options that avoid cloud storage and offer end-to-end encryption to protect your privacy and personal content.
Look for features like bidirectional transfers and cross-platform support (e.g., iOS to Windows) so you don’t need multiple apps.
Opt for wireless solutions with a simple, intuitive interface. This way, you won’t have to rely on cables or relearn steps every time.
iCloud is Apple’s built-in cloud service that helps you sync and back up your data—including photos, messages, and contacts—across all your devices. It’s a convenient option if your photos are already synced with iCloud, making it easy to access and download them to your PC. Every Apple ID comes with 5GB of free iCloud storage, but you’ll need to upgrade if you require more space. How to get icloud storage for free >>
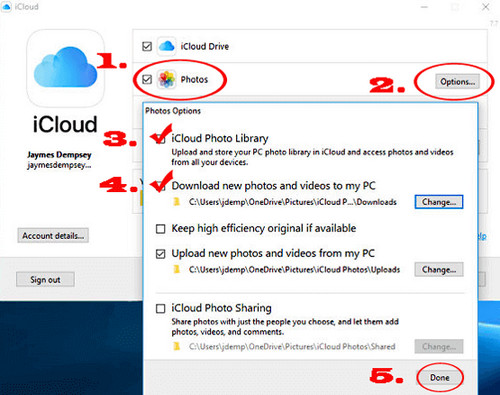
Once this is set up, new photos you take on your iPhone will automatically download to your PC.
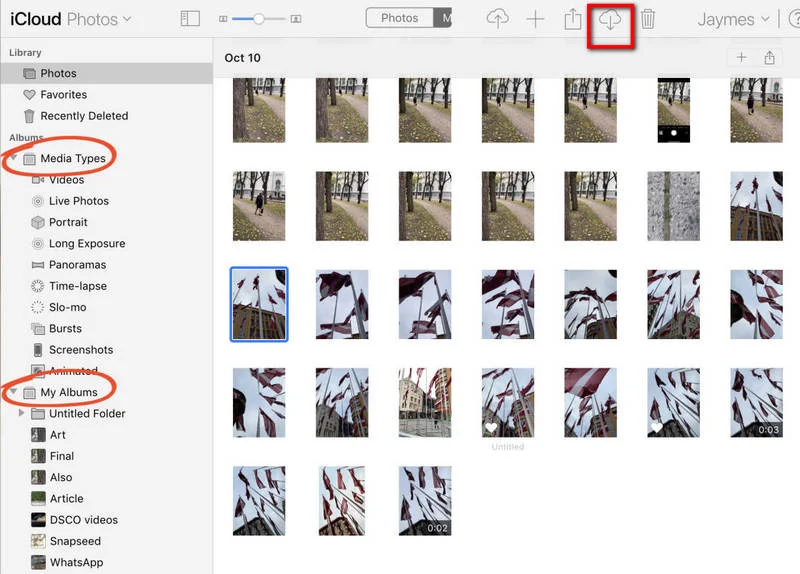
If you don’t want to install iCloud for Windows, you can simply go to iCloud.com on your PC. After signing in with your Apple ID, click on Photos in the sidebar. From there, you can manually select and download the images you want. To download multiple photos at once, hold down Ctrl while clicking on each image.
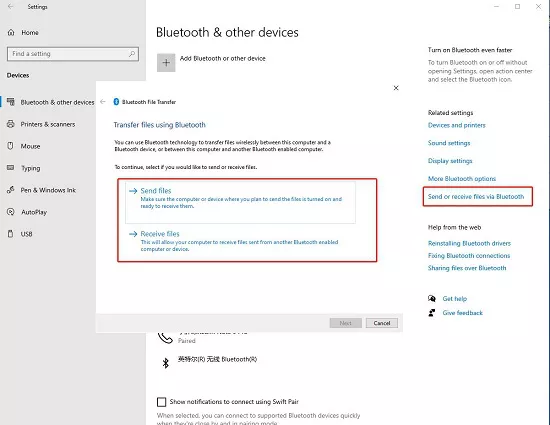
Bluetooth offers a quick way to transfer photos between devices, especially useful for small amounts of data. It's convenient for short-range transfers but can be slow for large volumes of photos. Ensure both devices support Bluetooth and are within range for successful transfers.
Emailing photos from iPhone to PC is a versatile method that works with any device capable of receiving emails. It's suitable for individual photos or small batches but can be cumbersome for large numbers of images due to attachment limits. Make sure you have an email account set up on your iPhone and know the recipient's email address for successful transfers.

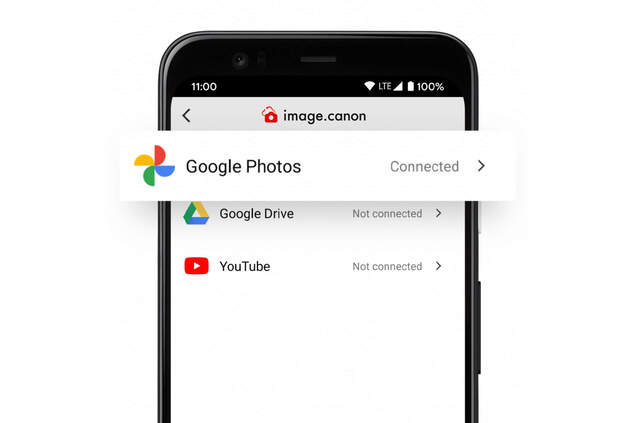
Another easy way to transfer iPhone photos to your PC is by using Google Photos, especially if you already use Google services. Just install the Google Photos app on your iPhone, back up your photos to the cloud, and then access them on your PC via the Google Photos website.
This method is great for wireless transfers and long-term storage. However, uploading and downloading large photo libraries may take time depending on your internet speed. Also, be aware that Google Photos may compress your images if you're not using the "Original quality" setting, unless you have enough Google Drive storage.
Dropbox is another convenient cloud-based option for transferring photos from your iPhone to your PC. By uploading your photos to Dropbox through the mobile app, you can easily access and download them on your computer using the Dropbox website or desktop app.
This method is ideal for users who already use Dropbox for file management. However, like other cloud services, it depends on your internet connection and available storage space. Also, free accounts have limited storage, so large photo libraries may require an upgrade to a paid plan.

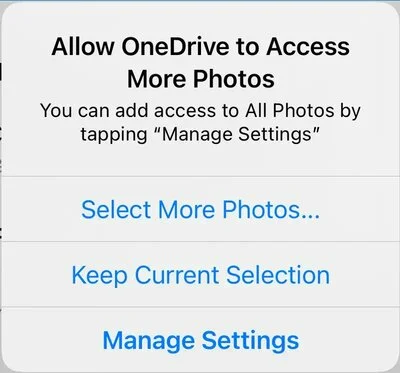
OneDrive, Microsoft's cloud storage service, offers an easy way to transfer photos from your iPhone to your PC — especially if you're already using a Windows computer. By uploading your iPhone photos to OneDrive using the mobile app, you can seamlessly access and download them on your PC without using cables or third-party tools.
This method is great for users who want automatic backups or already use Microsoft 365. Just keep in mind that the free storage space is limited (5GB), and upload/download speeds depend on your internet connection.
USB transfers provide a fast and reliable method for moving photos, especially beneficial for large quantities of high-resolution images. They require a USB cable and compatible ports on both devices. Follow the methods below to import photos from iPhone to PC.
The Apple Devices app facilitates easy photo transfer between iOS devices and computers. It's integrated into macOS and Windows systems, offering a straightforward interface for managing and transferring photos. Ensure you have the latest version of iTunes installed on your computer and trust the computer option enabled on your iPhone for successful transfers.

Using File Explorer on Windows or Finder on macOS allows for direct access to connected iOS devices, enabling users to drag and drop photos onto their computer. This method requires a USB cable and a compatible port on your computer. Ensure your iPhone is unlocked and connected to the computer during the transfer process. Use Free Download Best File Explorers for iPhone.


For a simple and quick way to transfer photos from iPhone to your PC or Mac, Tenorshare iCareFone is a great choice. If you're tired of the complicated steps, unstable connections, or quality loss when transferring iPhone photos to your PC, you're not alone. Many users find it frustrating that their high-quality photos end up looking compressed or blurry after transfer. With iCareFone, you can transfer original-quality photos from iPhone to PC without iCloud, iTunes, or any compression. Whether you're moving a few snapshots or an entire album, iCareFone ensures that your images remain crystal clear — exactly as they were taken.


After downloading and installing Tenorshare iCareFone on your personal computer or Mac, you will need to connect your device to the software.
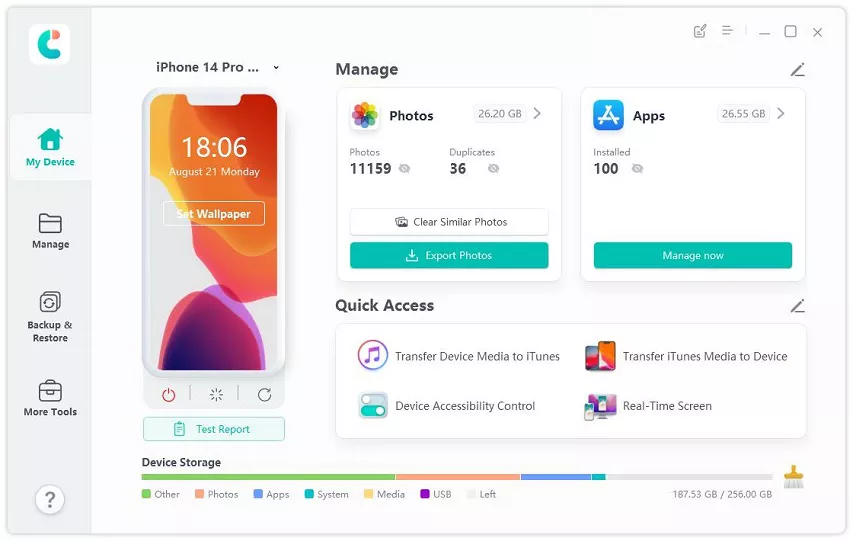
Once the device has been properly connected, go to the main interface and choose "One-click Export Photos to PC" for a speedy beginning.

Once you begin the exporting process, all of your images, whether they were taken by your device or acquired from the internet, will be transferred to your computer automatically.

The easiest way to transfer photos from iPhone to PC is by using Tenorshare iCareFone. It allows for quick, lossless photo transfers with just one click, ensuring your photos remain in their original quality without complicated steps.
If your iPhone isn't showing up on your PC, it could be due to several reasons: outdated drivers, faulty USB cable, incorrect connection settings (such as "Trust This Device"), or a problem with iTunes or Windows itself. Try restarting both your iPhone and PC, updating your drivers, and ensuring you select "Trust" when prompted on your iPhone.
Google no longer offers unlimited free storage for Google Photos. As of June 1, 2021, new photos and videos you upload will count towards the 15GB of free storage provided with each Google account.
If you're heavily integrated into the Apple ecosystem, iCloud is a seamless choice for syncing photos across Apple devices. However, if you want cross-platform access (e.g., on Android or Windows), Google Photos offers more flexibility, though it requires managing storage limits.
Transferring photos from iPhone to PC can be achieved through various methods, each with its own set of advantages and considerations. Wireless options like iCloud, Bluetooth, and email offer convenience and flexibility but depend on an internet connection. USB transfers, whether through the Apple Devices app or File Explorer, provide a fast and reliable alternative, especially for large datasets.
Tenorshare iCareFone stands out as a convenient solution for those looking to transfer photos with just one click. It simplifies the process, ensuring that your photos are transferred quickly and securely without compromising on data. Whether you're managing a large collection of photos or simply need to back them up, iCareFone provides a user-friendly experience.

Tenorshare iCareFone - Best iOS Backup Tool and File Manager


then write your review
Leave a Comment
Create your review for Tenorshare articles

Best Free iPhone Transfer & iOS Backup Tool
Easily, without iTunesiCareFone - Free iOS Backup tool & Easy Data Manager
Backup/Transfer/Restore/Manage iOS Data with Simple Clicks
Backup/Manage iOS Data Easily
Backup/Manage iOS Data in Clicks
By Jenefey Aaron
2026-06-08 / iOS File Transfer