

ReiBoot - No.1 Free iOS System Repair Software
Fix 150+ iOS Issues without Data Loss & Safely iOS 27 Upgrade/Downgrade
ReiBoot: No.1 iOS Repair Tool
Fix 150+ iOS Issues, No Data Loss
Every machine is vulnerable to software & hardware issues, Macbooks are too. One common issue Mac users face is “MacBook Pro Black lines bottom screen”. Many users have reported that the MacBook is having screen issues - some show black lines at the bottom of the screen, and some have reported gray lines, which get intense with the usage. After thorough research and reading technical articles and forums, we have gathered some solutions to help you resolve this issue on your Macbook.
Before we get into the solution part of this guide, let’s discuss some potential causes for black lines on the MacBook Pro so it’s easier for you to diagnose the problem on your MacBook machine rightly.
1. Heating Issues
One of the most common causes of the black line at the bottom of the MacBook is heating issues. After turning on your MacBook, these lines might get stronger and more prominent as soon as you perform the intensive tasks.
Probably, there’s dust accumulated on the fan, preventing the airflow inside the machine and eventually causing the “black lines MacBook Pro”. Otherwise, the heating issue can also be related to the T-Con board, a known fault in Macbook machines launched after 2016.
2. Physical Damage
Laptop screens are so fragile that even a slight hit on its edge can immediately leave a prominent crack that can damage the pixels on the screen. The screen might run smoothly at the time of damage but may develop issues over the period.
3. Software Issues
Besides the hardware and physical damage, the software updates, bugs and glitches can also cause the “MacBook Pro black lines bottom screen” issue. These can be easily resolved with some basic troubleshooting methods.
4. Graphic Card
Similar to Windows laptops, MacBook also takes the display’s output from the integrated Graphic card. If it’s not working properly due to corrupt drivers, software issues or physical damage, your Macbook display will show black lines or a black screen.
As long as you haven’t accidentally damaged your MacBook screen, the “MacBook Pro black lines bottom screen” issue can be resolved the following methods:
The best way to diagnose the “black lines MacBook Pro” problem on MacBook machines is by running the inbuilt Apple Diagnostic test, which performs a system scan and fixes minor bugs and glitches.
Here’s how to run Apple diagnostic test on Macbook:
Press the Command + D to run the Diagnostic test.

A progress bar will show up once you run the test. It’ll show the results at the end of the test if it finds any issues on the system and will fix it automatically. Otherwise, move to the next solution of this guide.
"MacBook Pro black lines" can appear on the screen due to a glitch. In this situation, a simple restart on your Mac should fix it. It might seem a silly thing to do, but it resolves minor macOS-related issues. Rebooting your device configures the settings on the system and refreshes it.
Here are the steps to Restart Mac:
1. Navigate to the top left corner of the screen, and click on Apple Logo.
2. Select the Restart option and wait for it fully restarts.

If the above-mentioned basic solutions didn’t fix the “MacBook Pro black lines bottom screen”, try resolving it with the Tenorshare ReiBoot tool - a powerful software that offers a one-click solution to fix major and minor issues on Mac, iPad and iPhone.
Tenorshare ReiBoot will fix the “black lines MacBook Pro” within a few minutes by eliminating the bugs and glitches on the system. It can also fix the Apple logo, Black screens, frozen screens and other OS-related issues.


Download and install ReiBoot on your Mac. Launch ReiBoot and connect your Mac devices to a stable network.

Click on the "Repair Operating System" option on the main interface.

In the next window, choose the Mac device model which needs to be repaired and follow the instructions step by step.

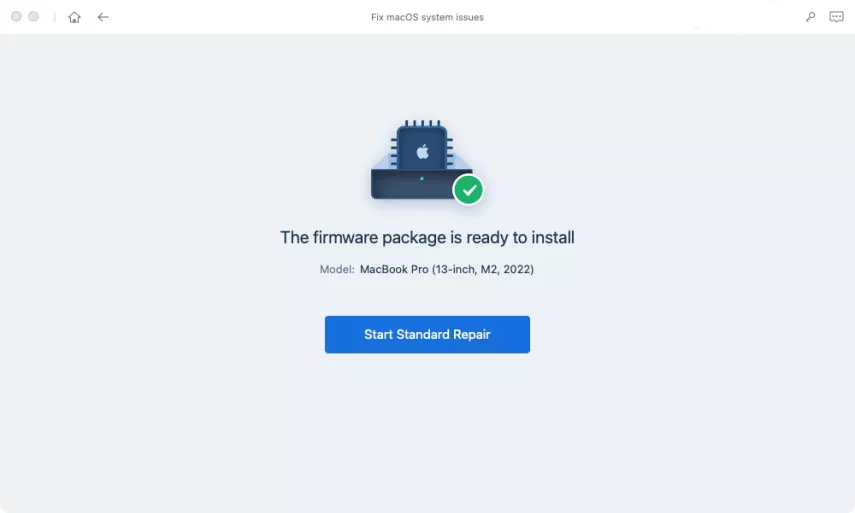
After you successfully enter into DFU mode, click "Download" to download firmware package.

Once the firmware package is downloaded, click on the "Start Standard Repair" button.
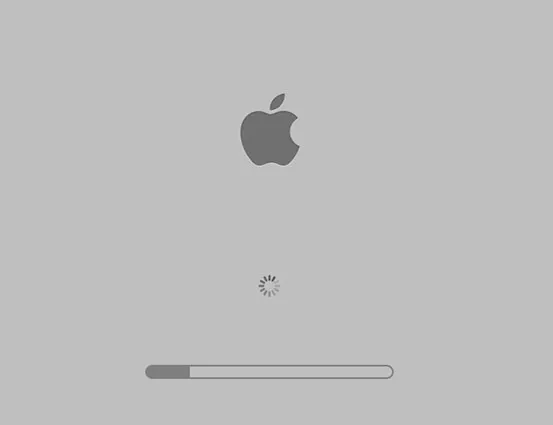
Wait for ReiBoot to repair your macOS system. This process may take a few minutes. After the repair is complete, your Mac will automatically restart, and the MacBook Pro black lines bottom screen issue should be fixed.

If you’ve connected an external monitor to your MacBook, ensure the cable is connected correctly on both ends. Loose cables can disrupt the current flow to the monitor, causing black-gray or black lines on the screen.
It’s also possible that the display cable of your MacBook can be loosened. Get it checked or do it by yourself at home if you’re good at it.
Sometimes, a malware attack can also cause weird issues on the computer - no matter how good an antivirus program you’re using. Safe Mode on MacBook allows you to boot with limited resources, which can help you identify if there’s malware causing the “MacBook Pro black lines bottom screen” issue.
Here’s how to boot MacBook in Safe Mode:
Now log into your Mac, and you should see the Safe Mode words on the screen.
MacBook comes with dual Video Cards onboard and switches in between depending on how much performance you need. It is certainly converting the battery juice to make it last more. There’s a possibility that switching between the GPU might be causing the “black lines MacBook Pro”. You can turn off this feature to see if it fixes the issue.
Here are steps to disable GPU switching on Mac:
Step 1: Go to the Apple Menu >> select System Preference >> choose Energy control panel.
Step 2: Uncheck the Mark for Automatic Graphics Switching on the top left corner of the screen.
Step 3: Close the System Preference window and restart your Mac to see if the black lines on the bottom have disappeared from the screen.

The bugs or glitches in the MacOS system can also cause “MacBook Pro black lines bottom screen”. The best way to eliminate them and get them fixed is by updating the MacOS. If you’ve not updated the latest software updates on your Mac, it’s time to do so. Here’s how to update your macOS system:
1. Navigate to the Apple Menu >> System Preferences >> click on Software Updates.
2. Click on Upgrade Now if newer updates are available.

SMC, System Management Control, manages the video switching, thermal and other hardware-related controls on the MacBook. The PRAM (Parameter Random Access Memory) stores the personalized settings such as MacBook resolution and other settings.
Corrupt files in the SMC or PRAM can disrupt the normal functioning of SMC and PRAM, causing a “MacBook Pro black line bottom screen” issue. Try resetting them, and see if the issue is fixed.
Steps to reset SMC on MacBook:
Steps to reset PRAM on MacBook:
To avoid the “MacBook Pro black lines bottom screen” issue from happening again, there are some tips that you can keep in mind. Here are some useful tips you should learn:
1. Make sure to close the lid carefully, as closing it forcefully can cause pressure on the screen, leading to black lines or other display-related issues. Be gentle and avoid slamming it shut.
2. Keep your Macbook’s display clean by regularly cleaning it thoroughly with a microfiber cloth. This will certainly prevent dust particles from accumulating on the surface area of Mac’s display.
3. Use a proactive case to help protect your MacBook from physical damage to the display when carrying it to your office or while traveling.
4. Don’t let your MacBook overheat by using it in a harsh environment. Using it in direct sunlight can impact Mac’s temperature. Also, turn on the “Automatic Graphics switching” to avoid always using it on high performance.
“MacBook Pro black lines bottom screen” is a common issue among Macbooks. It can occur for several reasons, and software issues mainly cause it unless the display is physically damaged.
In this guide, we discussed how to “MacBook Pro black lines bottom screen” with the top 8 methods. However, if you don’t want to go through all of them. Tenorshare ReiBoot is an in-one package to resolve macOS-related issues with a one-click process.

Tenorshare ReiBoot - Fix iOS Issues


then write your review
Leave a Comment
Create your review for Tenorshare articles

ReiBoot - No.1 Free iOS System Repair Software
Fix 150+ iOS Issues without Data Loss & Safely iOS 27 Upgrade/Downgrade
ReiBoot: No.1 iOS Repair Tool
Fix 150+ iOS Issues, No Data Loss
By Sophie Green
2026-06-17 / Mac OS