Step-by-Step Guide on How to Boot Mac Into Recovery Mode
"my MacBook Pro will not boot in recovery mode, and or internet RM. I'm running on OS X El Capitan and core 2 duo, I've reinstalled mac OS X, I have no idea what to do."
While there is usually slim to zero chance of your Mac getting any issues, sometimes it does get infected and will not work the way it is supposed to. Fortunately, you can boot into recovery Mac and fix all the troublesome things on your Mac by yourself. The recovery mode has all the tools you need to get rid of any kind of issues on your machine.
Your Mac comes with multiple recovery modes and it is important that you know how to boot your Mac into various modes of recovery. The following guide aims to help you with that by teaching you how you can boot your Mac into various recovery modes.
- Part 1. How to Boot Mac In Recovery Mode?
- Part 2. How to Boot Mac in Internet Recovery Mode?
- Part 3. How to Boot Into Recovery Mac with Installation Disk/Recovery DVD?
- Part 4: How to Boot Mac into Recovery Mode with Local Recovery?
- Part 5: How to Boot Mac into Recovery Mode from Time Machine?
Part 1. How to Boot Mac In Recovery Mode?
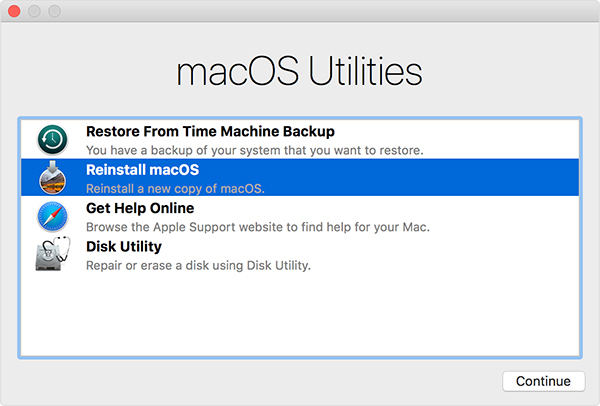
The standard recovery mode on your Mac is just called the recovery mode and it has all the basic utilities for formatting or reinstalling a new version of macOS on your Mac. This mode does not require you to be connected to the Internet as it loads-up locally on your machine.
The following shows how to boot into recovery mode Mac (the standard recovery mode):
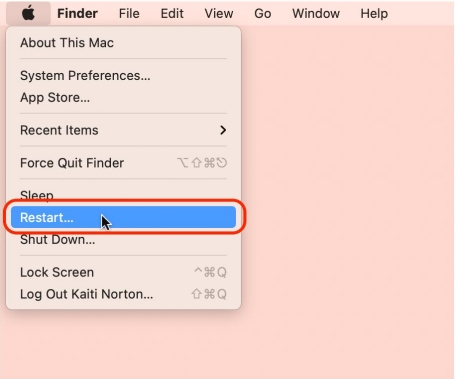
Step 1. Click on the Apple logo at the top left corner of your screen and select the option that says Restart. It will restart your Mac.

Step 2. When your Mac boots-up and you hear the startup chime, immediately press the Command + R keys simultaneously on your Mac's keyboard. An external keyboard may not work.
Step 3. Your Mac will start loading the recovery mode and you will soon be in the recovery mode on your Mac.

That is how you reboot your Mac into the standard recovery mode. When you are done with your tasks in the recovery, you may reboot your Mac so it boots-up normally.
Part 2. How to Boot Mac in Internet Recovery Mode?
There is one more recovery mode for your Mac that utilizes your Internet connection. It is called the Internet recovery mode and you can reboot your Mac into the same to format or install a fresh version of macOS on your machine.
The reason you may want to reboot into the Internet recovery mode and not the standard recovery mode is the former one boots-up even when your disk is corrupted, and you are unable to get into the standard recovery mode.
The following is how you boot Mac in recovery mode that uses your Internet connection:
Step 1. Click on the Apple logo at the top left corner of your screen and select Restart to restart your Mac.
Step 2. When you hear the boot chime on your Mac, press the Command + Option + R keys together on your keyboard.
Step 3. A globe icon will appear on your screen indicating your Mac is being booted, into the Internet recovery mode.

Once you are in the recovery mode, you can use it to perform your tasks. Again, reboot your Mac if you want to exit the recovery and you will be back to the normal Mac screen.
Part 3. How to boot Into Recovery Mac with Installation Disk/Recovery DVD?
While it has been a long time since Apple dropped CD/DVD drives on its Macs, there are still some users who have the old machines. If you are one of those users that has a Mac with a CD/DVD drive, this section will teach you how you can reboot your Mac into the recovery mode.

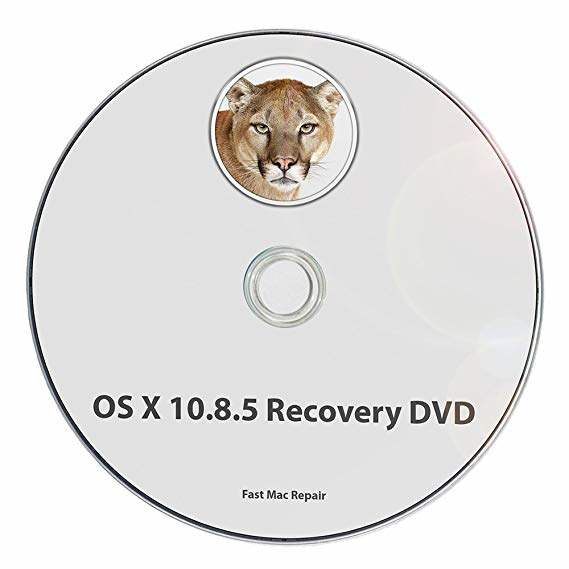
Your Mac has likely come with a grey DVD that should help you boot your machine into the recovery mode. Following is how you use the DVD on your machine:
Step 1. Insert the grey DVD into the CD/DVD drive of your Mac.
Step 2. Use the standard procedure to reboot your Mac.
Step 3. When your Mac plays the startup chime, press and hold down the C button on your keyboard to get into the recovery mode.
Your Mac should boot into the recovery mode using your DVD.
Part 4: How to Boot Mac into Recovery Mode with Local Recovery?
Local recovery, as the name suggests, loads locally from your Mac and the following shows how you can reboot into the same on your machine.
Step 1. Restart your Mac using the standard restart procedure.
Step 2. When you hear the boot chime, press and hold the Command + R keys together.
Step 3. The local recovery will load and be available to use on your screen.
Part 5: How to Boot Mac into Recovery Mode from Time Machine?
Time Machine also lets you boot your Mac into the recovery mode and the following shows how to do it.
Step 1. Restart your Mac as you would normally do.
Step 2. When you hear the boot chime, press and hold down the Option key on your keyboard.
Step 3. Insert your Time Machine drive into your Mac.
Step 4. Select your drive on your screen to reboot into the recovery mode.
Your Mac should now be in recovery mode, thanks to Time Machine.
If the above methods are performed carefully, you will not suffer any data loss. However, if things have gone wrong and you have lost your data on your Mac, you need to use a data recovery software to recover your data as soon as possible. Tenorshare 4DDiG for Mac Data Recovery is one of the great data recovery software
You may also want to know How to Fix Mac Recovery Mode Not Working?
Conclusion
Recovery mode is one of the powerful modes you can use to troubleshoot issues on your Mac. The above guide shows how you can get your Mac into various modes, so you can use these modes and fix any and all the issues on your machine.
- Recover data deleted, formatted or lost on Mac;
- Restore files from hard drive and external storage devices;
- Recover data from failed/crashed/dead MacBook;
- Fully supported latest macOS 10.15 Catalina;
Speak Your Mind
Leave a Comment
Create your review for Tenorshare articles


