[Solved] How to Fix iOS 13 iTunes Photo Sync Problem
Most of us have installed iOS 13 on their iPhone/iPad in order to get a taste of new features that this Apple’s latest software update brings along with it. Unfortunately, the new software update isn’t free of issues. Recently, some users reported that after iOS 13 update, whenever they do iTunes sync of their iPhone, the Photos library gets filled with duplicates of most. Well, there is a doubt that it’s quite maddening to encounter such a problem on your device. The good news is that there are several solutions available to fix the iTunes photo sync problem without much hassle.
- Part 1: Tips to Fix iTunes Photo Sync Problem on iPhone after iOS 13 Update
- Part 2: How to Sync Photos to iPhone without iTunes in iOS 13.1.3/13.1/13
Part 1: Tips to Fix iTunes Photo Sync Problem on iPhone after iOS 13 Update
Don’t worry if you’ve updated your iPhone and encounter the issue iOS 13 photos sync through iTunes causes duplicate photos. Just try the following tips to get your problem fixed.
- Tip 1: Restart Your Computer
- Tip 2: Update iTunes
- Tip 3: Uninstall and then Reinstall iTunes
- Tip 4: Restart iPhone
- Tip 5: Repair iTunes Using Free iTunes Repair Tool
Tip 1: Restart Your Computer
Before you proceed with other tips, you should try to restart your computer. Sometimes, performing a simple restart of the system helps to fix various iTunes sync related problems. In fact, it is one of the most basic troubleshooting steps one should try to resolve the problem like you’re facing now.
Tip 2: Update iTunes
The next thing you can try is to update iTunes. Most of the times, outdated iTunes version is the main culprit behind experiencing such kind of issues. So, check if your iTunes is updated to the latest version and if not, then update it to fix the problem.
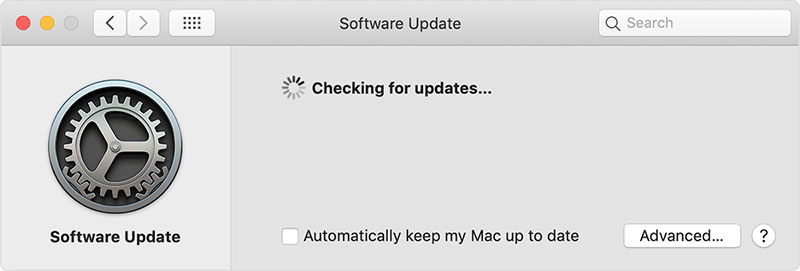
Here’s how you can update iTunes on Mac
Step 1: To start with, navigate to the “Apple” menu.
Step 2: Next, click “System Preferences”>” Software Update”.
Step 3: If any updates are available, then download and install right away
Here’s how you can update iTunes on Windows PC
Step 1: Open iTunes on your computer.
Step 3: Click on the “Help” menu from the menu bar located at the top of the iTunes window.
Step 3: Now, click “Check for Updates” and follow the instructions to install the latest version of iTunes.
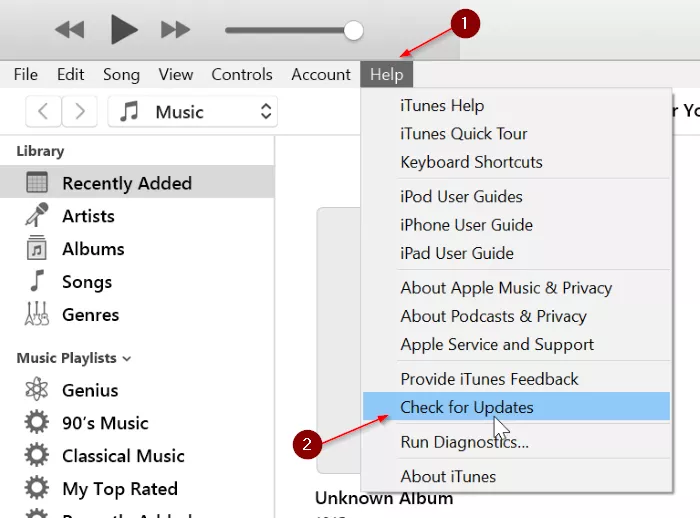
If you don’t find the Check for Updates option in the Help menu, it means that you’ve downloaded iTunes from the Microsoft Store. In this case, iTunes will be updated automatically whenever new versions are released.
Tip 3: Uninstall and then Reinstall iTunes
If you’re still facing iPhone photo sync issues using iTunes, then it’s time to uninstall iTunes and then, re-install it. Even though uninstalling iTunes is a little bit lengthy process, you will probably get your problem fixed.
The easiest way to reinstall iTunes is using a software tool which called TunesCare, it can help to reinstall in just one click. Tap the download button below and check the detailed steps here: guide on using TunesCare.
If you want to manually reinstall your iTunes, check the steps below:
Here’s how to uninstall iTunes and then, re-install it on Mac
Step 1: Go to “Finder”>” Applications”>” Utilities”>” Terminal” to run the Terminal app. Else, you can search “Terminal’ on Spotlight.
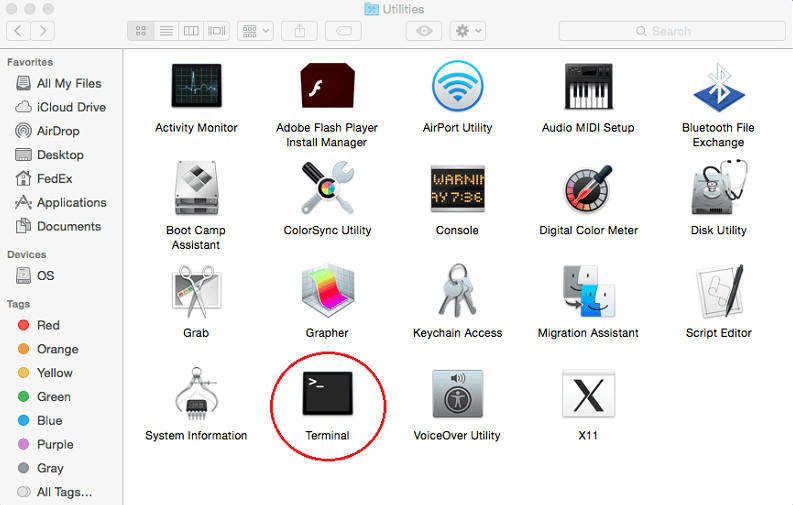
Step 2: Now, you need to type - cd/Applications/ and press Enter to open the Applications directory.
Step 3: After that, type - sudo rm -rf iTunes.app/ and press Enter again to uninstall the iTunes.
Step 4: Open the Apple iTunes official page and download and re-install the iTunes from it. Or go to the “Mac App Store” >” Updates” tab, check here for new updates.
Here’s how to uninstall iTunes and then, re-install it on Windows PC
Step 1: Click the Windows Menu, and scroll down to find iTunes, right-tap on it to select “Uninstall”. After uninstalling it, restart your system.
Step 2: Move to the “Control Panel”>” Programs & Features” and delete the following programs in the following order:
- QuickTime ( if it is there)
- iTunes
- Apple Software update
- Apple Mobile Device Support
- iCloud
- MobileMe
- Bonjour
- Apple Application Support (32-bit)
- Apple Application Support (64-bit)
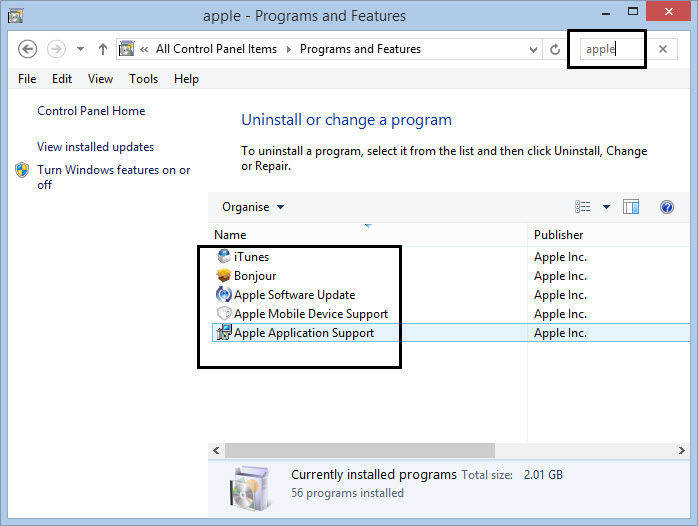
Step 3: Reboot your computer and remove the following folders if you find them:
- C:\Program Files\Bonjour
- C:\Program Files\Common Files\Apple
- C:\Program Files\iPod
- C:\Program Files\iTunes
On the 64-bit system, you find them as:
- C:\Program Files (x86)\Bonjour
- C:\Program Files (x86)\Common Files\Apple
- C:\Program Files (x86)\iPod
- C:\Program Files (x86)\iTunes
Keep in mind that program files and c:/drive may be replaced with a different name and letter in your computer respectively.
Step 4: Go to the Microsoft Store or Apple page and download iTunes from it on your computer.
Step 5: Follow the instructions to reinstall iTunes on your system.
Once you have successfully reinstalled iTunes on your computer, try again to perform iTunes sync of your iPhone and see if the problem is gone now. If not, then continue with the following tips.
Tip 4: Restart iPhone
It might be possible that there is a problem within your iPhone and so, restart your device to give it a fresh start. It may help you to fix the iOS 13 Photos sync through iTunes causes duplicate photos.
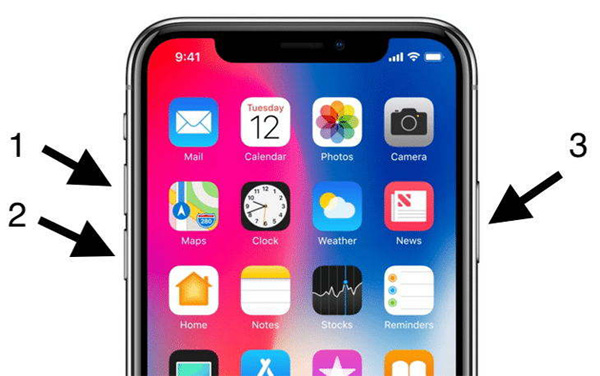
On iPhone X or later:
- Press and hold the Volume Down/Up button and Side button until you see the power off slider on your screen.
- Drag the slider to turn witch off your device.
- Press and hold the Side button again until the Apple logo appears.
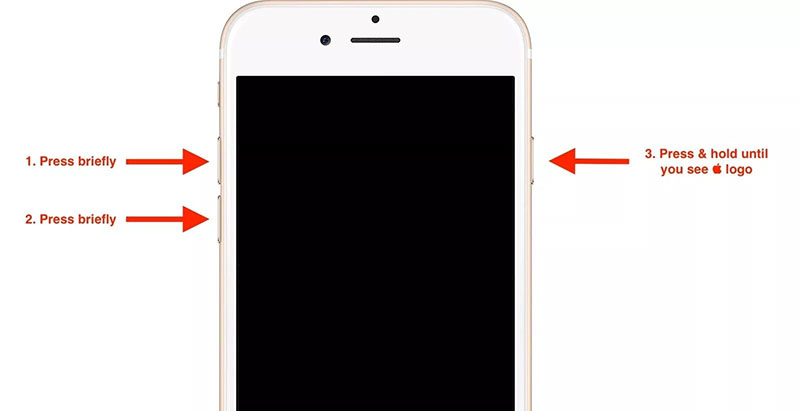
On iPhone 8 or earlier:
- Press and hold the Top/Side button until you see the power off slider on your screen.
- Drag the slider to turn off your device.
- Press and hold the Top/Side button again until the Apple logo appears.
Tip 5: Repair iTunes Using Free iTunes Repair Tool
If the above tips are of no use, you should give a Tenorshare TunesCare a try. It has free features -Fix iTunes Sync Problem you can use to fix your problem. With the help of this iTunes repair tool, you can fix various iTunes sync issues and iTunes errors. This tool comes quite in handy when common solutions fail to help you resolve the iTunes related problems.
So, download TunesCare from its official site on your system and follow the below instructions to get your problem fixed in three easy steps.
Step 1: After installing TunesCare, run it and connect your device to the computer and click on the “Fix iTunes Sync Problems” to get started with the process.

Step 2: The software will start repairing your iTunes and this may take several minutes to complete the repair process.
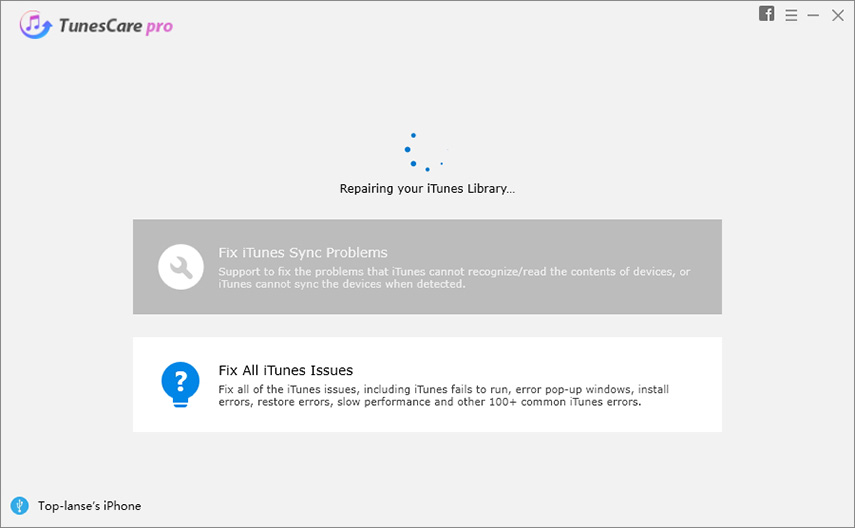
Step 3: Once the repair process completes, you will get the message on the software interface as shown in the below figure.

Part 2: How to Sync Photos to iPhone without iTunes in iOS 13.1.3/13.1/13
As you can see that iTunes isn’t an ideal solution to sync photos to iPhone. That’s why you need iTunes alternative and Tenorshare iCareFone is the most recommended. You can use this tool to sync photos to iPhone without iTunes. In fact, it provides full support to transfer photos from computer to iPhone without the need for iTunes. With this all-in-one tool, you can manage your iOS 13 data in a better and more efficient manner.
So, download iCareFone to learn how to use it to sync photos to iPhone without using iTunes.
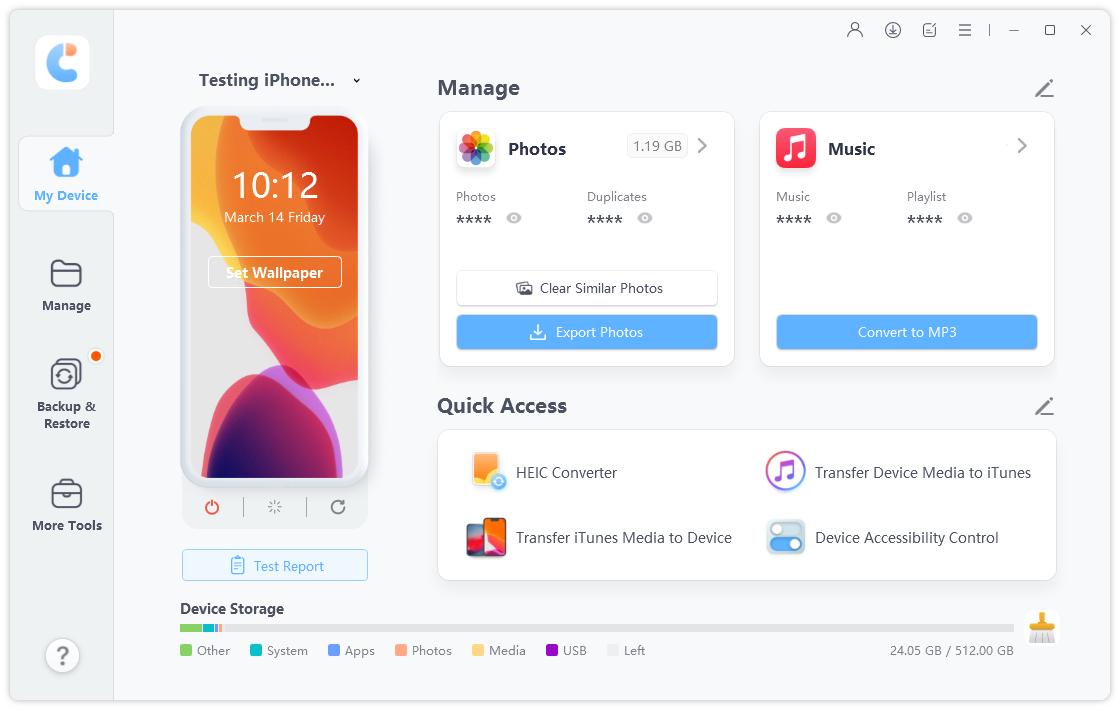
Step 1: Install and run it and connect your device to the computer using a digital cable. Next, click the “Manage” tab to get the process to start.
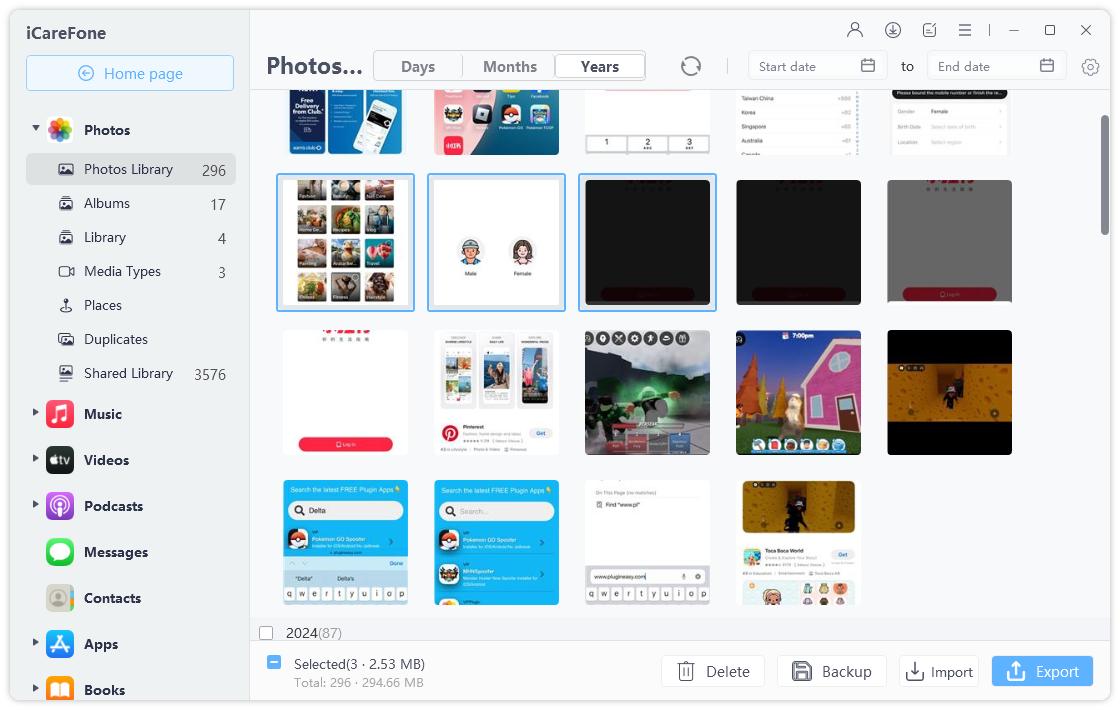
Step 2: Here, you will get to see the files you can sync or transfer to your device.
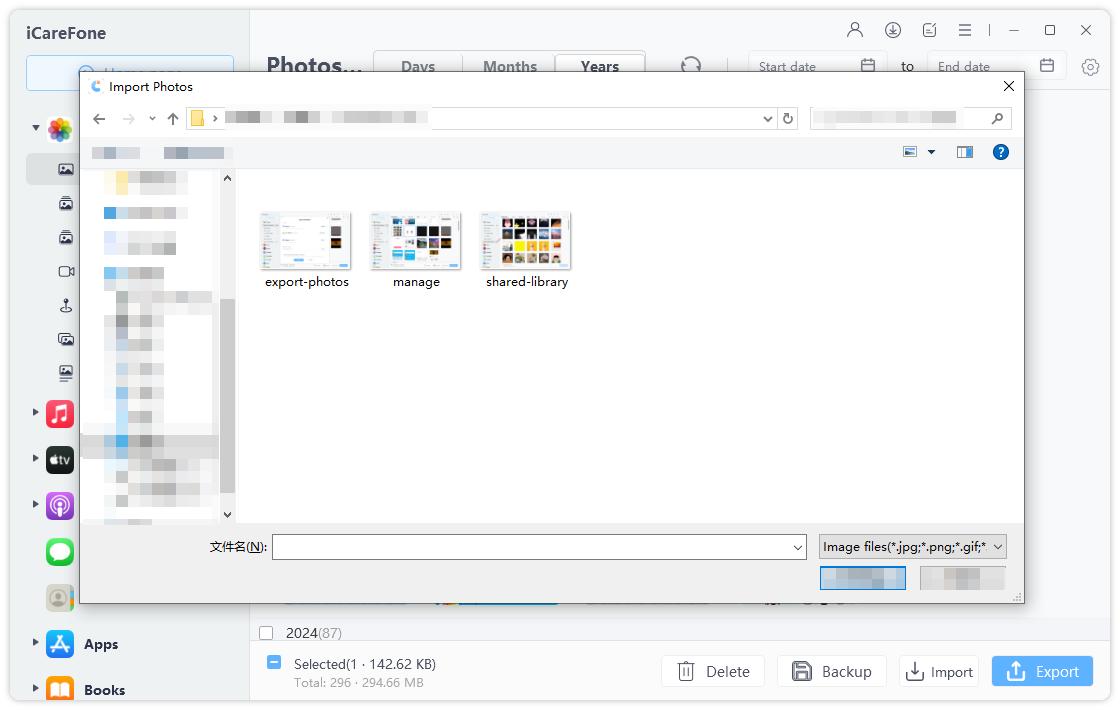
Step 3: Next, click the “Import” button and select the desired files you want to transfer from computer to iPhone and that’s all.
Conclusion
That’s all about what you can do to fix the iPhone photo sync problem using iTunes. We hope that our guide has helped to resolve the problem on your device. And the best thing is that you can prefer using iCareFone for iPhone photo sync without iTunes.
Speak Your Mind
Leave a Comment
Create your review for Tenorshare articles

Tenorshare iCareFone
Best Free iPhone Transfer & iOS Backup Tool
Easily, without iTunes


