Step-by-Step Guide on How to Reinstall iTunes on Mac
iTunes is a tool which is traditionally made for and used by all the iOS device users. All the major functions on an iOS device including file backup, restore, etc is done with the help of iTunes. Although iTunes comes with a variety of features which can be pretty helpful to make your device function normally, a major problem associated with it is it needs to be updated frequently. Several iOS device users have also reported that iTunes shows a lot of errors while syncing on a frequent basis. The best solution for such problems is reinstalling iTunes. You can know how to reinstall iTunes on Mac by following the steps detailed in the article below.
- Part 1: The Reason to Reinstall iTunes on Mac
- Part 2: Full Guide on How to Reinstall iTunes on Mac
- Part 3: If Don't Reinstall iTunes on Mac, How to Fix iTunes?
- Bonus Tip: Is there a Better iTunes Alternative Tool on Mac?
- Big News: There is No More iTunes on MacOS Catalina!
Part 1: The Reason to Reinstall iTunes on Mac
Several minor and major technical glitches can be easily solved by uninstalling and reinstalling iTunes. Some of the problems which can be solved are mentioned below.
- iTunes starts malfunctioning.
- iTunes starts showing frequent error messages.
- iTunes crashes, freezes or becomes unresponsive on a regular basis.
- The backup, restore and sync functions of iTunes is not working.
- When iTunes is not getting installed.
- When an alert dialogue by Apple Care keeps appearing that you have to reinstall iTunes.
If you are facing any of the problems mentioned above, the solutions given below to reinstall iTunes can prove to be very helpful to sort the problems out.
Part 2: Full Guide on How to Reinstall iTunes on Mac
There are a variety of ways in which you can uninstall and reinstall iTunes on Mac. Some of the most effective ways to know how to uninstall and reinstall iTunes on Mac are mentioned below.
2.1 How to Uninstall iTunes on Mac Completely before Reinstall
Prior to reinstalling iTunes, you would have to uninstall it. You can know how to uninstall iTunes on Mac system by following the steps mentioned below.
Step 1: On your Mac’s desktop, click and drag the iTunes icon to the Trash folder. If in case you get an error, follow the next step, if not, you can move on to Step 6.
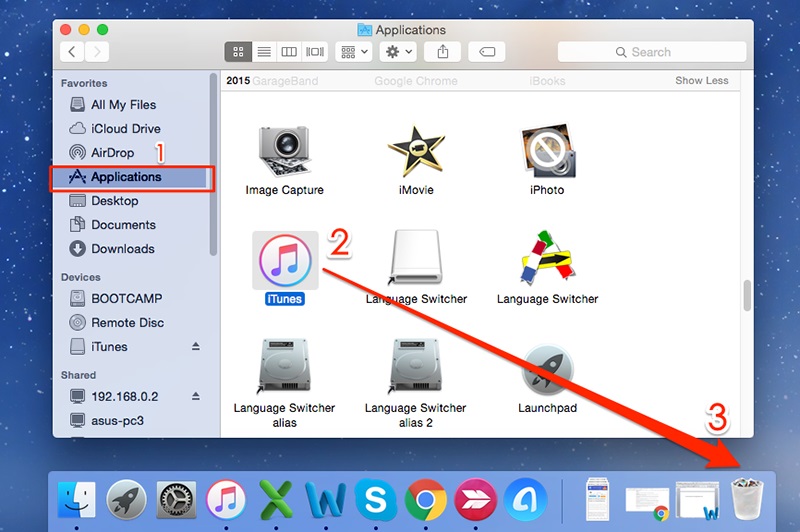
Step 2: Right click on the “iTunes.app” icon by going to “Application” and clicking on “Get Info”.
Step 3: Select the padlock icon and when prompted enter the Admin password.
Step 4: Click on “Sharing & Permission” and set the option of “Read & Write” to “Everyone”.
Step 5: Close all the windows and repeat Step 1 once again.
Step 6: Go to the Trash folder and empty it.
Step 7: On Spotlight, key in “Activity Monitor” and launch this.
Step 8: Look for “iTunes Helper” and then remove it.
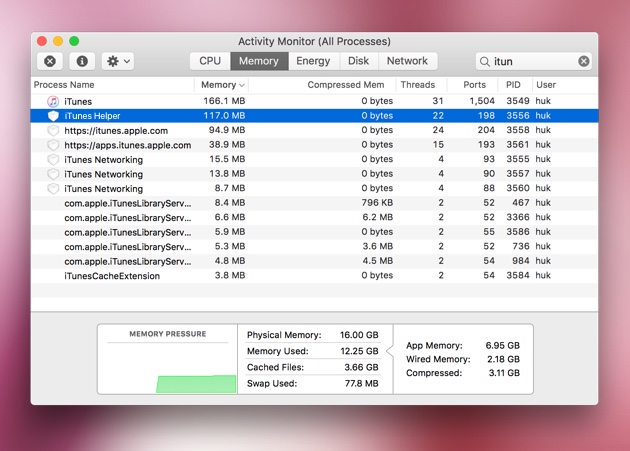
Step 9: Go to “Library” and then select “Preferences” and remove the files which have “com.apple.itunes” in the beginning.
Step 10: Restart your Mac system now.
Tunes would have been successfully uninstalled from your Mac system.
2.2 How to Reinstall iTunes on Mac Again
There are two ways in which you can reinstall iTunes on Mac again. Check out these methods below to know how to reinstall iTunes on Mac High Sierra.
Way 1: Go to Apple Official website
The best way to reinstall iTunes would be by going to the official site of Apple. You can reinstall iTunes Mac Mojave by following the steps mentioned below.
Step 1: From Safari, navigate to iTunes Download/ and click on “Download”.
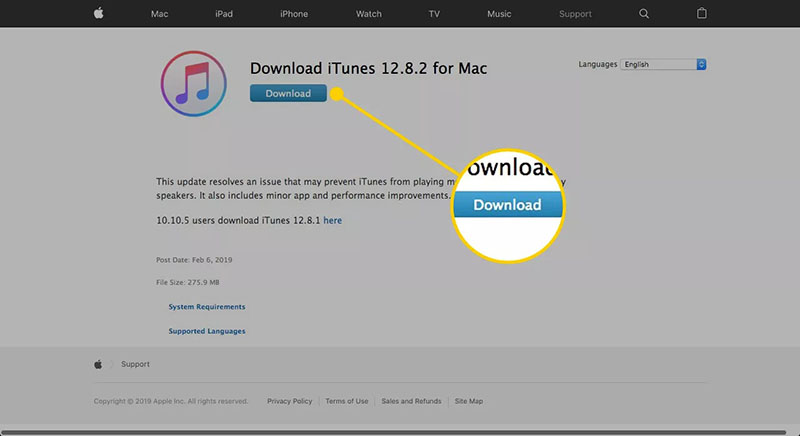
Step 2: Find the iTunes installer program and double click on it to follow all the instructions as given on the installer window.
Step 3: Type your admin login details if prompted and click on “Install Software”.
You will be notified as soon as the installation is complete.
Way 2: Go to Mac App Store
Another easy way to reinstall the latest version of iTunes is by going to the Mac App store. You can do this by following the steps mentioned below.
Step 1: Visit Mac Store on your Mac system.
Step 2: Go to the search bar and key in “iTunes” and install it.
This way the latest version of iTunes would be reinstalled on your Mac system.
Part 3: If Don't Reinstall iTunes on Mac, How to Fix iTunes?
Although the above methods are pretty effective in reinstalling iTunes, it can be pretty troublesome to reinstall it at times when there are some technical glitches. In order to completely eliminate these technical problems you can make use of Tenorshare TunesCare which is an excellent third party tool which has been specifically developed to fix all the technical issues, major and minor, related to iTunes. Here is how you can use this tool to repair iTunes.
Step 1: On your Mac system, install and launch the tool.
Step 2: From the main interface, click on “Fix All iTunes Issues”.
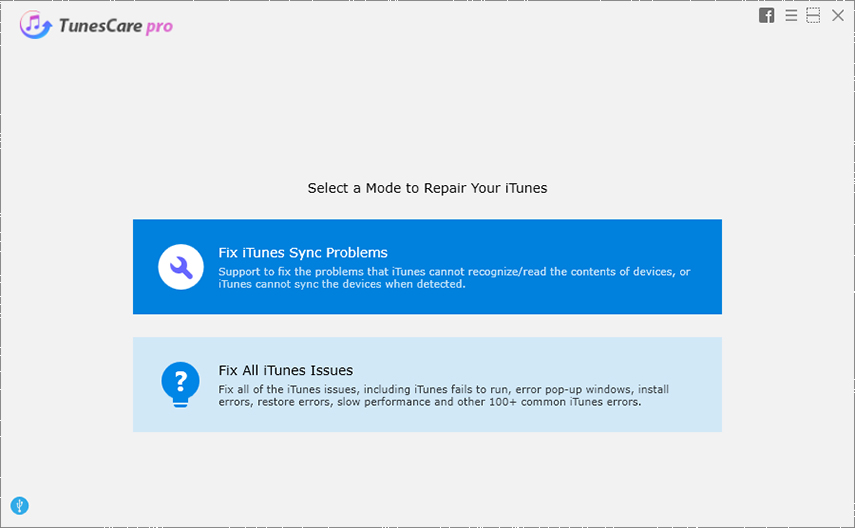
Step 3: Click on “Repair iTunes” on the next page.
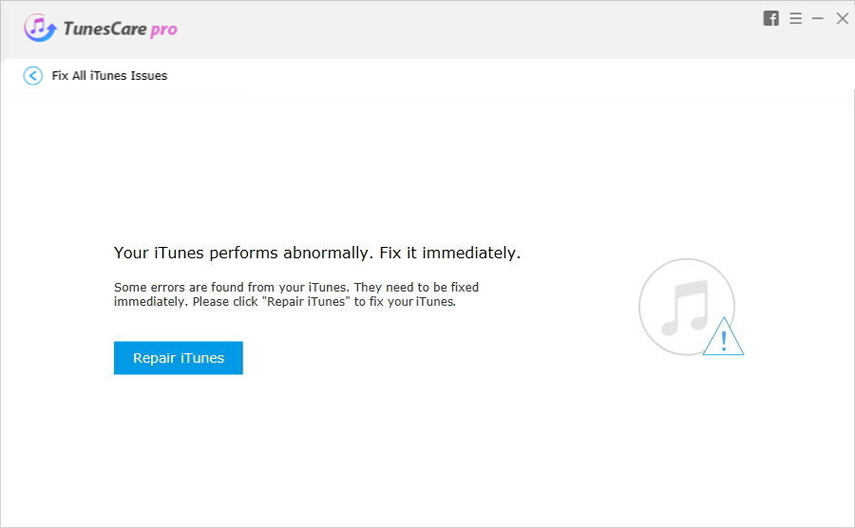
The progress of the repair will be shown on the screen and you will be notified when the repair process is over.
Bonus Tip: Is there a Better iTunes Alternative Tool on Mac?
Although iTunes is a great tool which is pretty beneficial for the iOS device users, it still has a few drawbacks like the ones displayed below.
- You cannot merge several accounts and sync all the libraries.
- The songs have to be manually deleted on the external device.
- It runs very slowly.
- The sidebar is turned off by default.
- There are way too many iTunes updates.
- The interface cannot be customized.
In order to overcome these disadvantages you can make use of Tenorshare iCareFone which acts as the perfect alternative for iTunes due to the following reasons.
- You can transfer as many videos, music files and other data as you wish across devices.
- The data can be selectively backed up and restored.
- 1-click transfer of files is supported making it quicker than iTunes.
This is why Tenorshare iCareFone is the best alternative to iTunes. You can use this tool to back up files from iPhone in the following way.
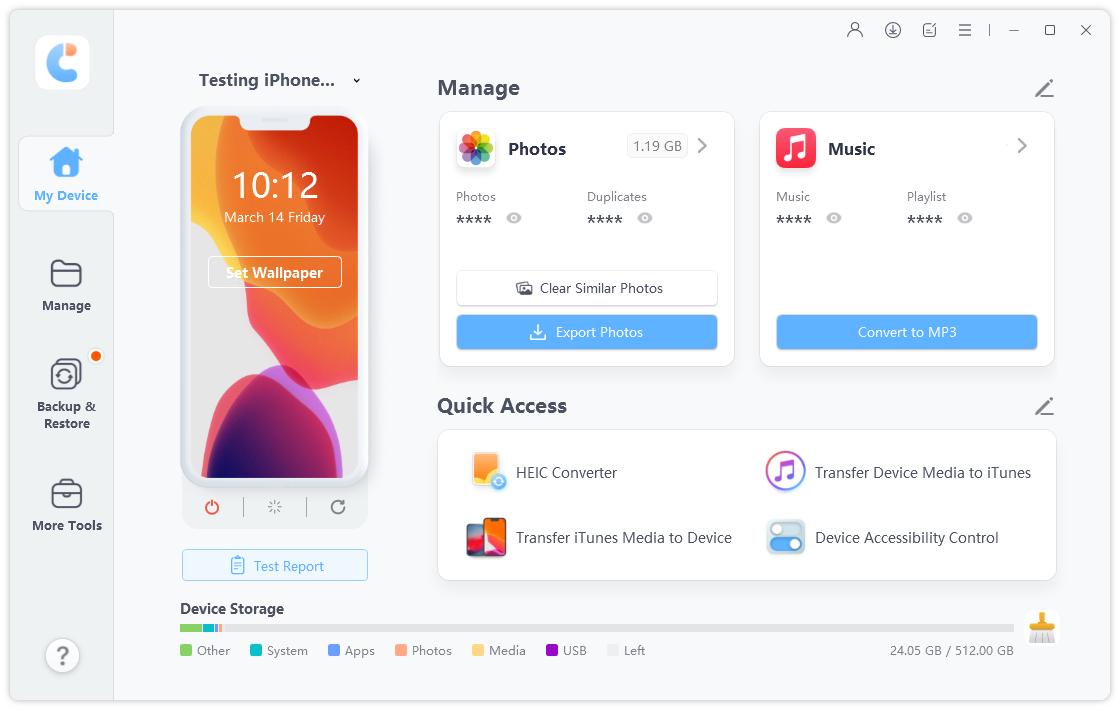
Step 1: Install the tool to your system and connect iPhone to it with the help of a USB cable.
Step 2: On launching the program, click on “Backup & Restore” option from the main menu.
Step 3: By default, all files will be selected, you can choose to select only a few files as well and then click on “Backup”.
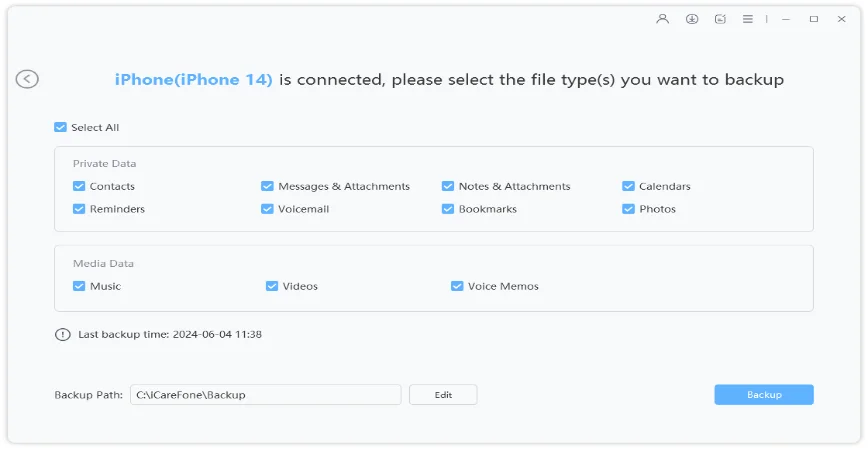
Once the backup is complete you will be able to view the backed up files through this program as well.
Big News: There is No More iTunes on MacOS Catalina!
If you have updated your MacOS to the newest version Catalina, then you will notice that you cannot find iTunes anywhere. The truth is that Apple has killed iTunes, and split it into three apps: Music, TV and Podcasts. You can click here to know more features about MacOS Catalina.
How about backing up or restoring your device? Don’t worry, Apple retained this feature. You can achieve this via these steps:
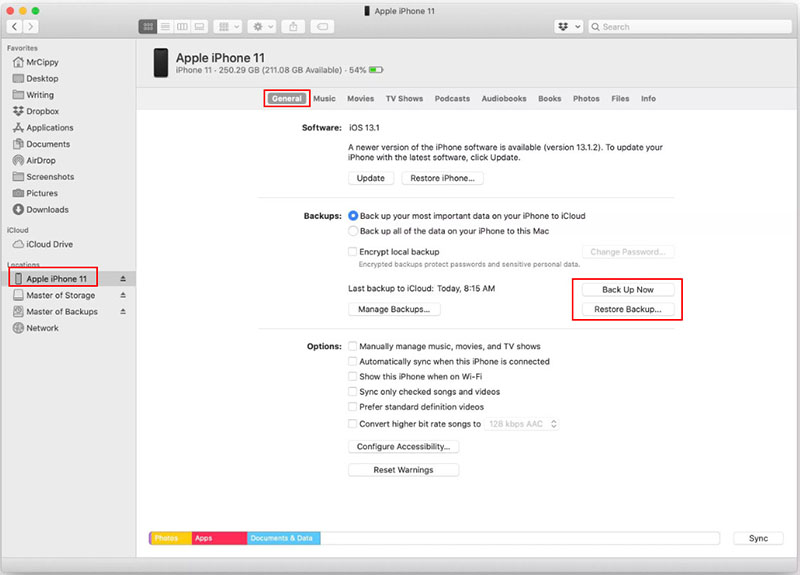
- Connect your iPhone/iPad to Mac.
- Open Finder App.
- Select the device you want to back up/restore from the left side.
- Then you will see your device info, click General and select Back Up Now or Restore Backup.
Conclusion
iTunes is one of the most essential software of Apple. All the iOS device users rely on this tool for syncing, backing up and restoring their iOS device data. Due to the security threats, Apple always urges its users to update iTunes regularly. However useful this tool is, it comes with its own set of drawbacks. To overcome these drawbacks you can uninstall and reinstall iTunes. You can know how to reinstall iTunes on Mac OS Mojave by following the steps explained in this article. For a more permanent solution, you can use Tenorshare iCareFone instead of iTunes to avoid the hassle. To fix any kind of technical issues in iTunes, Tenorshare TunesCare is the best tool and is highly recommended.
Speak Your Mind
Leave a Comment
Create your review for Tenorshare articles


