How to Fix iOS 26 Personal Voice Not Showing [Troubleshoot]
With the launch of iOS 26 during the WWDC event, Apple introduced many new accessibility features and apps that will make using the device much easier, especially for people with disabilities. One of those features is "Personal Voice," which enables users to save a unique voice and use it for Siri, VoiceOver, and other apps using live speech. However, many users can’t use it because iOS 26 personal voices are not showing. If you are here for the same reason, don't worry, as this problem is easy to fix as long as you follow the methods listed in this article.
- Part 1: Why Is My Personal Voice Not Showing in iOS 26?
- Part 2: [Before Fix] Make Sure You Activate Personal Voice on iOS 26
- Part 3: Top 6 Fixes for iOS 26 Personal Voice Not Showing
- FAQs about iOS 26 Personal Voice
Part 1: Why Is My Personal Voice Not Showing in iOS 26?
If the iOS 26 personal voice not showing up in live speech, it can be due to three main reasons. When setting up personal voice, make sure there are no background noises, as they can interrupt your recording, and make sure the microphone is not covered up. It can also happen if your device has insufficient storage and it cannot process features like the personal voice in live speech. One of the most common reasons for this issue is software bugs that are mostly seen in iOS updates. It also happens due to regional restrictions.
Part 2: [Before Fix] Make Sure You Activate Personal Voice on iOS 26
You cannot expect a personal voice to work without setting it up. Follow these steps to activate your personal voice on iOS 26.
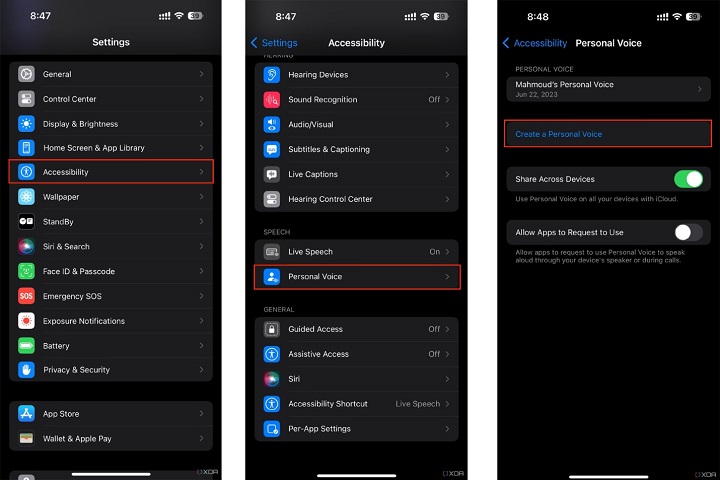
Open “Settings” on your iOS 26 device and navigate to “Accessibility >> Personal Voice”. Tap on the “Create a Personal Voice” option.

Proceed by tapping “Continue” on the next two prompts, and type the name of your personal voice. Hit the “Continue” option to advance.

Now, tap on the record button and start reading the phrases that appear on the screen. Once you are done, tap on the “end” option and listen to your recording to check for background noises. The system will notify if the background is too noisy.

- After you complete the sound check, you are ready to record your personal voice. Next, complete the 15-min voiceover session by narrating the lines that appear. You can review, replay, and record any line again if you think it’s not good. After recording, put your device on charge and lock its screen to begin the personal voice generation.
The process might take more time to complete than advertised, as you can only access iOS 26 bet version. So don't worry if it takes several days for personal voice to activate. Once it does, you will get this message on your screen.

Part 3: Top 6 Fixes for iOS 26 Personal Voice Not Showing
Here are the most effective methods to fix the “iOS 26 personal voice not showing” issue without reinstalling the update.
Fix 1: Check Language and Region Settings
If the personal voice feature is not working on your iOS device, it might be due to region restrictions. In iOS versions, some features are only available in specific regions for testing. You can easily fix it by changing your region and language settings. Follow these steps to change the region in your iOS device.
- Go to the “Settings” app and tap on your profile icon or Apple ID name.
- Tap on the “Press Media & Purchase” option. Select “View Account” and use your Apple id to sign in.
- Tap on the “Country/Region” option and change it to the “United States”.
- Agree to all terms and conditions by Apple and provide your payment method and address. After that, set up your personal voice and change your region back to its previous settings.
Fix 2: Re-enable Personal Voice
If you encounter the “iOS 26 personal voice not generating" issue and you know that this feature is accessible in your region, you can try re-enabling it to check if its works. Since you are using a newly released iOS 26 version, the feature might not activate on the first try. Here is how to re-enable and adjust settings to use personal voice.
Open the "Settings" app and tap on the "Accessibility" option. Scroll down and select "Personal Voice". Now, tap on the "Create a Personal Voice" option to set up a new one, or go to the previously set personal voice and disable and enable it.

While you are there, tap on the “Share Across Devices” and “Allow Apps to Request Use” toggle and turn it on for better usability.

Fix 3: Check Microphone Settings
If you are trying to set up a personal voice on your iPhone, but it is not recording anything, it might be due to faulty microphone settings. Here is how to check and fix it.
- Open “Settings” and navigate to “Privacy >> Microphone”.
- Now make sure that personal voice is enabled to use a microphone.
- If not, allow permission to use a microphone. In case you don't see the personal voice option, contact Apple support.
Fix 4: Reset Siri Settings
Resetting Siri can also help you fix the “iOS 26 personal voice not generating” issue. Follow these steps to do it in the fastest way possible.
- Open “Settings” and scroll down to the “Siri & Search” option and tap it.
- Now turn off the “Listen for Hey Siri” toggle and wait for a few seconds. Turn the toggle back on.
- Train Siri again, and once you are done, you will get back to the "Siri & Search" page.
Fix 5: [100% Assured] Fix iOS 26 Personal Voice Not Showing Without Data Loss
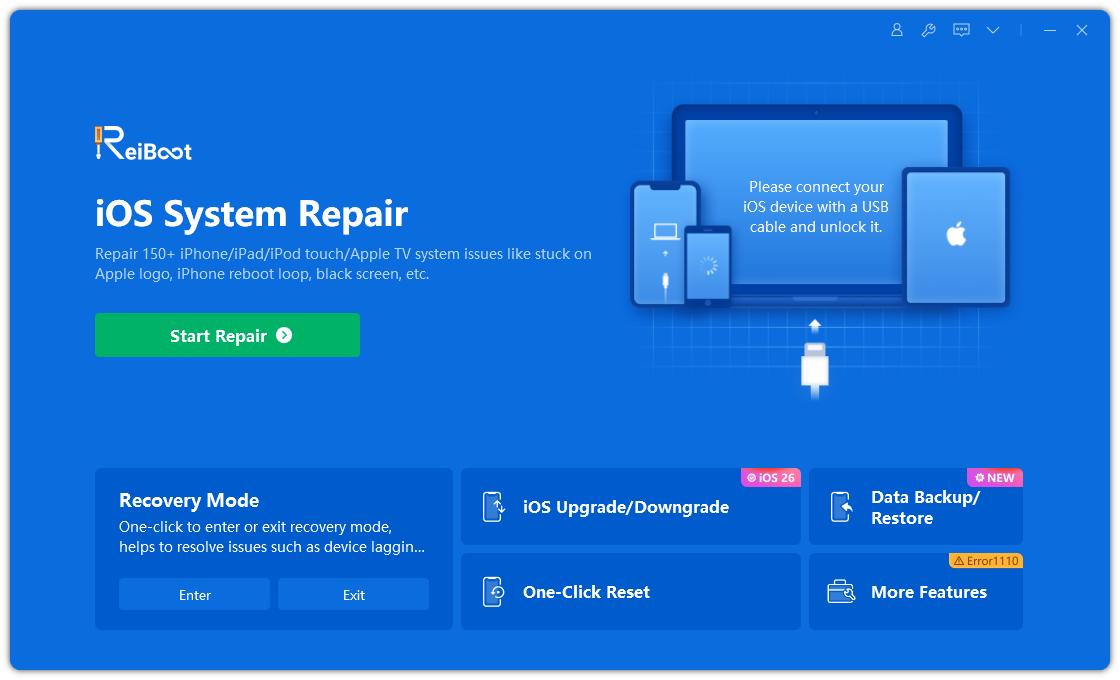
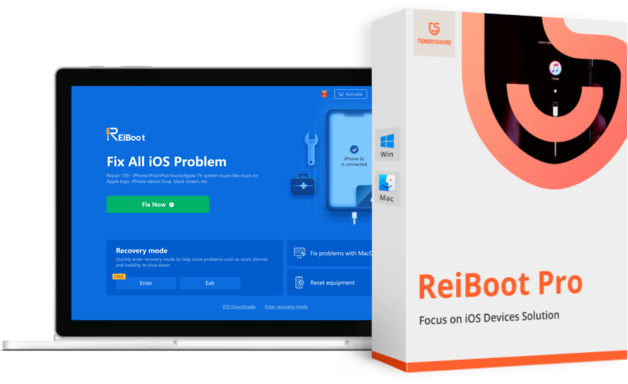
If you want to fix the iOS 26 personal voice not showing issue without data loss, use Tenorshare ReiBoot. It is an expert tool that can fix 150+ iOS-related issues, including personal voice not working. It is a one-stop solution that redoes your iOS system and fixes any bugs or underlying problems. It can also put your device in recovery mode for free and downgrade or upgrade your iOS. Follow these steps to fix your iOS device with Tenorshare ReiBoot.
Download and install ReiBoot on your PC. Run it and connect your iPhone to your computer. Once the device gets recognized, click “Start”.

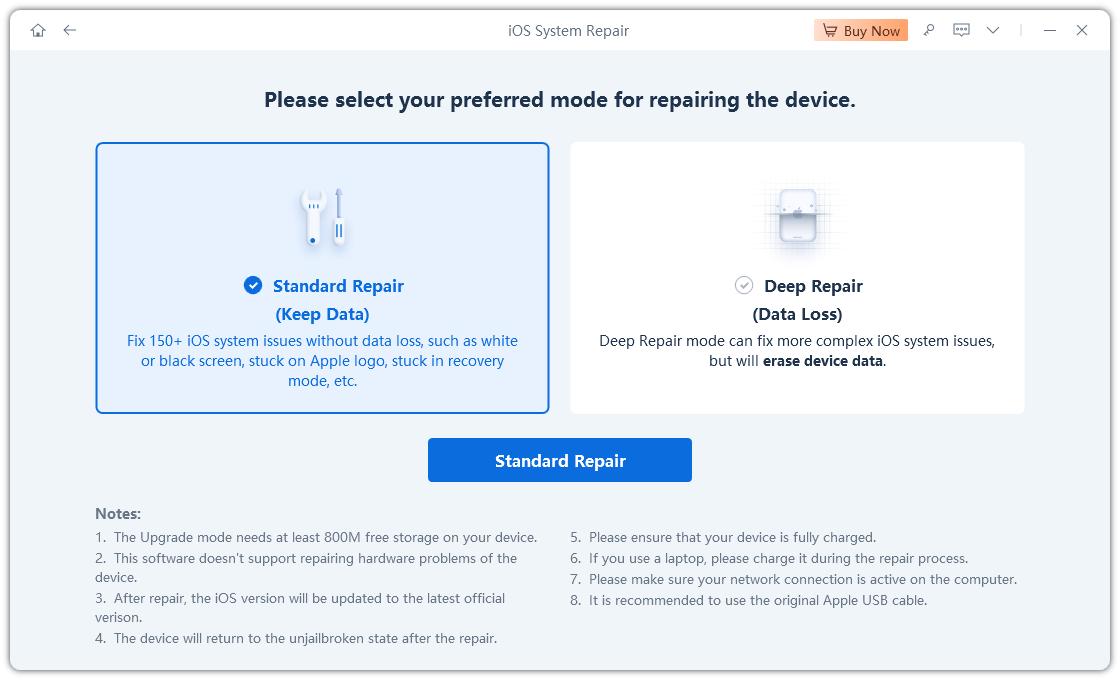
Select the “Standard Repair” tab and read the note below. Next, click on the “Standard Repair” button.

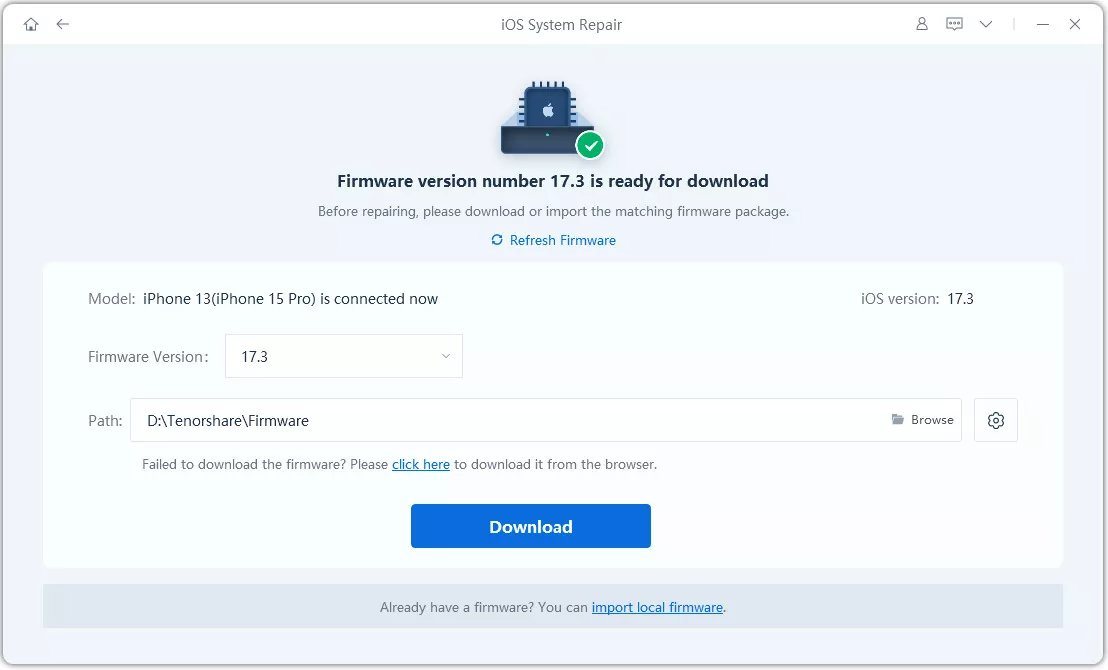
Click the "Download" button to download the latest firmware package for your device.

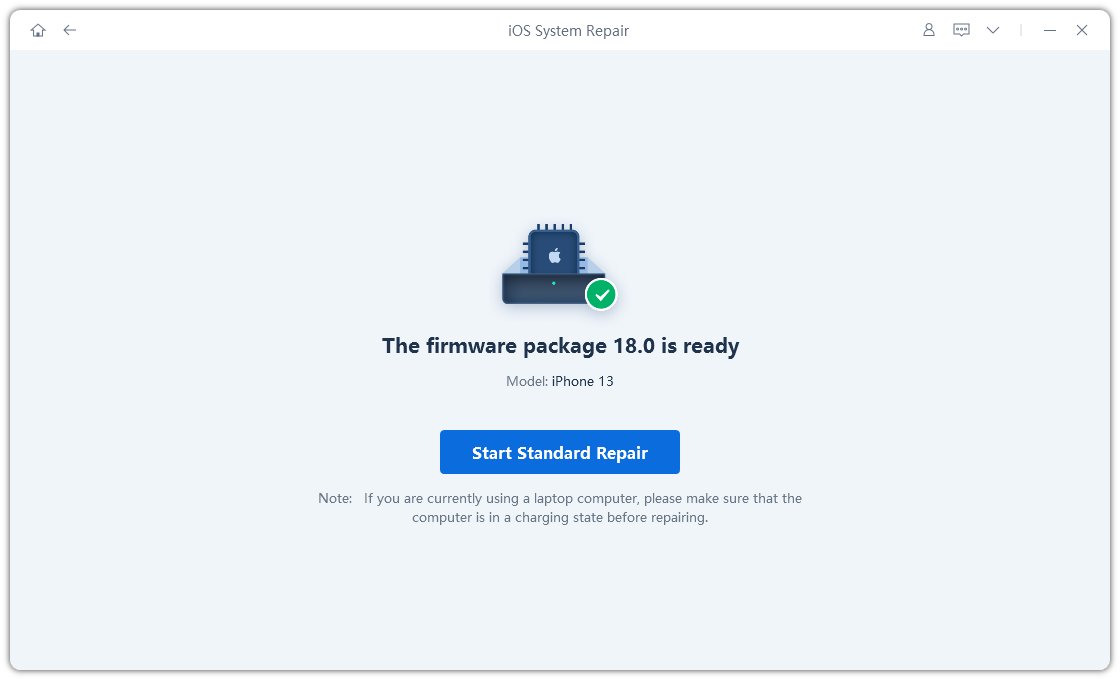
Click on the “Start Standard Repair” button and wait for the process to complete.

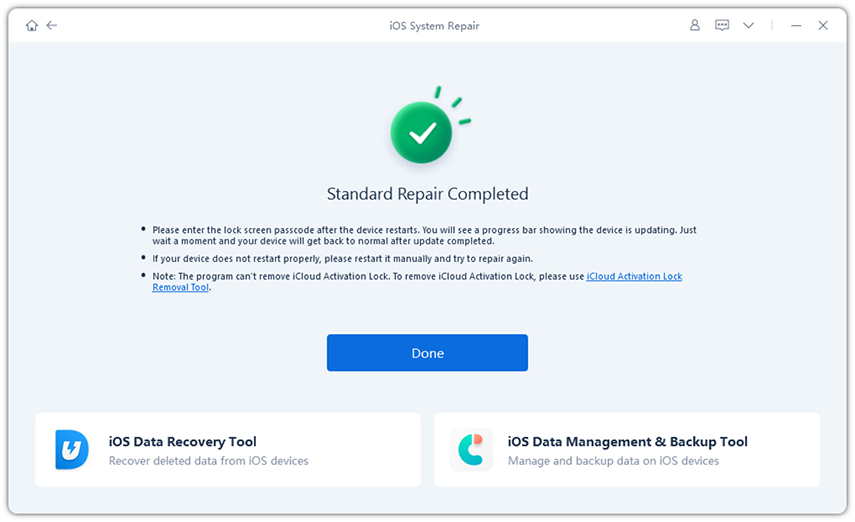
After the repair is complete, click “Done” to end the repair.

Fix 6: Reset All Settings (Data Loss)
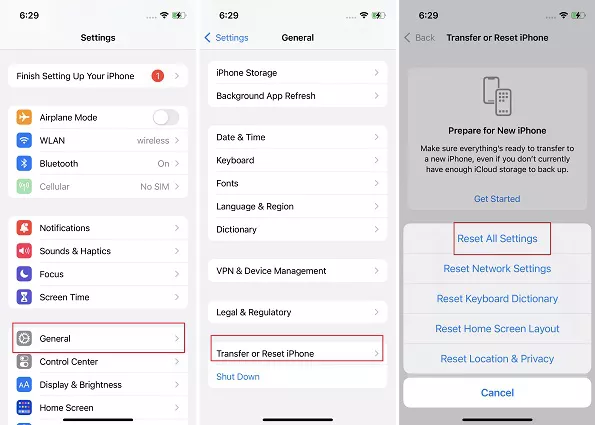
Another easy way to fix the personal voice issue is by resetting all settings back to factory options. However, it will delete all data on your device, so use it as a last resort.
- Open "Settings" on your iOS device and navigate to "General >> Transfer or Reset iPhone."
Now tap on the “Reset All Settings” option.

FAQs about iOS 26 Personal Voice
Q1: Can you use personal voice for Siri iOS 26?
The personal voice feature enables users to record their voice and use it with live speech to read any text on their screen. It is for users who have trouble speaking better communicate with others. You can activate personal voice with Siri; however, you cannot replace your voice with it.
Q2: How do I change Siri's voice to a personal voice?
The iOS 26 has personal voice features that record and dictate your voice; however, you can't set it as Siri's voice. In case you want to change Siri's voice with other options, go to settings and enter Siri & search. Here, you can tap Siri voice to change with other available options.
Q3: How do I change Siri's voice to my own?
As of today, the personal voice features only allows users to dictate the text. You can't set it as the voice for Siri. It means you cannot change Siri's voice to yours. This feature might be available in future updates, but iOS 26 will not have it.
Conclusion
Let’s conclude our guide on fixing the “iOS 26 personal voice not showing" issue. You can try the methods listed in this guide, and changing the region is the first thing to do if you don't live in the US. If these methods don’t work, use Tenorshare ReiBoot, as it will fix your issue with one click, and you will not have to worry about losing your data.
- Downgrade iOS 26 to iOS 18 ;
- Fix iPhone won't restore in recovery mode, my iPhone is stuck on the Apple Logo,iPhone black screen of death, iOS downgrade stuck, iPhone update stuck, etc.
- Support all iPhone models and the latest iOS 26 and earlier.
Speak Your Mind
Leave a Comment
Create your review for Tenorshare articles
