How to Transfer Voice Memos from iPhone to Computer (Win/Mac)
Transferring voice memos from iPhone to computer is best way to keep backup of your voice memos so that you can access them in future whenever you need them. People usually move voice memos to computer to keep a copy of those files and even to release some space on their iPhone. Once you transfer voice memos to your computer you can get it back to iPhone whenever you want. In this article you will learn top 4 ways to transfer voice memos from iPhone to computer. Just go through all the methods and choose the best method which suits you. So, let's get started.
- Way 1: How to Transfer Voice Memos from iPhone to Computer with iTunes
- Way 2: How to Download Voice Memos from iPhone to Computer with iCareFone
- Way 3: How to Export Voice Memos from iPhone with Share Button
- Way 4: How to Transfer Voice Memos from iPhone to Mac with Airdrop
Way 1: How to Transfer Voice Memos from iPhone to Computer with iTunes
Transferring voice memos from iPhone to iTunes is the first method that comes to everyone mind. iTunes is the most commonly used app for the Apple users. The moment you connect your device to iTunes, it will automatically sync and voice memos will appear on iTunes. If you don't get this then try manually to sync voice memos to your computer.
Note: Download and install latest version of iTunes on your PC.
1. Connect your iPhone to your computer with the help of USB synchronizer. It will detect your iPhone if you have previously synced, if not then you need to click on "Trust" option on your iPhone to connect with computer.
2. Locate your iPhone on the left side of iTunes then right click on it.
3. Click "Sync" option. You can see the messages that new voice memos are found and whether you like to copy them or not.
4. Click on "Copy Voice Memos" to sync voice memos.
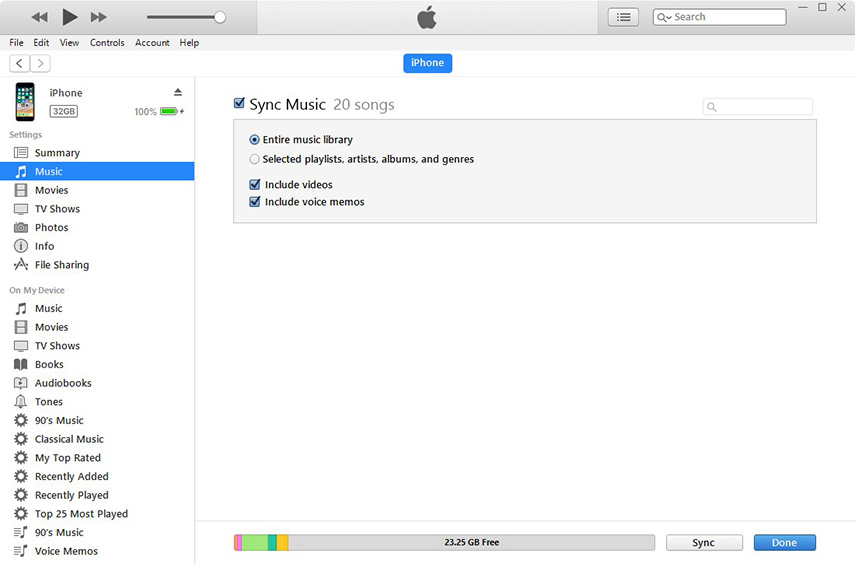
5. All voice memos will be saved on your computer.
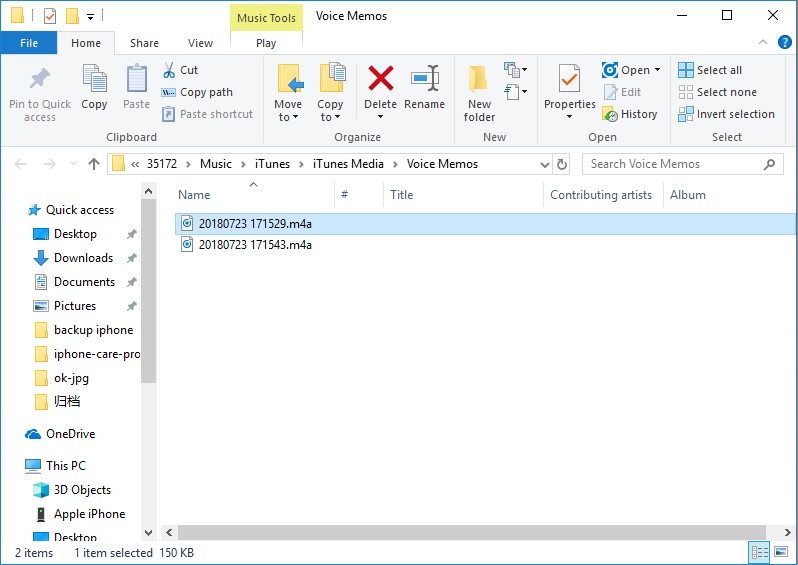
6. To locate them on your computer:
- Window- Go to File Explorer then go to C:\Users\NAME\Music\iTunes\iTunes Media\Voice Memos
- Mac- Go to Finder then go to /Users/NAME/Music/iTunes/iTunes Media/Voice Memos
7. You can find all the voice memos in this location according to the date and time when they were recorded in .m4a or MP4 format. These voice memos can be opened in different media players.
Way 2: How to Download Voice Memos from iPhone to Computer with iCareFone
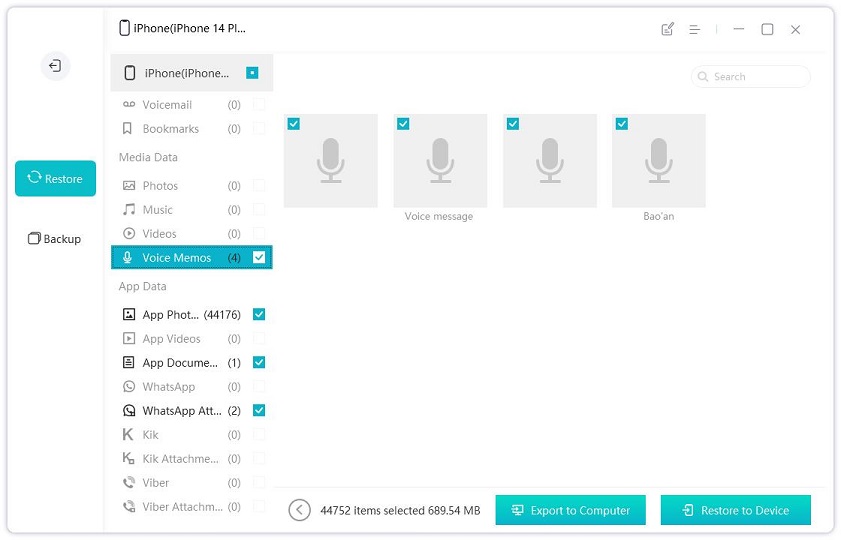
The fastest and easiest way to transfer voice memos from iPhone to computer is using Tenorshare iCareFone .iCareFone makes your task of moving voice memos easy within few minutes and just in some clicks. It is two ways transfer: iOS devices to computer and vice-versa. It supports both Mac and Windows. You can export voice memos from iPhone to computer in bulk or selectively. It also supports iPhone 15/14/13 and other previous models.
Process on how to transfer voice memos from iPhone to PC/Mac with iCareFone:
1. First download, install and launch Tenorshare iCareFone on your computer.
2. Next connect your iPhone to computer using USB cable.
3. If "Trust This Computer" dialogue box pops up on your computer, unlock your iPhone to enter the passcode to connect your phone with computer.
4. Click on "Backup & Restore" option that you find on the top of the menu bar.

5. Now select "Voice Memos" option from the list.

6. Click on "Backup", it will take a little time to finish the backup process. Once it is finished you can view the backed up voice memos.
Way 3: How to Export Voice Memos from iPhone with Share Button
Exporting voice memos from iPhone to computer with the help of share button is next method that lets you get your voice memos to computer via email. Simply open voice memos on your iPhone and tap on share button to send through email. Follow the steps to know clearly.
Process on how to get voice memos off iPhone:
1. Open voice memos and tap on share icon.
2. Click on mail option among the several options.
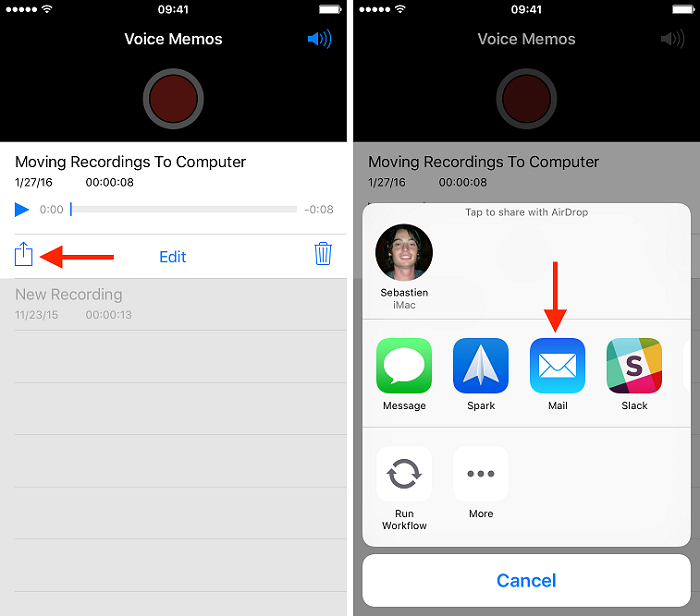
3. You can see new email on your screen, just type the email address whom you want to send this voice memos >> Click on Send.
4. On your computer, login the same email account and download to your disk.
Way 4: How to Transfer Voice Memos from iPhone to Mac with Airdrop
Transferring voice memos from iPhone to Mac with AirDrop is another method that makes your transferring job easy and you can acquire voice memos on your Mac without any problem. This method is a bit complex related to other methods mentioned above. So, make sure to follow the steps properly and carefully to sync voice memos.
Note: Enable Wi-Fi and Bluetooth as AirDrop only works when both are enabled.
1. Go to Control Center on your iPhone >> tap on AirDrop.
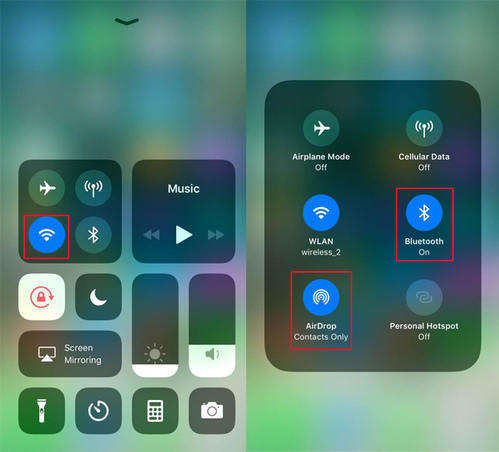
2. Choose whether you want to send voice memos to everyone or only to your contacts.
Now enable AirDrop on Mac:
3. First click on Finder >> Click on AirDrop.
4. Select "Allow me to be discovered by Everyone" option, if you want to receive voice memos from everyone's iPhone.
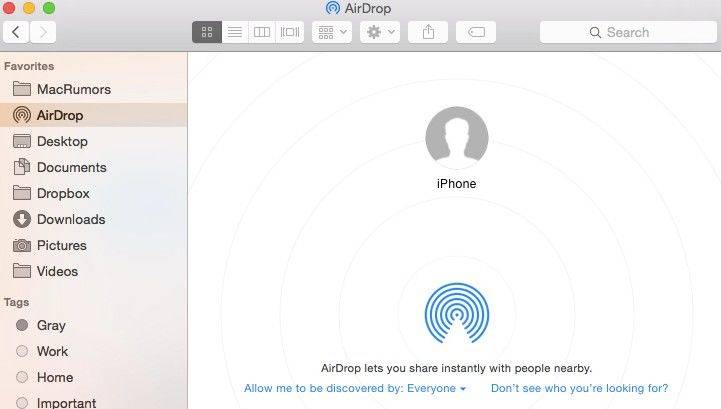
As you have turned on AirDrop on both iPhone and Mac, now head to the given process.
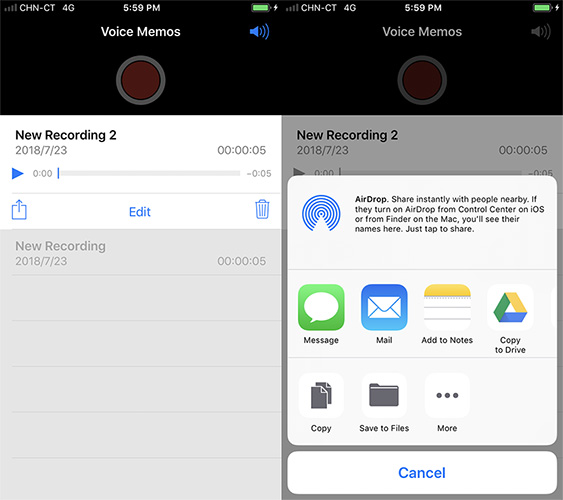
5. Choose the voice memo you want to send >> tap on Share icon.
6. You can see Apple devices/Person photo on the AirDrop section with whom you can share contacts >> tap on it.
These are the top 4 ways to move voice memos from iPhone to computer. It is recommended to use Tenorshare iCareFone to transfer voice memos from iPhone to computer as it is simple and easy to use. You will not face any error while transferring voice memos. You get other benefit apart from transferring voice memos. So, why not try this once? Give us feedback in comment section below.
Speak Your Mind
Leave a Comment
Create your review for Tenorshare articles

Tenorshare iCareFone
Best Free iPhone Transfer & iOS Backup Tool
Easily, without iTunes


