How to Sync Contacts from iPhone to Mac with 5 Ways
Syncing contacts from iPhone to Mac can be a risky job because if you do any kind of mistake or even there is fault in your process then you might end up losing your contacts. People transfers contacts to their Mac to keep the copy of their contacts so that they can use whenever they need and can easily backup contacts to their iPhone if they delete or lose it. Here, I will show you 5 different ways on how to sync contacts form iPhone to Mac. Just make sure to go through all the methods and choose the best method for yourself. So, let's get started.
- Method 1: 1 Click to Transfer Contacts from iPhone to Mac using iCareFone
- Method 2: Sync Contacts from iPhone to Mac using iCloud
- Method 3: Sync iPhone Contacts to MacBook/iMac using Airdrop
- Method 4: Import Contacts from iPhone to Mac using Email
- Method 5: Backup Contacts from iPhone to Mac using iTunes
Method 1: Transfer Contacts from iPhone to Mac using iCareFone
Tenorshare iCareFone is a wonderful tool that helps you to transfer contacts from iPhone to Mac without any trouble. It supports iPhone X, iPhone 8/8 Plus, iPhone 7/7 Plus, iPhone 6/6s and other previous models that means you don't need to worry which ever model of iPhone you have. It is two-way transfer, iOS devices to Mac and vice-versa. It supports systematic management of contacts and lets you add, delete selected or duplicate contacts. It helps you to import and export contacts and also allows you to export contacts to different formats: backup files, excel files, text file, xml file. It lets you transfer contacts selectively or in bulk.
Procedure on how to how to sync contacts from iPhone to MacBook Air/Pro/iMac:
Note: You need to download Tenorshare iCareFone on your MacBook Air.
- Install and launch iCareFone as well as connect your iPhone to MacBook using USB cord.
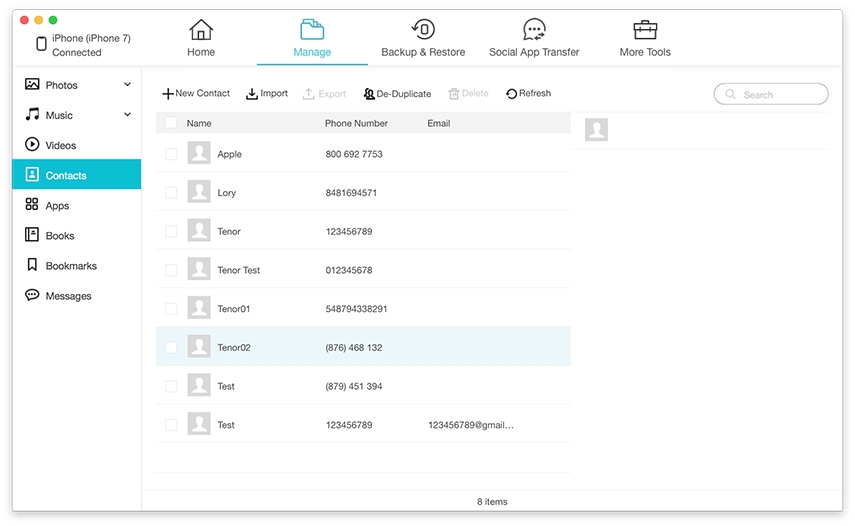
Next click on Manage from top menu bar.

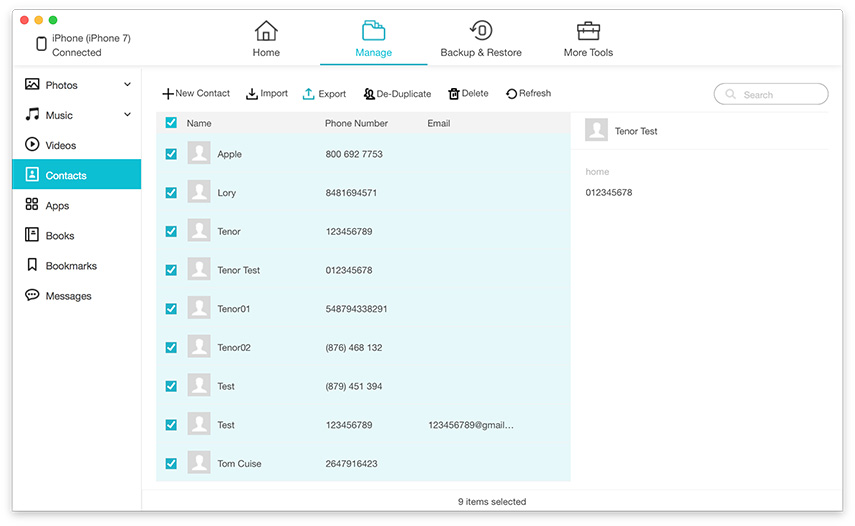
After that click on Contacts option to view all the contacts of your iPhone on MacBook/iMac.

- Then choose the contacts and click on Export button.
You will see 2 options to export as CSV or vCard file. Select anyone that you want.

Finally all your contacts will be transferred to your MacBook.
Method 2: Sync Contacts from iPhone to Mac using iCloud
iCloud can be used to transfer contacts from iPhone to Mac in easy way. In this method you need to turn on iCloud backup contacts and once it is connected over Wi-Fi or mobile data, it will automatically starts to back-up. Here you need to setup iCloud backup contacts and then go to icloud.com to export vCard file. So let's see how to sync contacts from iPhone to Mac using iCloud.
First let us see how to turn on iCloud backup contacts and after that we will see how to export vCard file.
1. Go to Settings of your iPhone and click on [your name].
2.Now tap on iCloud and then toggle on Contacts.
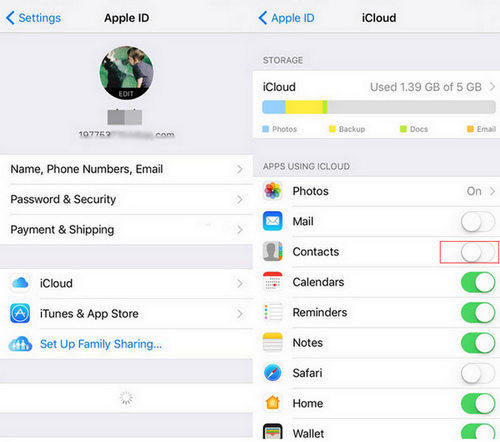
This way we will turn on iCloud backup after that let's see the process to export vCard to Mac:
3. Open you Mac, go to browser and login to www.iCloud.com.
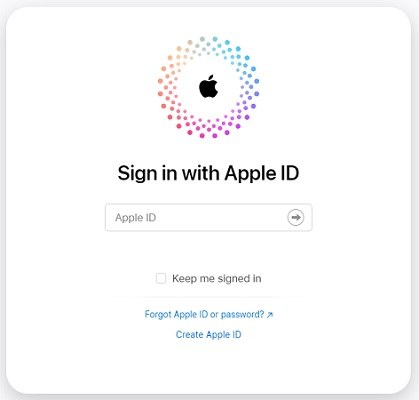
4. Enter your Apple ID and Password as well as select "Contacts" that you can see on the screen.
5. Next click on gear icon that you can find on lower-left side of the screen, choose Select All and click on Export vCard.

Method 3: Sync iPhone Contacts to MacBook/iMac using Airdrop
Syncing contacts to MacBook/iMac using AirDrop is next method that lets you access your contacts on your MacBook without any trouble. But you need to be careful using this method as the steps can be little bit different than other methods. The first thing that you need to do is turn on Wi-Fi as well as Bluetooth because AirDrop only works when both are turned on.
1. Slide down the Control Center on your iPhone >> tap on AirDrop option and choose if you want to send to everyone or only to your contacts.
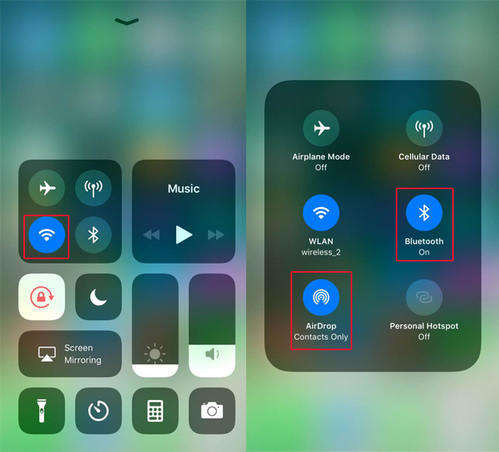
After finishing this process, we should turn-on AirDrop on MacBook.
2. Click on Finder >> Click on AirDrop and select "Allow me to be discovered by Everyone" option, if you want to receive contacts from everyone's iPhone.
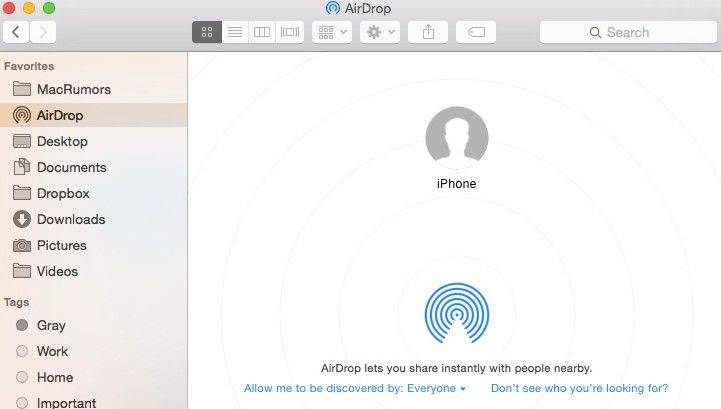
Once you enable AirDrop on both iPhone and MacBook, you can continue the given process.
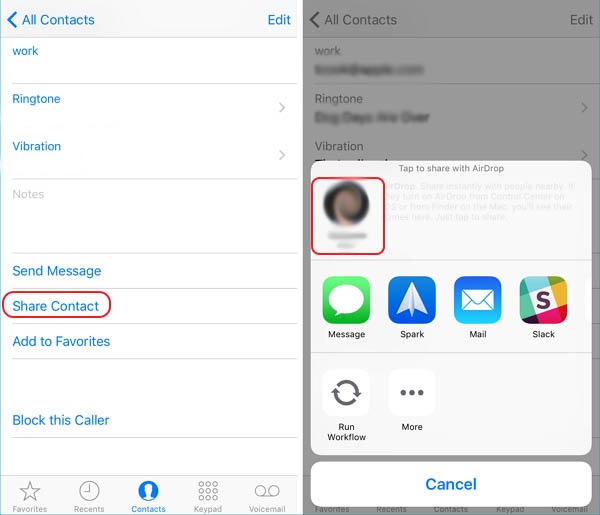
3. Select the contact >> tap on Share option.
4. You will see Apple devices/Person photo on the AirDrop >> tap on it.
Method 4: Import Contacts from iPhone to Mac using Email
Importing contacts from iPhone to Mac can be easy using Email but the thing is that there is some limitation. You are not able to send more than one contact at a time and this process is time consuming. But the process works completely fine so it is better to know how to move contacts from iPhone to Mac using Email.
1. Open your iPhone and go to Contacts, select contact that you wish to send to your Mac.
2. Tap on Share Contact >> select Mail option.
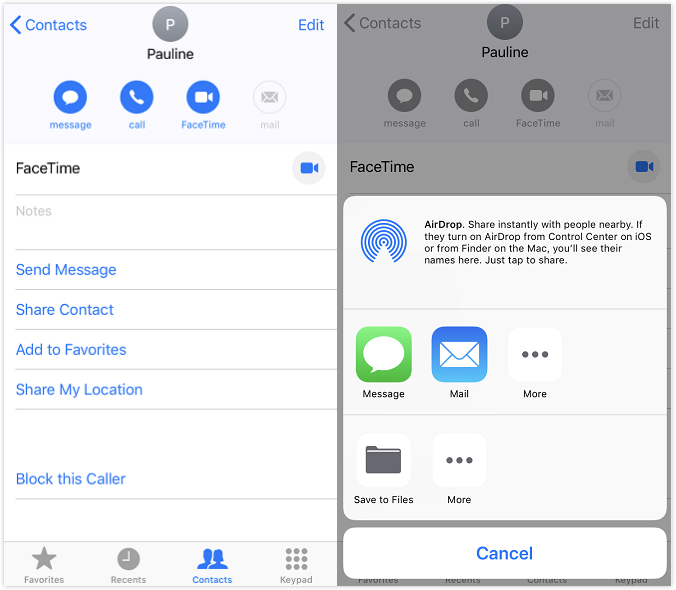
3. As soon as you select mail, you can send contact to your email and then open your email on Mac to download the contact.
Method 5: Backup Contacts from iPhone to Mac using iTunes
iTunes is really useful for all the Apple users. It helps you back up all the content of your iPhone including contacts of your iPhone. This method is quite common among the apple users to backup contacts form iPhone to Mac. All your contacts will be backed up from iPhone to your Mac automatically unless you have disable the function.
Procedure on how to sync contacts from iPhone to MacBook using iTunes:
1. First open your MacBook and connect your iPhone using USB cable.
2. Launch iTunes on your MacBook and then click on Device button.
3. Click on Summary, select "This computer" option and then click on Back Up Now.
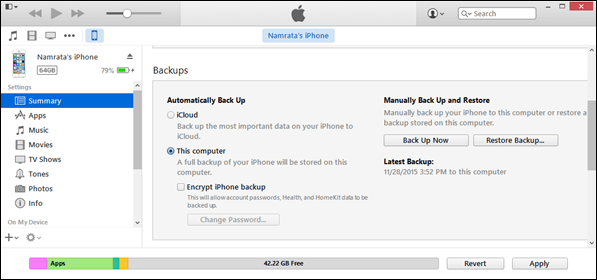
Once you click on 'Back Up Now', all the contacts of your iPhone will be saved on your MacBook.
Knowing how to sync iPhone contacts to MacBook with 5 ways can't be an easy task. Though you have learned all the possible ways to sync contacts from iPhone to Mac but if you want an easy and best method then you better try Tenorshare iCareFone. The most reliable and quick tool to transfer your contacts without any issue. Say us in comment section, how do you like iCarFone after using it?
You may also be interested in:
Speak Your Mind
Leave a Comment
Create your review for Tenorshare articles

Tenorshare iCareFone
Best Free iPhone Transfer & iOS Backup Tool
Easily, without iTunes


