How To Backup Android Photos To Google Drive
Google has introduced many utilities to help us keep our important files like photos and videos safe. Google Drive now facilitates you with its excellent cloud storage, where you can back up all your photos so that they can be safe in case of any accidental damage to the phone’s internal storage. We are here to discuss all the details of how android backup photos to google drive. With no further ado, let’s get into it!
- Part 1: How To Backup Photos From Android Phone To Google Drive
- Part 2: How To Restore Backup Photos From Google Drive
- Part 3: How to Recover Deleted Photos On Android
Part 1: How To Backup Photos From Android Phone To Google Drive
Whether you have used Google Drive or not, you must be thinking about how to backup photos from android phone to google drive. Well, there are two different ways to make it happen. The one is to back up on Settings, and the other is direct uploading which is a fantastic option provided by google drive. Let’s dive in and learn how to use both of these facilities!
Backup photos to google drive Android
Many android user have managed their Google account on their phones, so it is convenient for them to backup android photos to google drive. The following are the steps that you have to follow to backup photos.
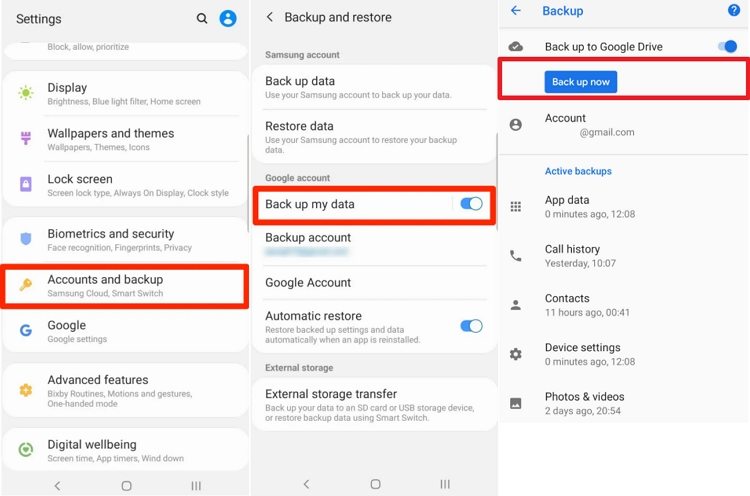
- Go to the Settings on your Android phone.
- Then tap on the Accounts & Backup > Backup and Restore, and turn on Back up my data.
Select your Google Account, enable the Back up to Google Drive option and then click on Backup now.

In this way, you can backup phone photos to google drive as well as other data. Note that different types of android devices may have different steps to access Backup section, just search backup on Settings app and then do the same as above.
Upload android photos to google drive
You can also directly upload your Android photos to Google drive app to create a backup and save them in a safe place. The following are the steps that you need to follow to backup phone photos to google drive.
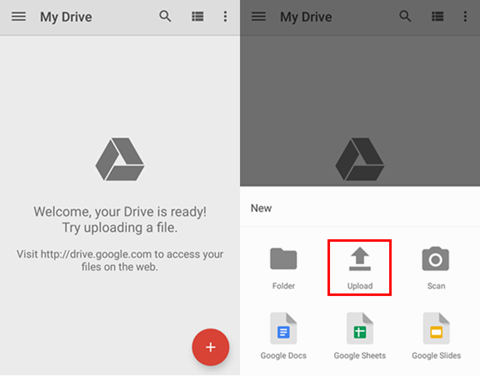
- Go to the google drive app on your smartphone.
- Click on the “Add” option. Then select the photo files that you want to upload.
You will start seeing the uploaded pictures in your google drive. You can make different folders to organize them on it.

Part 2: How To Restore Backup Photos From Google Drive
What is valued is more protected. The files that you backup are the files that you might need later in the future. You can download a copy of your files from Google. And that's why we would like to back up our photos to Google Drive. Follow the steps that we mentioned below, and restore your backup photos from google drive.
- At first, go to Google Drive app on your android phone.
- Tap and hold the photos that you want to restore to your phone’s internal storage.
- A list of actions will appear on the screen. Scroll down until you find the “download” option. Click on the download option and wait for a few minutes. All your selected photos will be downloaded to your phone that you can check in your phone’s gallery.
Also, you could go to Settings, in the same Backup and Restore section, choose restore data and restore the backed-up data including photos.
Part 3: How to Recover Deleted Photos On Android
Until now, we discussed how to backup android photos to google drive or how to restore the backup phone photos from google drive. Now, what if you haven’t backed up your photos from Android to Google drive and you lost them? We can imagine the frustration of such moments. That’s why we are here with a solution to that problem too!
Tenorshare UltData - Android Data Recovery is the best tool that can help you recover your deleted photos on an Android device. Let’s get into it with no further ado and learn about how this fantastic software can save the game for us!
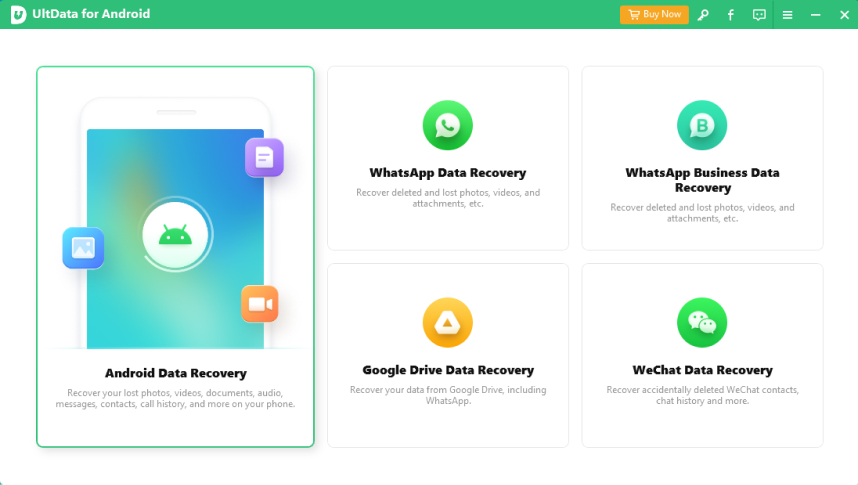
- First, download the application on your laptop or pc, and launch the program. Connect your Android device with the laptop via USB cable and make a secure connection.
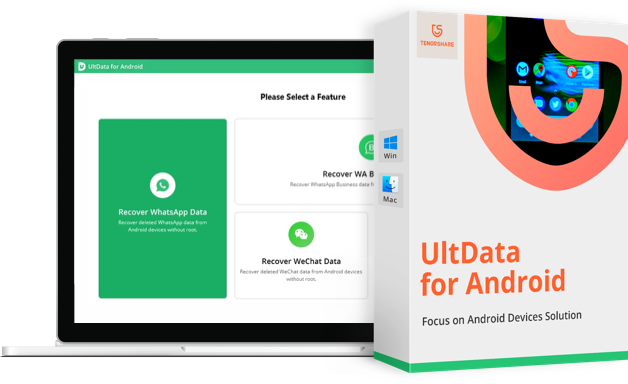
When you launch the program, you will see many options on the screen, and you have to choose the “Recover lost data” option.

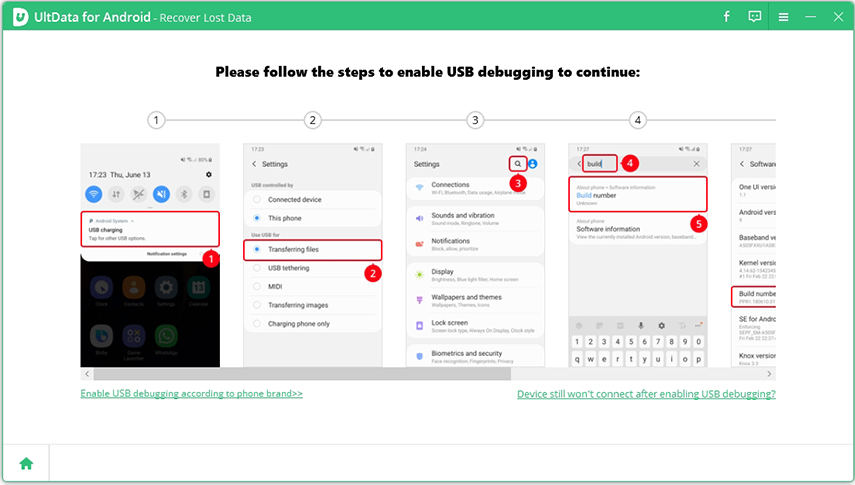
After this, enable USB debugging on your Android device following the mentioned steps on the screen.

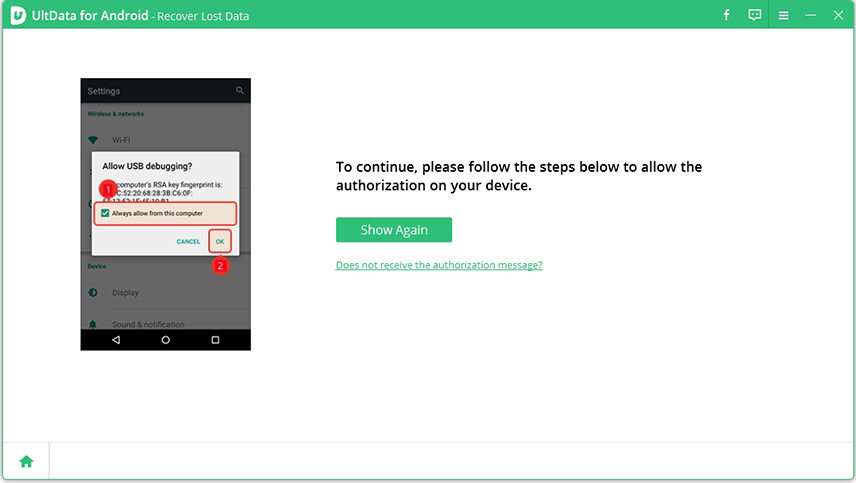
Now, it’s time to activate authorization on your phone. When your USB debugging is successfully enabled, a pop-up window will confirm to start the authorization. Tap on the “ok” button to continue the process.

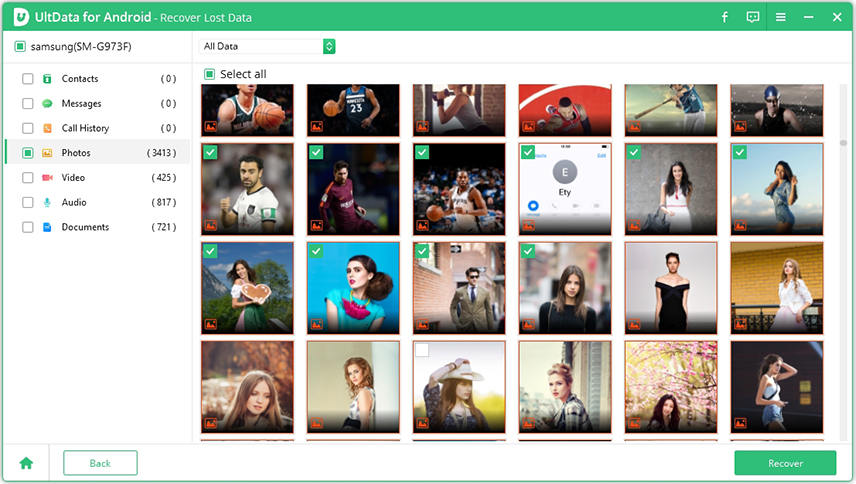
- Now, you will see many options on the screen. You can choose the photos option to recover your deleted files. Then click on the Start.
A preview window will appear. Choose the photos you want to recover. Click on the “recover” option, and the software will recover the lost photos.

Summary
Say goodbye to all the worries that your lost photos or files caused you. Now, it is no more difficult to backup android photos to google drive and even recover these files. We tried to provide you an optimal solution to all the critical issues related to data backup and recovery, as well as the best recovery software – UltData for Android . Remember these tips and tricks, experiment with them and don’t forget to let us know how beneficial these were for you!
- Recover deleted WhatsApp Messages on Samsung, Huawei, Xiaomi, OPPO without root;
- Recover photos, contacts, messages, videos and everything you lost;
- Preview individual file before data recovery;
- Support with most Android phones and tablets;
Speak Your Mind
Leave a Comment
Create your review for Tenorshare articles
Tenorshare UltData for Android
Best Android Data Recovery Software
Highest Data Recovery Rate
