How to Transfer Photos from Android to Mac via USB or Wirelessly
Your primary mobile device is an Android phone but you also own a Mac, then you might be left wondering how to transfer photos from Android to Mac. Despite of Apple efforts to create a whole Apple ecosystem, there is still room for their devices to be compatible with non-Apple devices. There are methods to do this photo transfer, which can involve using a USB cable or get done wirelessly.
- Part 1: Can You Transfer Photos from Android to Mac Using USB Directly
- Part 2: How to Transfer Photos from Android to Mac Using USB
- Part 3: How to Transfer Photos from Android to Mac Wirelessly
Part 1: Can You Transfer Photos from Android to Mac Using USB Directly
On Windows PC, people can access photos and other files and transfer them easily through a USB cable. Is it possible to transfer photos from Android to Mac using USB directly too? Well, there is one way that is to use Image capture program on the Applications folder in Mac. However, this is not a convenient method to import photos from Android to Mac. We will explain it below.
To provide more choices, we list 5 ways to transfer photos with USB and 2 more to transfer photos wirelessly.
Part 2: How to Transfer Photos from Android to Mac Using USB
Now, we will go through some using which you can transfer photos from Android to Mac using a USB cable. All of these have their pros and cons, and thus, you can review each and then decide which seems perfect for you.
1. Android File Transfer
Needless to say, anyone with this need must know about Android File Transfer by Google that supports Android phone to Mac file transfer. With this software and a USB cable, you are ready to transfer.
- First download and install Android File Transfer on your Mac. Click here to download. Note this is only for macOS 10.7 and later.
Open the application on your Mac and connect your Android phone via the USB cable.
Remember to allow Mac to access phone data and set USB settings used for transferring files.
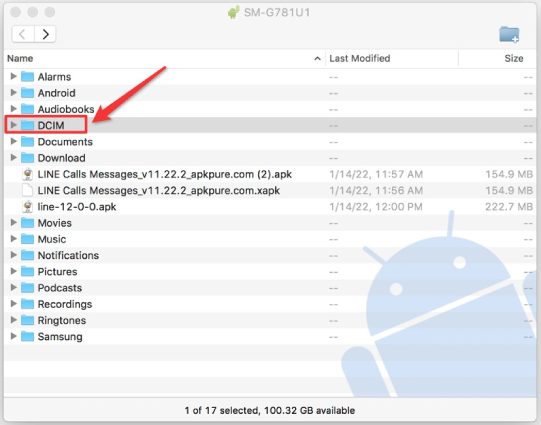
All the photos are kept in the DCIM folder. Click on it and drag and drop images to the desktop.

2. Phone Mirror
Tenorshare Phone Mirror is a software that mirror Android to PC and Mac. You can use it to transfer photos from Android to Mac too. How to use Phone mirror to transfer files is explained as below.
After downloading and installing Phone Mirror on your Mac, start the program.
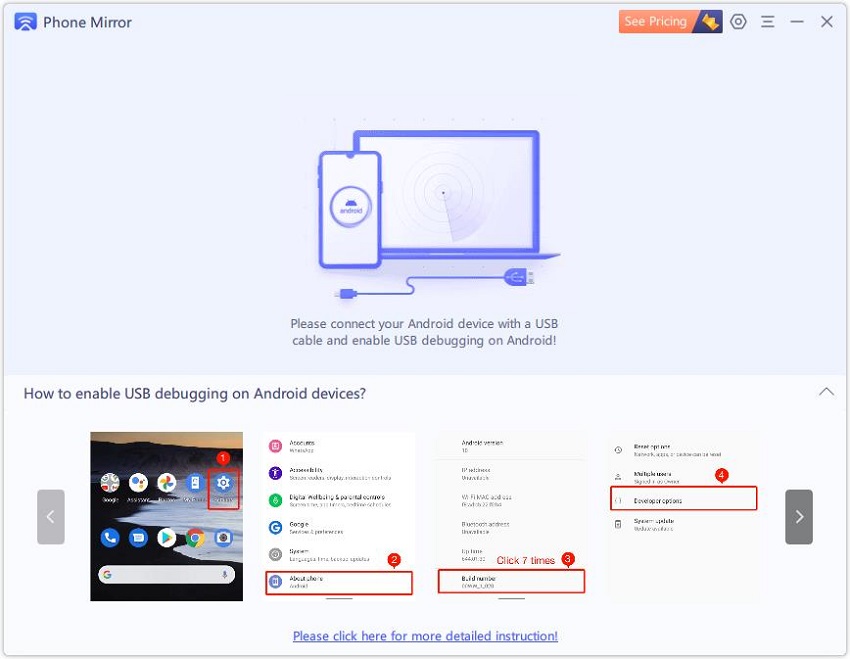
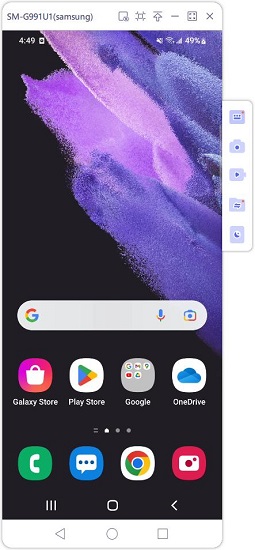
Connect your Android phone to Mac with a USB cable. And after enabling USB Debugging on your phone, its screen will be automatically displayed on your Mac.


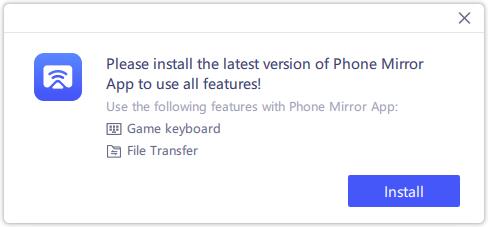
To transfer photos from Android to Mac, download the Phone Mirror app on your Android and allow it to access files.

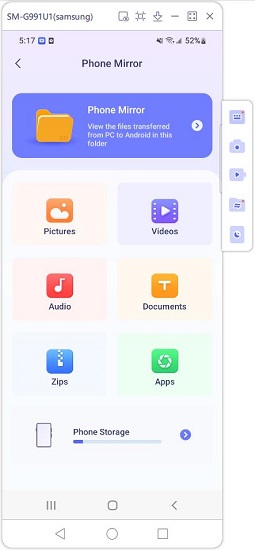
On the main interface, click on File Transfer and then select Photos. It will show all the photos on your Android.

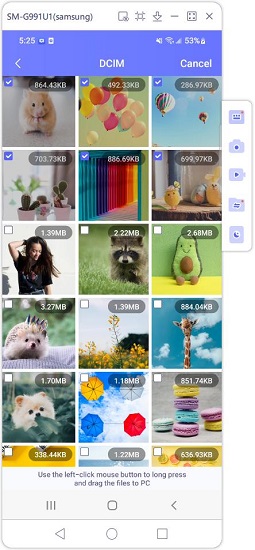
Long press the left-click mouse button and drag the photos you select to Mac screen. That's it.

3. SD Card
Some Android users will use an extra SD card to store photos to save device local storage. So to transfer these photos to Mac, you can also directly use this microSD card which requires a card reader though.
- Remove the SD card from your Android, put it in a card reader and insert it to your Mac.
- Run Finder and click on the card file, then you can drag and drop photos easily.
4. Image Capture
Image capture is a built-in app in your Mac which may be used for Android photo transfer. It can transfer images and videos from iOS device or even Android. But some photos may not be scanned and displayed well on this app. Anyway, you can have a try.
- Run image capture on your Mac and connect your Android to it by using a USB cable.
- And in the sidebar, look for your Android device. Tap on it.
- Now select the photos you want to transfer and select a destination folder. And then click on Download All to download Android photos to Mac.
5. Samsung Smart Switch
The last tool is specially for Samsung mobile owners. Samsung Smart Switch helps transfer photos, videos, contacts and other files from Samsung devices and you can also use it to create a backup of the data. To transfer photos from Samsung to Macbook, follow the steps below.
- Download and install Samsung Smart Switch on your Mac.
- After running the program, connect your Android device to Mac with a USB cable.
Click on Backup and select the Images folder that you want to transfer to Mac, and then click on OK. This will move all the photos from your Android to the Mac.

Part 3: How to Transfer Photos from Android to Mac Wirelessly
Compared to transfer photos from Android to Mac using USB, many people prefer a wireless way. So here we also list two ways to transfer photos wirelessly. They all use another app to help.
1. Google Photos/Google Drive
Android user will be familiar with Google products. And as for Android photos to Mac, Google Photos or Google Drive are the choices rank to the top. After you sync photos from Android to Google Photos, you can sign into its website on your Mac and view the photos at any time. Download is also supported.
- For Google Photos, open the app on your Android and go to Settings.
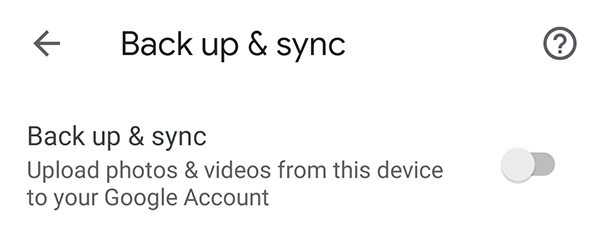
Tap on Back up & Sync, toggle it on. It will upload the photos and videos on your phone to Google account.

- Now on your mac, open Google photos from web browser and download any photo you want. All your device photos will be here.
2. DropBox
DropBox also offers cloud storage for Android users to save files like photos and videos. To transfer photos from Android to Mac, you can also upload all your photos to DropBox or let it automatically backup your photos, and then download them on your Mac from the DropBox website that you log in.
Conclusion
Moving data especially photos between devices is something that every person needs. You can easily transfer photos from Android to Mac if you know how to do it. Use methods which require a USB cable like Tenorshare Phone Mirror and wireless methods as well like Google Drive or DropBox. Choose whatever method suits you.
Speak Your Mind
Leave a Comment
Create your review for Tenorshare articles
