How to Fix iTunes Store Error 310 on Windows 10/8/7
“What does iTunes error 310 mean? I can't get my iTunes to connect to the iTunes store on my laptop. It has being doing this since I downloaded it. It keeps giving me the Error message ‘iTunes could not connect to the iTunes store an unknown error occurred 310’. How to fix iTunes store error 310?”
iTunes error 310 appears when installing a program from iTunes store, starting or shutting down Windows, or even connecting iPhone/iPad to iTunes. The causes of this error code are various, including incomplete installation of iTunes software, corruption in Windows registry for iTunes, iTunes-related files have been deleted mistakenly etc. This post will show you some free methods to fix iTunes store error code 310 completely.
1. Check the Network Connection Issues
When the “cannot connect to iTunes” error 310 occurred, it will inform you to diagnose network connection first. The following are all the items you need to check:
- Make sure your Wi-Fi router is in range
- Change to another wireless network or 3G connection
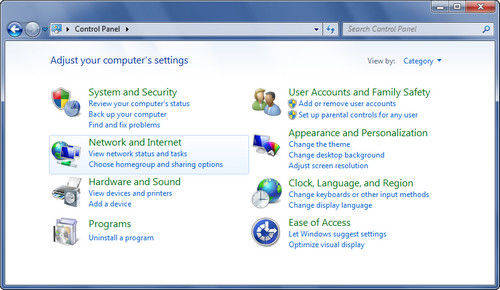
- Go to “Control Panel”, click “Network and Internet” and then choose “Internet Connections” icon, follow the instructions for troubleshooting.
- Reset Wi-Fi router. Unpack the device, press and hold the small Reset button for 5-10 seconds. You’ll then need to re-login with the default login configuration
2. Turn Off Parental Control
If the error still exists after network checking, turn off parental control would be another iTunes error 310 fix.
- Connect iOS device to computer and open iTunes
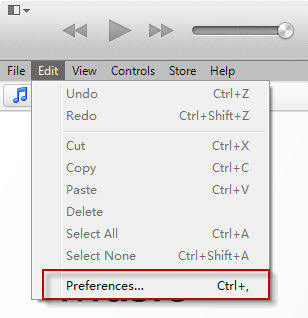
- Click iTunes and select the Preference option
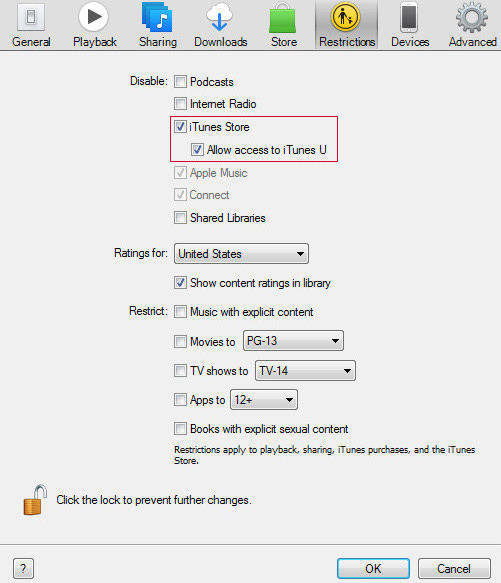
- Now click the Restrictions tab and check the box named as “iTunes Store” to disable access to it
- Select the “Allow access to iTunes U” , click “OK” and exit the program
3. Stop Using Proxy Server to Solve Error Code 310
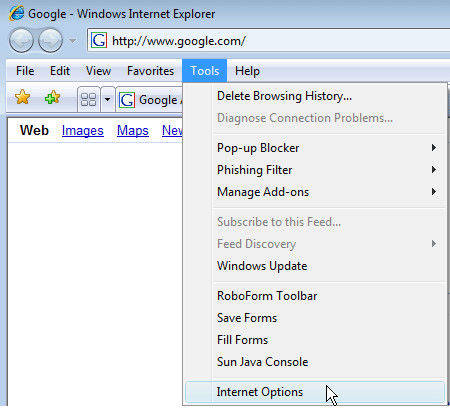
- Open “Internet Explorer” and press “Alt” key to show the menu bar
- From the main menu, click “Tools” menu and choose Internet options
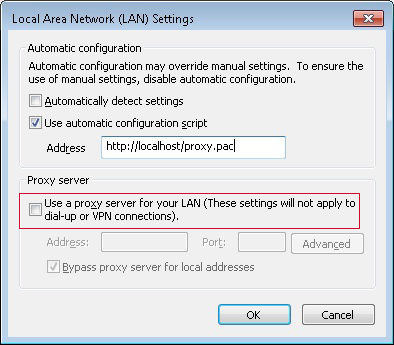
- Now click “Internet Options” tab, and choose to configure your LAN Settings
- Uncheck “Use a proxy server for your LAN” and click “OK” to save the changes
4. Fix Error 310 in iTunes by Modifying iTunes Host Files
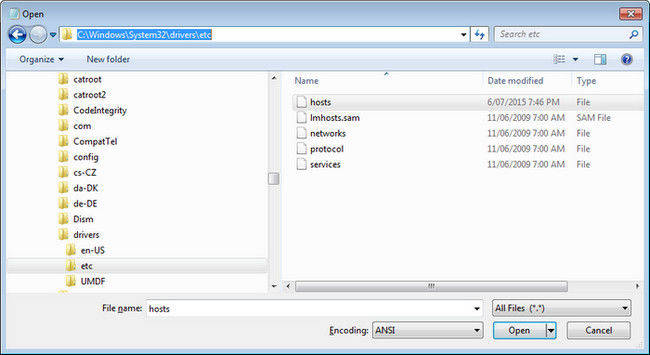
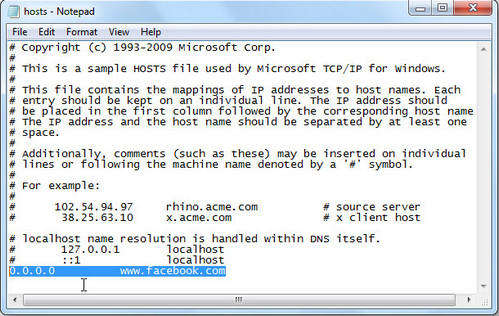
- Find the host files located in C:\Windows\System32\Drivers\ETC\HOSTS
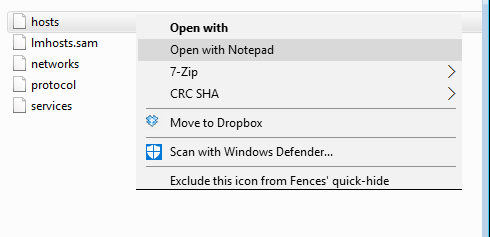
- Right click the Host files, then choose open with Notepad
- Click Edit -> Select all and edit -> Delete
- Save the changes and exit
5. Repair iTunes Library to Fix iTunes Error 310
As we’ve mentioned, one of the reasons for Apple iTunes error 310 is the corrupted iTunes-related files. Try Free Tenorshare TunesCare, a professional iTunes caring tool to fix iTunes error 310 and other itunes errors by repairing corrupted iTunesBD and iTunesCDB files.
- Download and install Tenorshare TunesCare on computer, run the program and connect iPhone to PC, click “Fix iTunes Sync Problems” from the main interface.
- The software will start to repair the corrupted iTunes library automatically. The process will complete within minutes, after the repairing, the error 310 will be gone.

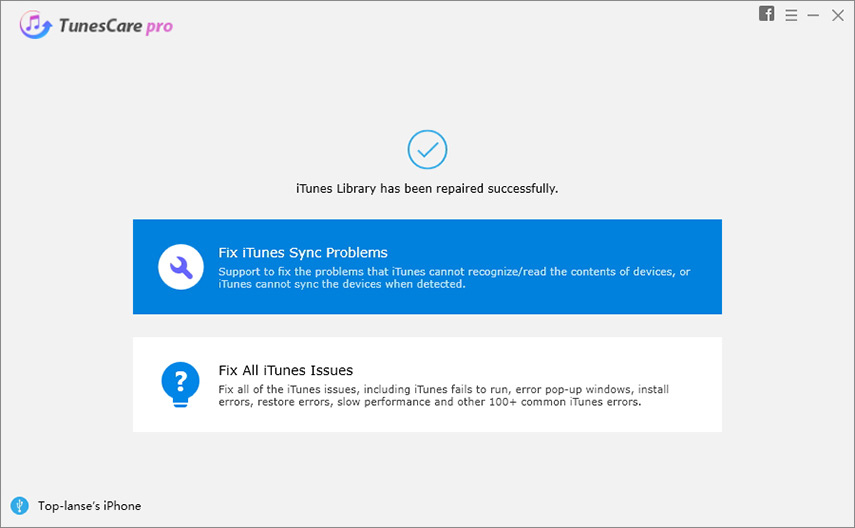
If you still see the error notice after that, you can try “Fix All iTunes Issues” option to fix iTunes drives.
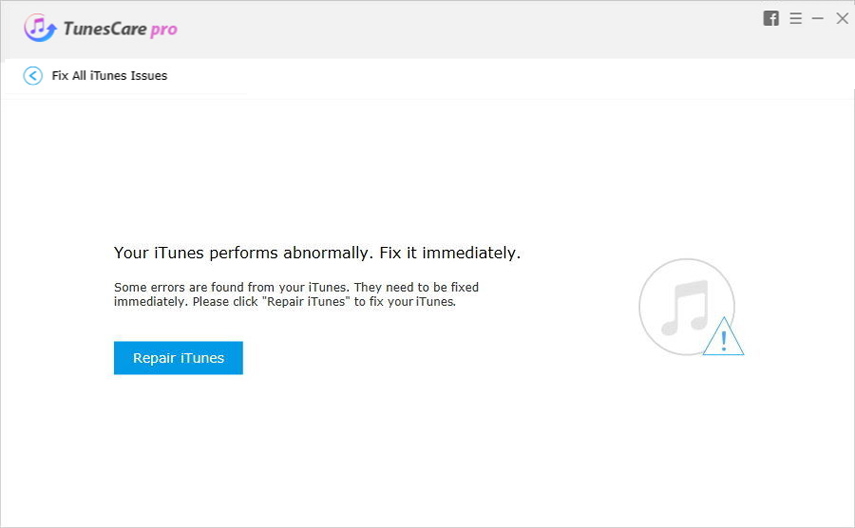
- Select “Fix All iTunes Issues” and the software will automatically detect the problem if there’s something wrong with iTunes, click “Repair iTunes” to download repairing drives.
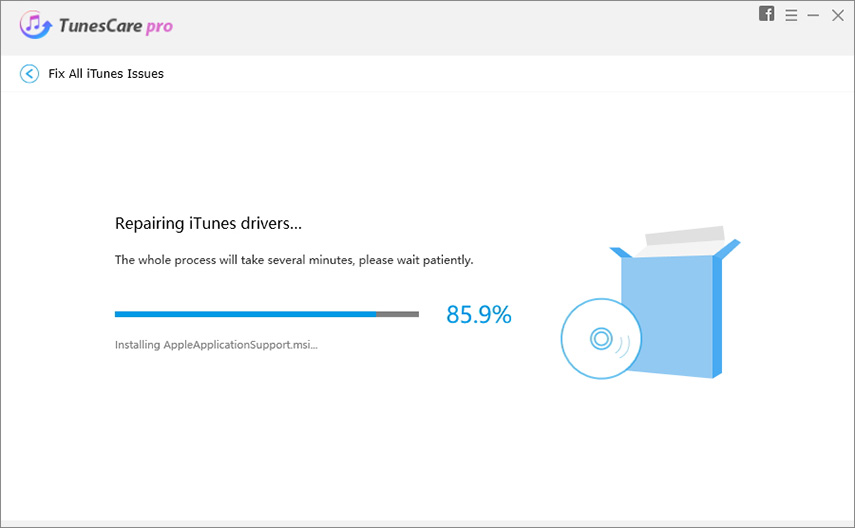
- Now the software will start downloading drives, when the downloading process completes, it will repair iTunes drives.
6. Update iOS to the Latest Version
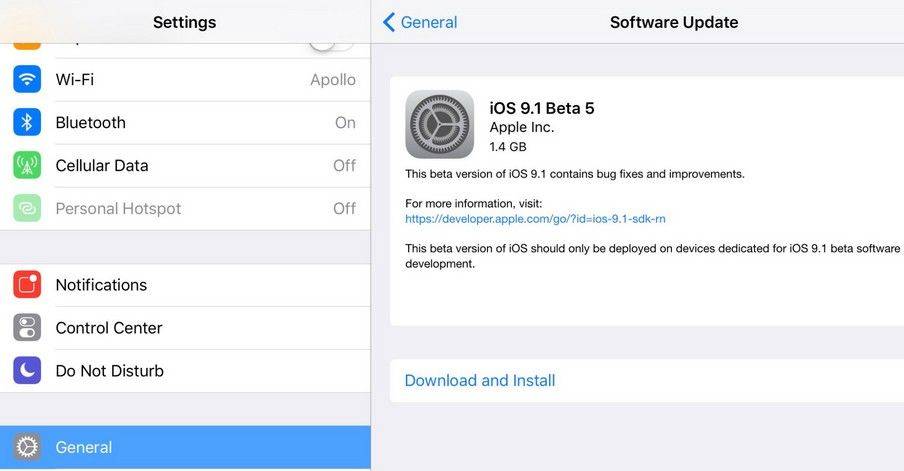
Sometimes an old versions of iOS can result into compatibility issues with iTunes, just go to Setting -> General -> Software Update to update software
Now you got to know how to fix iTunes store error 310 clearly. If you encountered other errors like iTunes error 17, iTunes error 4013 etc., you can still try Tenorshare TunesCare to fix them.


Speak Your Mind
Leave a Comment
Create your review for Tenorshare articles


