Full Guide to Transfer Files from iPhone to iPad Directly (iPadOS 16 Supported)
by Jenefey Aaron Updated on 2022-09-29 / Update for iPhone Transfer
A large amount of people across the globe use iOS devices and they love using it. However, more than often when they shift from one iDevice to another, the thing that concerns them is migration of the files between the devices. When it comes to file sharing between iPhone and iPad, people feel headache and find this a little troublesome since many of them don‘t have idea how to do this. But, no more headache now! We have brought a full guide to you that will make you understand the iPhone to iPad file transfer ways. Let us begin and explore the ways now.
1. With Tenorshare iTransGo – Super Simple
The first way and the highly recommended way that can help you transfer photos from iPhone to iPad or any other content will be Tenorshare iTransGo. This tool is specifically created to make the file transfer between iOS device easier than ever. You will find the transfer process extremely easy and seamless when you use this software. Also, the program promises to make the process complete in high speed and one-click operation. Its intuitive design and high compatibility with latest iOS versions and different operating systems make it more apt option to use.
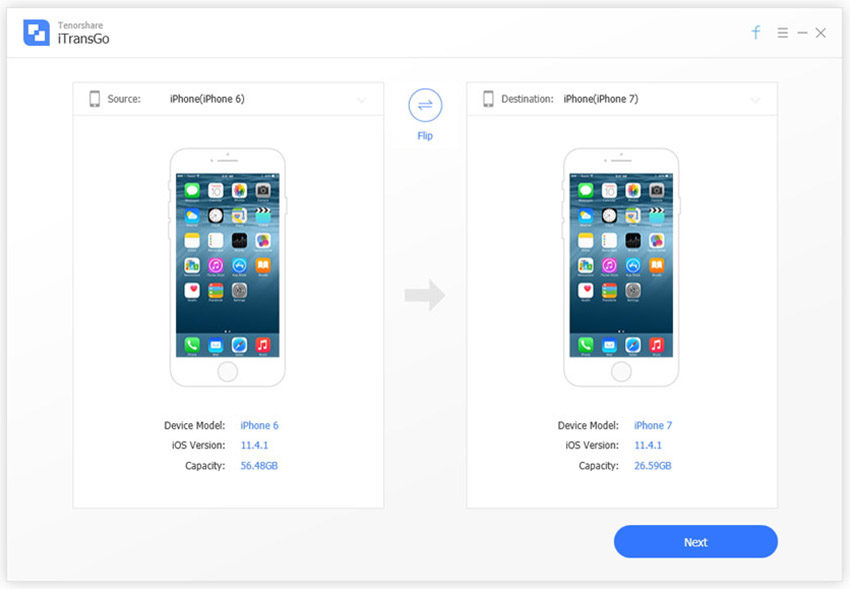
Step 1 – Go to the browser and visit the official website of iTransGo. Download the tool from there and install it. Now, open it and make the connection between the two iOS devices with the PC. Once done, click on the ‘Next‘ button.
Note: If the source and target devices aren‘t correct, you can click on the ‘Flip‘ button to switch them.
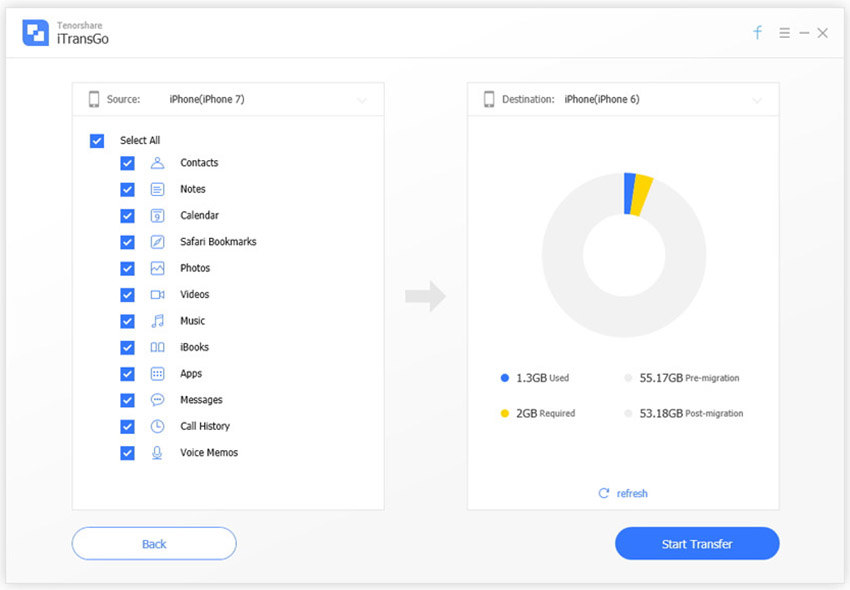
Step 2 – Now, the tool will analyze the contents of your source phone and you will see the data types with check boxes beside each on the screen. Start selecting the ones you need to transfer to your target phone.
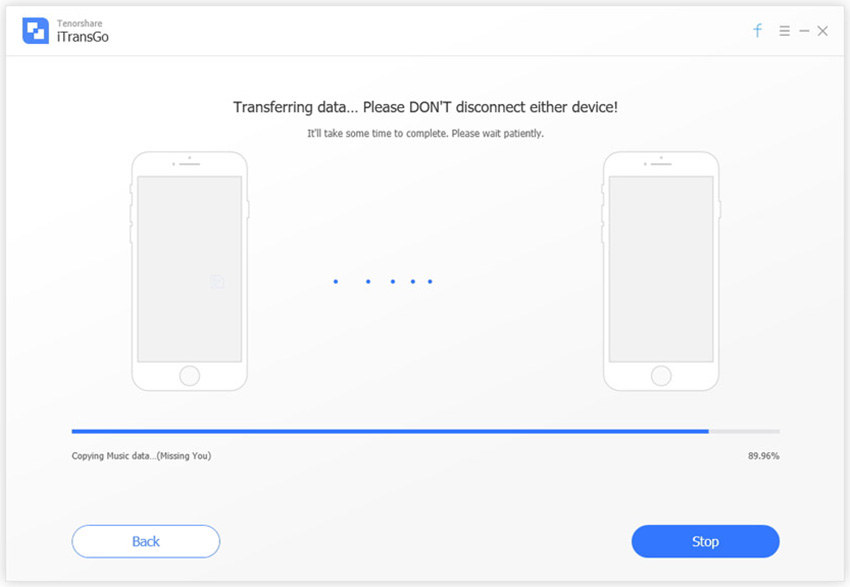
Step 3 – Click on ‘Stat Transfer‘ and your selected files will start getting transferred to the new device. Within a couple of minutes, you will get informed that all the files are successfully transferred.
2. With iTunes – Complex
When you want to know another way on how to transfer photos from iPhone to iPad or other data types, you can take help of iTunes. With the help of this common way, you will be transferring your iPhone file to iTunes and then the same files from iTunes to iPad. Here are the steps for this.
Start with launching iTunes and get your source device connected with the PC. Your device will be detected now and you need to click on the iPhone icon at the top.
Just below the icon, you will see files located. Click on the file type that you want to transfer such as we are choosing ‘Apps‘.
After choosing, look for the ‘File Sharing‘ option. There you‘ll find the apps. Choose the app icon you wish to transfer and the files from that app will show up at right column.
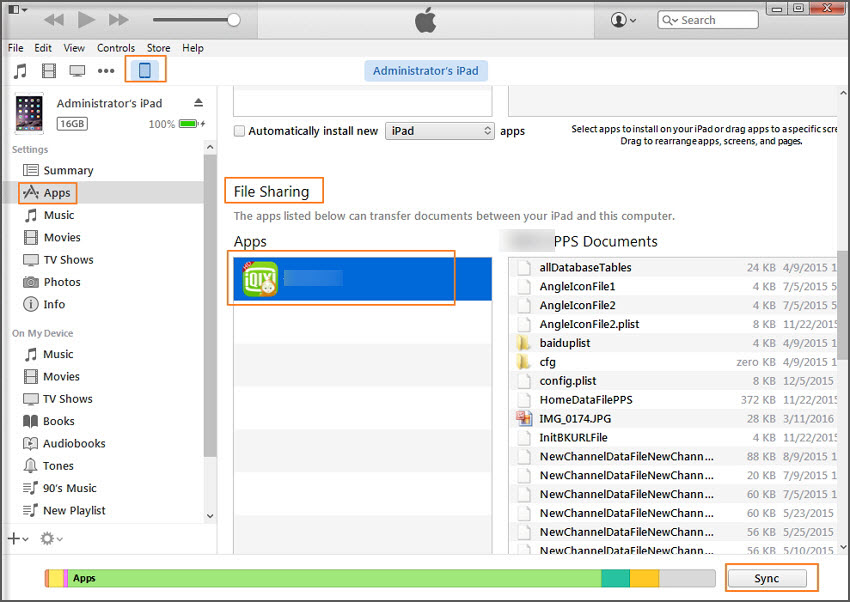
Select the files you want and hit on ‘Save to…/Sync‘ option from bottom right corner. Pick out the destination folder and save the files.
Now, get your iPad or target device connected with iTunes. On detection, click on the device icon at the top followed by ‘Apps‘ as we did above.
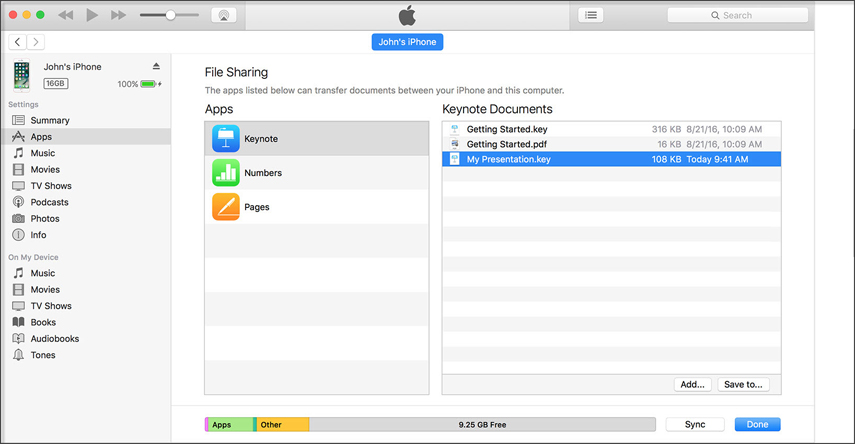
You‘ll notice the apps on the screen. Move to the ‘File Sharing‘ option and choose the files to be transferred. Click on ‘Add File…‘ followed by choosing the folder you wish to get your file in.
3. Via Bluetooth
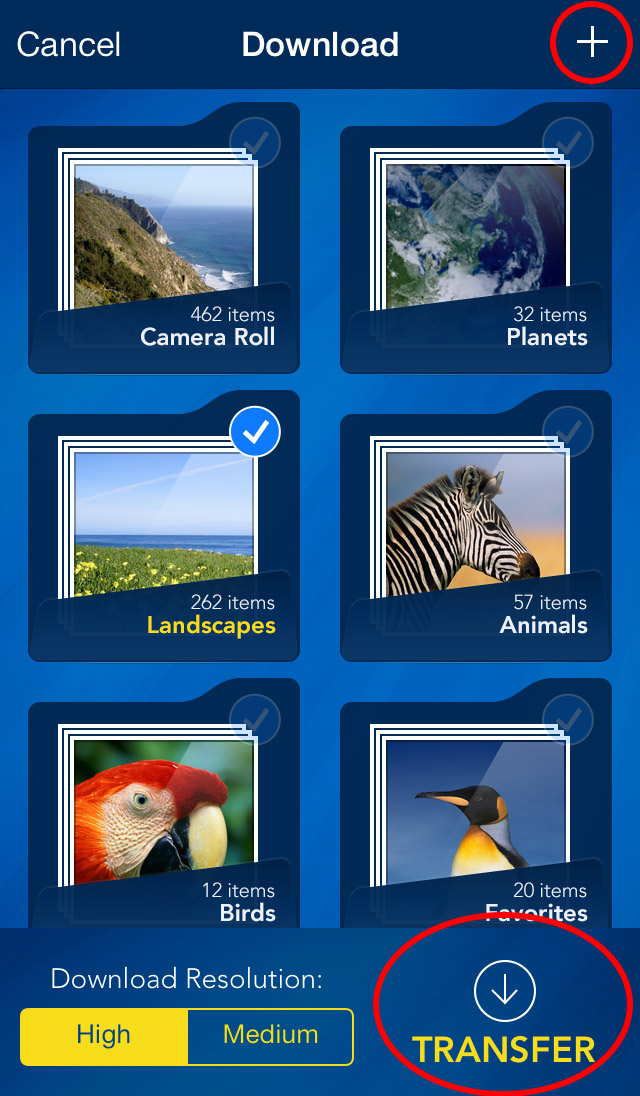
In order to transfer files to iPad via Bluetooth, you will need to take help of an additional app. in such case, ‘Photo Transfer App‘ is going to help you. However, you will only be able to transfer photos from iPhone to your iPad. The steps for this process are as follows:
Before beginning, please ensure that your iPhone and iPad are connected with the same Wi-Fi connection. Now, check out how to transfer photos from iPhone to iPad via Bluetooth.
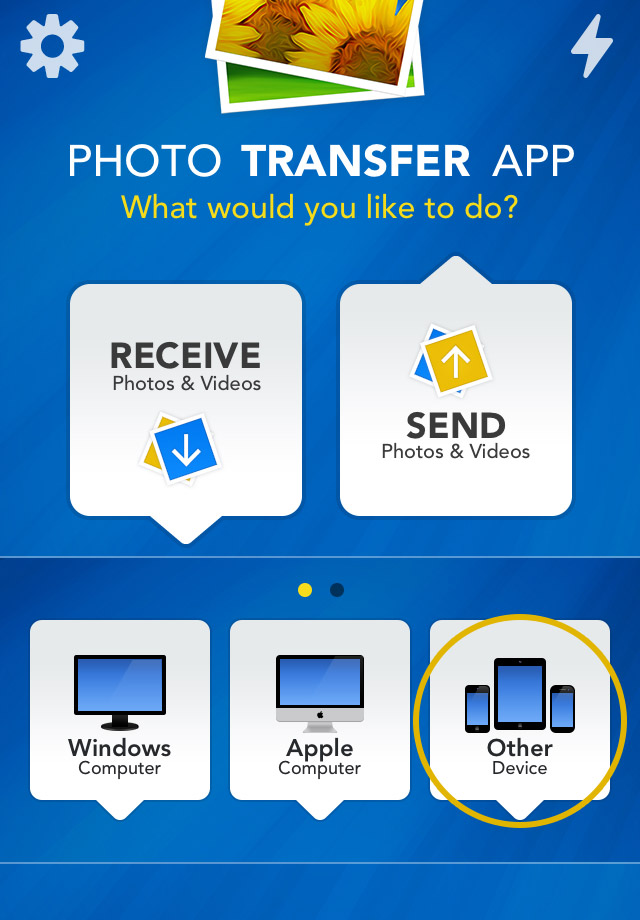
In your source device, open the app and tap on ‘SEND‘ option.
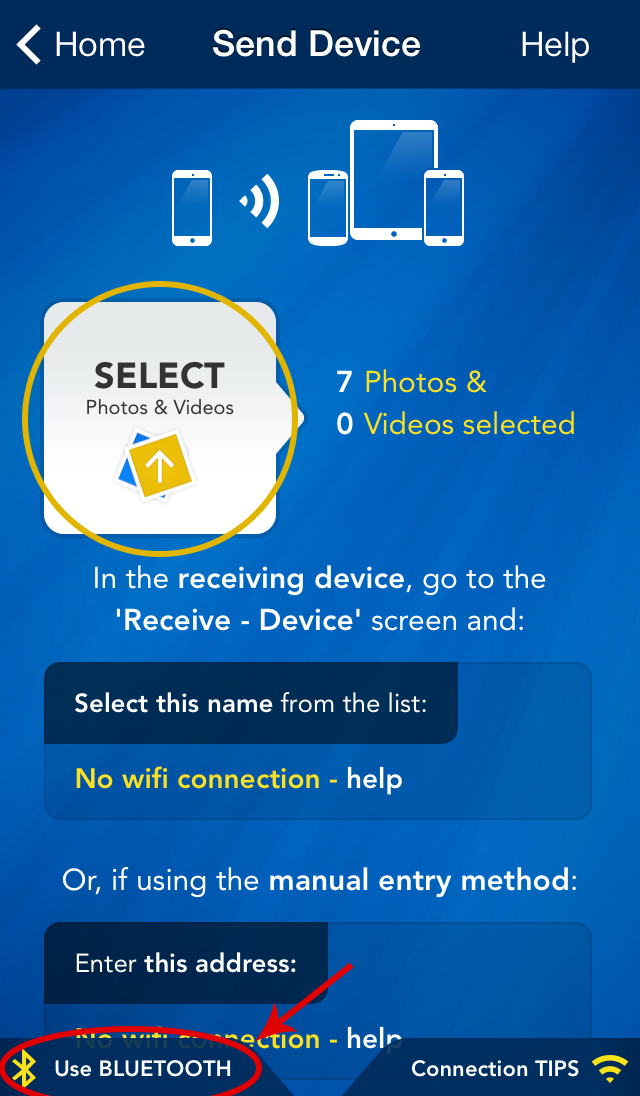
Now, tap on the ‘Other Device‘ tab and then click on the ‘SELECT‘ option in order to choose the photos you want to transfer.
You will see at the left bottom an option of ‘USE BLUETOOTH‘ and get to the target device then.
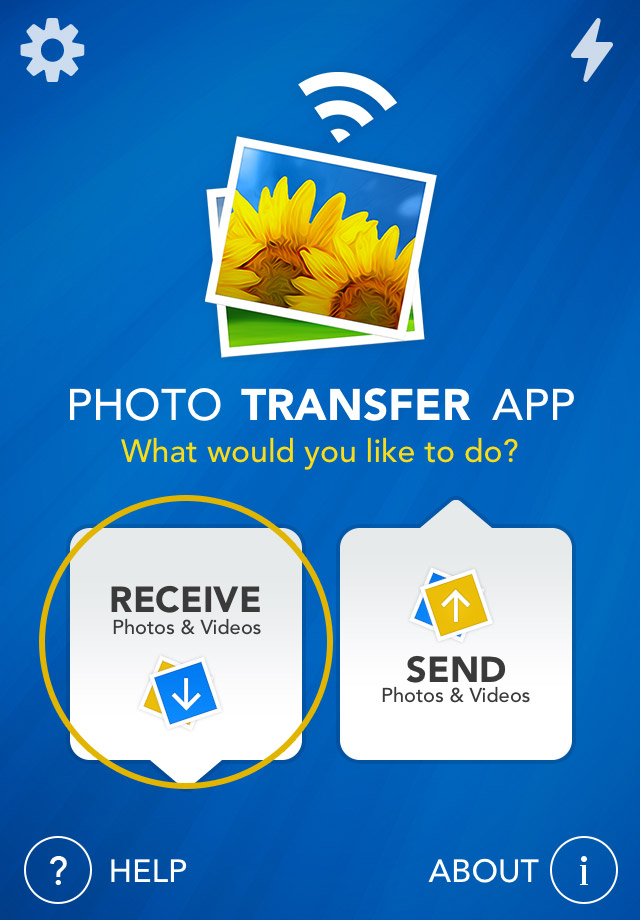
Open the app in the iPad now and tap on ‘RECEIVE‘ option. Tap ‘Other Device‘ followed by ‘USE BLUETOOTH‘.
After this, tap on ‘SEARCH DEVICES‘ and follow the prompts.
Tap ‘Get Photos‘ button after that and choose the location where you want to save those photos. Tap ‘Transfer‘.
Conclusion
You are provided with some easy ways and learned how to transfer photos from iPhone to iPad. Among the three of aforementioned ways, we would recommend you Tenorshare iTransGo. for its speedy performance and reliability. Also, within some easy steps, you‘re allowed to get the results. We hope you‘ve started transferring files to iPad by now. Stay tunes for more helpful guides. Thanks for reading!