Full Guide to Transfer Photos from iPhone to Mac
by Jenefey Aaron Updated on 2022-12-06 / Update for Transfer Photo
Because the iPhone provides non-expandable storage space, more and more users choose to store their data (photos, audio, etc.) on the computer. The normal ways to transfer pgotos from iPhone to Mac is using iCloud. Beyond that, is there an easier and quicker way?
In this article, we are going to talking about 7 ways on how to transfer photos from iPhone to Mac. Don't miss this article!
- Part 1: Top 4 Ways to Transfer Photos from iPhone to Mac with USB Connection
- Part 2: Top 3 Ways to Transfer Photos from iPhone to Mac without USB/Wirelessly
Part 1: How to Transfer Photos from iPhone to Mac with USB Connection
- Way 1: Restart Your Mobile Phones (Both iOS and Android)
- Way 2: Check Wi-Fi Connection (Both iOS and Android)
- Way 3: Turn Off "Smart Network Switch" on Android Phone
- Way 4: Check the Storage on Target Device
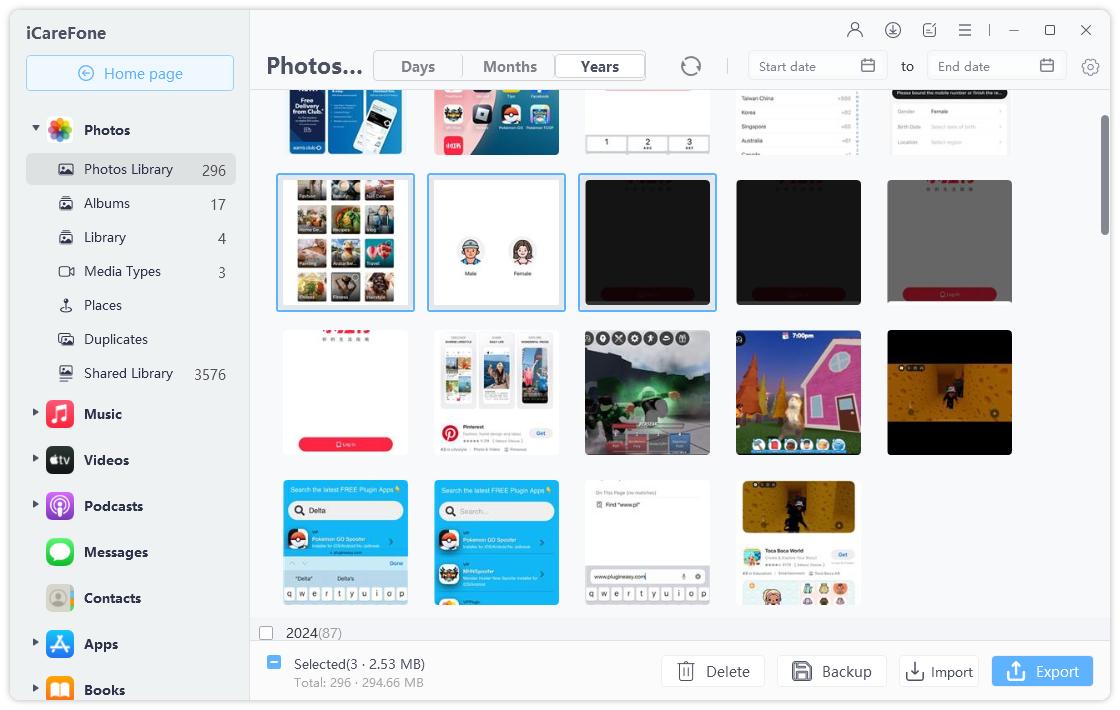
Talking about transfer photos from iPhone to Mac/PC, iCareFone was the first thing that came to my mind. It's an amazing transfer tool to transfer photos to PC and Mac in a few minutes.[iOS 14 and macOS Big Sur Supported!] Let's see how it works!
Way 1: Import Photos from iPhone to Mac with iCareFone
Run Tenorshare iCareFone on your Mac after downloading and installing, connect your iPhone to Mac via an original USB cable.

After detecting your device, find "File Manager" and then click on "Photos".

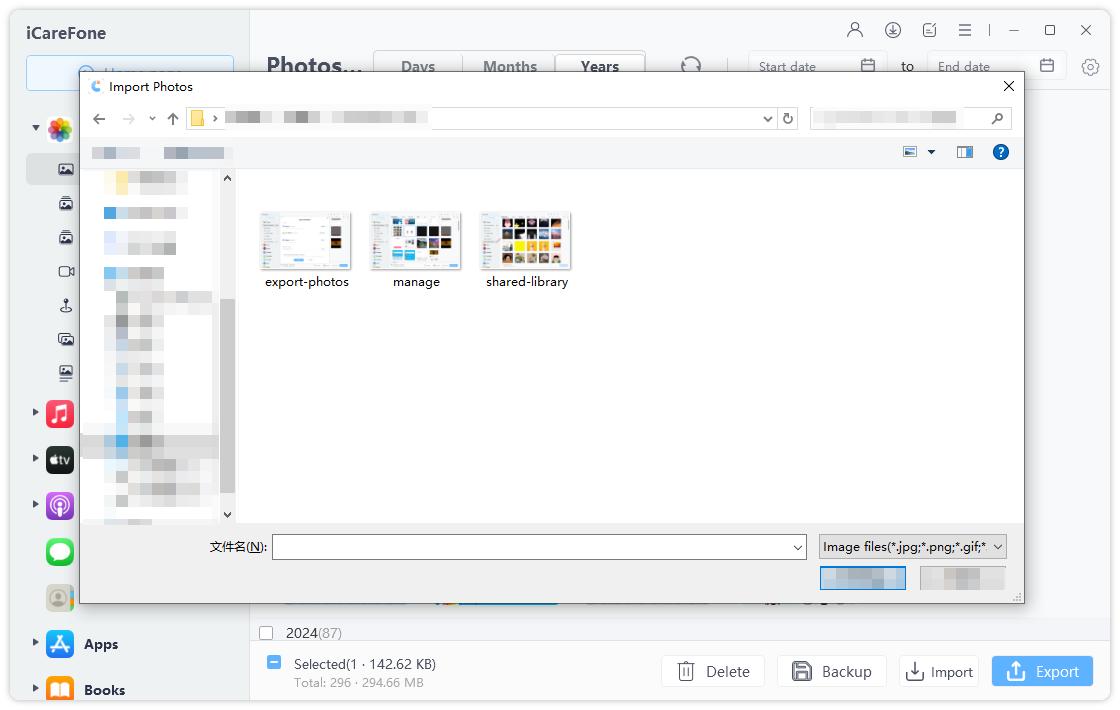
After selecting the pictures you just need to click on "Import" to transfer the images.

In the end, wait for a few seconeds then your photos will be transferred to Mac or PC. So, if you also want to know how to import photos from iPhone to Mac, iCareFone is also the best way for you!
Way 2: Upload Photos from iPhone to Mac with Photos App
The app not only stores your data but also organizes them so that you can easily find your precious photos whenever you need them. Here are the steps on how to transfer photos from iPhone to Macbook using Photos App are mentioned below.
1. Run Photos App on Mac.
2. Now, find a USB cable and connect your iPhone and Mac together.
3. After Mac detects the device, click on the "Import" tab.
4. All of the photo collection from your iPhone will be opened.
5. Now, you can choose of them or select a few specific ones.
6. After the selection process is done you can transfer them to Mac.

Although it is fairly a new app it has gained a lot of popularity among the users. Keep in mind, you will need iTunes pre-installed in your Mac to complete the process or else it won't work properly.
Way 3: Download Photos from iPhone to Mac with Image Capture
Another very popular Apple certified app is Image Capture. The app was basically designed for uploading photos and media from scanners and digital cameras. It also controls everything when it comes to connecting iDevices to your Mac. Transferring photos with Image Capture from iPhone to a Mac is very easy, and the steps are as follows:
1. Open your Mac and install Image Capture.
2. Now, get a USB cable and use it to connect your iPhone and Mac.
3. Now, open the program on Mac.
4. Now, a list of devices will be opened in front of you, be sure to select iPhone among them.
5. After that select a destination for your transferred files.
6. In the end, hit "Import" button to transfer the files to Mac.
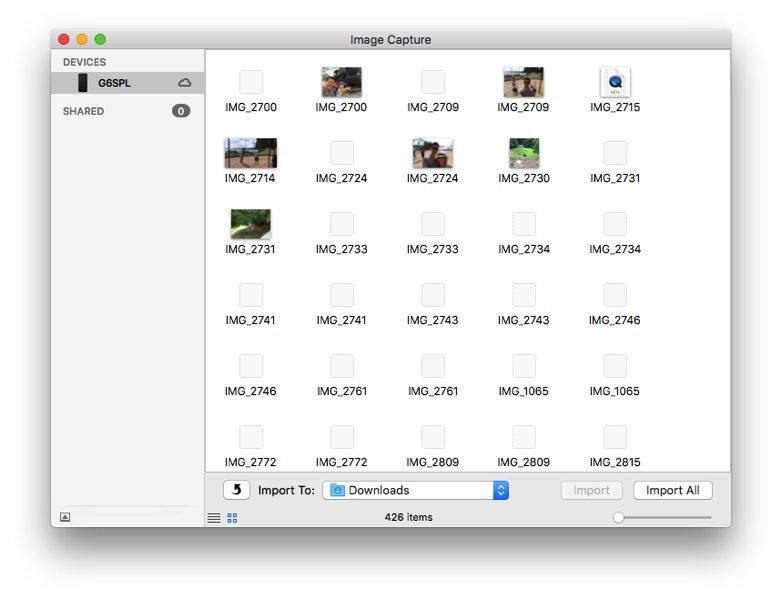
Here's how to transfer pictures from iPhone to Mac with Image Capture. It is a very reliable tool when you are transferring pictures from one iDevice to another, and there is no concern about data loss as well.
Way 4: Sync Photos from iPhone to Mac with Preview
Preview is a free Apple-designed app that supports Mac. The app is basically an image and PDF viewer. Fortunately, the app can also function as a medium to import photos from iPhone to Mac. The steps are as follows…
1. Get a good quality USB cable and connect your iPhone and Mac.
2. Launch the Preview app on your Mac.
3. Go to the upper left corner of the panel and click on "File".
4. Now, select the "Import from your iPhone" option.

5. Now, you can sync all the photos from your iPhone or select a few among them.

6. Finally, choose the destination for the imported photos.
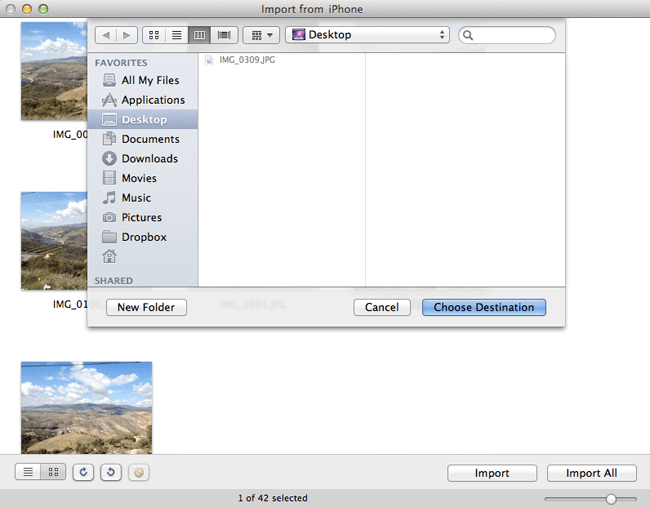
Ultimately, Preview is a great app but it is mostly used for its photo editing and PDF viewing functions, and if you take a deeper look at the app, you will find that the Import and Export options it provides are efficient. Overall a viable answer to a typical question like "How to transfer photos from iPhone to iMac?"
Part 2: How to Transfer Photos from iPhone to Mac without USB/Wirelessly
- Way 1: Restart Your Mobile Phones (Both iOS and Android)
- Way 2: Check Wi-Fi Connection (Both iOS and Android)
- Way 3: Turn Off "Smart Network Switch" on Android Phone
Wireless data transfer is a bit different from the above. This is simply the new-gen technique to transfer data without any drawbacks. If you want to transfer data wirelessly then you have to at least stay connected to a steady Wi-Fi network or you can use Bluetooth. But in this case, you have to stay in a close proximity to the device. A few apps which are designed to transfer data wirelessly are as follows:
Way 1: Upload Photos from iPhone to Mac by Airdrop
AirDrop is one of the newest apps in the App store but it has proven its worth by wirelessly transferring data from one iDevice to another, efficiently. The steps to use AirDrop may not seem very easy to the new users but if done right, it is very effective. But the major con here is the mandatory steady Internet connection without which it can't work. Anyhow, here are the steps to use it:
1. First make sure both your iPhone and Mac are connected to the same Wi-Fi.
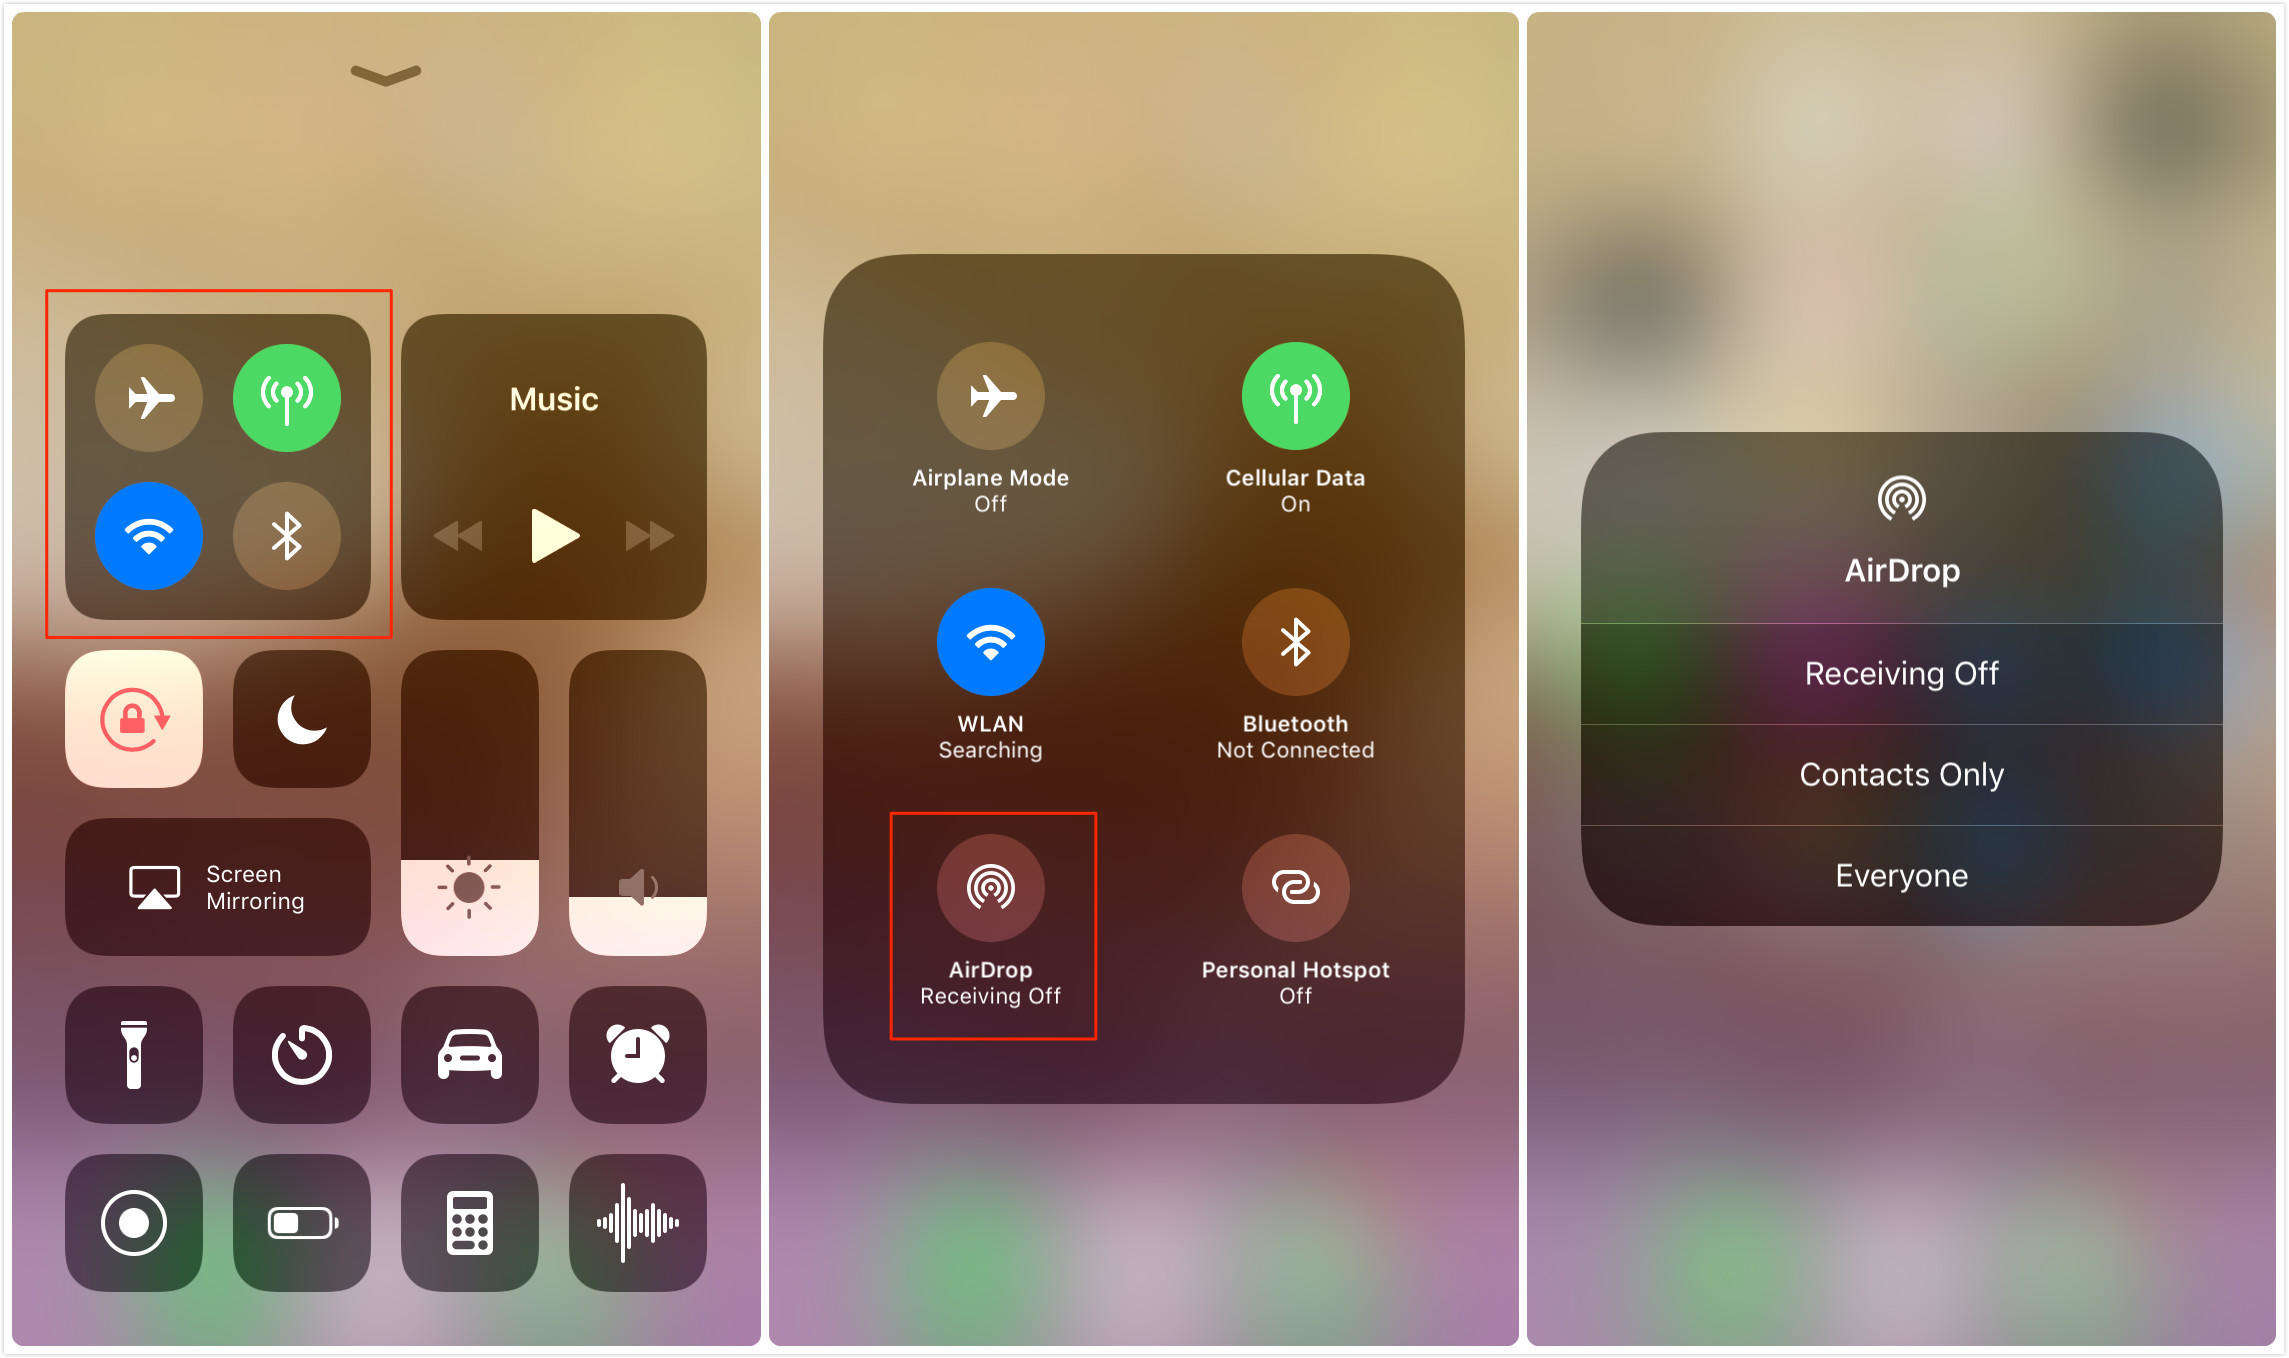
2. Enable Airdrop on your iPhone and choose "Everyone" in discovery settings.
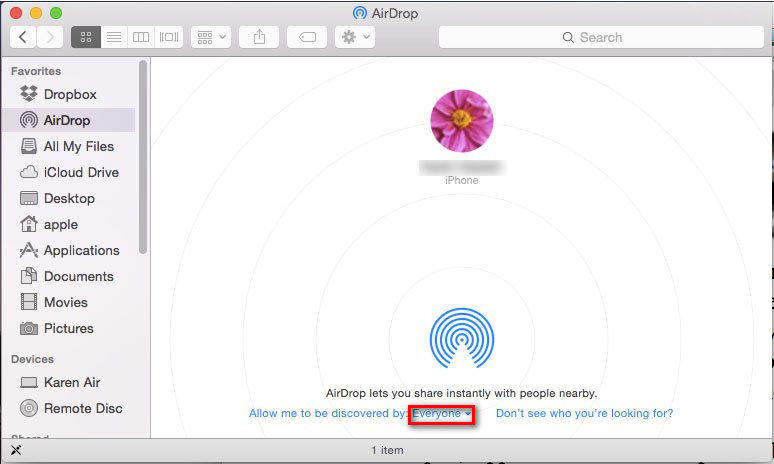
3. Launch the Finder on MacBook/ MacBook Pro/Air/iMac/iMac Pro and open Airdrop. Similarly select "Everyone" here too
4. Run the Camera Roll now on your iPhone and choose the required images
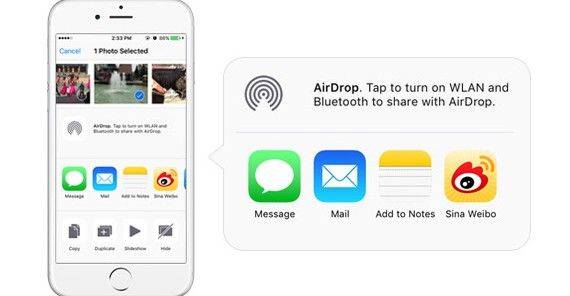
5. Simply hit Share and carefully save to Mac.
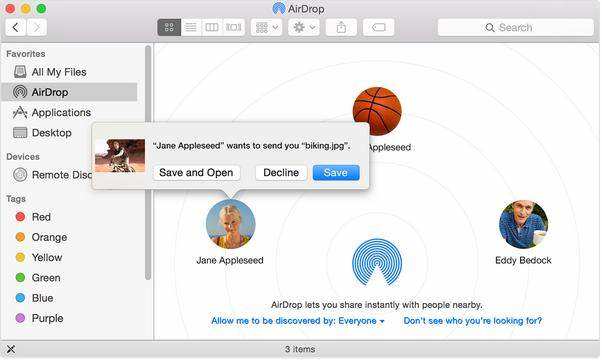
And you are done! Be sure to remember that AirDrop works in a different way compared to any other app. And you will need to have good Wi-Fi and the devices need to be in close proximity to each other for a smoother experience.
Way 2: Upload Photos from iPhone to Mac by iCloud
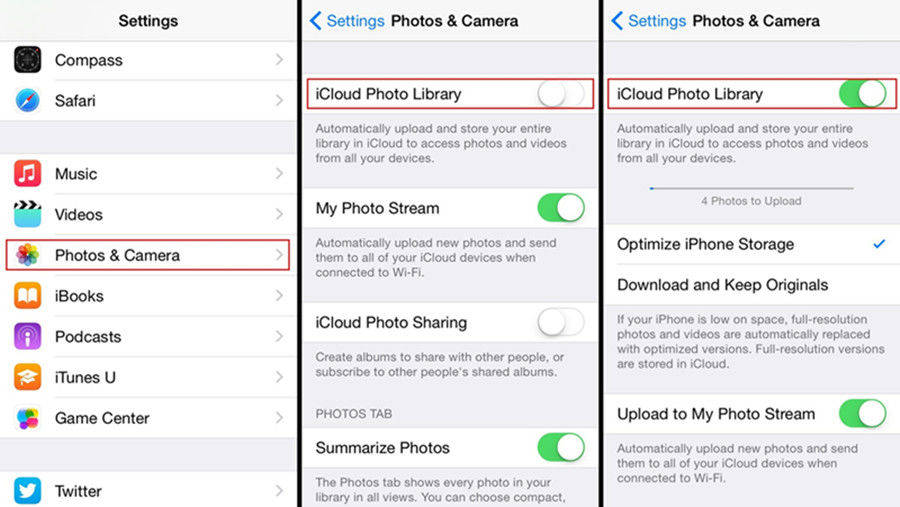
Before all of these fancy apps took over the market, iCloud was one of the few ways to transfer pictures from iPhone to Mac. So, basically, if you want to transfer photos with the help of iCloud you have to use the iCloud Photo Library feature and for that, you just have to turn on the function on both the devices namely your iPhone and Mac, and the app will take care of the rest.
On iPhone:
1. Open your iPhone and go to "Settings".
2. From there connect the device to a Wi-Fi network.
3. Now, go to "iCloud", before you have to tap on your name for iOS 11 devices. For iOS 10 or earlier, straight go to "iCloud" after "Settings"
4. After that go to "Photos" for iOS 11 devices and "Photo & Camera" for iOS 10 or earlier users and activate the "iCloud Photo Library" option.
On Mac:
1. Connect your Mac to the same Wi-Fi network as your iPhone.
2. Run the Photos App and click on the Photos option on the top.
3. Now, go to System Preferences and look for the iCloud tab.
4. There will be a list of options, you will find "iCloud Photo Library" among them, turn it on.
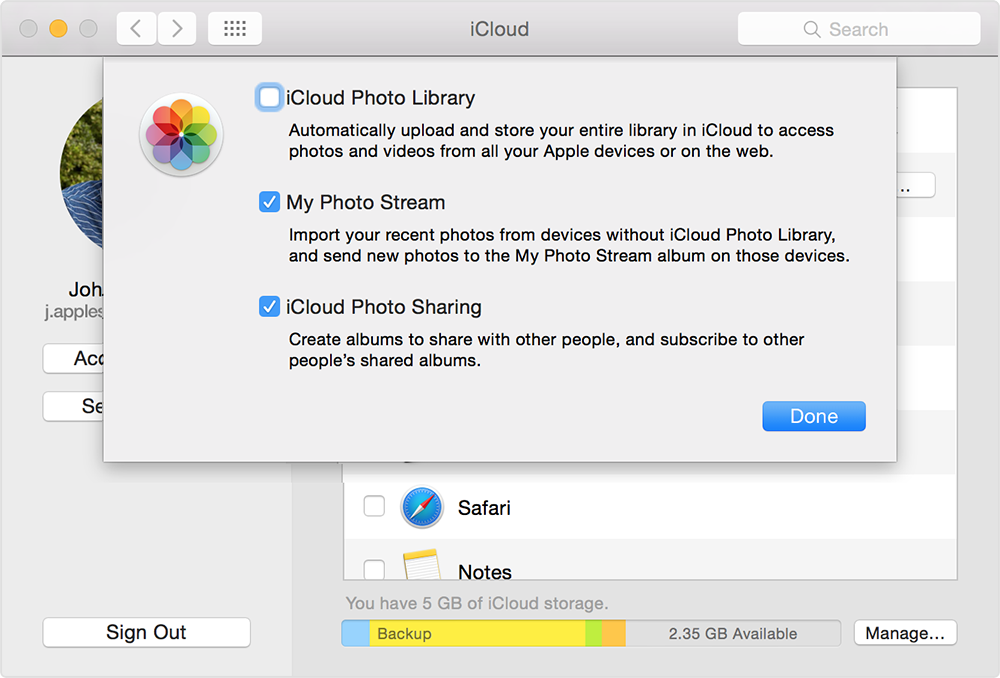
After this, the app will take care of everything and sync photos automatically from your iPhone to Mac but it will take a few hours to sync the data. You can follow the progress from the iCloud panel. You can get access to the synced photos in the Photos app.
Way 3: Upload Photos from iPhone to Mac by Email
When it comes to sending data from one device to another, we are forgetting the most basic method, Email. Actually, before all of these, the only way to send data was to attach the data to an Email and send it to the target. So, if you want to transfer photos this way to your Mac then read the following steps.
1. Now, on your iPhone go to Albums or simply open Camera Roll and select the photos you want to send and tap "Share".
2. A list will be opened, choose "Mail".
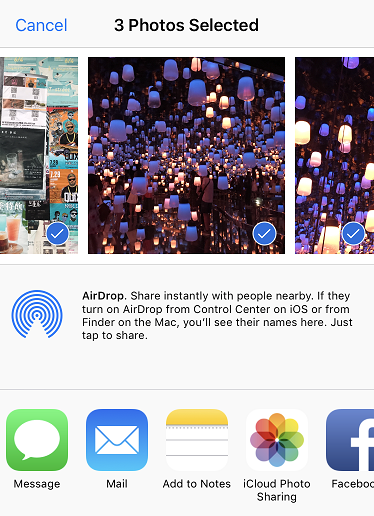
3. The new Email creation window tab will open with the attached images already present. You just need to provide the Email address and tap "Send" to transfer them to Mac.

4. Open your Email from Mac and download it to your preferred location.
So, it seems like Email is a secure way to transfer your photos from one device to another. Unfortunately, it is impossible to send a large number of photos through Email, so this is not a very practical method.
Summary
The way to transfer photos from iPhone to Mac/PC and how to import photos from iPhone to Mac with Tenorshare iCareFone, and other 6 ways to transfer photos between iPhone and Mac are all listed here. Any question? Leave a comment below!


