Real Fixes for iTunes Could Not Backup the iPhone Error (2025)
There are a lot of users who still use iTunes to backup their iPhone. But, iTunes application is complicated to run and you may face issues and errors, such as iTunes could not backup the iPhone because an error occurred.
There are numerous possible reasons why you are facing this annoying iTunes error message - installed iTunes application is outdated, iPhone is locked, iPhone being locked, not enough space to do a backup on the computer, etc. Well, the good news is that there are various ways that can probably help you to come out of this problem with ease.
- Part 1: 4 Ways to Fix This Issue: iTunes Could Not Backup the iPhone Error
- Part 2: iTunes Alternative Tool to Backup iPhone/iPad
Part 1: 4 Ways to Fix This Issue: iTunes Could Not Backup the iPhone Error
Here, we are going to mention four methods you can try to fix the error you’re facing. You can choose one as per your choice.
- Method 1: Use Tenorshare TunesCare to Fix iTunes Could Not Backup the iPhone Error
- Method 2: Fix the iTunes Errors by Restarting iPhone and Computer
- Method 3: Fix the iTunes Errors via Updating iTunes
- Method 4: Delete the Old Backup and Free Your Drive Space
Method 1: Use Tenorshare TunesCare to Fix iTunes Could Not Backup the iPhone Error
The first and best way to fix the iTunes error is using Tenorshare TunesCare. The software is designed specially to help users to resolve various iTunes related issues and errors. Whenever you are unable to restore, sync or backup your iPhone with iTunes, you can use Tenorshare TunesCare to repair iTunes so that you can manage your device content using iTunes without any trouble.
Here are its key features:
- It can help you to fix various iTunes restore or backup related issues.
- You can repair your corrupted iTunes library using the software.
- It can resolve several iTunes sync issues and errors.
- The software provides support for iTunes 12.9.
- It is compatible with both Windows and Mac computer.
To learn how to fix iTunes could not backup the iPhone error, you need to first download TunesCare software on your computer and then, follow the below steps:
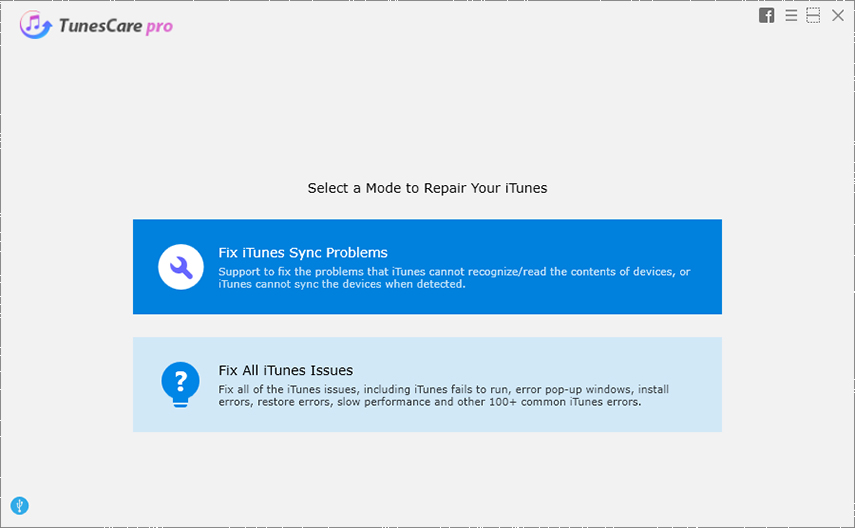
Step 1 Once installing the software, run it on your computer and next, connect your iPhone to the computer using a USB cable. Now, click on “Fix All iTunes issues”.
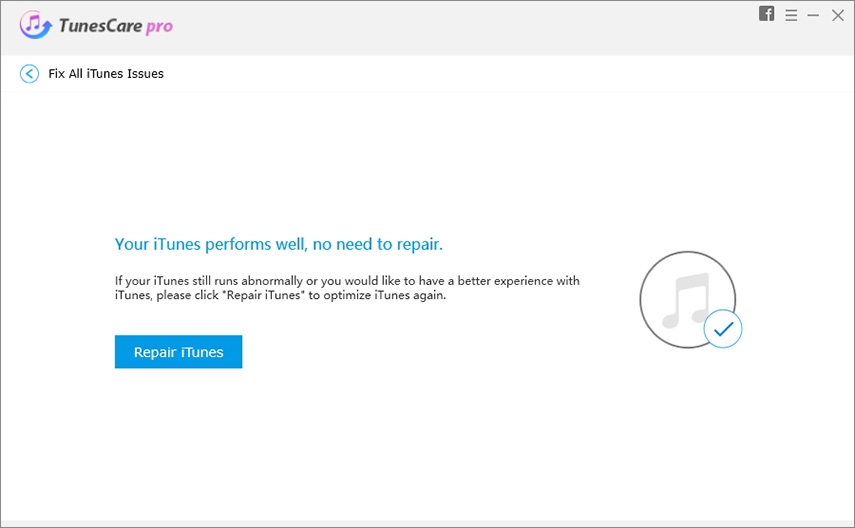
Step 2 After that, click on “Repair iTunes” to begin downloading the iTunes application drives to repair it.
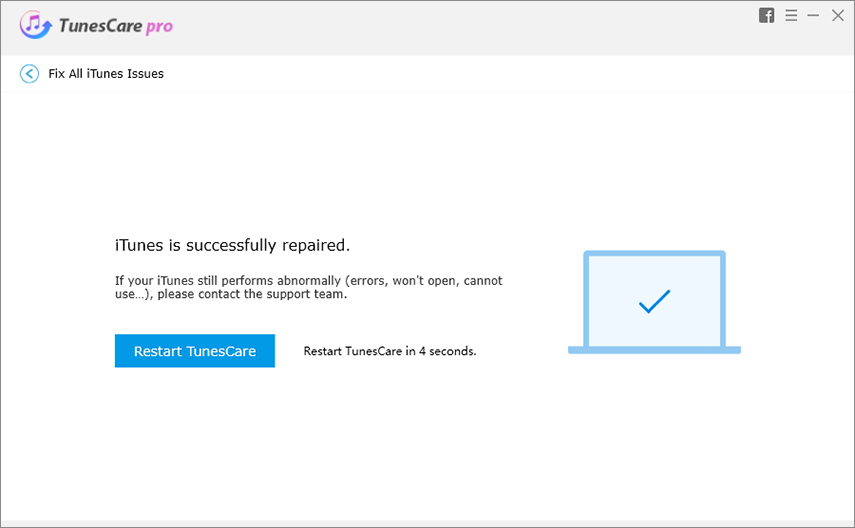
Step 3 Once the software downloads the repair drives for your iTunes, it will automatically begin to repair it and in a while, iTunes will be repaired successfully.
Method 2: Fix the iTunes Errors by Restarting iPhone and Computer
Are you using your iPhone and computer for a very long time? In some cases, when you use your device for such a long time without turning it off can make you go through issues while you trying to backup iPhone to iTunes. Thus, in this scenario, all you can do is to restart both of your devices and try again to backup your iOS device with iTunes.
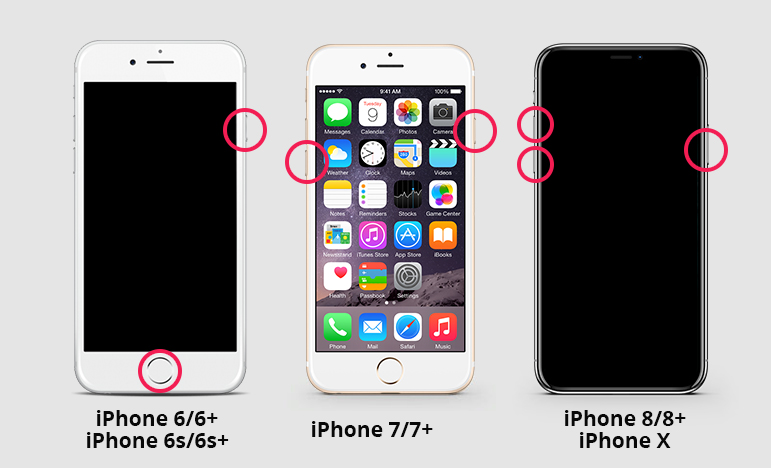
1. To restart iPhone 8 or above:
Press and Hold the Volume Down or Up and Side button until the power-off slider appears. Once it appears, drag it to turn your device off. Now, restart your iPhone by pressing the side button.
2. To restart iPhone 7 and iPhone Plus:
Press and Hold the Volume Down button with the Power Button. Next, drag it to switch off your device. Finally, Press the Side button again until you see Apple logo icon.
3. To restart iPhone 6s and earlier:
Press and Hold the Power button with the Home button. The Slider will appear but ignore it, do not release the buttons until the Apple logo icon appears again.
Method 3: Fix the iTunes Errors via Updating iTunes
Sometimes, the error message “iTunes could not backup the iPhone because an error occurred” occurs due to an outdated older version. So, if you are using older iTunes version, then you need to update its version to the latest one.
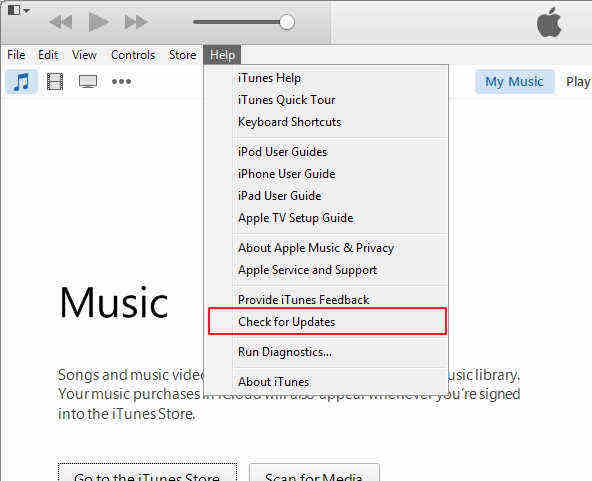
Follow the below steps to update iTunes on Windows:
Step 1: To start with, run the iTunes application on your computer.
Step 2: Next, tap “Help” option from the top menu bar and then, select “check for updates”.
Step 3: Finally, download and install updates if they are available.
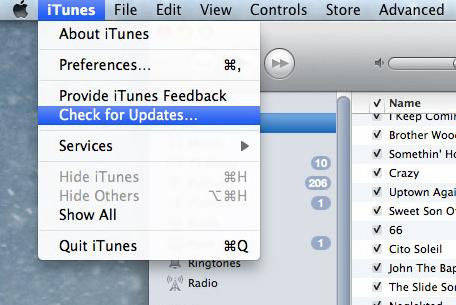
Follow the below steps to update iTunes on Mac:
Step 1: To begin with, go to the Apple menu.
Step 2: Now, click on “iTunes” and next, click on “Check for Updates”.
Step 3: If updates are available, then download and install them.
Method 4: Delete the Old Backup and Free Your Drive Space
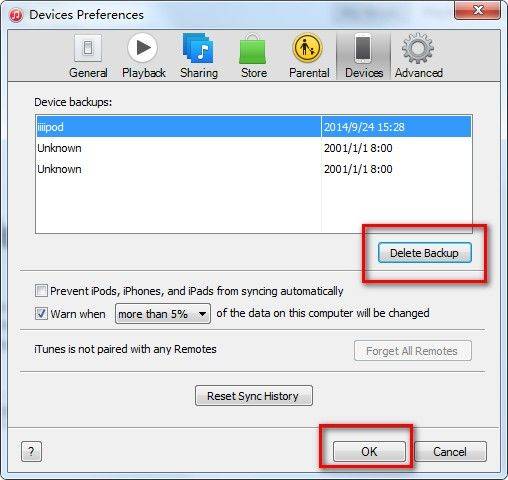
Keep in mind that insufficient storage space on the computer can also be the reason why you unable to backup your iPhone to iTunes. In such case, all you can do is to delete old iTunes backup files in an effort to free up your drive space to create a new backup. While cleaning your drive space, make sure to free up at least 5 GB storage space on your computer.
Here is the guide on how to delete old iTunes backups:
Step 1: Open iTunes application on your system.
Step 2: Next, click on “Edit” in case of Windows PC and click on the “iTunes” icon in case of Mac.
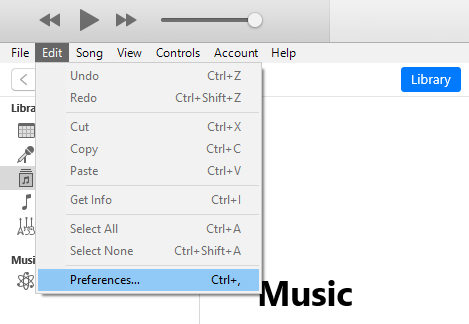
Step 3: Now, move to “Preferences” and next, go to “Devices”. Here, you can delete the backup.
Part 2: iTunes Alternative Tool to Backup iPhone/iPad
Tried all the above methods and still, facing iTunes could not backup the iPhone because an error occurred problem? We recommend using Tenorshare iCareFone. It is the best iTunes alternative that comes with backup and restore feature you can use to backup and restore your iPhone/iPad without iTunes. The feature is free to use and offers many advantages such as backup iPhone to computer without errors, selective backup, and much more.
Here, we are going to guide you how to backup by using Tenorshare iCareFone.
Step 1 Download and install.
Download and install Tenorshare iCareFone on your PC or Mac and then connect your device with it. Please uclock your device and input the passcode to ensure successful detection. Then, click “Trust” if your device prompts out a message, After the device is connected, select “Backup&Restore” tab on the first toolbar to start.
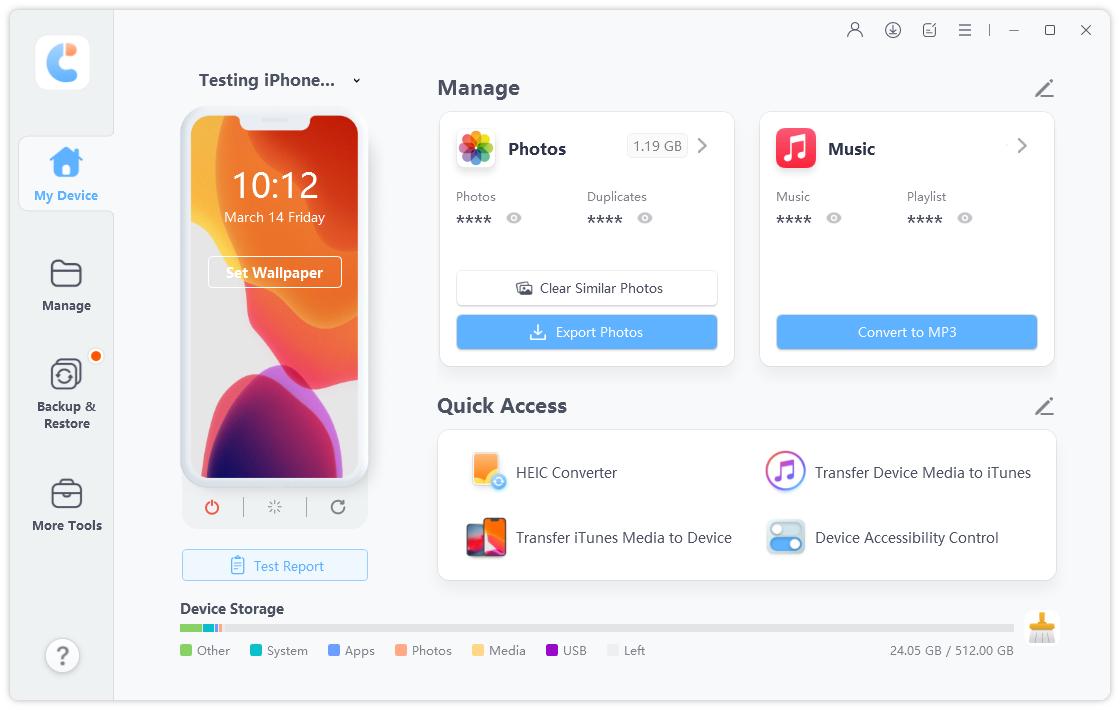
Note: while using iCareFone please turn off “iTunes” to make software run successfully.
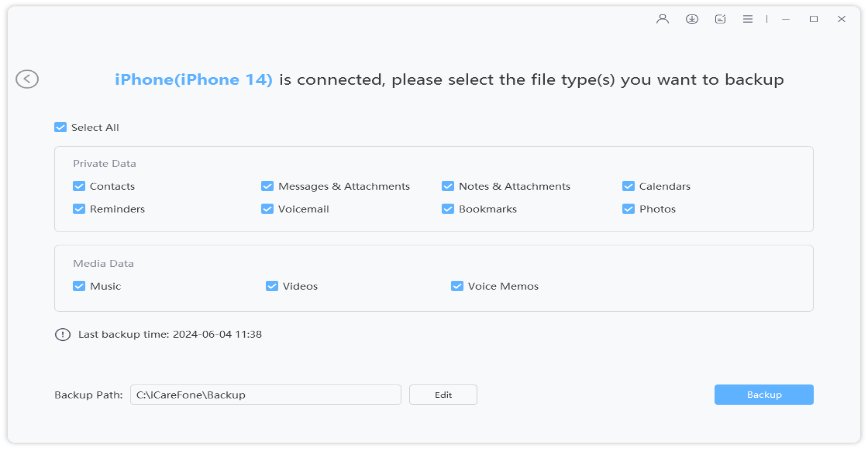
Step 2 Select Files
By default, all the files will be selected. Of course, you can select the files type you need to backup.Then click “Backup” to start.
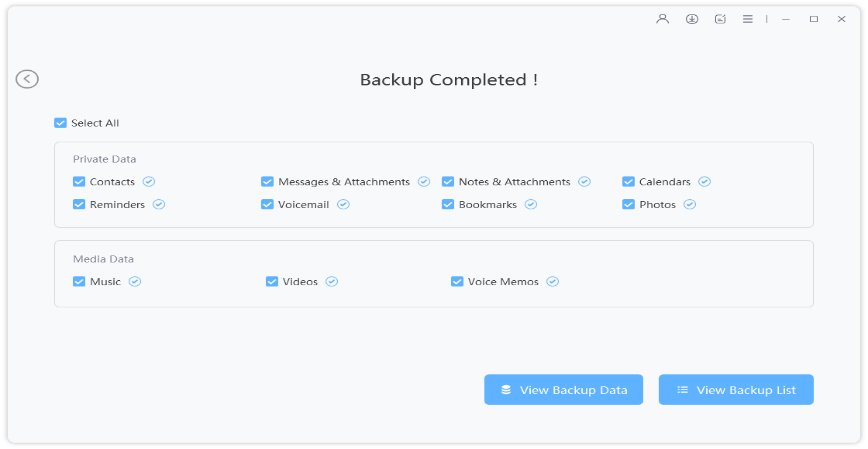
Step 3 Backup Completed
The whole process will take a while, please wait. Once backup completed, you can select “View Backup Data” or “View Backup List” to check the files you backup.
Conclusion
We hope that the error message “iTunes could not backup the iPhone because an error occurred” is fixed now on your device. However, Tenorshare TunesCare is the most recommended way to resolve iTunes related errors and issues.
Speak Your Mind
Leave a Comment
Create your review for Tenorshare articles


