Tips & Tricks to Fix iTunes Error 42110
Recently, one user reported a problem on Apple Forum that when he was trying to purchase music, he continually got the same message: “There was a temporary problem completing your request, an unknown error occurred (-42110), Try again later”. Another user reported an issue that he got an error 42110 when purchasing movies.
Part 1: What is iTunes Error 42110?
The error is a sign of an issue with the users account authentication. It generally arises after the computer to computer iTunes library transfer procedure completes. The error restricts you from completing the download process. At present, lots of iTunes users are experiencing this annoying error after they launch iTunes on their system.
There are many reasons behind the error, and the most common ones are:
- Outdated iTunes version
- It the files or content present in the “SC Info” folder gets corrupted.
- When the Windows firewall restricts iTunes to function properly.
- The corruption in the registry files of the system.
- When you are attempting to install a newly purchased driver software or hardware.
- When you purchase some video or music from the iTunes store.
If you’re one of those users going through this same situation, then you don’t need to worry as there are some methods that can probably fix the problem for you.
Part 2: Extra Tips - How to Fix Android Phone System Problems
Here, we are going to mention various methods you can try to resolve “iTunes error 42110 rental movies” error.
- Method 1: Repair iTunes Using Free Tenorshare TunesCare
- Method 2: Remove the SC Info Folder
- Method 4: Check your iTunes Account Authorization
- Method 5: Scan and Repair the Registry
Method 1: Repair iTunes Using Free Tenorshare TunesCare
The ultimate solution to come out of the error you’re experiencing is using Tenorshare TunesCare. When it comes to resolving iTunes errors, including error 42110, this software is a perfect choice because it fixes iTunes related errors and problems effectively.
The software has free features “Fix iTunes Sync Problems”, and you can use it to fix the error. In case if the error doesn’t go away, you can use the “Fix All iTunes Issues” feature, which is powerful enough to repair iTunes with 100% success. The feature will uninstall all iTunes components from your system, and reinstall the latest iTunes, and components on your computer to ensure you don’t face any interruption or corruption afterward.
So, download Tenorshare TunesCare and follow the below guide to fix your iTunes problem in easy ways.
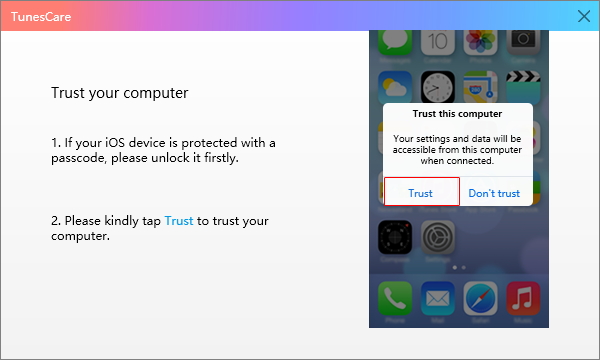
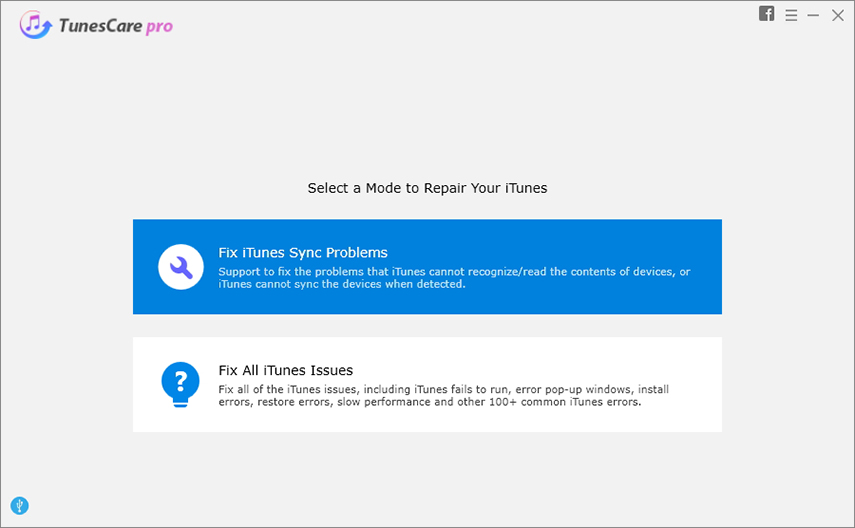
Step 1 Launch Tenorshare TunesCare, connect your iTunes to computer with the USB cable, a message will prompt on your device and click "Trust" to make the proccess go on successfully. Then select "Fix iTunes Sync Problems" to start to repair your iTunes.
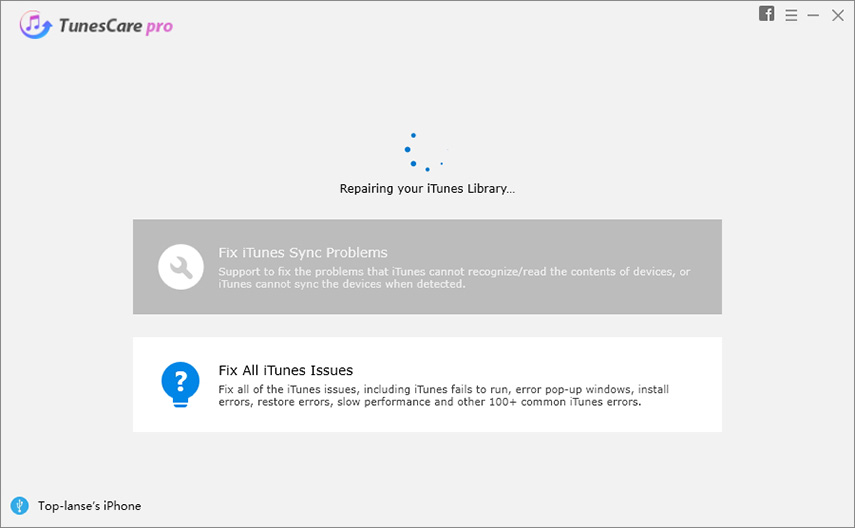
Step 2 The software will take a while to complete while repairing your iTunes.
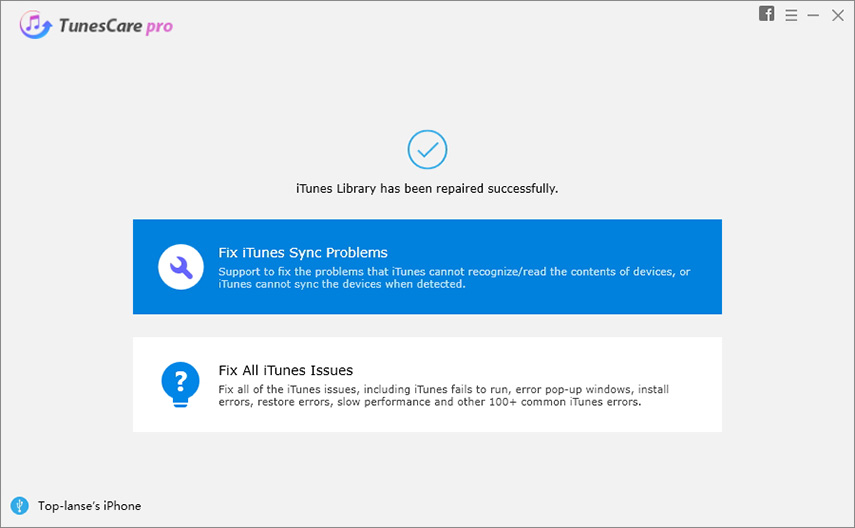
Step 3 After repairing, you will get the message on the software interface as shown in the below figure. Open your iTunes and sync your devices ad you want.
Method 2: Remove the SC Info Folder
The SC Info folder plays a crucial role in the proper working of the iTunes application. If it is corrupted, how you are sure to receive “iTunes 42110” error. In this case, the best thing you can do is to remove the SC info folder so that iTunes work properly.
To remove the SC Info folder from Mac, follow the below steps:
Step 1: To begin with, close down all the applications, and then, run the Finder.
Step 2: Next, move to the bar, which is at the top. Afterward, select "Go" > "Go to Folder".
Step 3: Now, you'll get a popup window, and here type "/Users/Shared/SC Info". Next, click on "Go" to get that folder.
Step 4: If you can’t find the folder, then you need to either type “/Users/Shared/” or just input the necessary permissions to that folder.
Step 5: If the Finder doesn’t show contents in a columnar manner, then choose “View”>” As Columns” from the menu bar.
Step 6: Look for SC Info folder, and simply drag or move that folder to the trash.
Once you are done with above steps, reboot your computer, and restart iTunes. Afterward, authorize your system with your Apple ID.
To remove the SC Info folder from Windows, follow the below steps:
Step 1: To start with, close iTunes, and other applications open on your computer.
Step 2: Next, hold down the “Control + Escape” keys at the same time, or tap on the “Windows” key.
Step 3: After that, tap on the “search” box, and enter “%ProgramData%”, and press Enter to display all hidden files.
Step 4: Go the “Apple Computer” folder, and here, select the “iTunes” folder also.
Step 5: Now, look for the SC Info folder, and simply delete it.
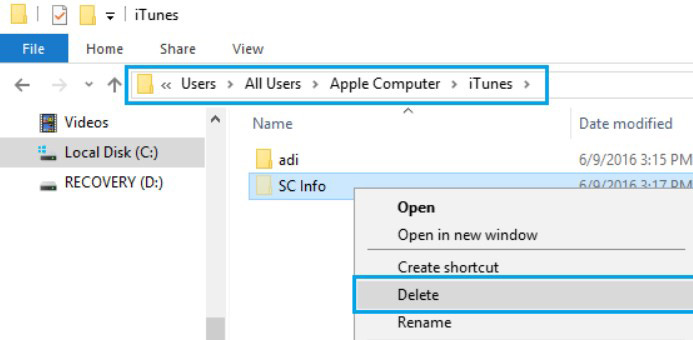
Once you are done, reboot your computer, and open your iTunes account. Here, authorize your system with your Apple ID.
Method 3: Check Date Time Settings
It might be the case that date and time settings of your system are not in sync with Apple servers and that’s why you encounter with “iTunes error 42100”.
Here are steps to check the date and time settings on Mac:
Step 1: Go the “System Preferences” and choose “Date and Time”.
Step 2: After that, ensure the option “Set date and time automatically” is selected.
Step 3: Move to the “Time Zone” and ensure that you have chosen the right one.
Step 4: Now, tap on “Ok” to set the time correctly.
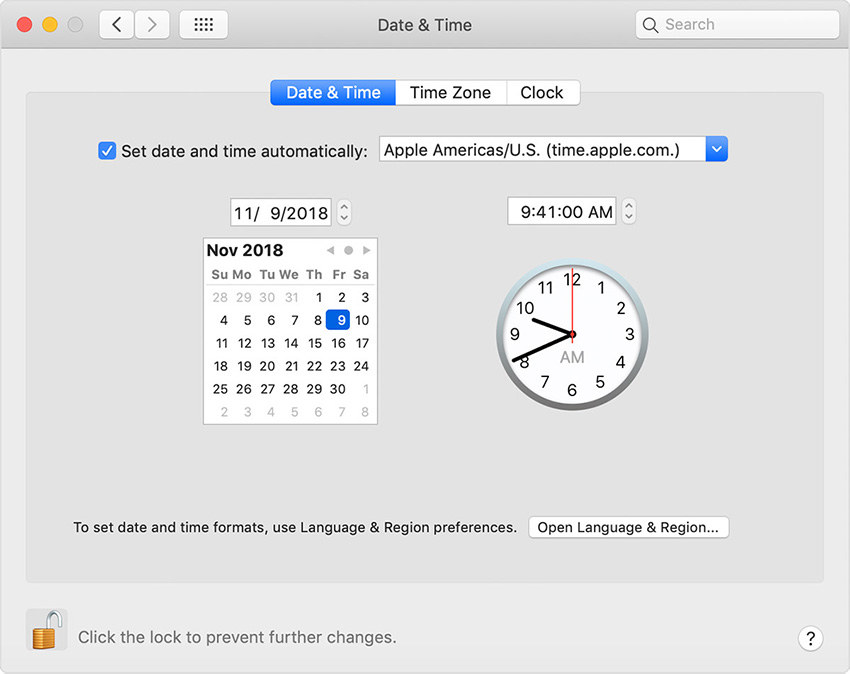
Here are steps to check date and time settings on Windows
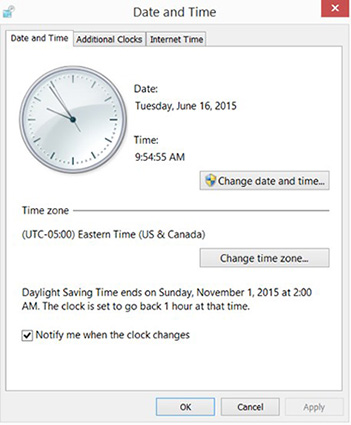
Step 1: Open the Taskbar, and here, right-click on the Time.
Step 2: After that, tap on “Adjust date/time” option, and ensure that time zone is set correctly.
Step 3: If it is not set correctly, then tap on “Change Time Zone” and next, make the necessary changes.
Step 4: Tap on the drop-down arrow to choose the right time zone and ensure “Automatically adjust clock for daylight savings time” is selected.
Step 5: Finally, click on the “Ok” button, and exit.
Method 4: Check your iTunes Account Authorization:
Sometimes, iTunes account authorization is the reason behind the“Movie Rental Not Playing-Error 42110”issue. Well, the iTunes application needs the authorization of your system to interact with your books, apps, movies, and other data. You can authorize a maximum of 5 computers for one single account. So, you have to ensure your authorizations.
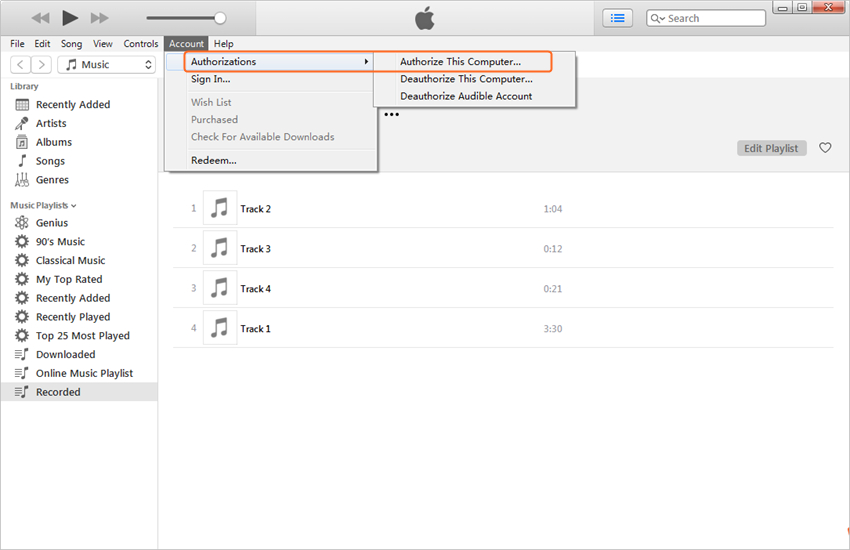
Before you check, ensure that you have iTunes latest version on your computer. Next, open iTunes, and log-in with your Apple ID.
In the case of Mac: Move to the menu bar, and choose “Account>” View My Account”.
In the case of Windows: Move to the menu bar, and then, select “Account>” View My Account”. If you don’t see the menu bar, then press “Ctrl + B”.
Afterward, enter your account passcode, and press Enter or choose “View Account. Once you get access to the “Account Information Page”, all you have to do is to follow the below steps:
Move to the “Apple ID Summary” section. Here, you get to view the list of computers you’ve authorized with your Apple ID.
In case of more than 5 computers authorization, you need to deauthorize all, and next, authorize that one you’re using once more. But, if you’re using more, then you’ll reauthorize each again.
Note for Windows users: If you’ve made hardware or system changes without firstly removing authorizations, then your system may be operating multiple authorizations. In this case, you have to remove authorizations numerous times until you have no more.
Once completed, you can finally authorize your system once more.
Method 5: Scan and Repair the Registry:
As we told earlier, the error 42110 can be caused by issues in critical computer settings like the registry. In such a case, you need to scan and repair the registry.
Follow the below steps to do this:
Step 1: To begin with, click on the “Start” button.
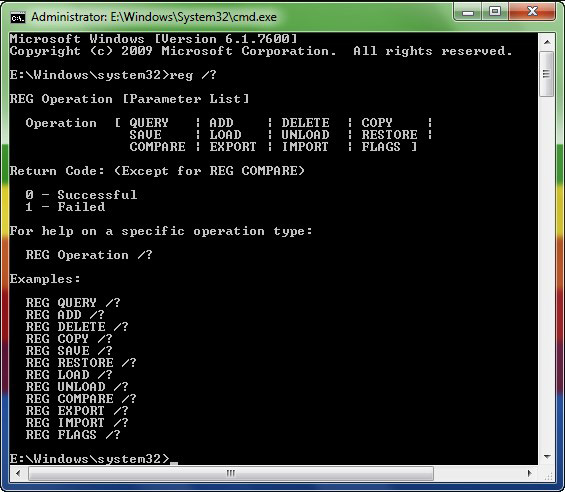
Step 2: Next, type “Command Prompt” or “CMD” to get access to the ‘registry editor”.
Step 3: Now, right-click on it, and choose “Run as Administrator” to run Command Prompt as Admin.
Step 4: Here, you end up finding a list of commands and operations that you can modify or change.
Step 5: Once you are done with all necessary changes, press the “Return” key, and next, exit CMD.
Note: Keep in mind that when you modify the registry, it can lead to serious errors to your OS. Thus, any modifications you make need to be considered carefully. The best thing you can do is to back up your system before you do any changes.
Conclusion:
In this guide, we have covered every possible solution to fix “iTunes error 42110”. Hopefully, the error you’re facing gets solved with ease. However, Tenorshare TunesCare is the most recommend method to resolve the iTunes errors. Unlike other methods, it can help you to repair iTunes in much simple and efficient way.
Speak Your Mind
Leave a Comment
Create your review for Tenorshare articles


