Top 5 Ways to fix iTunes Error 3
iTunes is unquestionably a convenient service for iOS device users. It is helpful in serving various purposes like updating the device or backup or restore. However, there are times when iTunes fails to perform the task properly eventually emerging some errors and making the process incomplete. We have already helped you for such different errors in our previous articles and here we are going to talk about iTunes error 3 and how it can be removed. First, let us know the reasons behind this error and later get to the solutions.
Common Reasons of iTunes error 3
Here are the most common reasons that are likely to trigger the error code 3:
- An unfinished iTunes installation and corrupt download.
- An error in operating system.
- Windows system files and iTunes-related files corruption due to virus or malware entry.
- The removal of iTunes-related files accidentally.
- The system not being able to find the mentioned path.
- Any sort of iTunes software related changes (install/update/uninstall) that you made recently has not been successfully registered in Windows Registry or is either corrupted.
Common Solutions to fix iTunes error 3
It's time to now learn how you can resolve the problem and get your iTunes back to normal. Here are some of the common tips and troubleshooting steps. We have listed to most potential solutions that can be of real assistance.
1. Update iTunes
We follow the rule of first things first. And here too we are going to apply the same. The first thing to do when the error pops up will be checking the iTunes in the PC if it is updated or not. When you work with the outdated iTunes on your PC, odds are that error code 3 will bother you. Hence, check and install the latest version of it. Here's how.
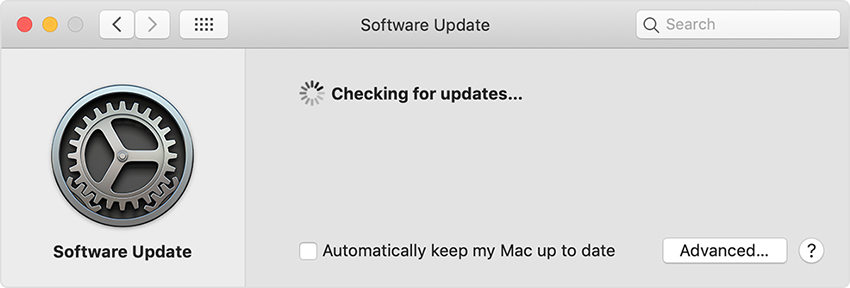
If you're using Mac, go to 'App Store' and click on 'Updates'. You will get to know if any new update is available. Follow the prompts accordingly.
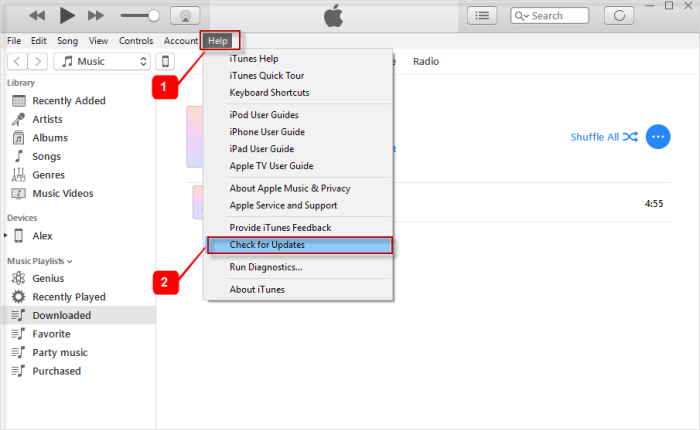
On Windows, open 'iTunes' and go to 'Help' from the menu. Click on 'Check for Updates' and follow the installation prompts if update is present.
2. Force Restart Device
Make sure to give a forced restart on your device. It has been useful a lot of times to the users. the steps are like this.
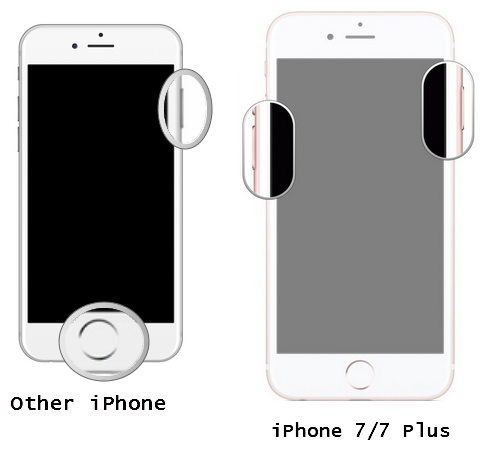
iPhone 6 and below: Hold down the 'Home' and 'Power' buttons together and release them when you find Apple logo on the screen.
iPhone 7 and 7 Plus: Keep pressing the 'Power' and 'Volume Down' buttons altogether and stop pressing when you see the Apple logo on the screen.
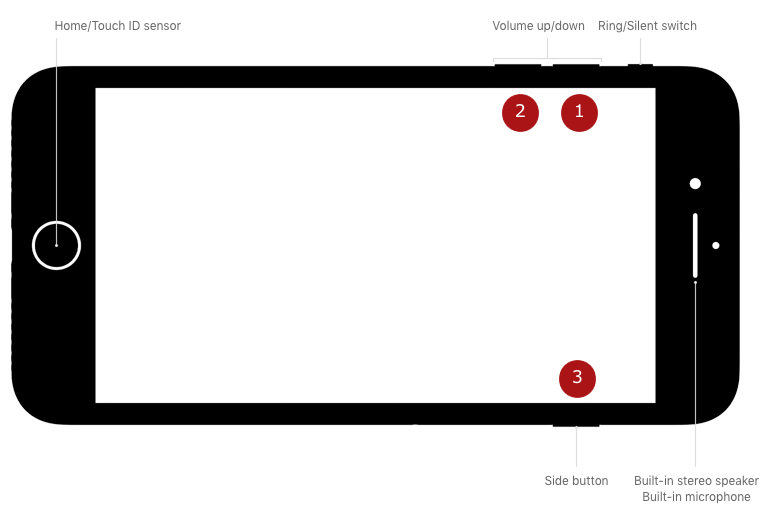
iPhone 8, 8 Plus and X: Press and release 'Volume Up' button. Press and release 'Volume Down' button now. Afterwards, keep pressing the 'Power' button and release when Apple logo comes.
3. Reset Network Settings
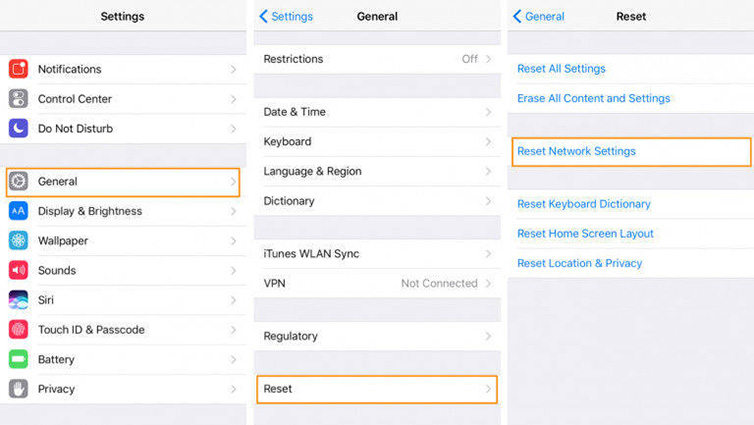
Another option to fix the problem is resetting the network settings. Most of the times the issue appears because of some network issues. And in order to remove the error code 3 when this is the reason, you should try resetting the network settings. Also, please note that this method will remove all your Wi-Fi passwords and other network settings. The steps are:
Go to 'Settings' and tap 'General'.
Tap on 'Reset' > 'Reset Network Settings' > enter password and confirm.
4. Update Computer OS
If still your iTunes is not working and giving you iTunes error 3 warning, perhaps the existing operating system is not updated. Therefore, we will now suggest you to update your computer's operating system if the above methods were proved unsuccessful.
5. Factory reset
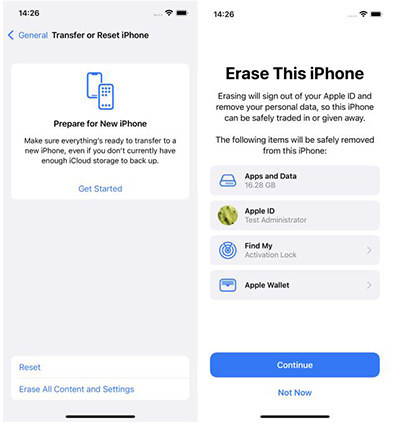
Another tip that can be helpful to you when iTunes error 3 comes your way is performing the factory reset. When you do this, all your data will be deleted and the device will become the same what it was when you bought it.
Get your device and open 'Settings'. Tap on 'General' > 'Reset' > 'Erase All Contents and Settings'. Confirm the resetting now.
The Most Recommended Solution: Tenorshare TunesCare
When all the efforts go in vain and you still get iTunes error 3, the moment can be sad for you. But, we have a one-stop solution for you. You need to use Tenorshare TunesCare if all the aforementioned methods fail to help. TunesCare is a software that aims to solve different kinds of iTunes syncing problems and iTunes errors people get stuck with. Moreover, it is totally compatible with latest iOS versions. Also, you can simply use this tool if you own Windows computer or Mac computer. Let us now get the guide which will help you to learn how to use this tool.
How to fix iTunes error 3 via Tenorshare TunesCare
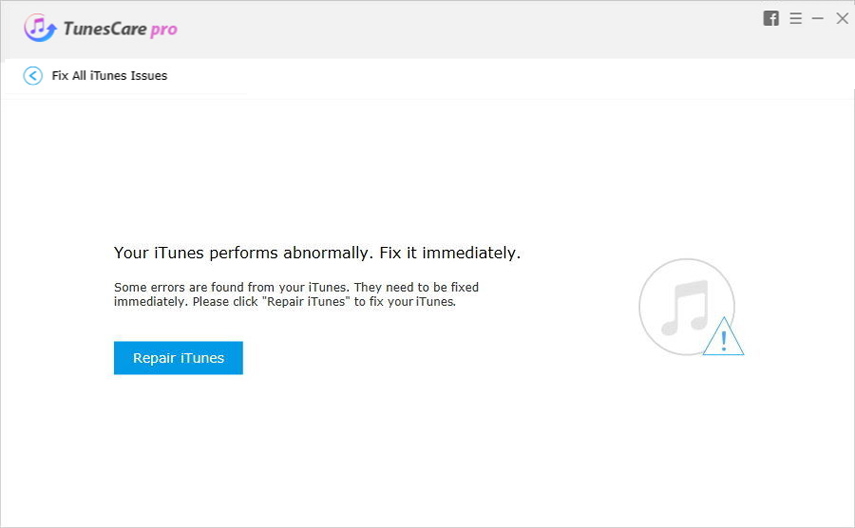
Step 1 – Start with downloading the software on your PC. Launch it now and click on 'Fix All iTunes Issues' panel.

Step 2 – From the next screen, click on 'Repair iTunes'. Now, wait till the program works and fixes the issue that is occurring. It will repair the problem as well as make your iTunes perform better than before.
Conclusion
These were some of the solutions you need to try when iTunes error 3 makes you worried. We think that by now, you have an idea about this error and you might have started working on the fix. Please give us your thoughts on this post by dropping comments below. Thanks for reading folks!
Speak Your Mind
Leave a Comment
Create your review for Tenorshare articles


