Detailed Guide on How to Move Google Photos to SD Card
Through this post, we will let you know how to transfer photos from google photos to sd card? So, if you want to know all about the same, keep reading ahead!
- Before We Start
- Method 1. Download Google Photos to PC and Transfer to SD Card
- Method 2. Download Google Photos to Android and Move to SD Card
- Bonus Tips: How to Recover Lost Photos on Android without Backup
Before We Start
Google came to an end with its free and limitless storage service in June 2021. From this date onwards, if you want to access this storage drive, you need to pay an additional amount if your capacity exceeds 15 GB. If you are someone who has been using this Google service for quite some time now and still wants to continue using it for free then think about creating a backup of all your data on some other device.
You can backup all your photos from Google Photos to your laptop, PC or mobile device using a tool called Google Takeout. With this tool, you can seamlessly copy all your content to your computer's hard drive and then further copy to devices like SD cards or an external hard drive. However, the only crux of using this tool is that its resulting .zip files are cumbersome to navigate. Therefore, it's better to download all the photos on your computer and then transfer them to the SD card.
Method 1. Download Google Photos to PC and Transfer to SD Card
The first method to move google photos to sd card is by downloading the photos on your computer or laptop and then transferring them to your SD card. You can follow the below-given steps to download and transfer the photos.
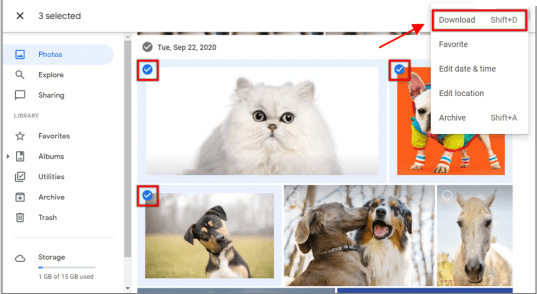
- Select all those photos you want to download on your computer.
Now, go to the menu by clicking on the three dots and selecting Download all.

The only issue with this method is that it allows you to download 500 photos in a single go. But, if you choose to add photos to the album first, this limit becomes 20,000. Once your photos are in the album, you can open them up and then click on the menu from the three dots to download all the photos on your computer.
After downloading all the photos to your computer, now it's time to transfer them to your SD card. The below steps will guide you on how to do this.
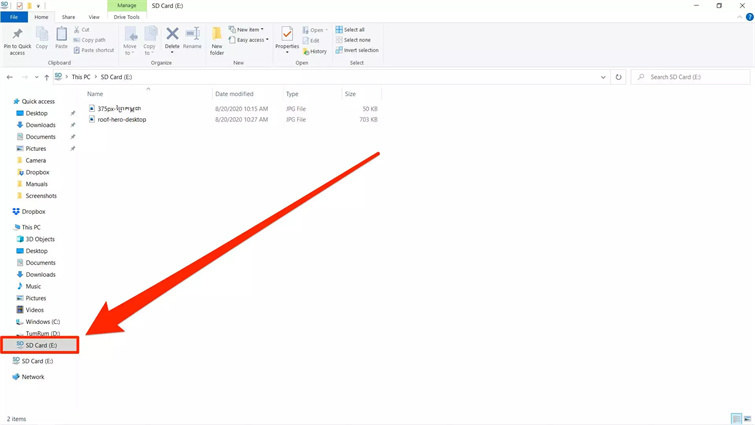
- Insert the SD card into the card reader of your computer.
Then, open any folder and your SD card should be seen on the left sidebar, most probably listed under This PC.

- After this, look for the photos you want to move to the SD card and then drag and drop them to the SD card.
- After moving all the photos, click right on the SD card and select the option to Eject. Once your SD card disappears from the left panel, it is ready to be removed.
Method 2. Download Google Photos to Android and Move to SD Card
Now, if you are wondering how do I move photos from google photos to sd card using my android device? Then let us tell you that the steps are pretty simple.
- Install the Google Photos application on your Android device.
Then open the app and log in using your Google credentials.

- After this, look for the photos you want to download and select them at once.
Now, click on the menu or three dots on the right-hand side followed by choosing either Save to device or Download from the menu option.

Once you have downloaded the photos from Google Photos to your Android device, follow the below steps to know how to move google photos to sd card?
Android phones are not designed to support normal SD cards therefore, you need to use a microSD card, which has a small size and is capable of holding large amounts of data. Also, if you don't want to use a separate SD card or microSD card, you can opt for a microSD card adapter to let you seamlessly use a microSD card on your computer.
- Insert the SD card by switching off your android device. The microSD card slot can be found near the SIM card slot.
- Now, switch on your device and open Files.
- From the Files app, navigate to Images located under Categories.
- After this, press and hold the image you want to transfer to the microSD card.
- Then, click on the ellipses icon from the top right of the screen and go to the menu followed by selecting the "Move to" option. This option Move to should automatically show, after which you need to click on “t” to proceed.
- In case, you get a prompt to grant file access to the SD card, click on Allow to do so.
- Now, to remove the SD card, again switch off your android mobile and then take the card out. To confirm if all the photos are saved on your SD card, open it on your android device and look for a small tag at the top right of the image.
Bonus Tips: How to Recover Lost Photos on Android without Backup
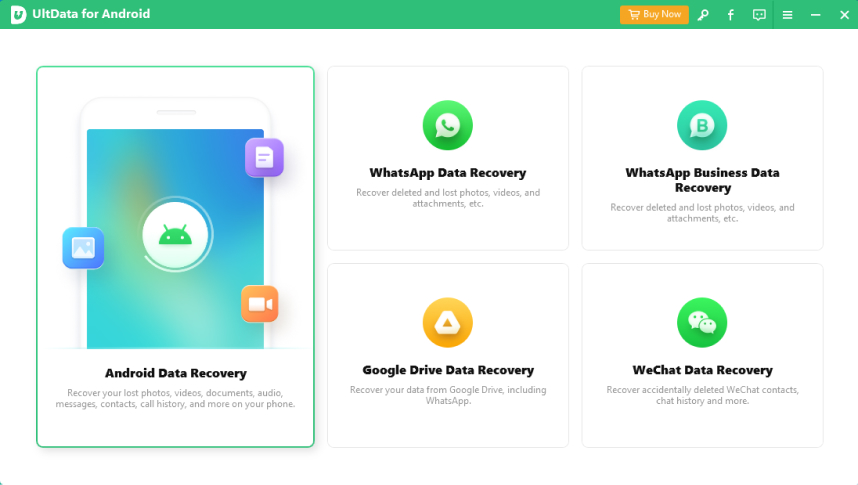
After getting to know how to move photos from google photos to sd card, you must also know how to recover all your lost/deleted photos from your Android device without backup using Ultdata for Android. This highly efficient recovery tool has a user-oriented interface and is capable of recovering a large variety of data such as calls, contacts, messages, images, video etc. from Android devices in just a few minutes. To know how you can recover data using UltData for Android, follow these steps.
Download and install UltData for Android, and open it on your computer. After launching the software, click on the “Recover lost data” option.

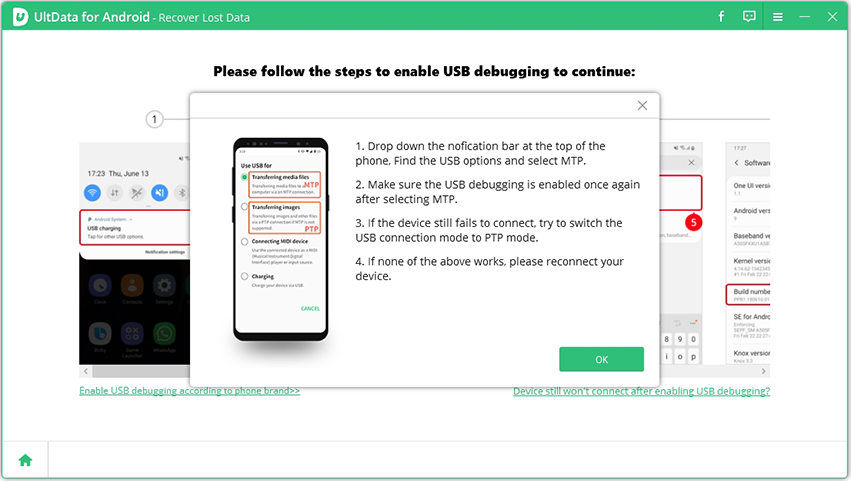
Now, connect your Android mobile to your computer and enable USB debugging by following on-screen instructions. Then you can continue the process of recovering your lost photos.

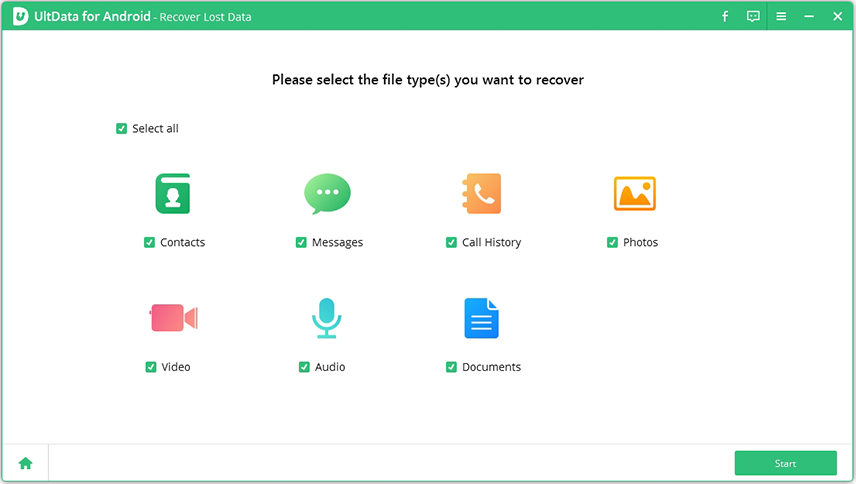
Choose the file types you want to recover from Android.

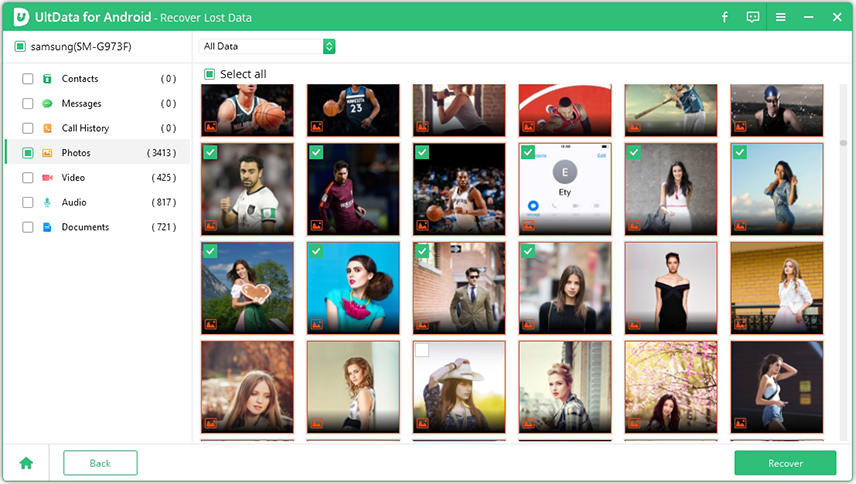
Once the scanning is done, select images from the left side that you want to recover followed by pressing the Recover button.

Conclusion
If you are thinking about how to move photos from google photos to sd card, follow the above given easy methods. Plus, if you want to recover all of your deleted or lost photos from your Android device without backup, opt for a third-party data recovery tool such as Ultdata for Android due to its simple interface and the capability to recover data in just a few steps.
Speak Your Mind
Leave a Comment
Create your review for Tenorshare articles
Tenorshare UltData for Android
Best Android Data Recovery Software
Highest Data Recovery Rate
