Last updated on 2025-07-09
How to Add, Edit, and Remove Watermark in PDF
If you want to mark your PDF with ownership or branding, Tenorshare PDNob PDF Editor offers a simple way to manage watermarks. This guide walks you through how to add, adjust, or remove a watermark using its built-in tools.
Video Guide on How to Add Watermark in PDF
1. Add Watermark for a single PDF
Here the quick steps to add watermark in Tenorshare PDNob PDF Editors:
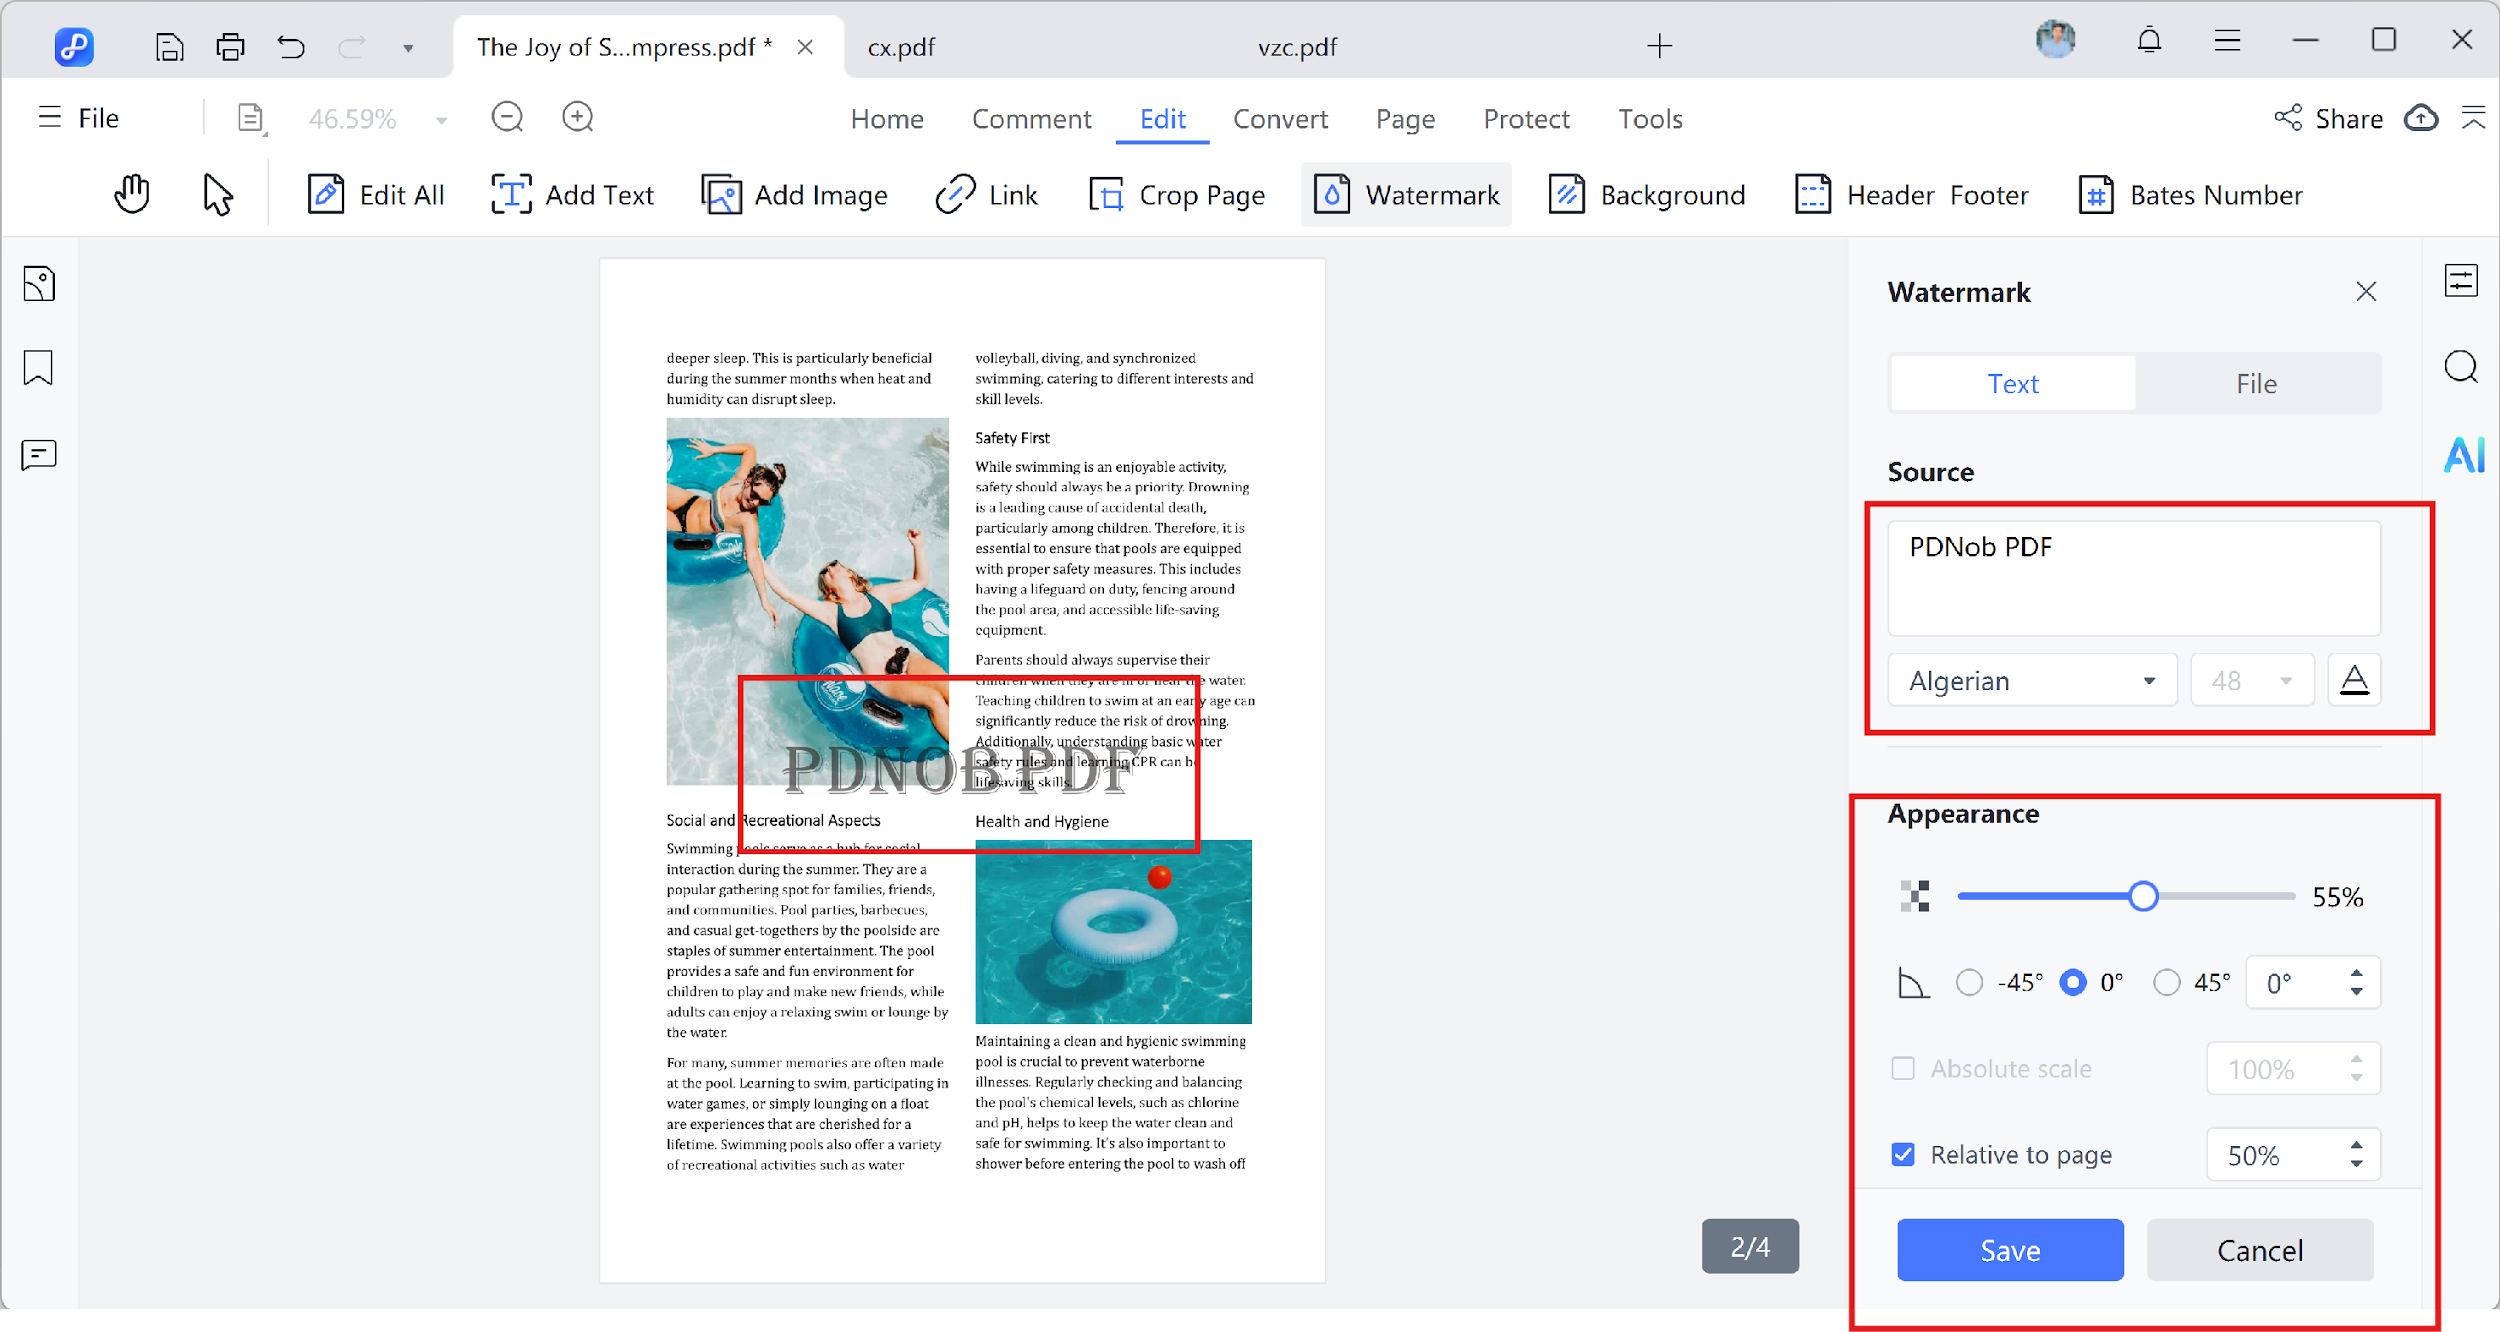
- Open your PDF in Tenorshare PDNob PDF Editor and head to the "Edit" tab from the top menu. Click on "Watermark" and select "Add Watermark" to begin.

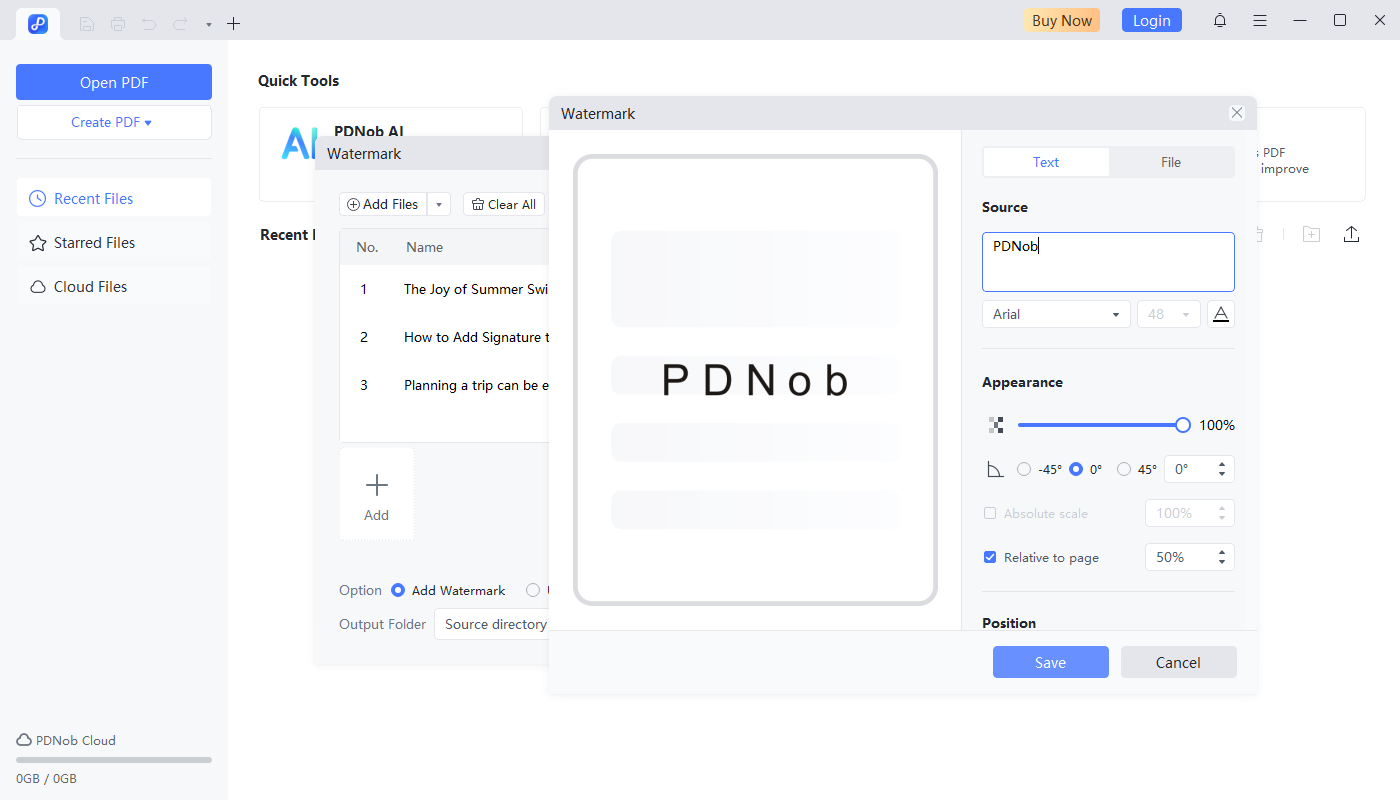
- Pick the type of watermark you'd like to apply --- either a text label, an image file, or another PDF page.

- Type in the content or upload the image/PDF as needed. Adjust settings like font style, color, transparency, and size from the toolbar.

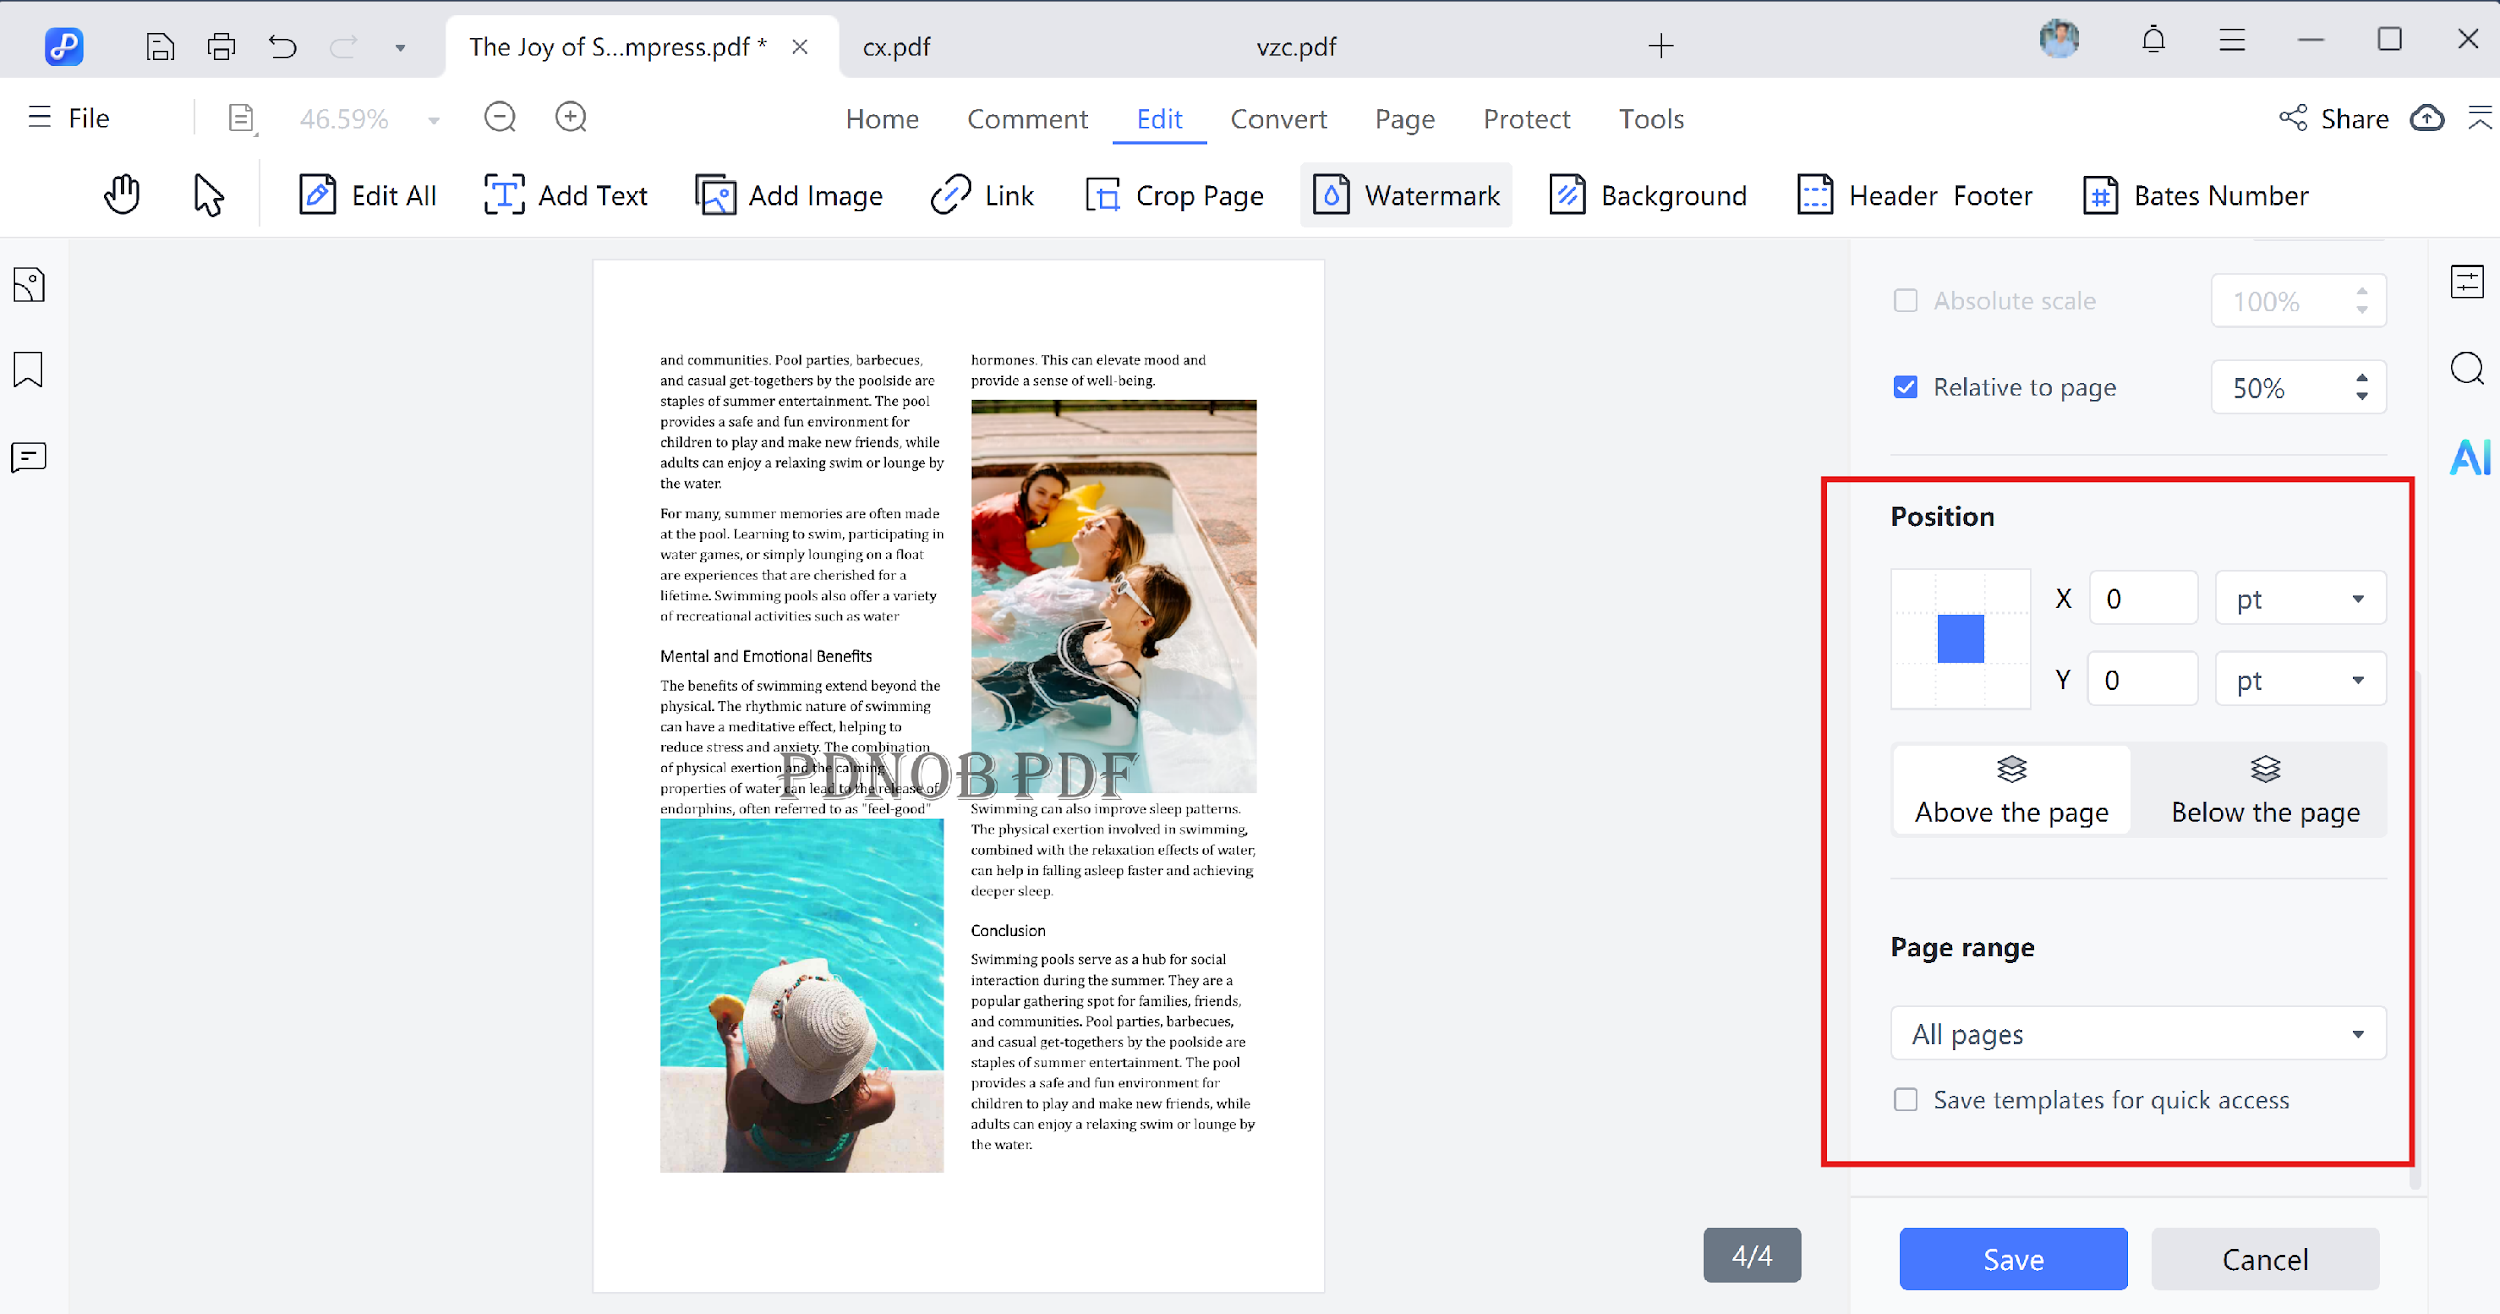
- Choose if the watermark should overlay on the top or sit behind the content, and decide whether to tile it across the page.

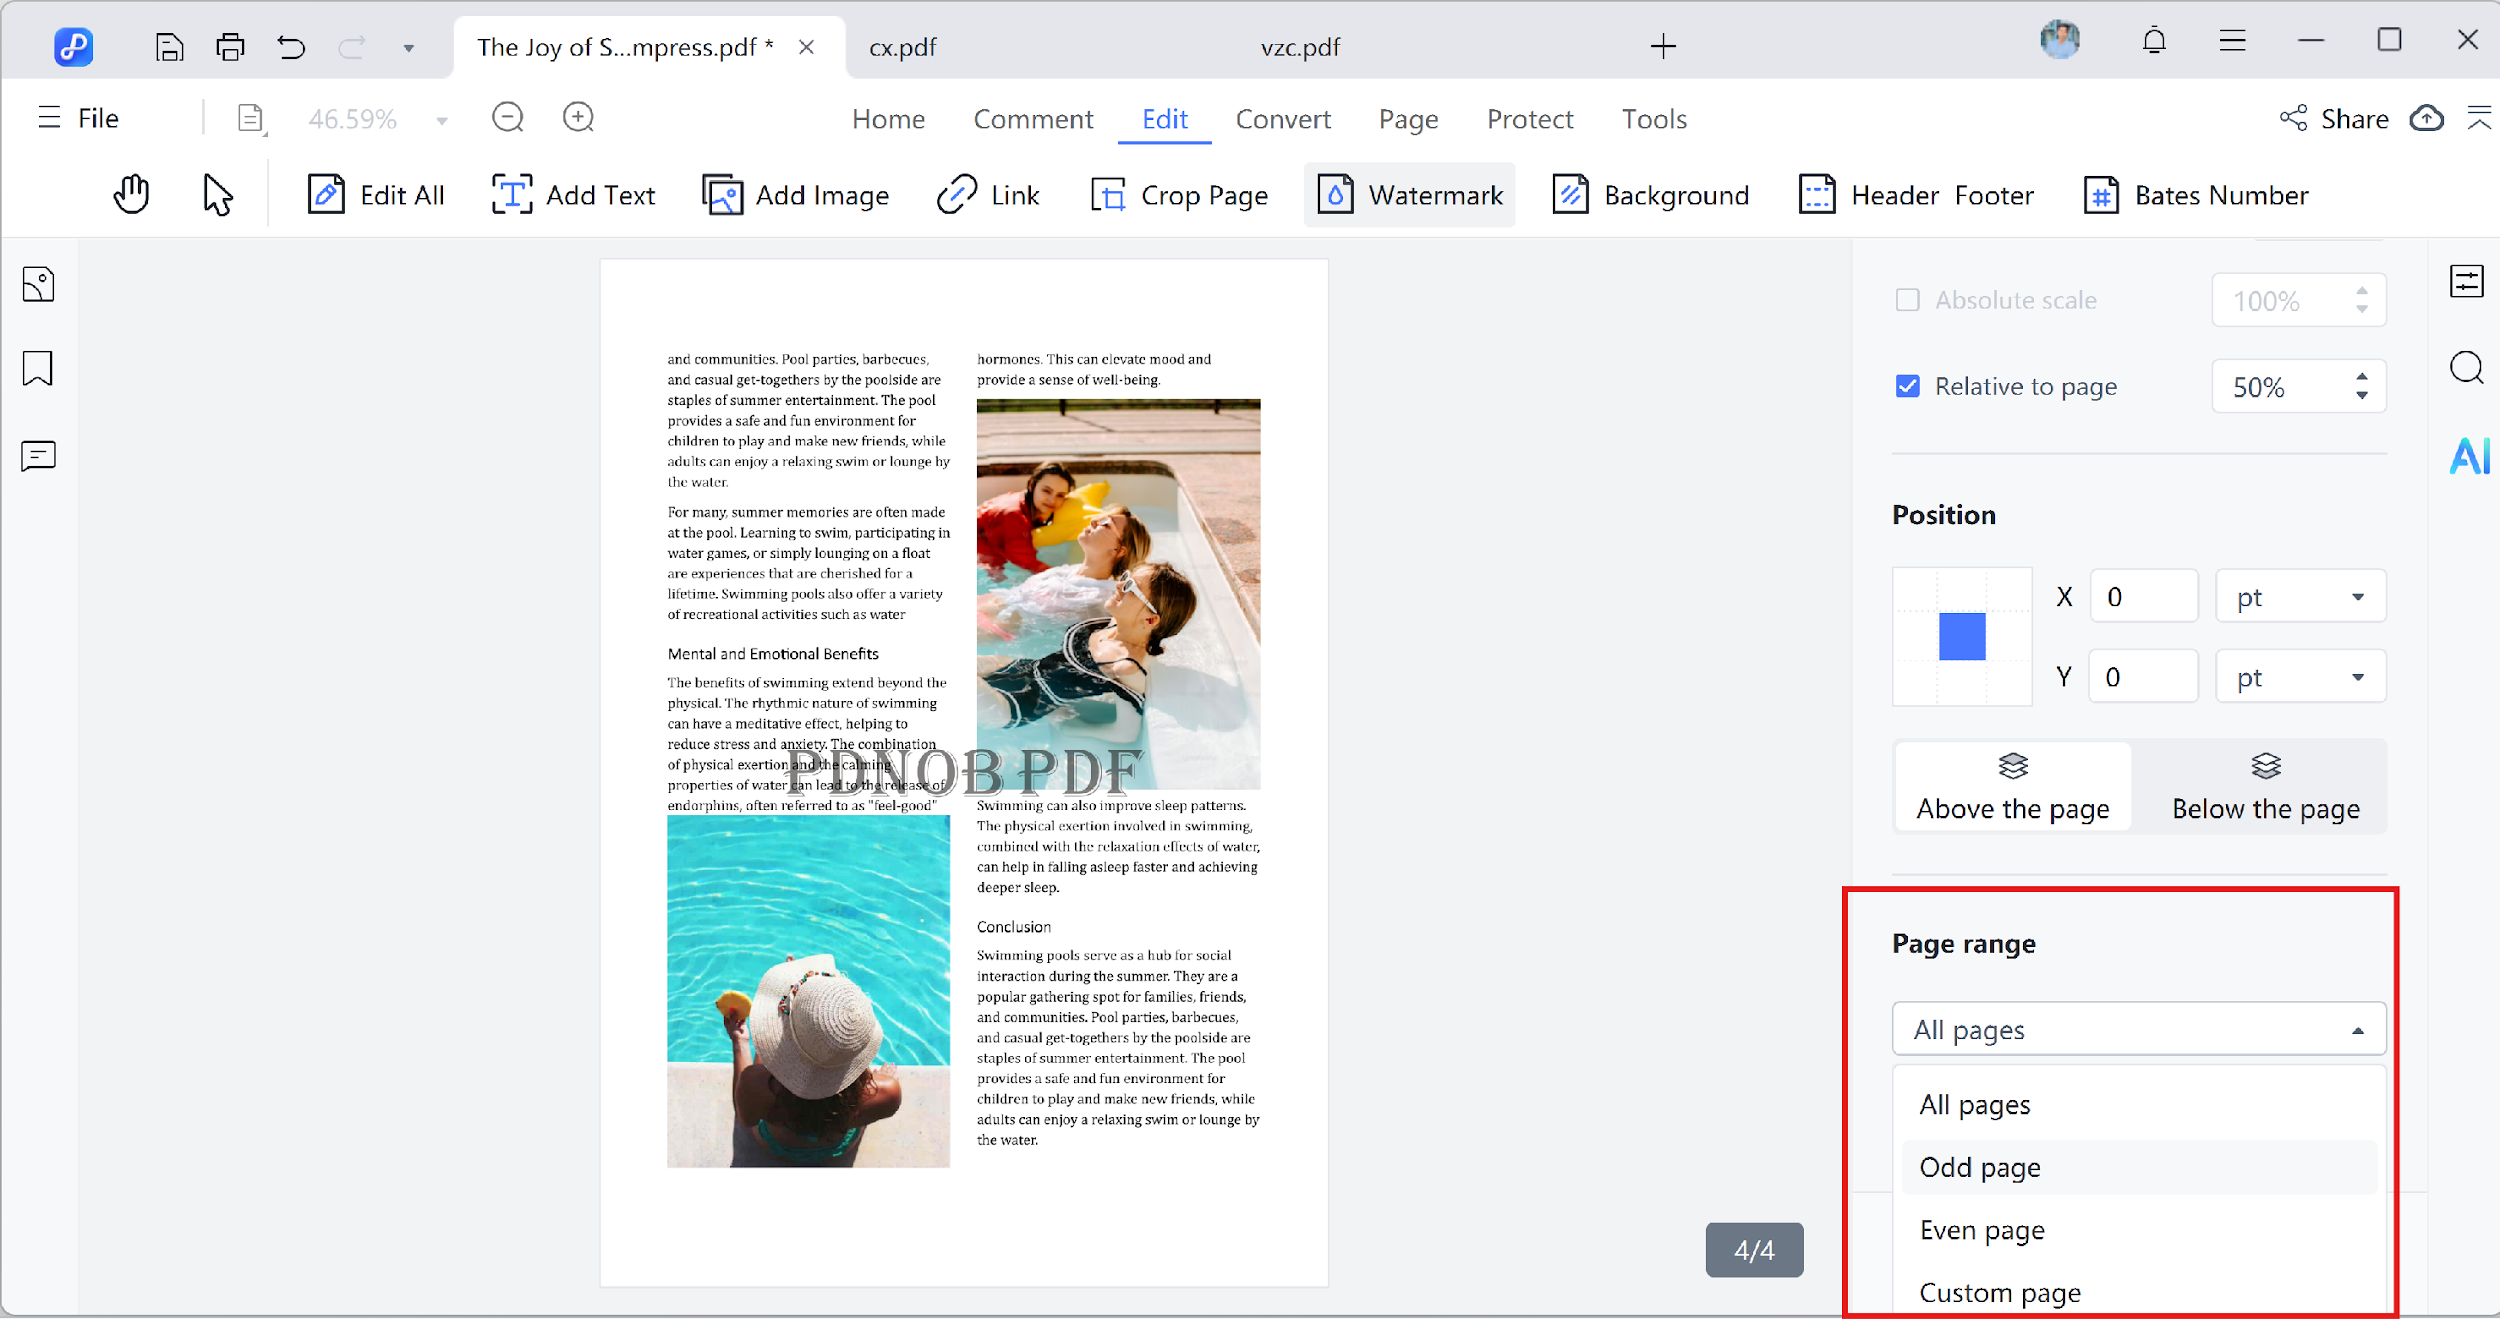
- Select the page range where the watermark should be placed. You can apply it to all pages, a custom range, or only odd/even pages.

- Click "Save" to insert the watermark into your file.
2. Edit Watermark in PDF
Follow these steps to edit an existing watermark in your PDF document.
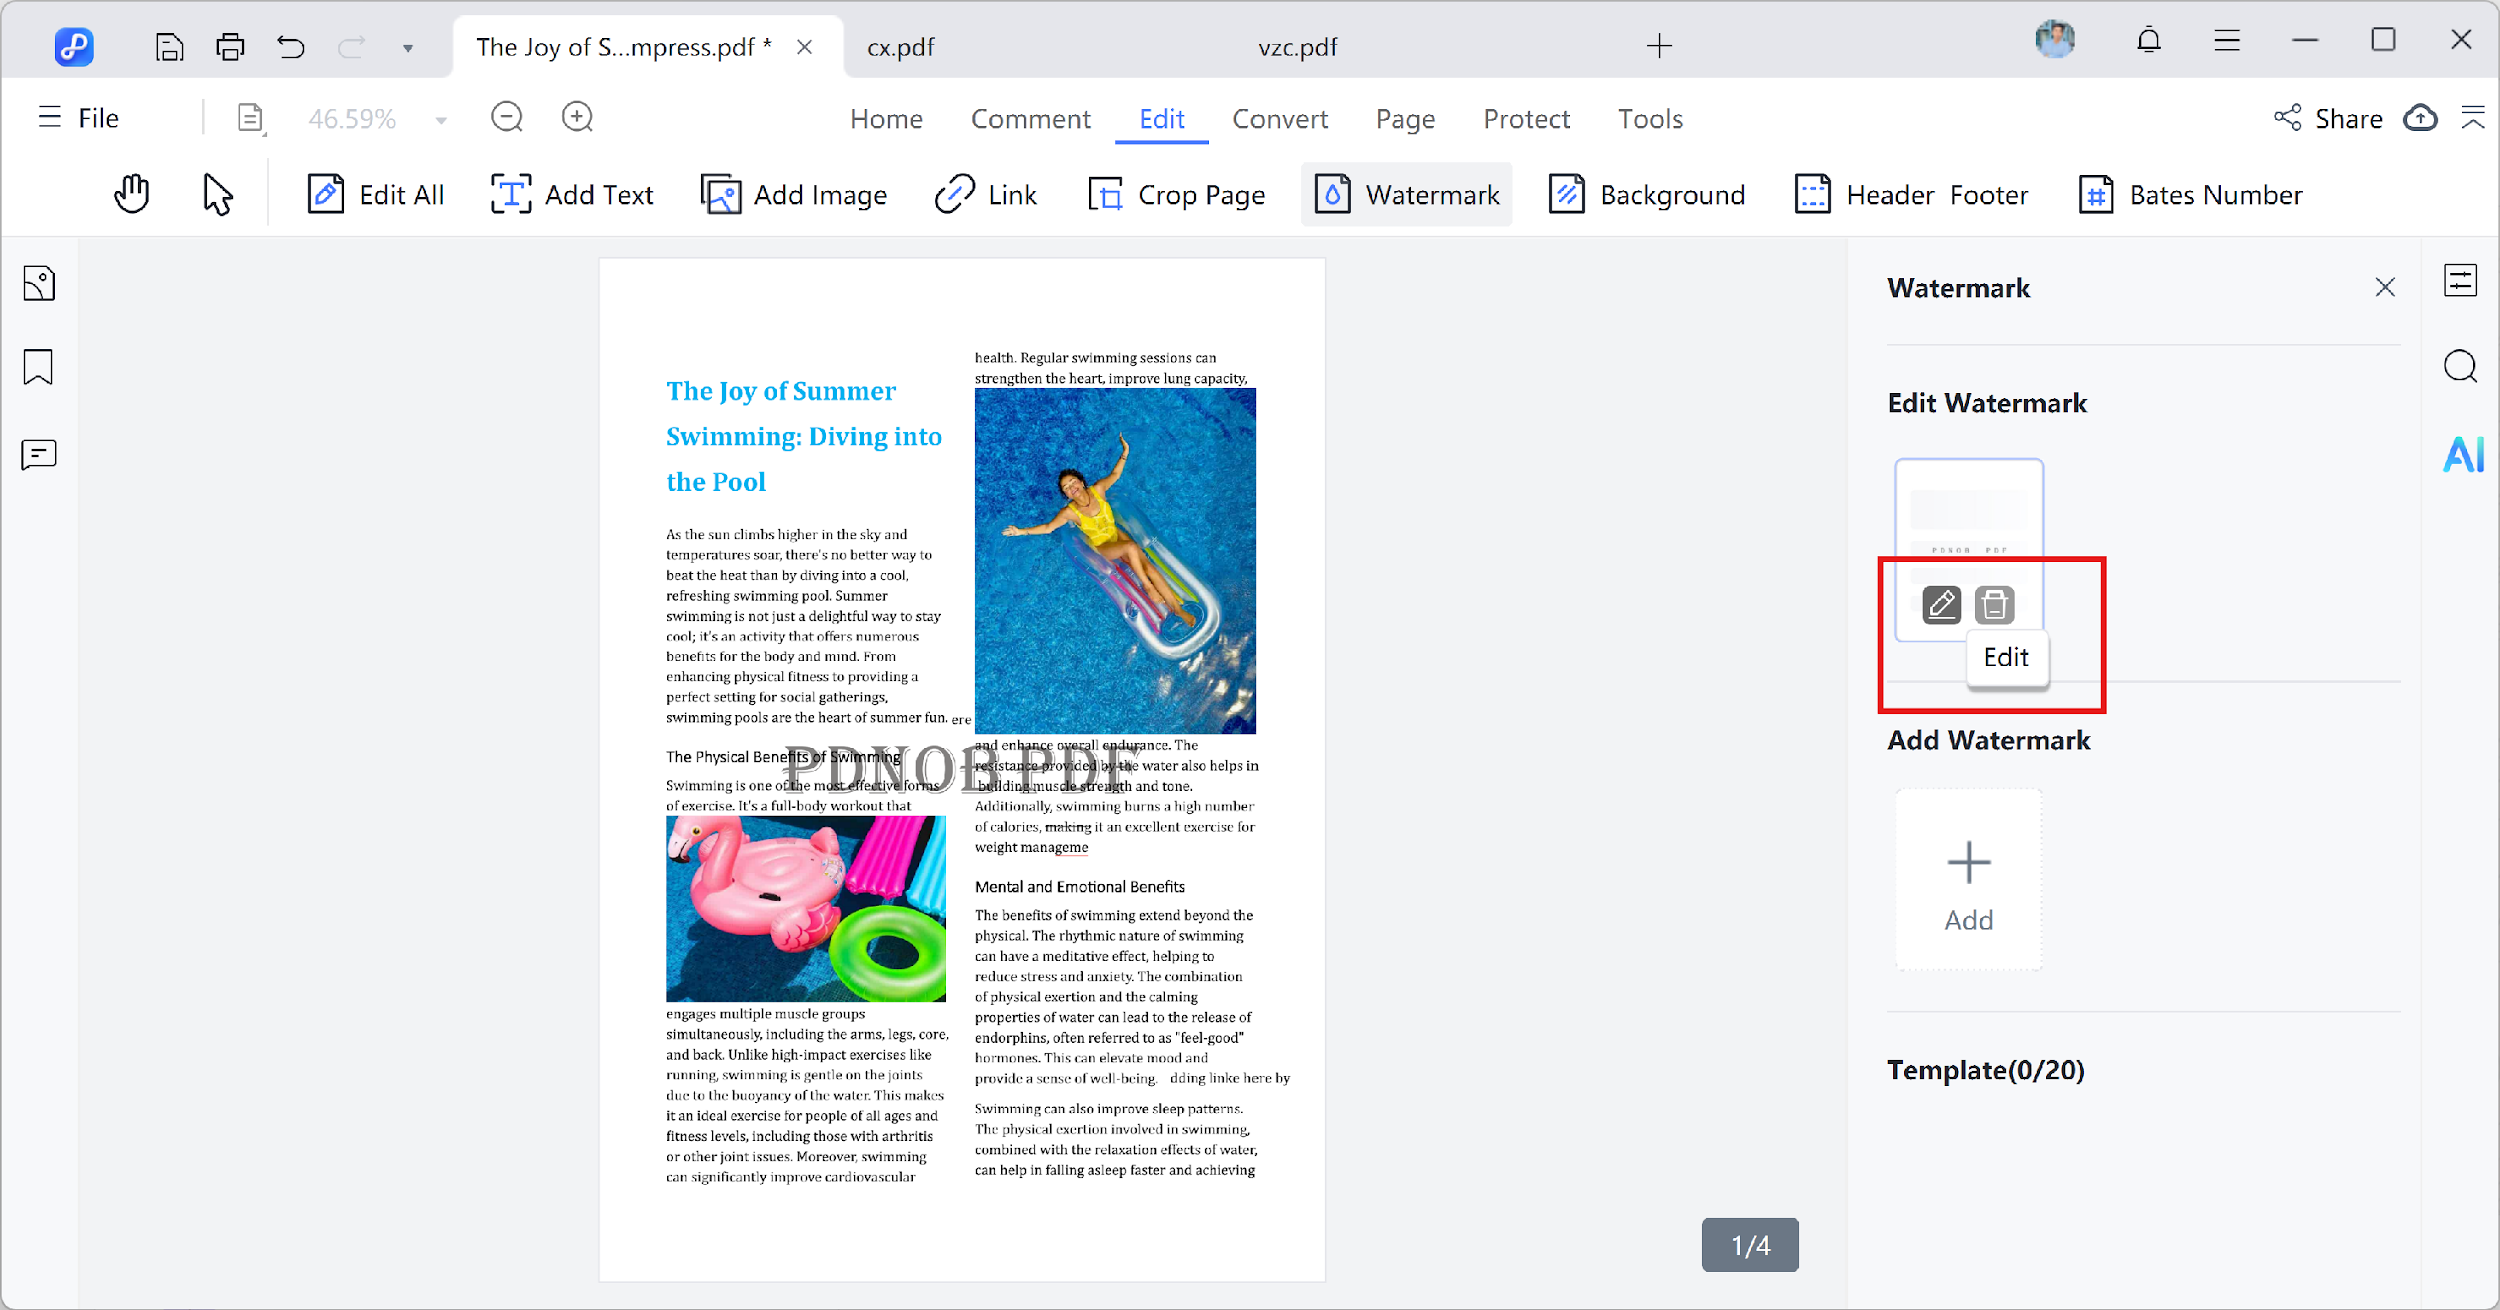
- To make changes, reopen the same "Watermark" section in the Edit tab. Find your current watermark listed there and click the "Edit" option on the right side.

- The watermark settings will reappear, allowing you to update its content, style, or layout. Once done, hit "Apply" to save the updated version.
3. Batch Add/Remove watermark in PDF
Follow these steps to manage watermarks for multiple PDF files at once.
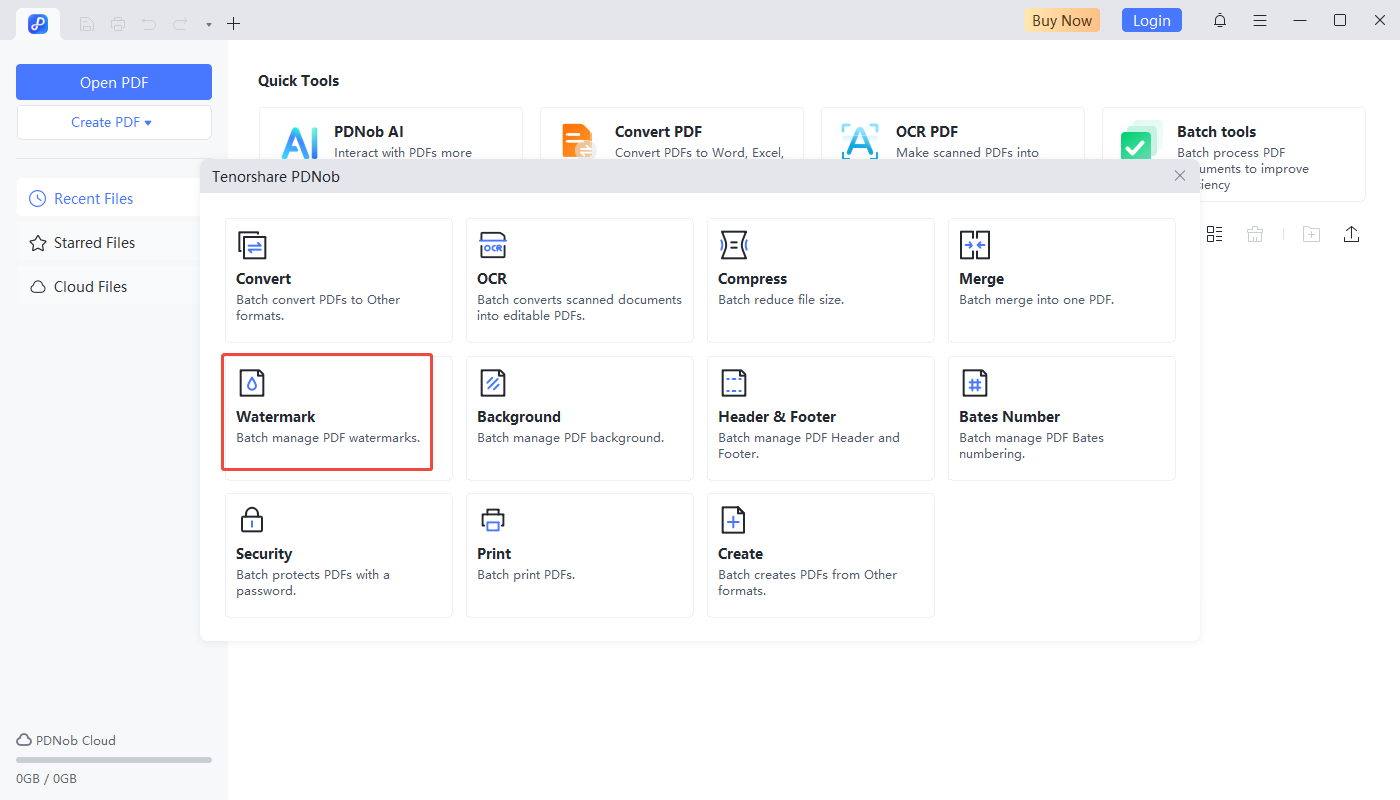
- Click the "Batch tools" tab on the toolbar. In the popup box, choose "Watermark".

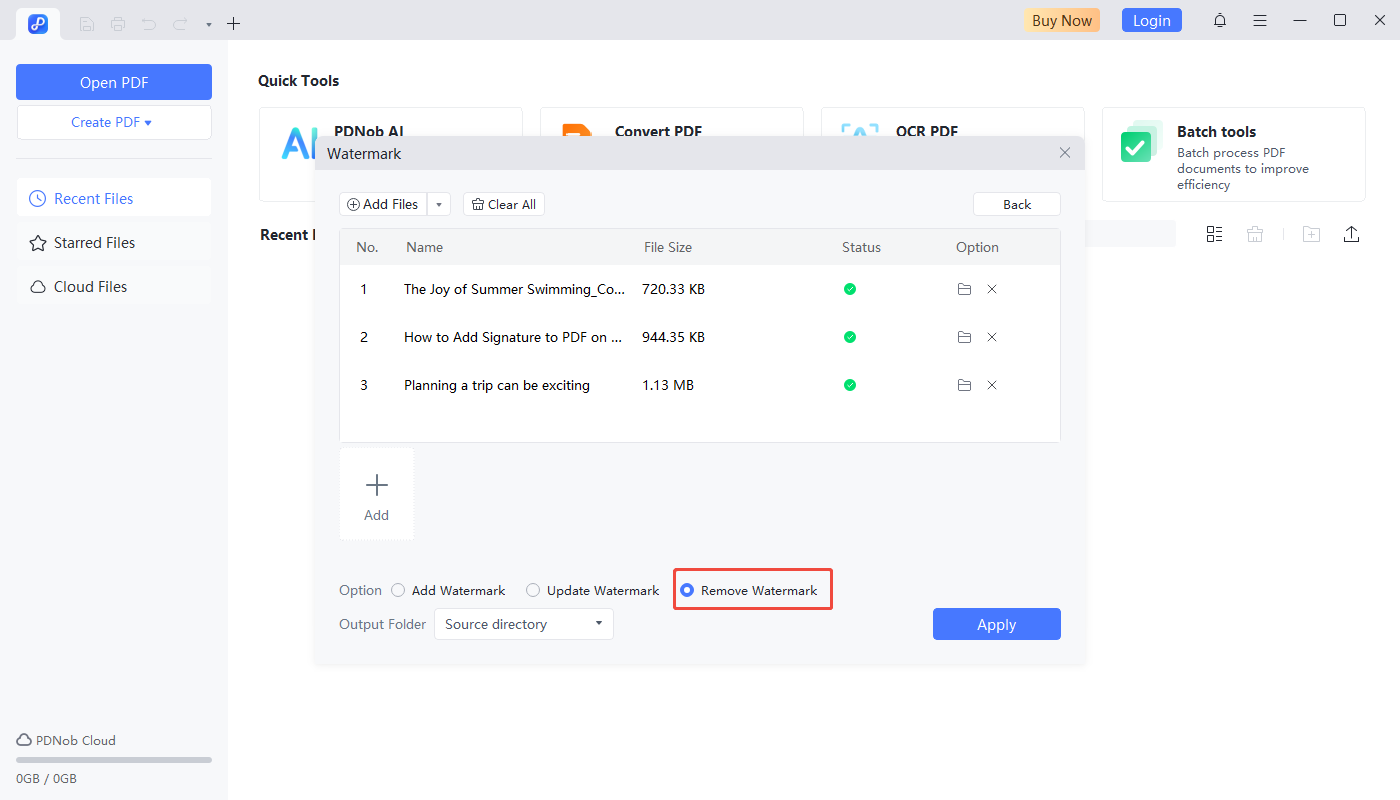
- Click "Add Files" (or "Add Folder") and select all PDFs you wish to watermark.
- Switch to the "Add Watermark" pane. Choose Text Watermark or File Watermark.

- Or switch to the "Remove Watermark" pane and choose Apply. The tool will detect and remove all recognizable text or image watermarks.


