2 Best Ways to Transfer Photos to iPhone without iTunes
by Jenefey Aaron Updated on 2024-04-18 / Update for Transfer Photo
Since I can remember I have always used iPhones, kind of started from iPhone 5 and then the iPhone 5S, iPhone 7 then iPhone 8 and 3 months ago I bought the new iPhone 13, and it is an extraordinary piece of hardware. So, for me, it was the time when I was about to change my iPhone or the time when I needed to update the iOS, I transferred all of my iPhone files to my PC and after the task was completed I transferred them to my new iPhone from my PC. Most people usually do it with iTunes but I didn’t. The risks involved and the complications were too much for my liking. So, if you want to know how to transfer photos from PC to iPhone without iTunes then read the rest of the article, I have listed two of my favorite and most effective apps below.
- Part 1: Why is it Not Recommended to Transfer Using iTunes
- Part 2: How to Transfer Photos from PC to iPhone without iTunes
- Part 3: How to Transfer Photos from Mac to iPhone without iTunes
Part 1: Why is it Not Recommended to Transfer Using iTunes
As one of the oldest iOS apps, many people rely on iTunes for various services, unfortunately, the app has lost its standing and it does not provide the quality of services that it used to. Actually, the app wasn’t upgraded and it uses the same system as 10 years ago. So basically it is clear that it won’t be able to compete with the modern apps. There are also several issues with the app like very slow download speed with the PC version of the app. Modern apps are taking 2-3 steps to transfer files, whereas, iTunes provides the users with a complicated set of procedure just to transfer a few files. There are also complaints about data corruption, data loss and sudden crashes too.
So, it seems that iTunes has become an artifact from ancient times that does not do you any good. This is the reason users are looking for something like “how to copy photos from PC to iPhone without iTunes”. Two of the best photo transfer apps are described below, and they do not use iTunes services.
Part 2: How to Transfer Photos from PC to iPhone without iTunes
Without a doubt, Tenorshare iCareFone is one of the best iOS apps available on the market. This app was designed to run on several platforms like iOS, Windows, and Mac. Among the various features of the app, it provides the user with a simple interface and super fast data transfer speed. So, basically, when you want to transfer photos from PC to iPhone without iTunes, you do not need to think of any other options. Here’s how to transfer photos from computer to iPhone without iTunes by Tenorshare iCareFone.
1. First, you need to download and install the said app on your PC or Mac.
2. Launch Tenorshare iCareFone on your PC/Mac.
3. Now, find a USB cable and connect both of the devices. Tenorshare iCareFone will take a few moments to detect the device.
4. Now, on your PC go to “Manage”.

5. Now, on the next screen click on the "Photos" and click click "Import".
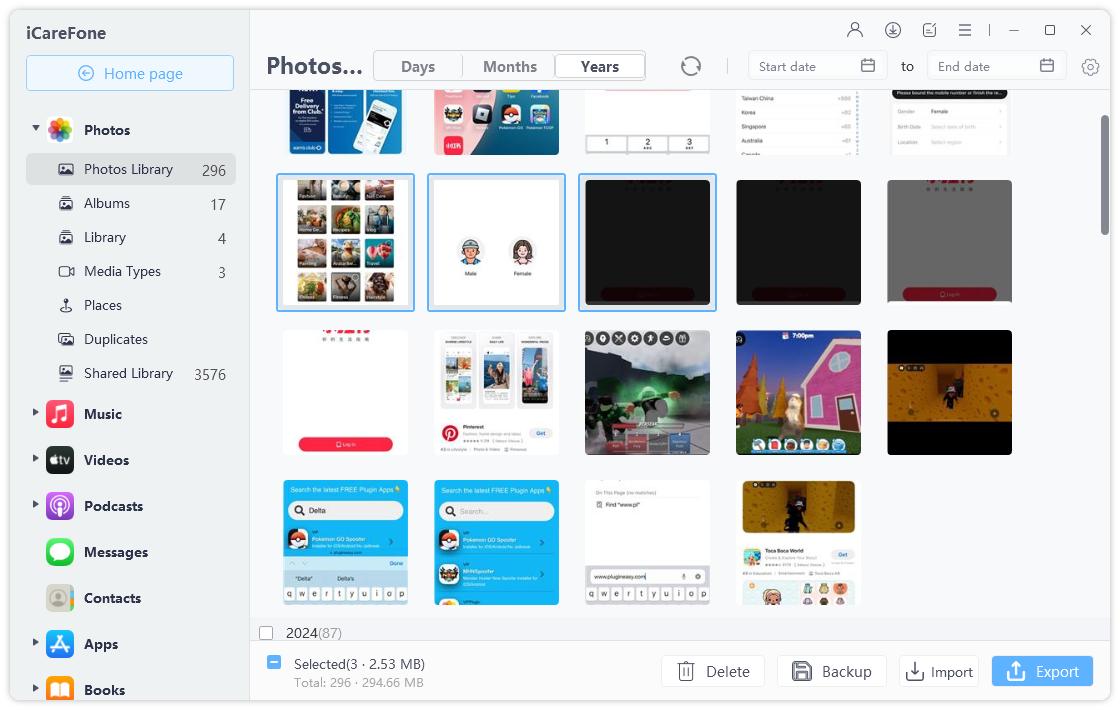
6. Now, you have to select the photos on your computer and click on "Open" to add to your iPhone.
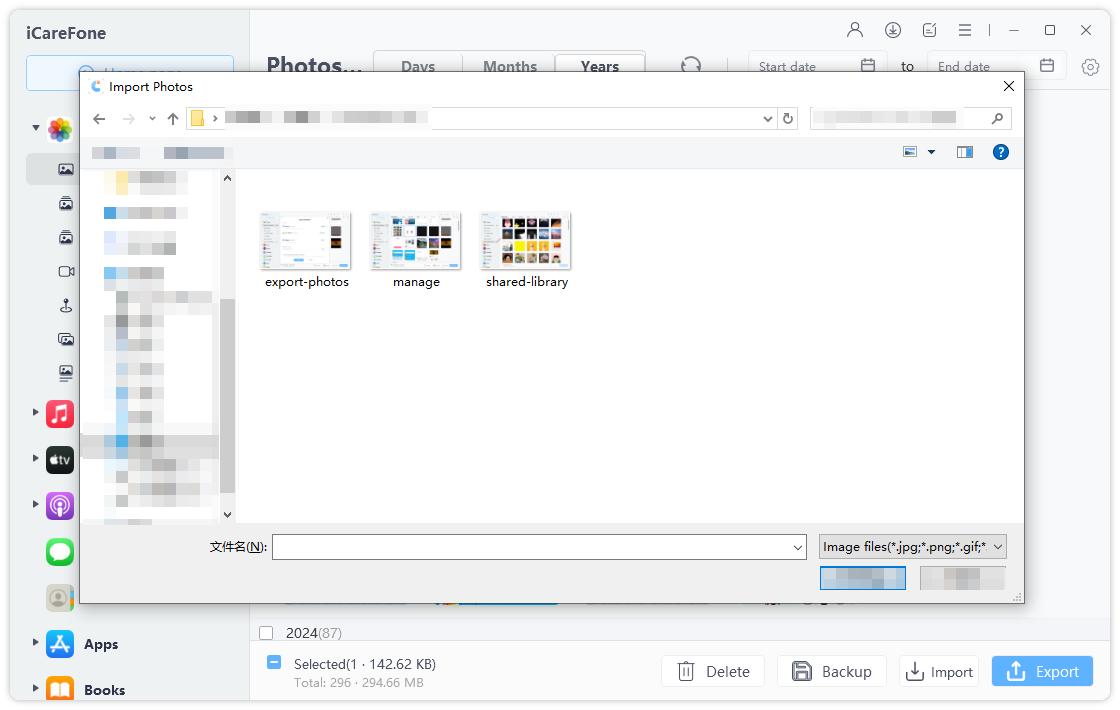
Notes: You will need to install iCareFone app on your devices to successfully import photos. This is to break Apple's limitation that photos transferred via 3rd party tool cannot be deleted directly on iOS devices.
All your selected photos will be imported to your iPhone now. You can clearly see from the above description that why iPhone users are going for the Tenorshare iCareFone app. It is fast, efficient and there is no risk of data loss. So, if you want to transfer photos from PC to iPhone without iTunes free, Tenorshare iCareFone is your best option hands down!
Part 3: How to Transfer Photos from Mac to iPhone without iTunes
Another app you can use to transfer photos from Mac to an iPhone without iTunes is AirDrop. It is a very well known Apple certified app which has the ability to transfer files wirelessly. The data transfer speed is fast and it is completely dependent on Wi-Fi. Here are the steps to use AirDrop on Mac.
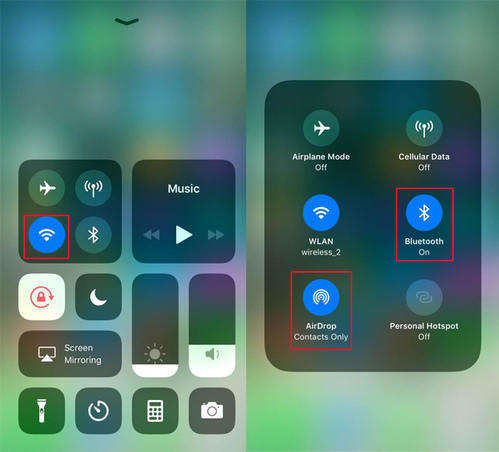
1. First, connect your Mac and your iPhone 13/12/X/8/7/6/6s/5/5s/SE to the same Wi-Fi network.
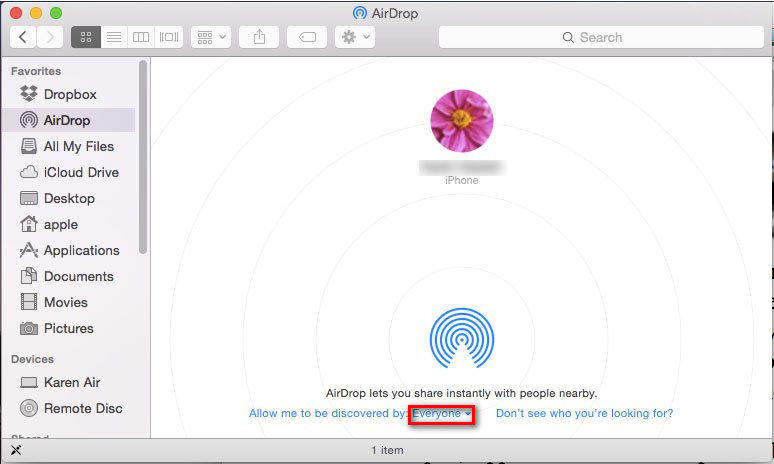
2. Run Finder on Mac and select AirDrop.
3. Now, your device is invisible by default but if you want it to be found by other devices then you have to activate the option “Allow me to be discovered by” and choose “Everyone” or “Contacts Only”.
4. You also have to run the AirDrop app on your iPhone. Enable Everyone here too. As long as the app is activated on the other device, the Mac will detect it.
6. Now, on your Mac, in the AirDrop panel there is an icon that represents the iPhone, select the file you want to send and drop it there.
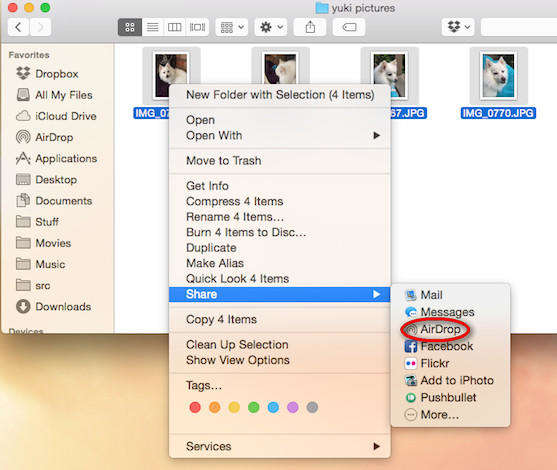
7. After that a blue colored ring will be visible, it indicates the progress of the data transfer.
8. Accept the transfer on iPhone.
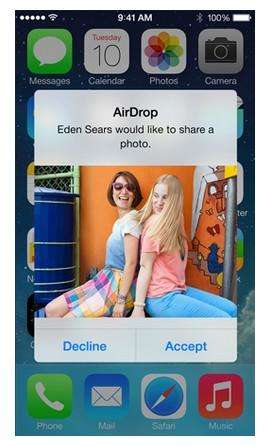
As you can see it is very easy to operate AirDrop. The app is simple and efficient and the file transfer speed is commendable as well.
Conclusion
As a matter of fact, iTunes has frustrated the users including me so much that they are burning all the bridges with the app. They don’t even want to use the apps that are remotely connected to iTunes. If the app has glitches or a bit troublesome, most of the users cope with that in their own way but if an app is damaging precious data or even deleting data then there is no redemption for that app. AirDrop is an extremely good iTunes free app that transfers data at light speed but if you want the best then go for Tenorshare iCareFone. It is simply the best!

