4 Top Ways to Import Photos from iPhone to External Hard Drive with video
by Sophie Green Updated on 2023-12-11 / Update for iOS File Transfer
With just the photos, an iPhone with 64GB space can be out of storage in a very short span of time. This is especially true when live photos are taken using iPhone. One of the best ways to increase the storage is by backing up the photos to the cloud. But, there are several users who would want to have a backup of the photos on an external hard drive just in case any issue crops up with the cloud storage. This would ensure that a backup is available with you at all times even if the cloud storage crashes and you lose all the important data including the photos. If you are one of such users who would want to know how to import photos from iPhone to external hard drive, you can follow any of the methods given below.
Method 1: Best Way to Move Photos from iPhone to External Hard Drive
The best way in which you can import the photos from iPhone to an external hard drive is by making use of any of the programs which have been specifically developed for this purpose. Out of all the available programs, Tenorshare iCareFone is the best and can be used to effectively import all the photos from iPhone to an external hard drive easily. Follow the steps below to know how to use this program to know how to move photos from iPhone to external hard drive.
Step 1 Download, install and then launch Tenorshare iCareFone on your laptop.
Step 2 Connect your iPhone to your laptop with the help of a USB cable. Click on "File Manager" and then on "Photos".
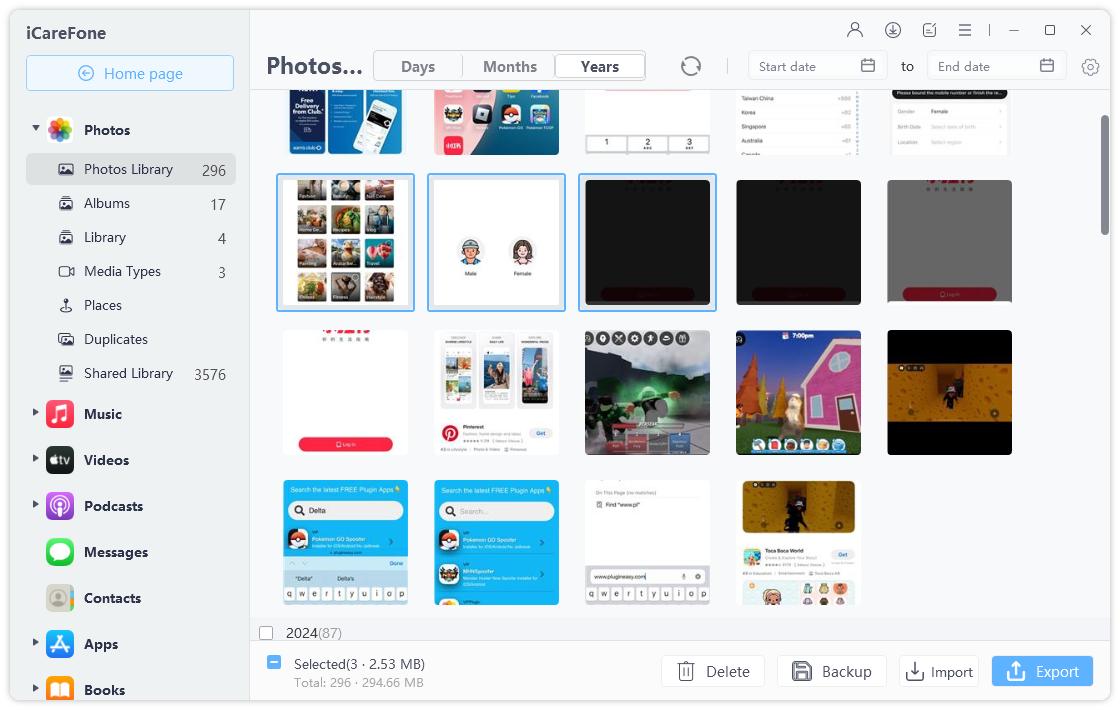
Step 3 Browse the photos which have been stacked categorically and pick the pictures which you wish to export to the external hard drive. Click on the "Export" button and choose the external hard drive from the available options and then click on "OK".
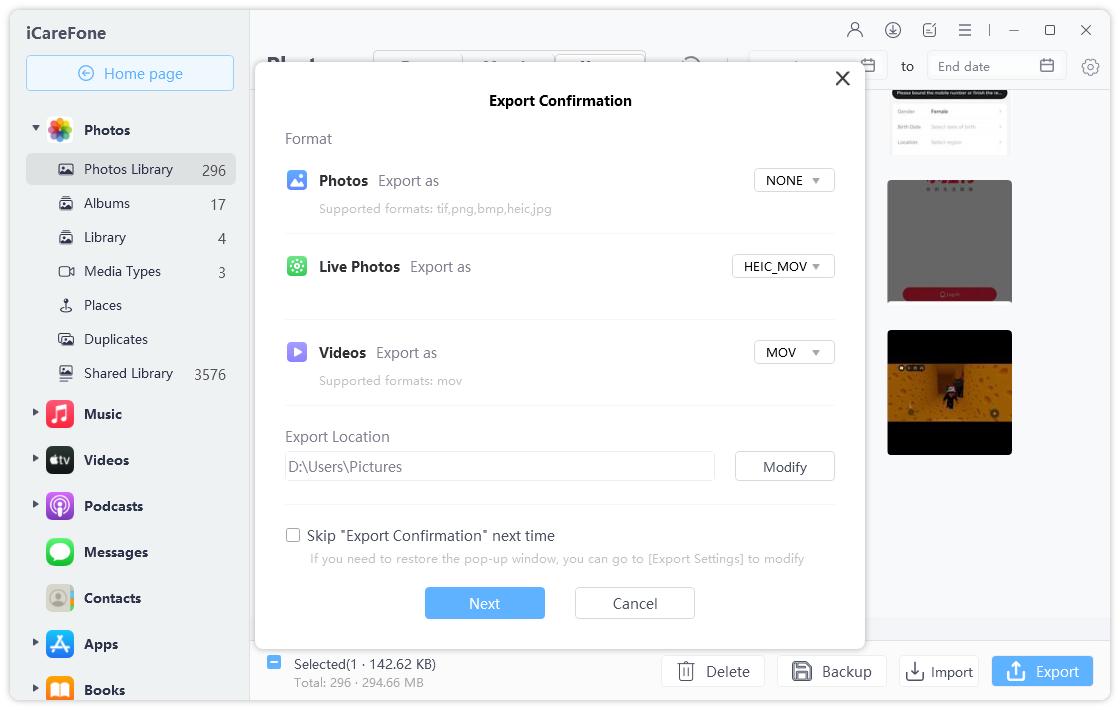
This way all the photos which you have selected will be transferred to the external hard drive.
Method 2: How to Import Photos from iPhone to External Hard Drive via USB Cable
You can make the transfer of photos from iPhone to an external hard drive through a USB cable as well. Check out the steps below to know how to transfer pictures from iPhone to external hard drive using USB cable.
For Windows 10/8/7 Users:
Step 1: Connect your iPhone as well as the external hard drive to your Windows system through a USB cable.
Step 2: From the Autoplay window, click on "Import pictures and videos" and select "Import".
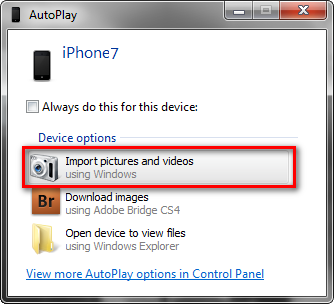
Step 3: Select the external hard drive as the final location and click "Continue". All the photos on your iPhone will be transferred to the external hard drive.
For Mac Users:
Step 1: Connect your iPhone and the external hard drive to your Mac system by using a USB lightning cable.
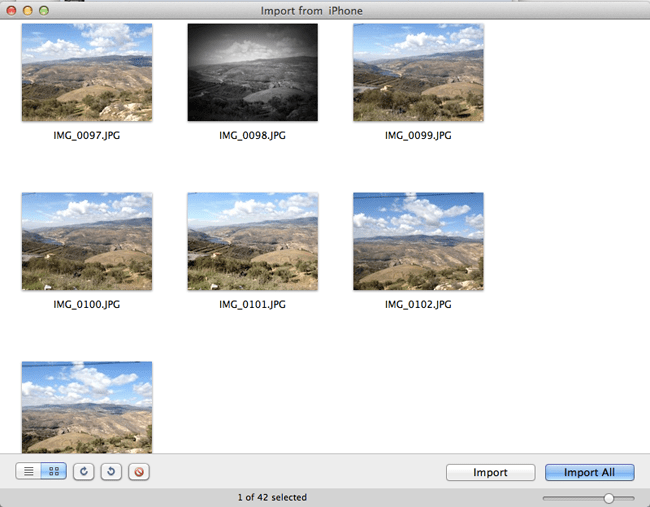
Step 2: Use Spotlight and search for "Image Capture" and launch it. All the photos in your device will be displayed on the screen.
Step 3: Select the photos which you wish to import and click on "Import". Then, choose the external hard drive. Click on "Import All" if you want to transfer all pictures and click on "Import". This would import all the photos from your iPhone to the external hard drive.
Method 3: Use iCloud Photo Library to Transfer Pictures from iPhone to External Hard Drive
If you want to use an official source to import your photos to an external hard drive, you can make use of iCloud. To know how to copy photos from iPhone to external hard drive using iCloud, you can follow the steps mentioned below.
Step 1: On your iPhone, go to "Settings", select "iCloud" and click on "Photos" on iPhone to turn on iCloud Photo Library.
Step 2: Launch the iCloud program on your system or navigate to www.icloud.com and login using your credentials.
Step 3: Choose "Photos" tab from here and select all the photos which you wish to import.
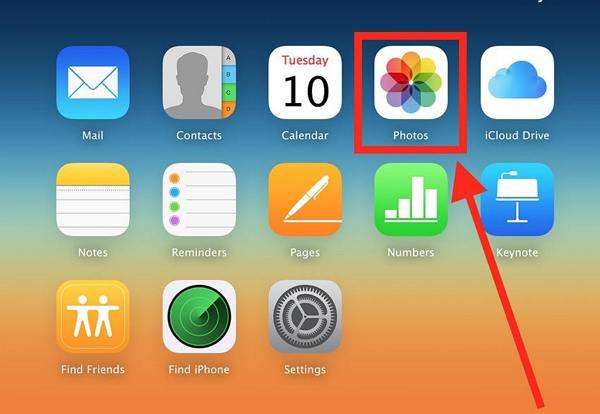
Step 4: Tap on "Download selected items" and wait.

Step 5: Plug in your external hard drive, open it and copy all the downloaded photos to it. Your external hard drive would then have all the imported photos from iPhone.
Cons of using this method:
- iCloud is very slow
- Only limited storage space for free
- Time consuming
Method 4: How to Import iPhone Photos to External Hard Drive Using iTunes
iTunes is program developed by Apple which can be used to sync photos on iPhone to the computer. You can even make use of iTunes to import the photos from iPhone to an external hard drive. You can use the steps below to sync the photos to a folder on your system and then import it to an external hard drive.
Step 1: Open iTunes on your computer or Mac.
Step 2: Connect your iPhone to your computer and select your device in the iTunes window.
Step 3: Click on "Photos" option available on the left.
Step 4: Tick the box in front of "Sync Photos".
Step 5: Select "Photos" from the drop down menu of "Copy photos from".
Step 6: Select "All photos and albums" and click on "Apply".
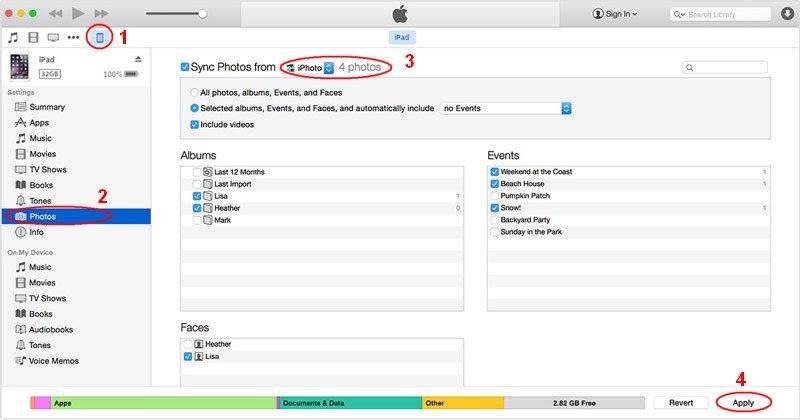
Step 7: After this, you can select these photos, connect the external hard drive and copy the photos to it. This way you can know how to import iPhone photos to external hard drive using iTunes.
- It runs pretty slowly
- Does not work if not updated to the latest version
- Needs a stable internet connection
Bonus Tip: How to Recover Photos from iPhone to External Hard Drive
If in case you lose or accidentally delete a few photos during any of these processes, you can make use of Tenorshare UltData for recovering the photos. This is a highly recommended tool in such scenarios. Follow the steps below to do this.
Step 1: After downloading the tool, launch it. Connect your iPhone using USB cable.
Step 2: From the main interface, click on "Recover from iOS Device". Select "Photos" option and click on "Start Scan".
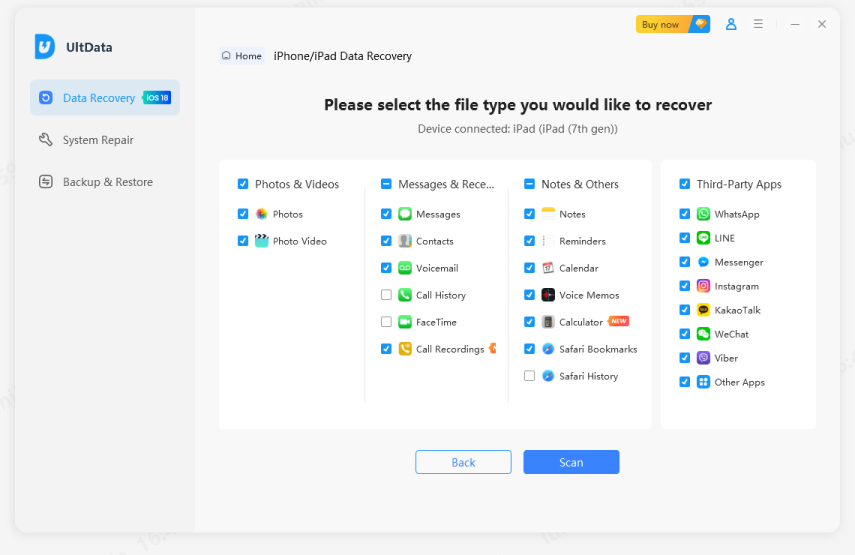
Step 3: Preview the recovered photos and click on "Recover".
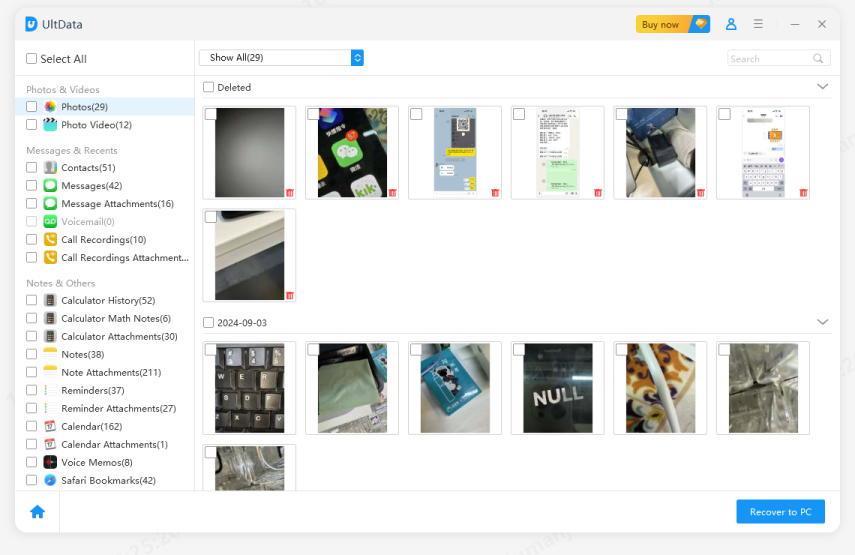
This way any deleted or lost photos can be easily recovered using Tenorshare UltData.
Conclusion
Although cloud backup is the most preferred option by all iPhone users, iCloud and iTunes come with their own set of disadvantages. To overcome this, it is always better to store the photos in an external hard drive for ease of access. You can use any of the above methods to know how to transfer photos from iPhone to hard disk but the most recommended out of all would be Tenorshare iCareFone. In case you lose or delete any pictures accidentally while doing this, you can use Tenorshare UltData to recover those pictures or images.


