How to Recover Deleted Notes on Mac with 5 Reliable Ways?
How to recover deleted notes on Mac is a genuine query from the users. You have a dedicated app to organize your Notes properly on a Mac. The Notes contain several important information for the users; so, notes are crucial.
Unfortunately, the notes tend to disappear often. Sometimes this happens very suddenly, or sometimes the disappearance occurs after an update. Accidental deletion is also possible. But whatever the reason, if you ever feel the need to recover the lost Note file, we strictly recommend checking out the article below. The 5 most reliable solutions are detailed below.
- Part 1: Can You Get Back Deleted Notes on Mac?
- Part 2: How to Recover Deleted Notes on Mac without Backup?
- Part 3: How to Recover Deleted Notes on Mac with Backup?
Part 1: Can You Get Back Deleted Notes on Mac?
How to recover notes on Mac? Notes on Mac are crucial for most users. But is it possible to recover deleted notes?
Of course, recovery is possible. After the deletion, the Notes most likely go to the Recently deleted Folder. Where they will stay for 30 days waiting for permanent deletion. Within these 30days, you will be able to get them back.
But if you have a backup, then you will have other means of recovery accessible to you as well.
Part 2: How to Recover Deleted Notes on Mac without Backup?
In this part, we will be discussing the procedure of Notes recovery on a Mac if you won’t have a backup. There are a few options available, and you can check them out in detail below.
Way 1. [Any time]Using Tenorshare 4DDiG to Recover Deleted Notes
If you have accidentally deleted the Note file and you don’t have a backup, we recommend using a professional data recovery tool to recover the file.
There are other methods available as well, but using a professional tool will be easier and more efficient. So, before you go and look for a tool, we have a very promising recommendation for you. Tenorshare 4DDiG for Mac Data Recovery. It is a data recovery tool specially developed for Mac. It has the highest success rate, and most importantly, it is easy to use.
So, without further ado, check out the steps below. Here’s how to recover lost notes on Mac…
- First, complete the installation of Tenorshare 4DDiG on the Mac.
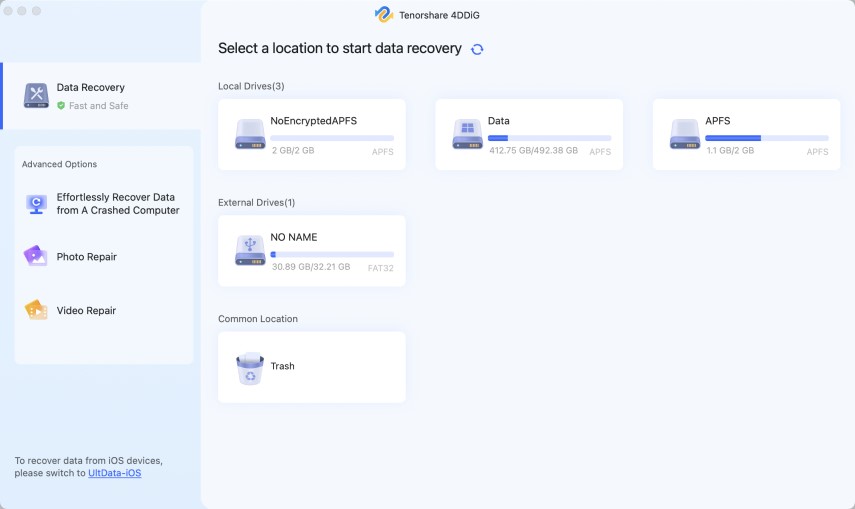
Run the program and choose a location your drive to make the recovery. Click on the ‘Scan’ button below.

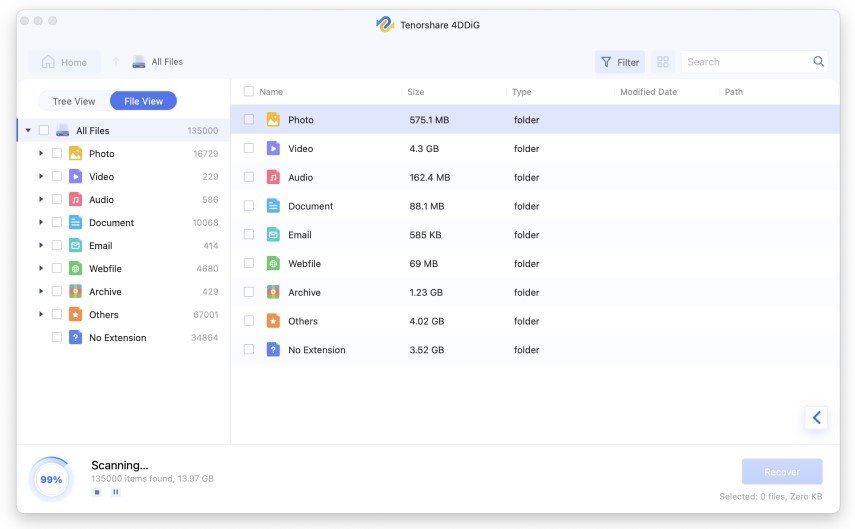
Scanning for the deleted files will take more than a few minutes. After the scan, a result will be displayed. Click on the files to get a detailed preview.

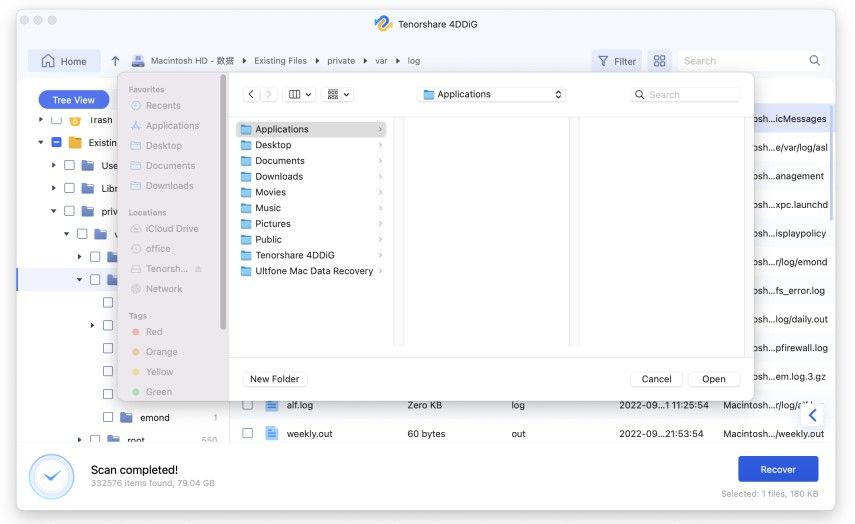
Now, select the necessary files and click on the ‘Recover’ button below.

You have to choose a location to save the recovered files but do not save them in the same location from where they were erased previously. If you do that, the files will be overwritten, and they will be lost forever.
Way 2. [Within 30 days]Using Recently Deleted Folder to Recover Lost Notes
How to recover a deleted sticky note on Mac? In the previous part, we have discussed the most effective way to recover the notes on Mac, which involves using a professional tool. But it is not the only way to do it.
macOS has very recently included a Recently Deleted Folder. This folder stores the deleted files temporarily. But the files in this folder will be cleared out automatically after 30 days.
Therefore, if you have deleted Notes on the Mac and it hasn’t been 30 days yet, you will be able to restore the deleted Note from the Recently Deleted Folder. The steps are below for you to check out.
Here’s how to restore notes on Mac…
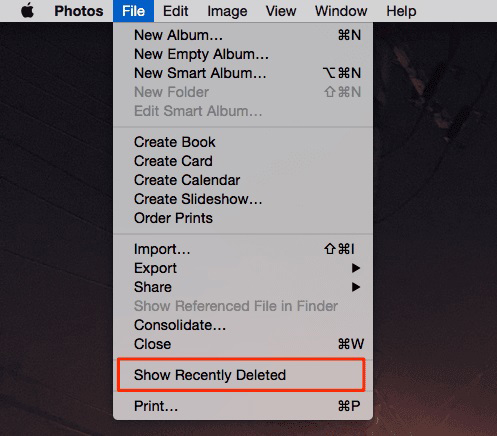
Go to the File menu on the main screen and click on ‘Recently Deleted Folder’.

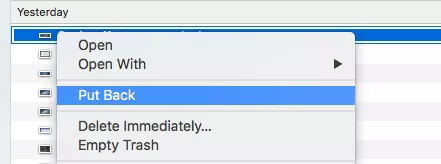
In the Recently Deleted Folder, you will have all the deleted files that are temporarily stored. Just locate the Note you have accidentally deleted. Right-click on the Note and from the drop-menu, choose to put it back to its original place.

This is an easy and effective way to recover lost or deleted Notes on Mac, but the only condition is that you have to do it within 30 days.
Way 3. [Complicated]Using .storedata Files to Restore Disappeared Notes
There is another method you can use but remember that this procedure is used only by the experts when Mac notes get disappeared out of the blue.
You have to use .storedata. It is a place where the native Mac file to temporary file information gets stored. So, you can visit this place and recover the contents of your deleted note.
The steps to visit. storedata are listed below. Here’s how to retrieve deleted notes on Mac…
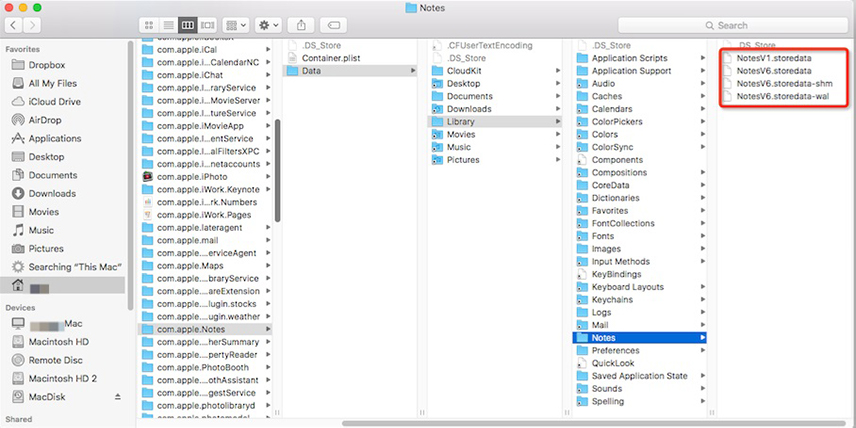
- Open Finder on the Mac and go to the ‘Notes Folder’ under Library.
- In the ‘Store Data’ format, you will be able to see a few files here. Just copy and store them in a different location.
- Now, you have to change the extension forcefully to ‘.html’. Open them with a web browser.
The text content will be displayed, which you will be able to copy easily and restore Notes raw data.

This is a bit complex method. So, be very careful.
But if you don’t have a backup, we recommend using Tenorshare 4DDiG- Mac Data Recovery for notes recovery. Unlike the recently deleted folder, it isn’t dependent on any conditions, and unlike the last method, 4DDiG’s method is really simple.
Part 3: How to Recover Deleted Notes on Mac with Backup?
Previously, we have discussed a few ways to recover deleted Notes on Mac if you don’t have a backup. But in this part, we will discuss a few more Note recovery procedures on Mac, only if you have a backup available.
If you have a backup, then 2 more options are available for you. If you have a backup created on The Time Machine, then you can use Time Machine to restore the Note file, or you can do it via the iCloud. But it all depends on where you have made the backup. For your convenience, we have detailed both procedures below.
Way 1. How to Restore Notes from Time Machine Backup
How to find deleted notes on Mac? If you are maintaining notes backup with the Time Machine, then it will be easy for you.
Time Machine is a built-in tool on Mac. It maintains a backup of your system. So, when the time comes, you just have to visit Time Machine and retrieve the data.
Here’s how to restore notes from Time Machine backup…
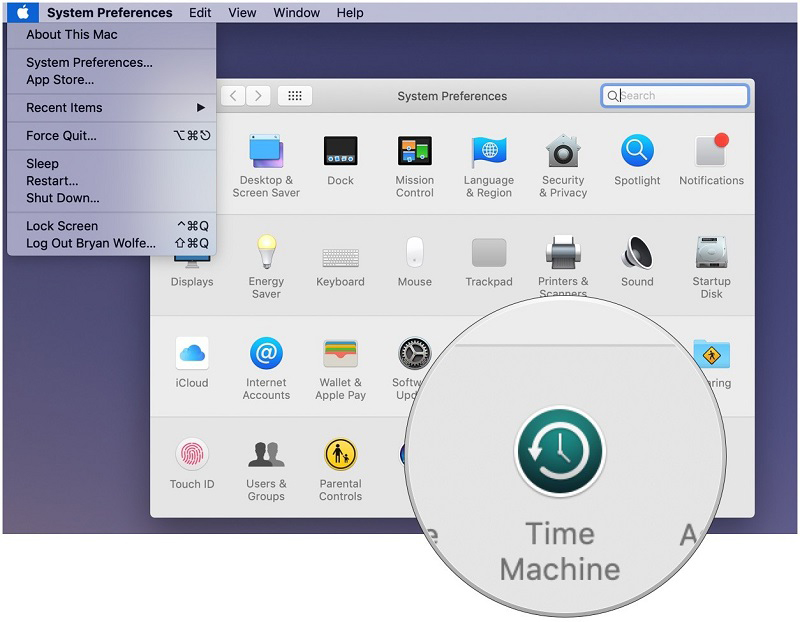
Access Time Machine.

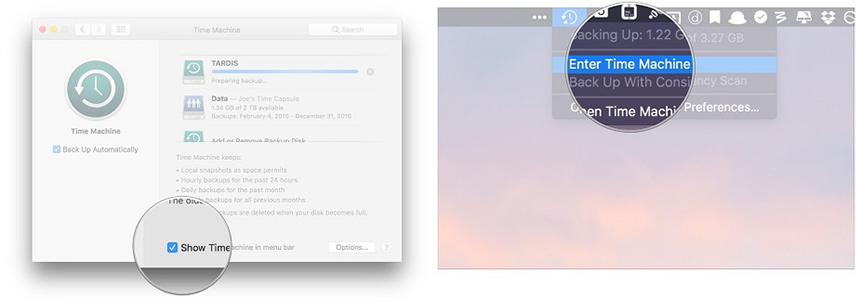
- In the Time Machine app, enable the ‘Show Time Machine’ option. Then. Click on the ‘Enter Time Machine’ option.
Now, all the data stored in the Time Machine will be displayed. Scroll down and browse through the data.

When you locate the deleted note, choose them and click on the ‘Restore’ button below.

This will restore the notes to their original location. But this method will only work if you have made the backup with the Time Machine beforehand.
Way 2. How to Undo Deleted Text in Notes on Mac with iCloud Backup
If you have used iCloud to create a backup beforehand, you will be able to use it to restore Notes. Just like the Time Machine, you will be able to sync notes.
Using this procedure, you will remotely access notes and get them back from the ‘Recently Deleted Folder’. But remember, your access will only last 30 days since the time of the deletion.
The steps are detailed below. Here’s how to get back deleted notes on Mac…
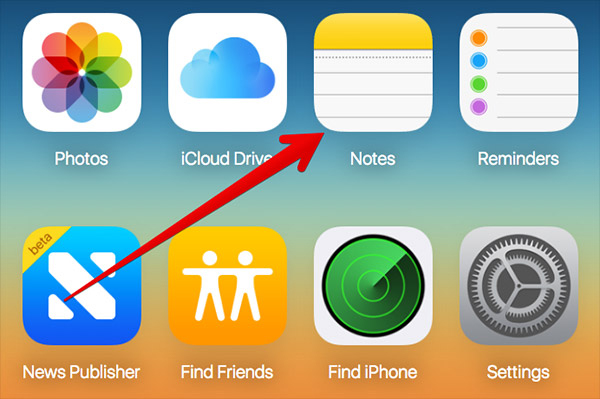
- On the official iCloud website, you need to log in.
After login, click on ‘Notes’ on the Home page.

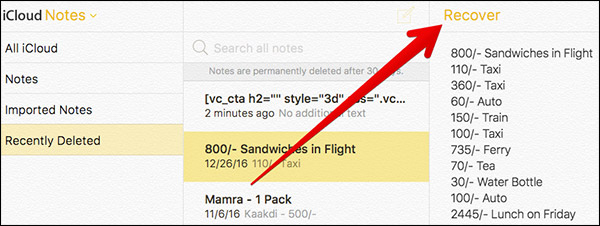
- A new window will be opened where you will view all the saved notes on the iCloud interface. On the left side, you will find the ‘Recently Deleted Folder’. Click on it.
Open the Note that you need to restore and then click on the ‘Recover’ button below.

This will only happen if you have synced with iCloud. And just to make sure, you have to make the recovery within 30 days.
Final Words
Therefore, if you have lost Notes on your Mac, there is nothing to panic. The file can be recovered in different ways. If you have a backup, then you will have options like Time Machine or iCloud to restore the data.
But if you don’t have a backup, we have detailed 3 different methods for you. But we suggest going with Tenorshare 4DDiG. It is easier to execute, and recovery is guaranteed.
Speak Your Mind
Leave a Comment
Create your review for Tenorshare articles

