MacBook Pro Recovery: How to Recover Data from MacBook Pro
"Data Recovery from a MacBook Pro SSD. Is there any suitable method to recovers the deleted Mac data back to the hard drive? I do not have any backup solution on my computer. Please help me urgently!!!
"My friend has got a MacBook Pro (13-inch, 2016, Four Thunderbolt 3 Ports). One day it just suddenly stopped turning on. He did not make any regular backups of his data before this issue occurred. Does anyone know if there is any chance he can get his data back?
Accidents happen without any prior warning and anything like that happening with your MacBook Pro would cost you heavily. Data being the front runner for today's high paced life might wreak havoc if lost by accident, formatting or deletion. Whether the hard drive has crashed, any Apps got corrupted or the system has undergone any glitch, recovering the underlying MacBook Pro data is prominent. If you are in such dilemma and want to carry out MacBook Pro data recovery, we are here to help you. In this article, we would introduce detailed guide on how to recover deleted files on Mac.
- Part 1: How to Recover Deleted Files on Mac with the Best MacBook Pro Recovery Tool
- Part 2: If You Want to Restore MacBook Pro to Factory Settings
Part 1: Recover Deleted Files on Mac with the Best MacBook Pro Recovery
While you are concerned about recovering the lost data from your MacBook Pro, the usual methods seem very daunting and you need a trusted and intuitive tool. In such a situation, 4DDiG for Mac Data Recovery comes as a welcome respite. No matter, how the data has been lost from your MacBook Pro, this software can recover 1000+ data types for you. Formatted, lost, deleted or corrupted files on MacBook Pro, 4DDiG for Mac Data Recovery can seamlessly get back the data.
Features of 4DDiG for Mac Data Recovery:
- Using this software, you can recover deleted or lost files, audio, photos, emails etc. from your MacBook Pro.
- It can retrieve formatted, lost or deleted data on your MacBook high data recovery rate and 100% security.
- Whether your MacBook or other storage space like micro SD, SSD, hard dis etc. this tool effortlessly gets data bac on track.
- Recover Data from Dead/Crashed/Failed MacBook Hard Drive.
- Compatible with 550 file types to recover them on your MacBook Pro.
- Fully support APFS, HFS+, FAT32 and other file system.
- High successful recovery rate and fast scanning speed.
- Support macOS BigSur 11.0, macOS 10.15, macOS 10.14 (macOS Mojave), mac OS X 10.13 (High Sierra), 10.12(macOS Sierra), 10.11(El Capitan), 10.10 (Yosemite)
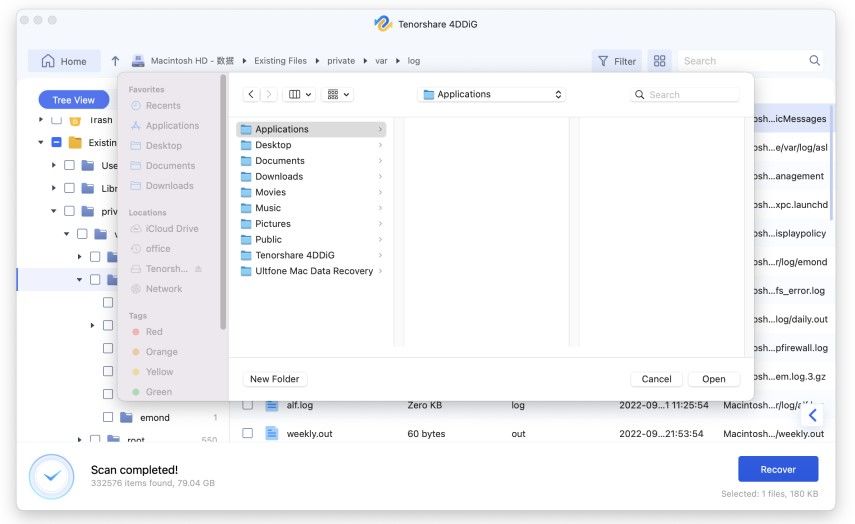
Guide showing users MacBook Pro data recovery with 4DDiG for Mac Data Recovery.
Step 1: First and foremost, install 4DDiG for Mac Data Recovery on your system. Select the location as Mac hard drive for starting data recovery process after running the software. Hit 'Scan' in order to find the formatted, lost or deleted files.

Step 2: It will take some time to scan the lost files. You can preview the files by clicking it on the result section.

Step 3: Press 'Recover' and then decide the destination folder for saving the files you recover. Saving them on the same partition or folder where you lost them would result in losing them forever. So, avoid that.

Part 2: If You Want to Restore MacBook Pro to Factory Settings
Now that you have learned how to recover deleted files on MacBook Pro. Here is the process for factory resetting your MacBook Pro. Ensure that the data has been backed up before factory restoring your MacBook Pro.
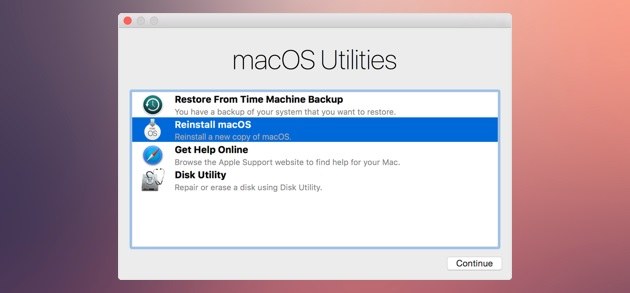
Step 1. You need to restart the MacBook in 'Recovery mode' by browsing Apple menu > 'Restart'. Hold down 'Command' + 'R' keys until you see the 'Recovery mode' window appearing.
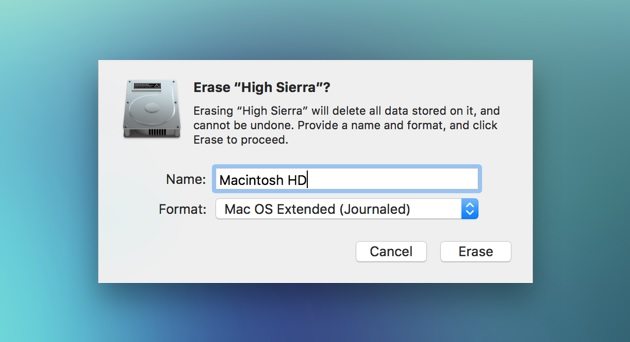
Step 2. For erasing MacBook hard drive go to 'Utilities' > 'Disk Utility' > 'Continue' > pick your startup disk > 'Erase'.
HFS+ files system on Mac Sierra and older – select Mac OS Extended (Journaled).
APFS file system on Mac High Sierra, Mojave – select APFS as to Format.
Then click on 'Erase'.
Now, hit 'Quick Disk Utility'.

Step 3. Reinstalling the OS
Now that the hard drive has been formatted, a clean Mac OS can be installed on your MacBook Pro. Tap on 'Reinstall macOS' or 'Reinstall OS X'. Confirm your selection and go through the onscreen instructions.
Note: In case you are giving away the system to someone else, then exit the process, so that the new user will enter his/her details there. Press the 'Command' and 'Q' keys and tap 'Shut Down' to turn off the MacBook. It's clean and on its factory settings mode which a new owner can personalize.

Things to remember before resetting MacBook Pro
After you have recovered data from MacBook Pro hard drive, you got to make sure that your system related services must be disabled. They include deactivating programs on your Mac along with iCloud, iTunes, and iMessages. Avoid the post sales call from the new owner by signing out of your MacBook completely.
- Deauthorize iTunes – To ensure that your Mac is completely disconnected from you, delink your iTunes.
- Turn off FileVault – As FileVault encrypts hard drive data for protecting against unauthorized access on the startup disk, turn off FileVault for that matter.
- Disable iCloud – Log out from iCloud to ensure that all your data on iCloud account is wiped from the computer.
- Sign out of iMessage – Prior to restoring the MacBook to factory settings, make sure of signing out of iMessage.
- Erase Touch Bar Data – Erasing the Touch Bar data would ensure that it's not visible to the new Mac user.
Final Verdict
From the above article, we have observed that the while you are up for MacBook Pro data recovery the best way, there is none other than 4DDiG for Mac Data Recovery from Tenorshare that beats the rest. When it comes to data recovery then 4DDiG for Mac Data Recovery can recover 550 plus data types from your MacBook.
Speak Your Mind
Leave a Comment
Create your review for Tenorshare articles


