How to Fix Encrypt iPhone Backup Option Greyed Out?
When you attempted to uncheck the encrypt backup option on iTunes, you found the check box greyed out and according to the suggested method, you tried to deleted profile. But unluckily, you didn't see any profile in settings. If you have met the same situation and are looking for the options for fixing this solution, here are the fixes.
- Part 1: Fix Encrypt iPhone Backup Check Box Greyed out
- Part 2: How to Turn off iPhone Backup Encryption in iTunes
- Part 3: How to Create a New Backup on iTunes?
Part 1: Fix Encrypt iPhone Backup Check Box Greyed out
You can use a suitable app to resolve the issue. The problem may have several reasons that stop you from unchecking the option for encrypting the iPhone backup. The following image should give you an idea of how will this happen?
Whatever be the reason that causes it, you should be able to use an app to address the issue, and fix encrypt iPhone backup option greyed out. One of the best solutions you can use to sot out the issue would be Tenorshare 4uKey-iTunes Backup. It is an outstanding option for iTunes backup encryption settings.
The tool can remove the iTunes backup encryption settings quite easily in one click. Here is the complete tutorial for your redressal of the issue. Check out the steps here below
Get Tenorshare 4uKey-iTunes Backup downloaded and installed on your computer.
Launch the application and choose the option Remove Backup Encryption Settings from the main interface.

Next, connect your iPhone to your computer. Then wait till the connection prompt appears on your device. Once the connection is made, click on Start. It should be enabled as soon as the iPhone is detected by Tenorshare iBackupUnlocker.
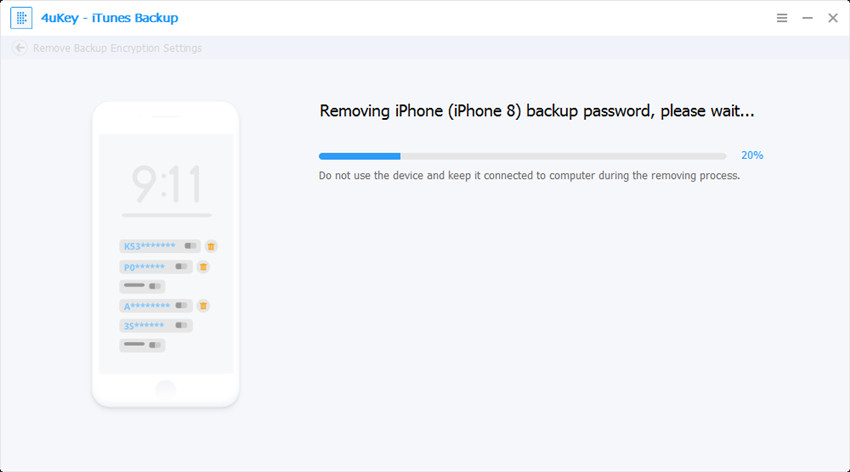
The software should now begin removing your iPhone encryption settings.Wait patiently till the process is completed. Once the process is completed, your password for the iPhone backup encryption will be removed, and you will be able to uncheck the encryption settings on iTunes. You should get a prompt when the settings are reset, and the encryption setting is removed.
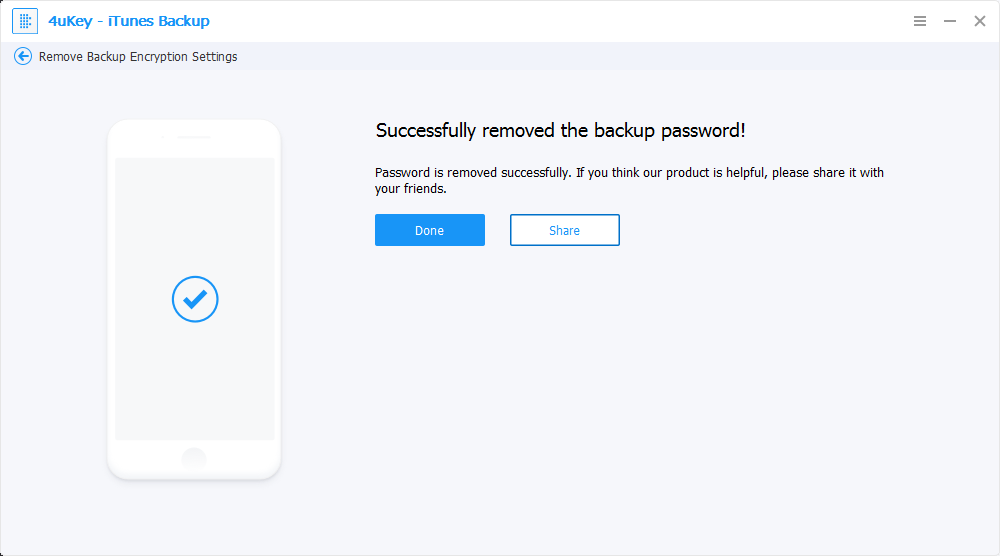
Once the settings are removed, the greyed out encrypt iPhone backup option will be removed. You should now be able to uncheck the Encrypt iPhone backup option easily.
Part 2: How to Turn off iPhone Backup Encryption in iTunes?
If you have the password and the Encrypt iPhone backup option is not greyed out, you can easily turn off iPhone backup in encryption on iTunes. Here are the steps involved in achieving this task
Launch iTunes on your computer. Connect your iPhone to your computer. Wait until the connection is completed. You should get a prompt once your iPhone or any other iOS device is connected.
Once your iOS device is connected, click on the icon representing it on your iTunes. You will find the details of your iPhone or other iOS device connected to your computer.
Locate and click on the Summary option on the left pane on your iTunes screen.
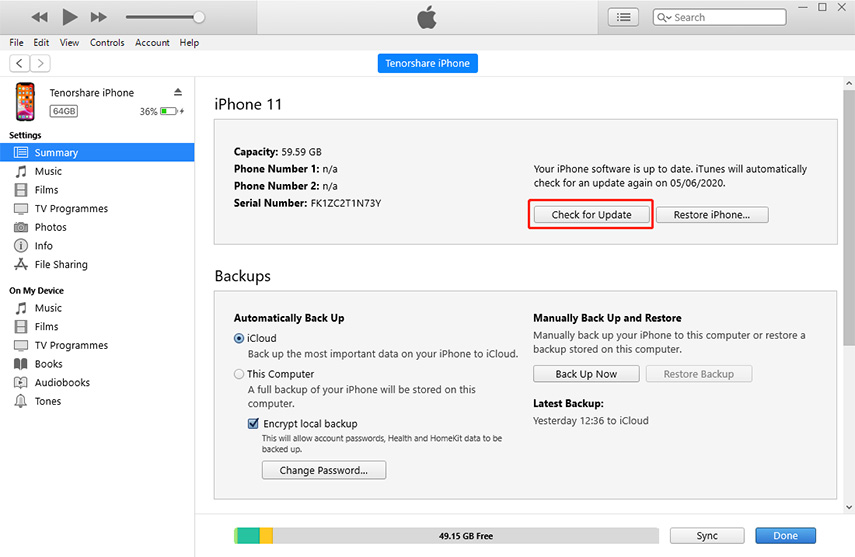
Scroll down to find the Backups section, locate the option Encrypt iPhone backup option and uncheck the checkbox next to it.
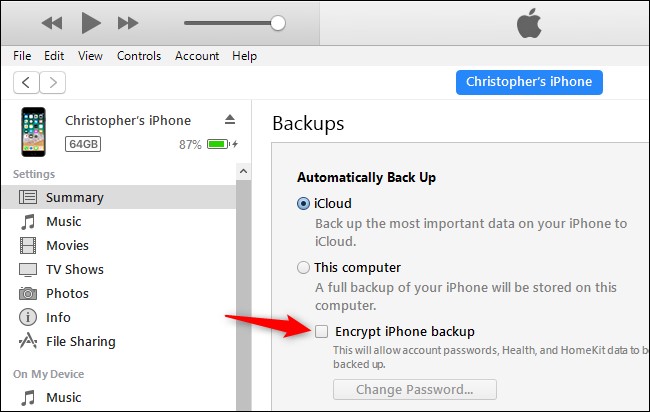
You will be asked to enter your password set for your encrypted iPhone backup. Simply enter the password and click on OK.
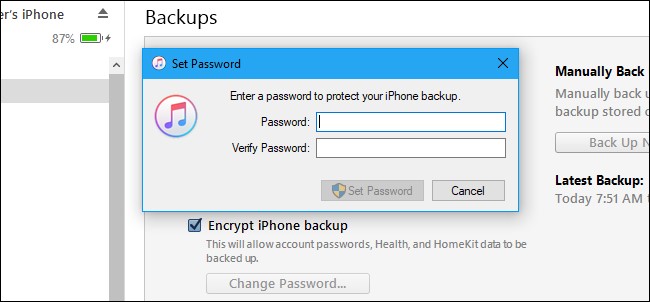
Your iPhone backups will now be unencrypted. Please note that the future backups will be unencrypted, while those already encrypted will not be affected. If you have forgotten the password, you will be able to retrieve it using Tenorshare iBackupUnlocker. You will also be able to remove the encryption settings for your backups using the application following the above method.
Part 3: How to Create a New Backup on iTunes?
Creating iPhone backup can be achieved through several means. You can opt for encrypting your iPhone data automatically by setting it up on your iPhone. You can also opt for backing up your iPhone to iCloud.
However, the easiest option to achieve the feat would be to use iTunes. The steps involved would be rather easy and simple. Follow the instructions here below.
Step 1: Launch iTunes on your computer. Ensure that you have set up iTunes on your computer with proper credentials and configuration.
Step 2: Connect your iPhone or iOS device to your computer. Wait till the iPhone is detected on your iTunes.
Step 3: Once the connection with your iPhone is established, you can click on the Summary option on the iTunes screen that displays your iPhone information.
Step 4: Click on Back up Now option on the iTunes under Backups. Wait till your iPhone data is backed up on your iTunes.
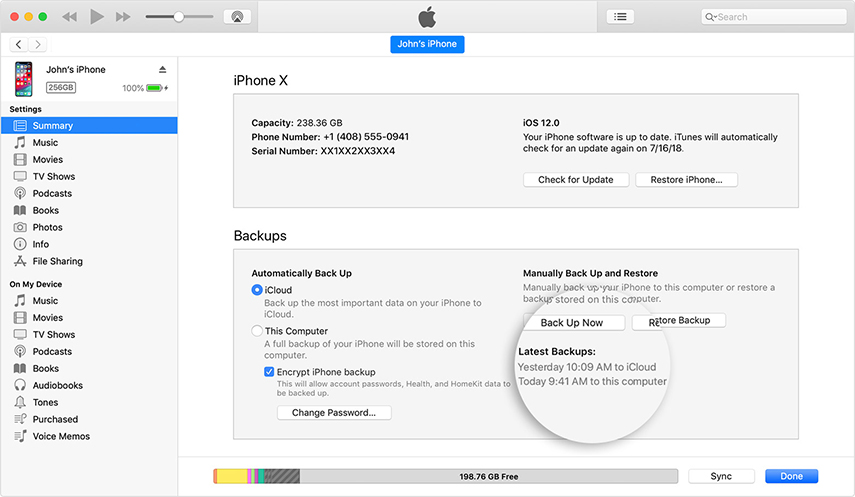
Your backup will be completed and saved on your computer. You can check if the backup has been completed successfully on the Summary Screen.
That complete your task. You have successfully created a new backup without encryption.
Conclusion:
If you are troubled with unable to check the encrypt iPhone backup option error on your iTunes, the solutions outlined in the above paragraphs should help you achieve the perfect results. You will also be able to create your iPhone backups even without the encryption following the above tutorial with ease.
Have you used any of these methods to address the issues with your iPhone backup? If you have used the techniques for your needs, do share your experiences and opinions about the Tenorshare 4uKey-iTunes Backup option for an enhanced backup password recovery on your iPhone or any other iOS device.
Speak Your Mind
Leave a Comment
Create your review for Tenorshare articles
