How To Calibrate iPhone Battery [iOS 17/16 included]
If you are an iPhone user, you can relate to this issue when you notice a fast battery drain after your install updates on your phone. It happens because when you install an update, the system has to load files, remove unnecessary files, and things have to settle. All of this uses enough battery, and that's why we notice battery calibration. We are here to guide you about everything related to iPhone battery calibration. So, if you want to know in detail about this issue, stay with us till the end!
- Part 1: Why You Need To Calibrate iPhone Battery
- Part 2: What To Do Before Reset iPhone Battery
- Part 3: How To Calibrate iPhone Battery
- Part 4: The Best Tip To Fix iPhone Battery Issues
Part 1: Why You Need To Calibrate iPhone Battery
The most important question that you must get the answer for is "Why You Need To Calibrate iPhone Battery?" It is the most frustrating for iPhone users, and that's why we always see them complaining about the battery time of their phone. So, we got here to discuss when you need to calibrate iPhone Battery. The following are the reasons; read them to learn.
- When you update to iOS 17, the battery drains fast. At that time, you have to calibrate iPhone Battery.
- When you replace your old battery, iPhone battery calibration will help you.
- iPhone battery calibration also helps you to improve your phone's battery health and keep it in good condition.
Part 2: What To Do Before Reset iPhone Battery
Resetting the iPhone battery is probably the most convenient way to calibrate iPhone Battery and keep your phone's battery in good condition. And before starting, the following are some things that you must not forget to do. And if you use them a lot, you can turn them on again after calibration.
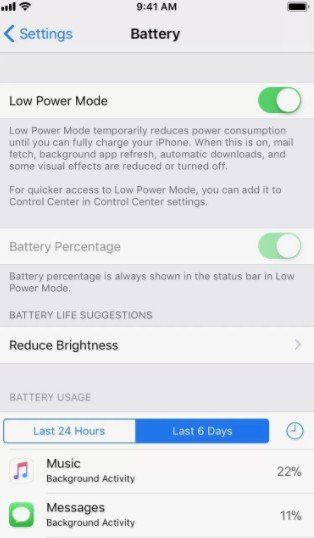
Turn Off Low Power Mode
To do this, you have to tap on the Settings menu and click on the Battery panel. Then Toggle the "lower power mode" option to turn it off.
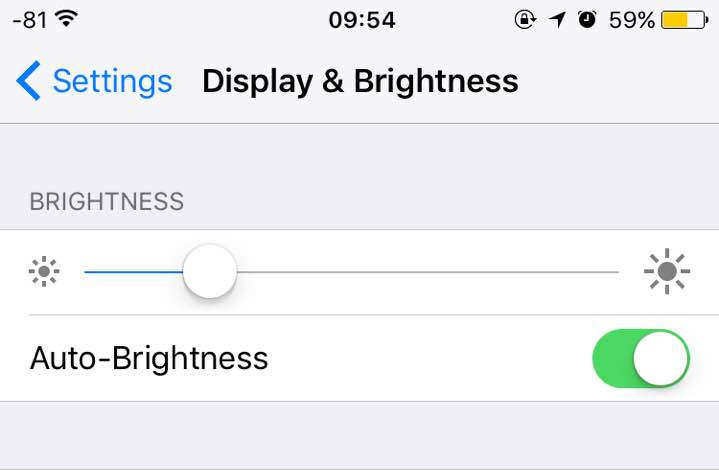
Lower The Screen Brightness
Click on the Settings menu and then scroll down to Display & Brightness to put your iPhone’s brightness to lower.
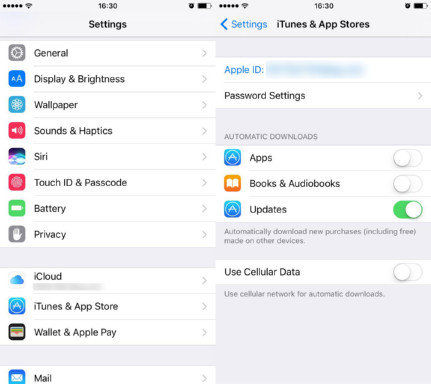
Close Automatic Updates
Then you should also turn off the app aotomatic update. Click on the Settings menu and head to iTunes & App Stores > Update to swipe off App Update.
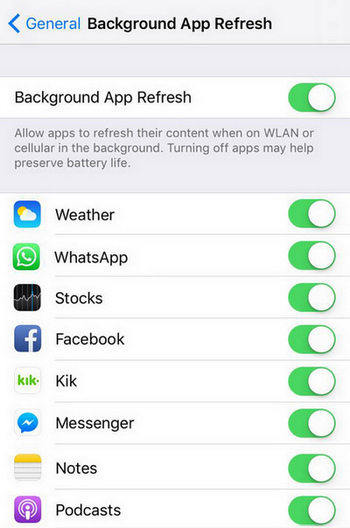
Disable Background App Refresh
Remember to disable Background App Refresh before calibrating iPhone battery. Click on the "Settings" menu and then go to "Generals." After that, click on "Background App Refresh" and turn it off.
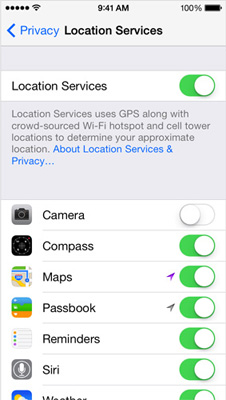
Turn Off Location Services
At last, you need to turn off your device's location service. Go to the "Settings" app, tap on the Privacy > Location Services. Then toggle the button to turn off location services for all the applications.
Part 3: How To Calibrate iPhone Battery
Now after you have prepared well, it comes to the main part of this article : how to calibrate battery iPhone. It is simple and easy by following the 3 steps below:
- First drain your iPhone battery by watching videos or doing other things until it turns off automatically. Then leave it and do not use it for several hours.
- Next charge your iPhone with an official Apple cable. When it turns on, swipe it off and keep charging for several hours.
- Don't plug the cable. And turn on your phone and then force restart it in the charging state. The final step is that you can enable the functions mentioned in last part in order to use your phone normally.
Part 4: The Best Tip To Fix iPhone Battery Issues
Sometimes, following the solutions mentioned above don't work for everyone. After iPhone battery calibration, if you still face battery health issues like draining fast, using this software utility called Tenorshare ReiBoot. This software would help you solve many of your issues regarding iPhone battery management.
The following are some significant features of this incredible software that will convince you of its importance and worth:
- With this single software, you can resolve more than a hundred iPhone issues, including iPhone 14 Apple logo stuck problems.
- You can quickly enter recovery mode and DFU mode with just a single click.
- You won't need to permanently lose your important data and files while repairing your device.
With no further ado, let's get into it and learn how to use it.
-
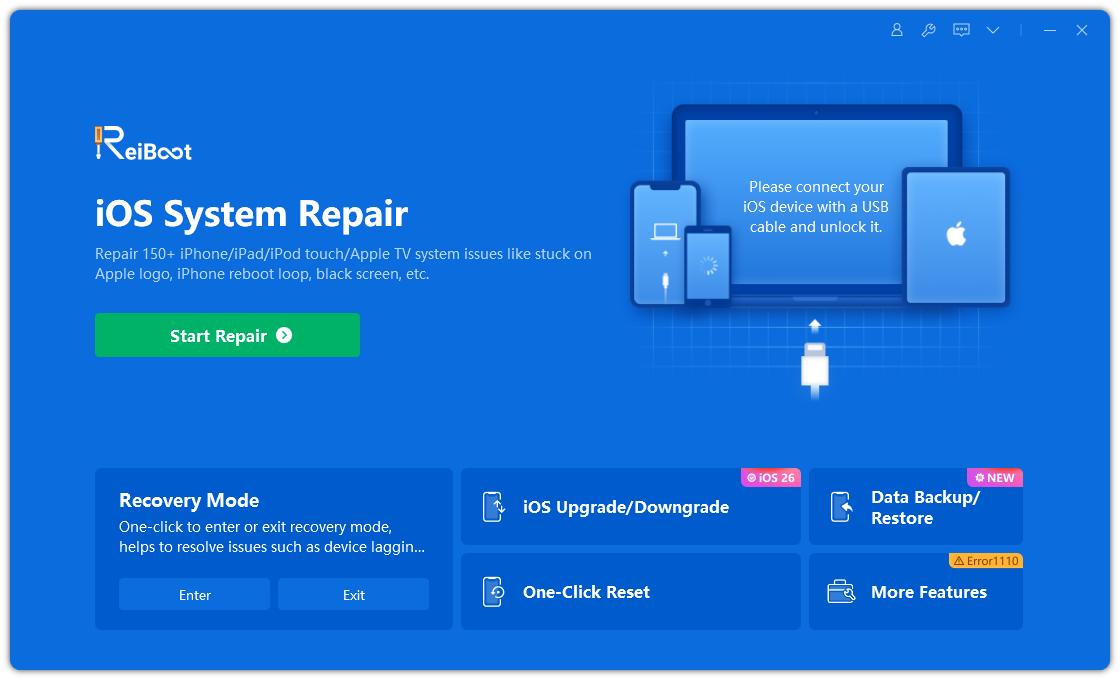
First of all, you have to download Tenorshare Reiboot on your PC or laptop. The next step is to connect your device with the laptop/pc using an original lightning USB cable. Ensure a stable connection.

-
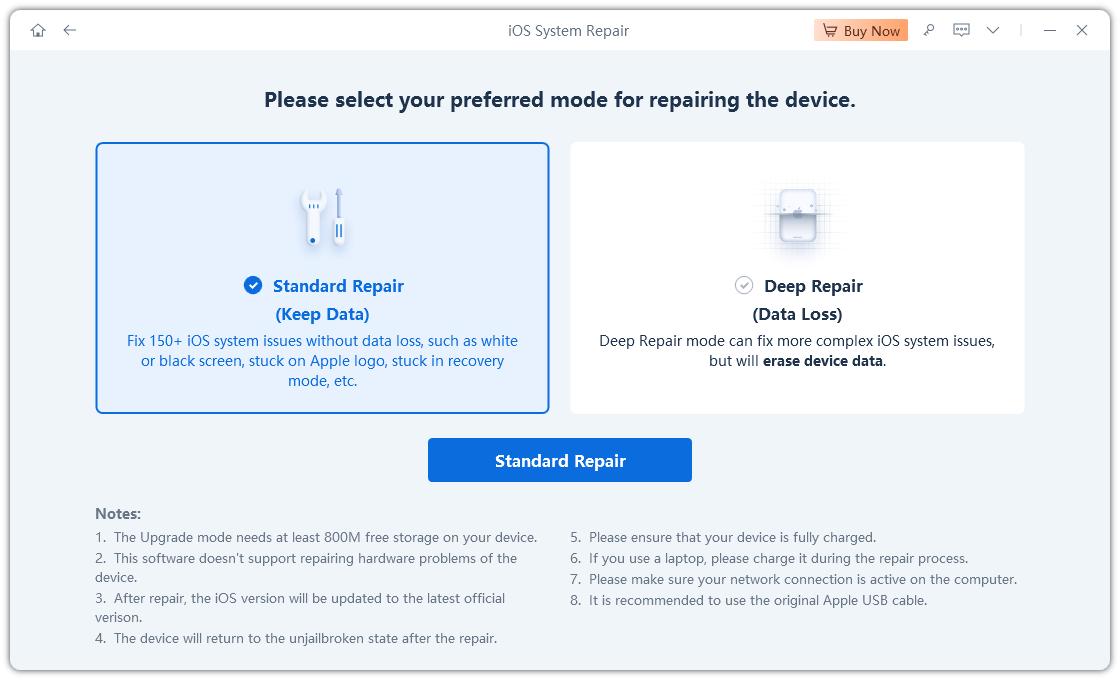
Now, you have to choose the repair type to get started. We recommend you choose the standard repair option for iPhone battery issues without losing data.

-
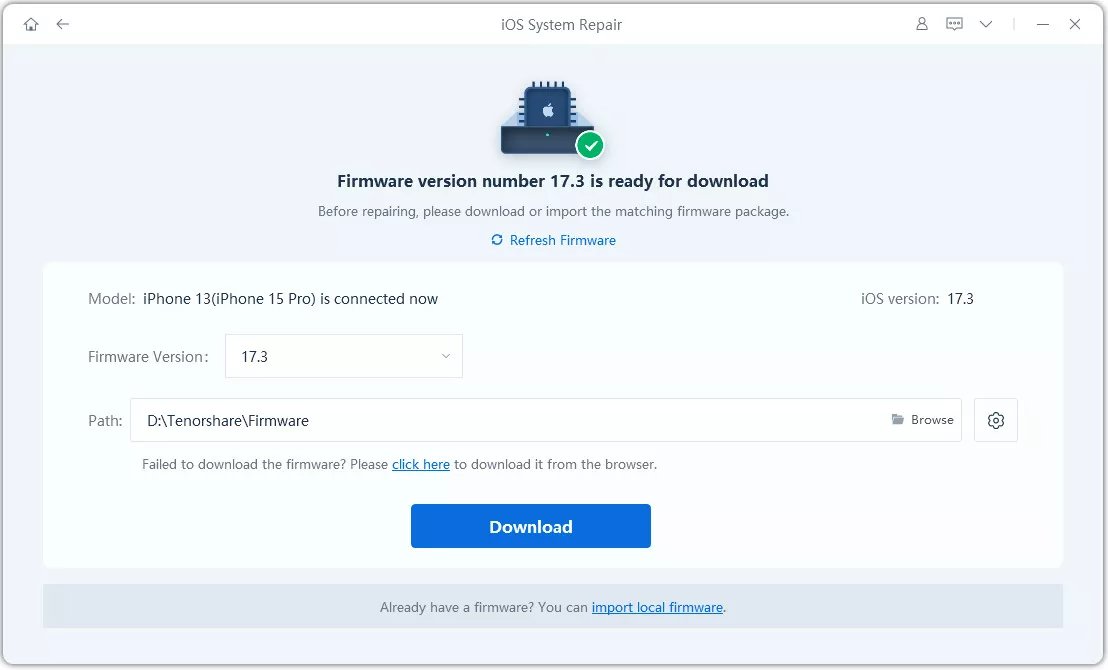
Now, download the firmware packages to start the process. It will take time to download, so wait until it's done.

-
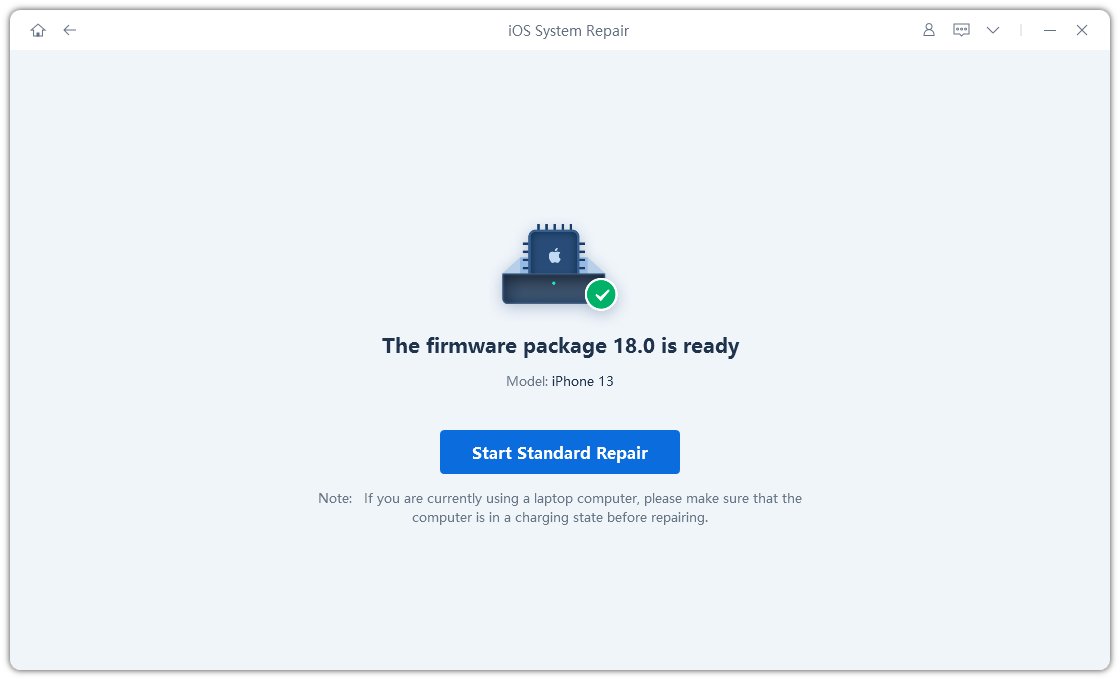
After downloading the package, when the firmware is ready, click on "start standard repair" to start!

-
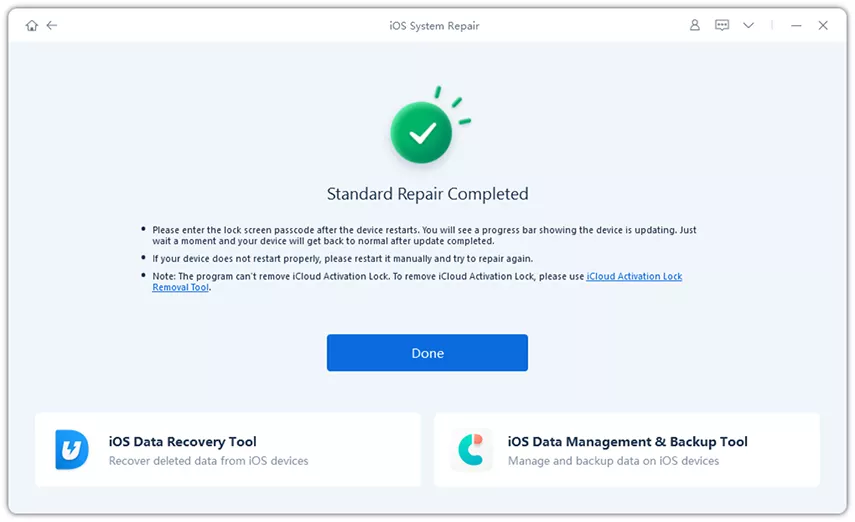
The repair process will take time, be patient and wait. At completion, the screen will show a completion message. Know that your reboot is completed now, and not all of your data is erased!

Summary
We exactly know the frustration when you have to recharge your phone very often, and well understand the importance to recalibrate battery sometimes. Therefore we shared enough methods, ways, and step-by-step procedures to solve the issues. Reiboot is an all-in-one system recovery software that handles all your iPhone-related issues. Gone are the days when you had to spend dollars on repairing your phone. With a handy tool like Tenorshare ReiBoot, you can fix iOS at home! Get it now and repair your device to make it look new!.
- Downgrade iOS 26 to iOS 18 ;
- Fix iPhone won't restore in recovery mode, my iPhone is stuck on the Apple Logo,iPhone black screen of death, iOS downgrade stuck, iPhone update stuck, etc.
- Support all iPhone models and the latest iOS 26 and earlier.
Speak Your Mind
Leave a Comment
Create your review for Tenorshare articles
