

 iOS Tips & Latest Updates
 Bug Fixes, Unlock Guides
 Giveaways & Freebies

UltData - Best iPhone Data Recovery Tool
Recover Deleted & Lost Data from iOS Devices Easily, No Backup Needed!
UltData: Best iPhone Recovery Tool
Recover Lost iPhone Data without Backup
When an iPhone restore gets stuck, fails, or brings back only part of your data, panic comes first. The good news is that iCloud backup recovery is not hard to understand once you know what Apple restores, what can interrupt the process, and when a third-party tool makes sense. This guide walks you through the official method, restore problems, and a no-reset recovery option.

iCloud backup recovery restores data saved in an iCloud backup or extracts needed files from that backup. Apple's official restore method is for full-device setup. But recovery tools are useful when you only need certain data, such as photos, contacts, messages, notes, or app information.
You may need recovery from iCloud backup after buying a new iPhone, resetting a device, losing data after an iOS update, deleting files by mistake, or seeing your restore process get stuck halfway. For example, if your new iPhone reaches 80% restore and then stops overnight, the issue may be related to Wi-Fi stability, available storage, Apple ID syncing, or a backup that cannot fully complete. If you run into this situation, check our guide on how to fix an iPhone stuck on Restore from iCloud for step-by-step solutions.
An iCloud backup can bring back device settings, app data, Home Screen layout, text messages , photos if they are not already handled by iCloud Photos, and other device content. Yet, some items are synced separately through iCloud rather than stored inside the backup itself. They may return after sign-in instead of during the main restore.
Apple also says that iCloud backup restores continue in the background and can take hours or even days as per the amount of data.

Apple's official way to recover from iCloud backup starts from the setup screen. If the iPhone is already set up, Apple says you must erase all content before restoring from an iCloud backup.
Go to Settings > General > Transfer or Reset iPhone > Erase All Content and Settings. Remember, before doing this, confirm that you know your Apple Account password, your device has enough battery, and your important current data is backed up elsewhere.

After erasing, turn on the iPhone and follow the setup screens until you reach Transfer Your Apps & Data. Tap From iCloud Backup, sign in with your Apple Account, and choose the most relevant backup by date and device name.

A small backup, such as a lightly used iPhone with basic settings, contacts, notes, and a few apps, may finish the main setup stage quickly. Still, apps, photos, and media can continue downloading later. Do not judge the restore by the first progress bar alone.
For a normal daily-use iPhone with many apps, photos, videos, and messages, expect more patience. Apple says the full background restore might take anything from a few hours to several days, particularly when there is a lot of information stored on the device.
The biggest factors are Wi-Fi quality, backup size, Apple server response, iPhone storage, battery level, and whether the phone is connected to power. Do not use mobile data. Apple says iCloud backup restore requires Wi-Fi and cannot be completed over a cellular internet connection.
If the progress bar is frozen, plug the iPhone into power and place it near the router. Then check whether the restore is still running under Settings > your name > iCloud > iCloud Backup. A device may show that it is still being restored and will back up automatically once finished.
A stuck loading screen happens when the connection drops, the backup is too large for the network, or the device needs a software update. Apple recommends that you should check the software version and try another Wi-Fi network if restore errors continue.
If apps are waiting, photos are missing, or messages appear slowly, leave the iPhone charging on Wi-Fi overnight. Unless it is obvious that the process has failed, you should avoid restarting it many times. That can waste time as well as create more confusion.
For this purpose, do a quick check. Open Safari, load a heavy webpage, and test another device on the same Wi-Fi. If the network is unstable, either switch to a more powerful router, temporarily deactivate VPN profiles, or restore in a location that has a faster internet connection.
Some missing data is not always "lost." Photos may be syncing through iCloud Photos, files may live in iCloud Drive, and contacts may depend on the selected account. Visit iCloud.com to check Photos, Drive, Contacts, Notes, and Calendar before assuming the backup failed.
If the wrong Apple Account is used, iCloud data may not appear. Make sure that the iPhone is signed in with the same Apple Account that created the backup. Also check two-factor authentication prompts, payment verification screens, and app-specific sign-ins.
Officially, restoring an iCloud backup requires going through the iPhone setup process, which means an already configured device must be erased before the restore can begin. Therefore, the answer to “Can I restore an iCloud backup without resetting my phone?” is no — not with Apple’s built-in full-device restore method.
However, this does not mean you have no alternatives. If you only need specific files or certain types of data, an iCloud backup data recovery tool can be a more practical option because it allows you to access selected data without wiping your entire iPhone.
Tenorshare UltData comes handy when you want to preview and recover selected iCloud data without doing a factory reset. Tenorshare's official page says UltData supports recovery from iPhone/iPad, iCloud, and iTunes backup, and it can selectively restore iCloud data without reset.
Use it in situations like these:
Follow the following Steps:
Download and install Tenorshare UltData. Switch to "Recover Data from iCloud" . This function supports recovering data from iCloud backups you have already created.




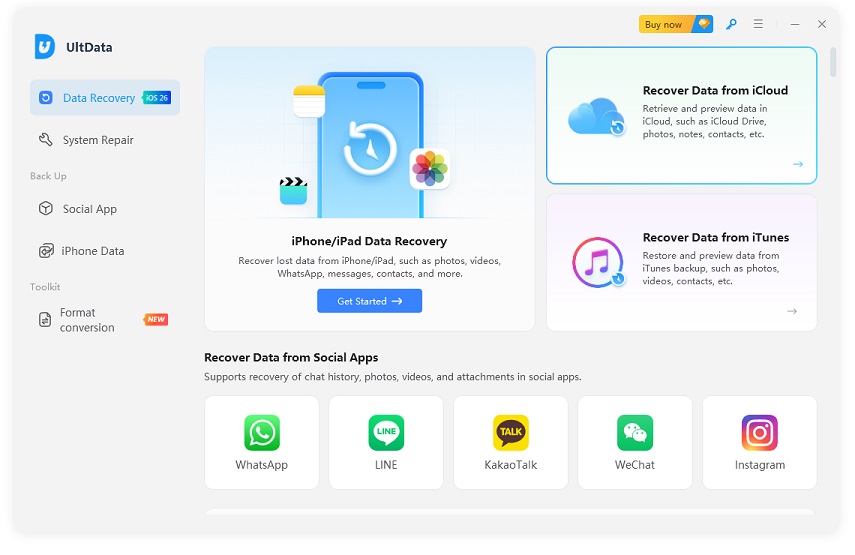
If you have previously created an iCloud backup, select "iCloud Backup Data Recovery" to access your backup files. This option allows you to preview and recover data from existing iCloud backups without restoring your entire device.

Log in with your Apple ID and password to securely access your iCloud backup and continue the recovery process.

Browse the list of available iCloud backups, select the backup you want to download and scan, then click "Next" to continue.

Select the specific data types you want to recover
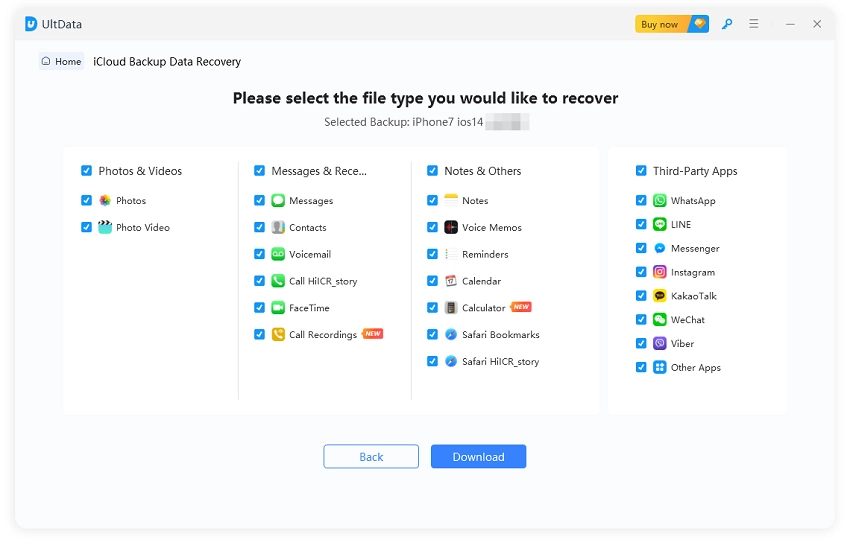
Once the scan is complete, preview the found data, select the items you want to recover, and click "Recover to PC" to save them to your computer.

iCloud backups are available for 180 days after you disable or stop using iCloud Backup. Backups currently being used to restore a device cannot be deleted. For iCloud Drive files and iCloud Photos, Apple provides a 30-day recovery window before permanent deletion.
Erase the iPhone, restart setup, choose From iCloud Backup, sign in with your Apple Account, and select the backup you want. Keep the device on Wi-Fi and power until the background restore completes. If it fails, try another network or another available backup.
A failed restore may not mean your data is gone. Start with Apple's official iCloud backup recovery steps, check Wi-Fi, power, Apple ID, and backup availability. Decide whether a full reset is worth it. If you only need selected iCloud files or want to avoid wiping your iPhone, Tenorshare UltData iCloud Backup recovery is a route to preview and recover important data with less risk.


then write your review
Leave a Comment
Create your review for Tenorshare articles
Share this post


UltData - Best iPhone Data Recovery Tool
Recover Deleted & Lost Data from iOS Devices Easily, No Backup Needed!
UltData: Best iPhone Recovery Tool
Recover Lost iPhone Data without Backup
By Jenefey Aaron
2026-10-14 / iOS Data Recovery